ZBrushCentral

the wrestler (WiP museum_scene)

Thanks Patpotlood !
Thanks Doris.
Back into ZBrush sculpting for me.
Two reason,

  1. I’m just in love with the simple (the first on the row) clay brush. I did most of the work with this. (clay tubes, Dam standard, move brush etc of course)
  2. I realized what I have to do with the Z shaders, to have a very close preview of what gonna happen under SSS conditions, using a decent (physically correct) pathtracer. (like cycles).
    “Anisotropic diffuse” shader parameter then. The best we can have for previewing sculpting, to know how deep is needed to carve on a marble like material. I lowered its value a lot, for the BPR I posted, of course.

~10 Min to build them! :open_mouth: That is amazing. I am an old Zbrush user returning to Zbrush sculpting after 3 years. I have so much to learn!

I read that you are using displacements to generate a lot of the details. Would you mind making a quick breakdown of your workflow? Or even a time lapse video of you sculpting something like this would be greatly appreciated! I know that in Zbrush, there are many ways to do one thing, and you seem to have a great workflow down to be able to make these in minutes. Great work!

Thank you, Aberrant
This is an older post, maps are generated in zbrush but that’s all. The rest in blender.
However, you can do a bit similarly in zbrush, though you can’t have much control, so some randomness is acceptable.
Follow the thread of Mealea, people are very helpful there.
http://www.zbrushcentral.com/showthread.php?103320-Now-Im-having-fun&p=1039792&viewfull=1#post1039792
Mealea is really very helpful
As for blender, here is the link for a huge thread and a tutorial. On post #2 I added some interesting links on this rather chaotic thread.
http://blenderartists.org/forum/showthread.php?273033-Sculpting-with-UVs-and-displacements&p=2245866&viewfull=1#post2245866
Though a blender tutorial/thread, these basic principles are valid under any application, including Zbrush, (well, almost). Modo, 3dmax, maya, LW, etc etc such apps are compatible to this method alright.

Thank you Michalis. I appreciate it, and I am going to look at the first link right now.

843 is gorgeous but how do you fix the blotchiness in the render?
This is one of those questions for the Blender forum right?

Or wait… is that post work???

seeing these things I can only say that Rome wasn’t built in a day and I will need to live for 300 more years to produce such beauty. Yet I also recognize that being old does not guarantee the talent, hard work can provide knowledge, but not always talents. Beautiful and inspiring work Michalis!

Thank you Mealea, all done in zbrush. Sculpting, BPR, three lights. PP in Ps. (the overlay noisy thing)
It is a WIP, right? Lot of work is needed now. Building some capitals (column heads, right?) now. On top of their heads.
Still in dynamesh mode, meaning that retopology is coming, more detailed sculpting and baking. To export in blender cycles of course.
@pfrancke
Thank you. Am I that old? :lol:
On another thread I read your question:

Could other programs (say Blender, 3dCoat, etc) be used to modify the UV and then import the UV into ZB and then do a Poly-group creation that is
based on that externally modified UV? Or does this only work with PUVTiles/GUVTiles?

In blender, of course you can. You can do much more, you can move the UV islands, place them exactly where you like. In fact, this is the only decent way. The advanced way, the easy way. If you are familiar with blender. If not… well, ask Mealea. :lol:
3dcoat is an application that is dedicated to such workflows. Not in our case. You need a UV editor capable to do a specific unwrapping. The result should be UV islands that are aligned to horizontals and verticals, as the displacement map is. In blender there is the superior “follow active quad”. In Zbrush the GUV (and the PUV). 3dcoat can’t do this. Is great for figures though.
What you have to do: Export the obj to blender (export options, uncheck groups!). Do the unwrapping (follow active quad) if you know how. Export the as obj to zbrush again. Now if you apply a texture you’ll find the UVs there. For some reason, zbrush inverts UVs vertically, so ask to invert it again.
In post #848 the second link is for a blender basic tutorial, on this technique.
It starts actually like this
"Inspired by some zbrush technics of my good friend MelaleaYing. " So, she is a good friend after all.

We can UV unwrap (GUVs or PUVS or both) in zbrush. If we unwrap visible groups results may look better. However, opening the obj file in blender and having a look in the UV editor, these group UV islands are overlapping each other. It means that you can’t bake on such a UV set, you can’t bake a possible polypaint there. (but you can always export the whole dense mesh as VRML and blender will render the polypaint directly. VRML exporter can be found under the 3d print plugin of zbrush)

Ha! I was getting jealous of the fun so there, I joined here as well :slight_smile:

Great pieces Michalis as always!

GRIN!!!
Obviously Im your friend you MONSTER!

What is PP though? You keep mentioning it but I have no idea what it is.

Wait…
VRML is still around?
That was a failed attempt to get 3D stuff onto the web, it almost never worked so people did other things, that from the early 90’s…

Thank you mealea, Obviously I’m the monster, obviously you are my friend!
PiPi stands for PostProcessing. :lol:
You’ll find VRML exporter under the 3d print Z add-on.
It will export the full mesh, plus the polypainting information. (this is the trick)
For instance, imported in blender, under cycles nodes setup, add an attributes node. The default name of the polypainting set (as Vertex painting under blender) is Col (watch out, case sensitive writing). So write it on the attribute node, plug it in diffuse node as color and render polypaint directly. No UVs or maps have been used in this case.

OK, I was just testing something.
Another usual boring thing. (blender-cycles render)
TestingDynTopoNewL.jpg

plas,plas,plas,with two hands, bravo, bravo:+1:small_orange_diamond:+1:small_orange_diamond:D

Michalis … Your sculpts are never boring! This one is really wonderful IMHO! :smiley:

Cheers, David

very boring. :smiley:

come on, it’s fanatastic!!

grtz p

Thank you PFC666, David, Patpotlood
It is boring, because there isn’t any reference and I sculpted the usual things imitating some masterpieces on museums.
There is a stylistic thing around, which I like and this is why I posted it.
When you copy the masters you learn something useful. When imitating them… you only learn what is going wrong with them.
More or less. I think, Picasso’s quotes, if I recollect correctly.

This actually looks as though it is chiseled from stone. Amazing work!!!

Thank you remcv8

Back into the loops for a while.
I won’t call it a tutorial, Mealea and other friends posted a lot of them. Great ones.
Just wanted to show a little simpler approach on this matter.
My goal is to be able to export it to another render engine / application.

So, my basic principles:

  1. Find a way to keep subdivisions as you work, as possible. This example costs 10k, 20k, 27k, three overlapping (layered) meshes. Easy to export them, right?
  2. Real displacement will take place into the final render engine. So, avoid distractive solutions in zbrush. I mean, NEVER apply the subdivisions in zbrush. A non distractive preview is all you need. (DISP+MOD) . A fine way to preview your work.
    If you apply real displacements, a. you gonna need lot of subdivisions, b. The worse: it will distort the base of the mesh (and the UVs)
  3. As a conclusion of the #2, don’t ever apply displacements twice, or give more displ passes on your mesh. It is against the principle #2 but it also creates, dull. blurred, confused effects on the surface. Of course, if this is among your intentions, go ahead.

Here we are:

Sculpt (a rather low poly dynamesh). Boolean operations, simple and a little smooth clean forms. Some holes maybe. Keep it clean and simple.
Enter z remesher and ask for a ~ 10 - 20 k poly remeshing (retopology).
This is your base. You can work on it as it is, or, you can create some loops on it (Mealea’s tutorials, please don’t allow triangles so uncheck the appropriate button there) Loops must be at 1, a simple loop.
So:

  • polyframe view ON.
    -Ctrl+Shift (hide tool), lasso mode!
    -Start hiding loops by clicking on an edge, make the brush small please. (Undo always acceptable LOL)
    -Ctrl+Shift+drag in empty space (=invert hide)
    Screen Shot 2013-08-28 at 6.38.45 PM.jpgScreen Shot 2013-08-28 at 6.39.02 PM.jpg
    -Under SubTools palette, extract, preview it and accept it. This will directly create a new SubTool.
    Select a second optional group of loops and create a third SubTool.
    Or, optionally, subdivide once, one of the subtools, select (hide/invert) thinner and more detailed loops and create another overlapping SubTool.
    During these operations, I never applied a subdivision, noticed it? Non distractive operations.

We have a few Subtools this way, layering, overlapping the base mesh.
-Pick one by one, Create GUVs, / texture panel / new texture.
-Import your Displacement map.
(It can be created by sculpting on super subdivided plane, horizontal and vertical interesting strokes etc, fill the screen with it, BPR rendering, export the depth pass. This is a 16 bit B&W displacement map. Alternatively, you can also save an AO map (we’ll talk about it in another post)

-On the displacement panel select the imported displ map.
-Fine tune the strength - Intensity (you can preview it like bump) But you need the slower and better Mod Preview. You may see some holes like but don’t bother, it is only a preview that shows the real elevation that gonna happen. (subdivide the subtools 2-3 levels for great previewing, but go to subd level 1 before exporting, once again, non distractive as long you don’t apply disp)
Under the create disp map button there is a Mid slider. This tell to the disp engine one thing. The mid grey tone of a dispMap (by default grey means No disp), what it will be. By example, if the elevations ± are more than your thin object, they will distort it badly. So, move Mid to the left works as the black tones (carved) stay on the surface, the white hi elevation will go higher.
All these are a nice preview only, this information will not be exported.
When you feel happy with your creation, after exporting to an advanced renderer - application, all this fine tuning will take place there.
I hope all these are helpful.

A simple test:
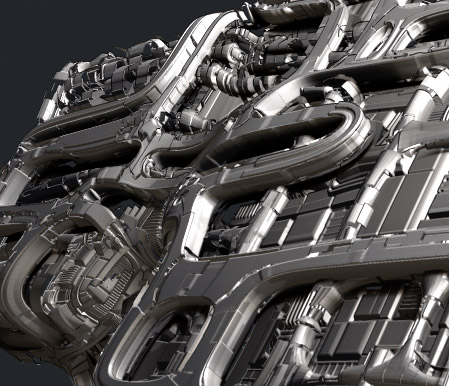
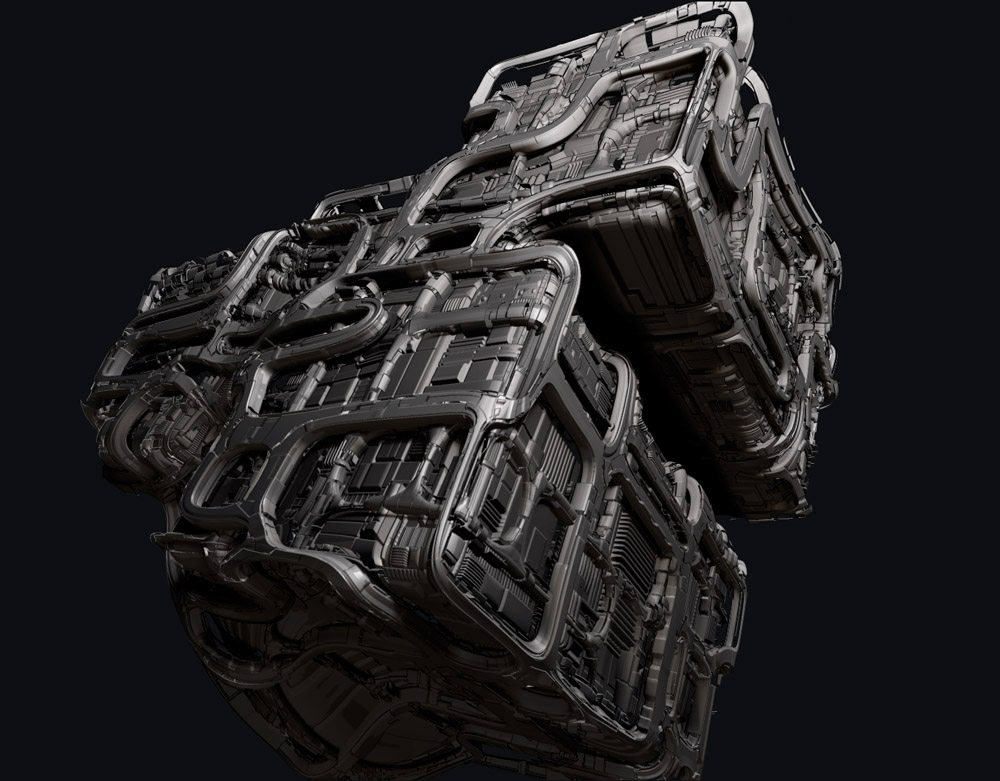
The BPR final render (displacments are in Mode, not applied)
Clean, crisp and precise displacements, loops. Two lights in used composed in a postpros image editor.
ZBrush T#1.jpg
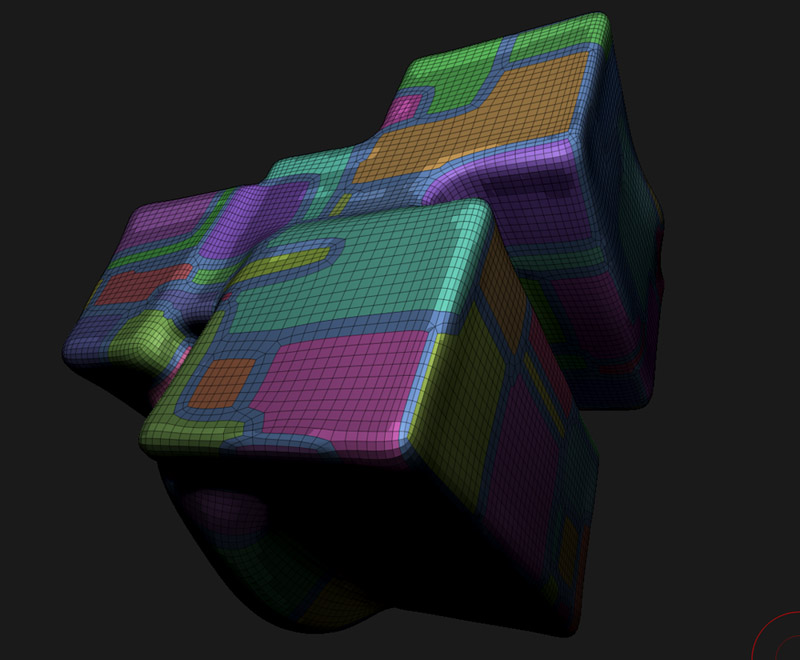
The base mesh, after Z remeshing, after adding a few loops.
ZBrush T#2.jpg
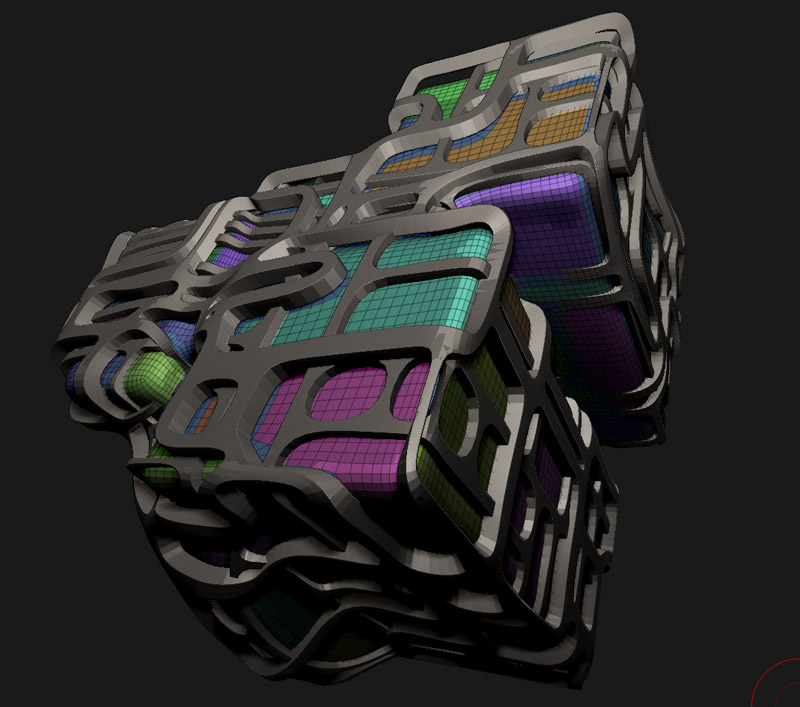
Selecting loops, extracting them
ZBrush T#3.jpg

I’m facing a bug saving a thumbnail, after more tan one files are attached on a post.
Sorry for this second post.

Attachments

ZThumb.jpg

Thanks Michalis
it seems a bit complicated, because the google translation is confusing
but try to follow all these steps
the effect is fantastic
leave me a little time
Thanks for sharing your knowledge
a hug:+1::wink:

thanks
LOL
google translation from my english, well I have to see it. :lol:
There are more details on such methods but have been discussed on other thread like Mealea’s already.
On how to pick one only polygroup, UV unwrap it, move the texture on it… More advanced methods.
My goal was to expose the basic principles of a method that is valid under any application can be a part of a workflow.
Staying in zbrush internally, it isn’t a great idea. It reminds me older european political situations :lol:
On the other hand, staying in zbrush can lead to really crazy, impressive creations. There is always a payment, whatever road you choose.