haha, he reminds me of sloth from the goonies!
beautiful!
lol

WICKED! Your take on the creature as an entirety is perfect!!!
excellent work so far, looking forward to updates 5*
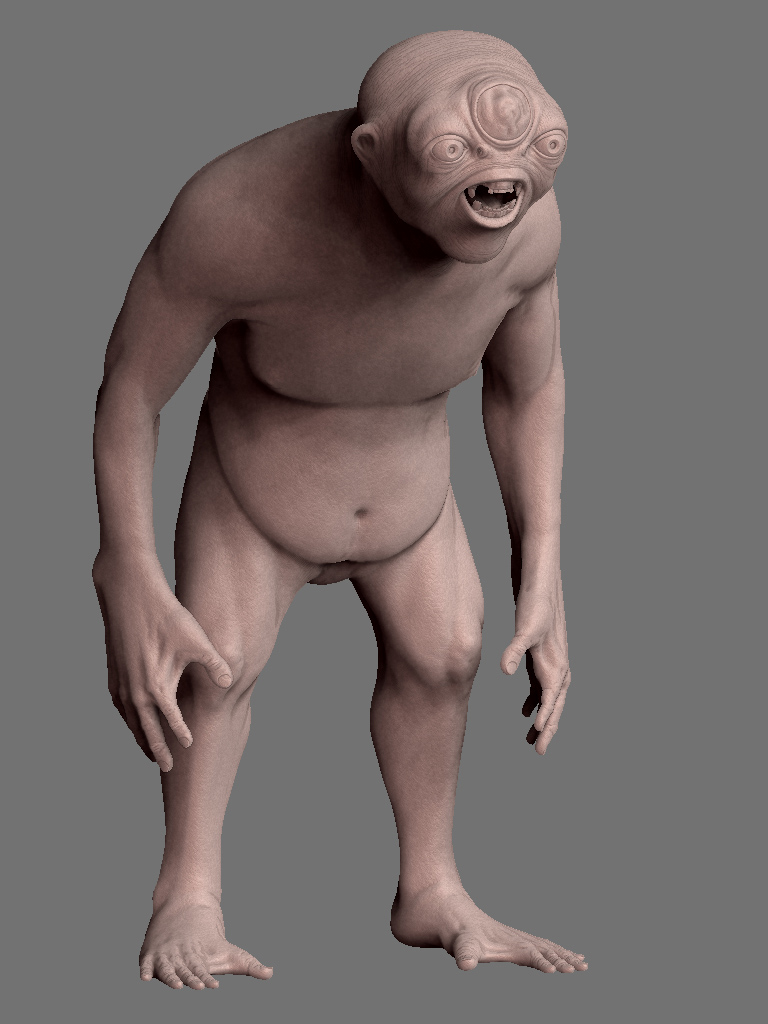
Good work… I like the concept and body proportions
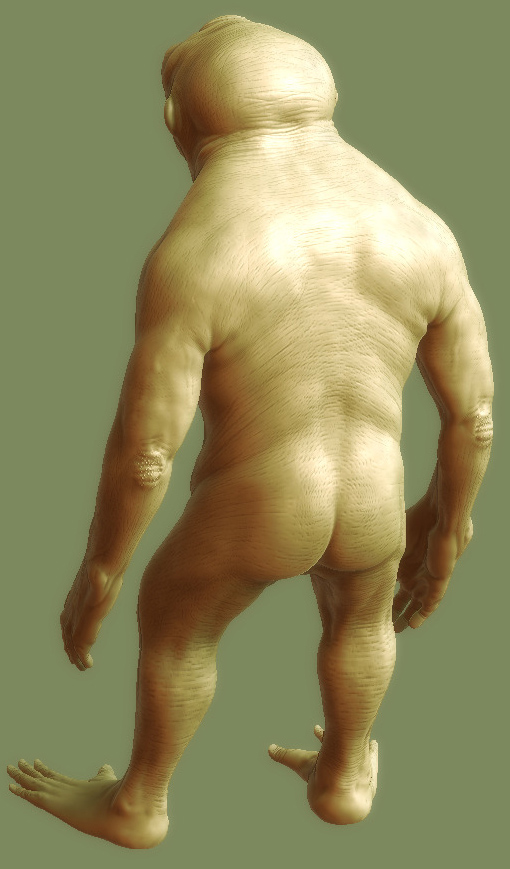
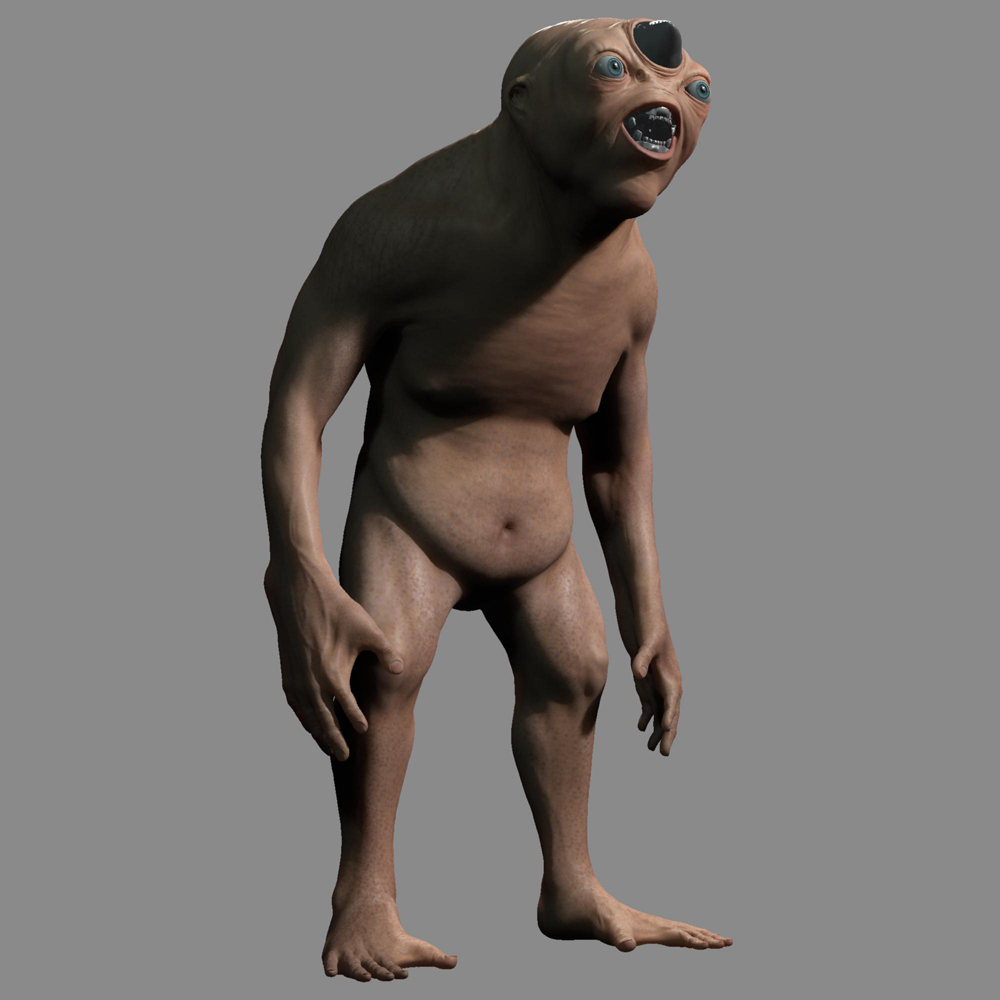
Hey again, and thnx for the comments  Im now at the stage where i ruffly add in the skin folds though out the body starting off with the head. At first ill ruff out the lines on where my folds will go. after then i just smooth it out just a bit then addin your focus folds. Once my folds are done, ill add in the pores, warts vaines etc etc thats the last stage for me anyways ill be back.
Attachments
Its looking sweet! Thanks for the break down of your workflow. Very cool.
cheers
Very good job…
Nice concept and good material…
To be continued…
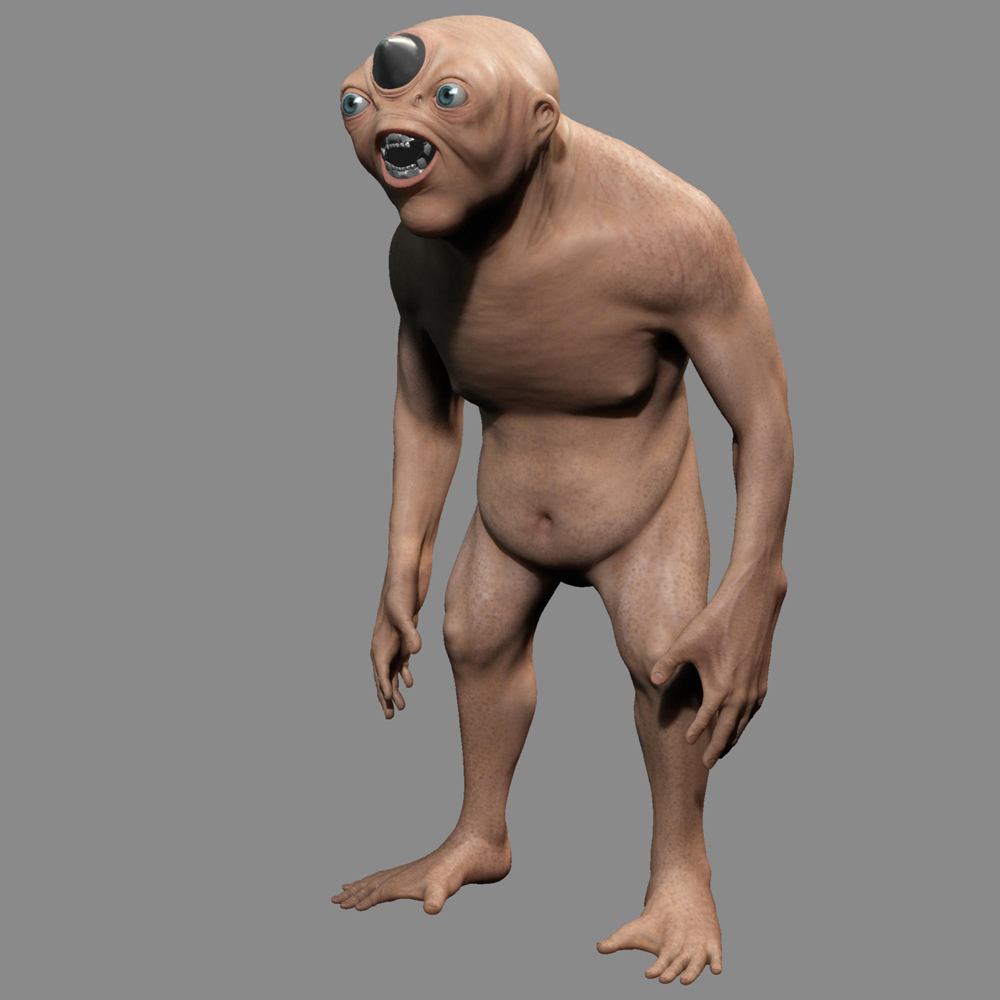
Hey verry cool sculpting!! Can I ask you a question. You attach all the mouth, eyes and body as one right? Did you do the unwrap uvw in max? and is the map all in one UV texture sheet?
How do you model multiple object in ZBrush?
very cool!
Could you explain for what and why you used mudbox?
and why didn’t you do that part in zbrush??
Peter
Hey guys!, okay i did the first coat of wrinkles, Im now adding in the viens in areas that are needed hehe, after that is complete, ill then addin another coat of wrinkles. then im done, after that is textures heeh ill be back again raawr!
Peter Pankras: hey guy, I used mudbox for the basic overal shape and sculpt of the character, i like this way because i can see it in 3d perspective other then orthagraphic views. Im so used to modeling in 3d max view ports, gives me better understanding on depts etc etc. I love zbrush for its finals, IE the final wrinkles, pores, and also love the texturing aspect of it all both aplications are great 
Yuzrass: I bring the onjects from mudbox at a high defenition. I have these obejcts n there for referances and the general outlook. I then later del those and keep the main body mesh within zbrush and reconstruck and subdivide to my main base cage, at that stage i can generate disp and norm maps. I already have the teeth and eyes within 3d max so.
Attachments
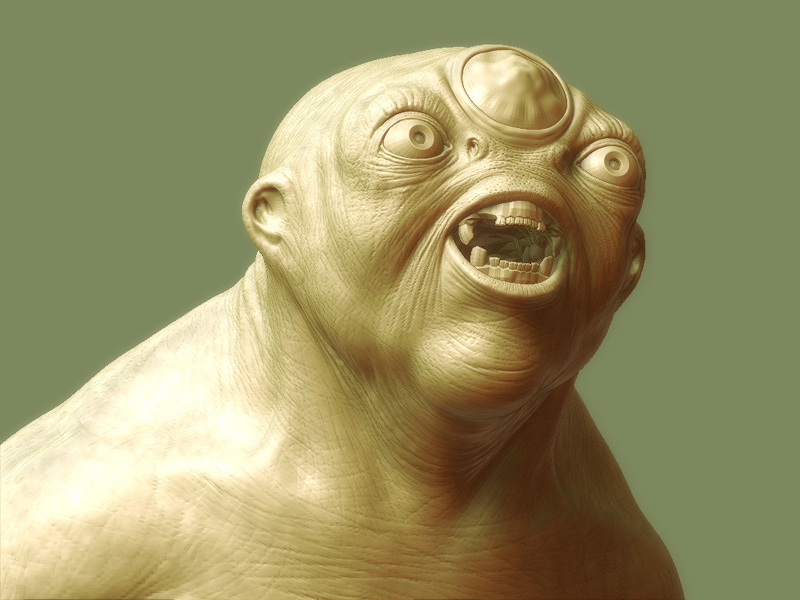
I really like this. His got an innocence about him. I’m loving those teeth! Good job! Can’t wait to see this guy finished.
Chow!
Very good job !!!
I am very interesting bye your material and lights preset for render.
Thanks.
Great job, I like the expression.
Hey guys thnx for the comments and critts, adding in the extra fatty wrinkles now, ill post more in time heeheh

After viewing your addition of the fat to the wrinkles, I’m sure you will have probably already done this… the viens just ain’t working. I’m pretty much assuming that you just put those in there for placement, and I really hope you work them in smoother/bulkier/less defined, which is why I made my first comment. You obviously know your stuff. In laimens terms, this was a wasted post. Cheer:rolleyes:s!
definately top row material here.
the hands are excellent! but, so is everything else on this sculpt! 
i can’t wait to see the final result. GREAT WORK!
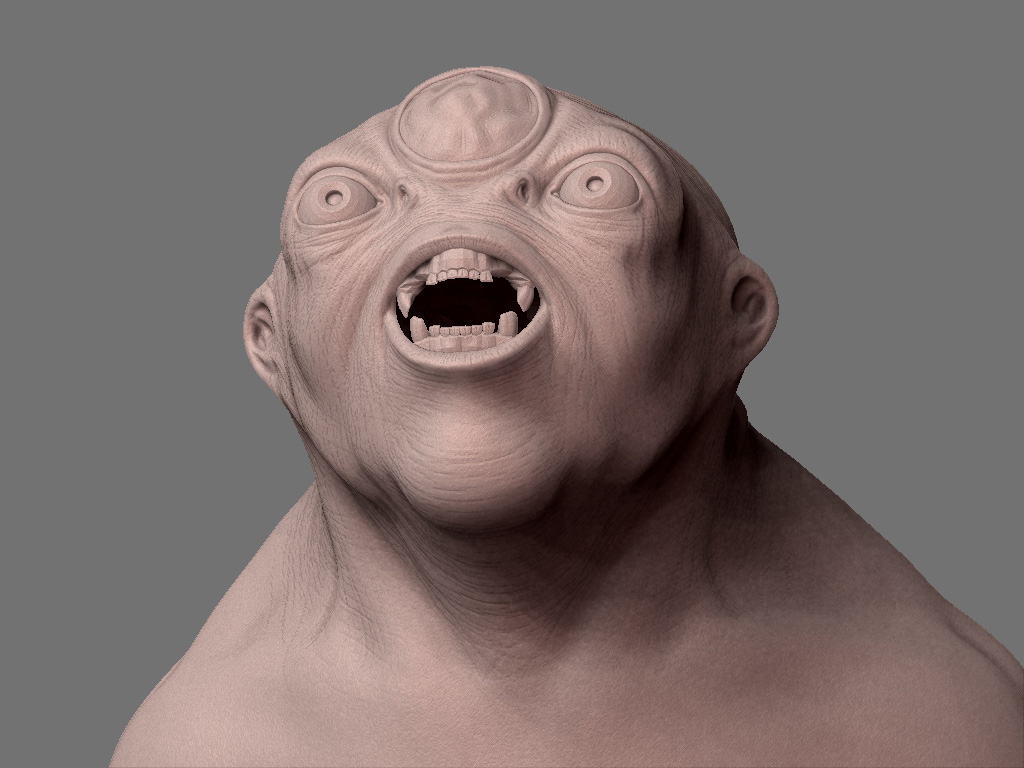
very good model, gums need a bit of smoothing, and if you color, wew its gonna be cool. gj
Hello again, I thank you for the comments and critts today Ill post up some renders of the color map so far and the basics of the uh spec maps, There is no bump maps involved nor normal maps as of yet. I just wanted to block out the SSS shaders within maya 8.5 and this is what I have so far, The eye I did seperatly along with its own seperate 1 k map textures. later I just merged them into the scene. I textures this guy within zbrush by generating a cavity shader and baking that onto the UVmaps. once I did this three times of different colors I then took those maps and blend them together to create a skin canvas. after that I brought that again into zbrush and imported skin textures from the net here and there. I used alpha maps go generate the frekles etc etc. and thats what I have so far. Ill post another with the bump maps.
PS: Riggin is in progress to set up poses later one.
http://www.youtube.com/watch?v=2r0ZMj3kGSM
W.I.P textures.
Attachments
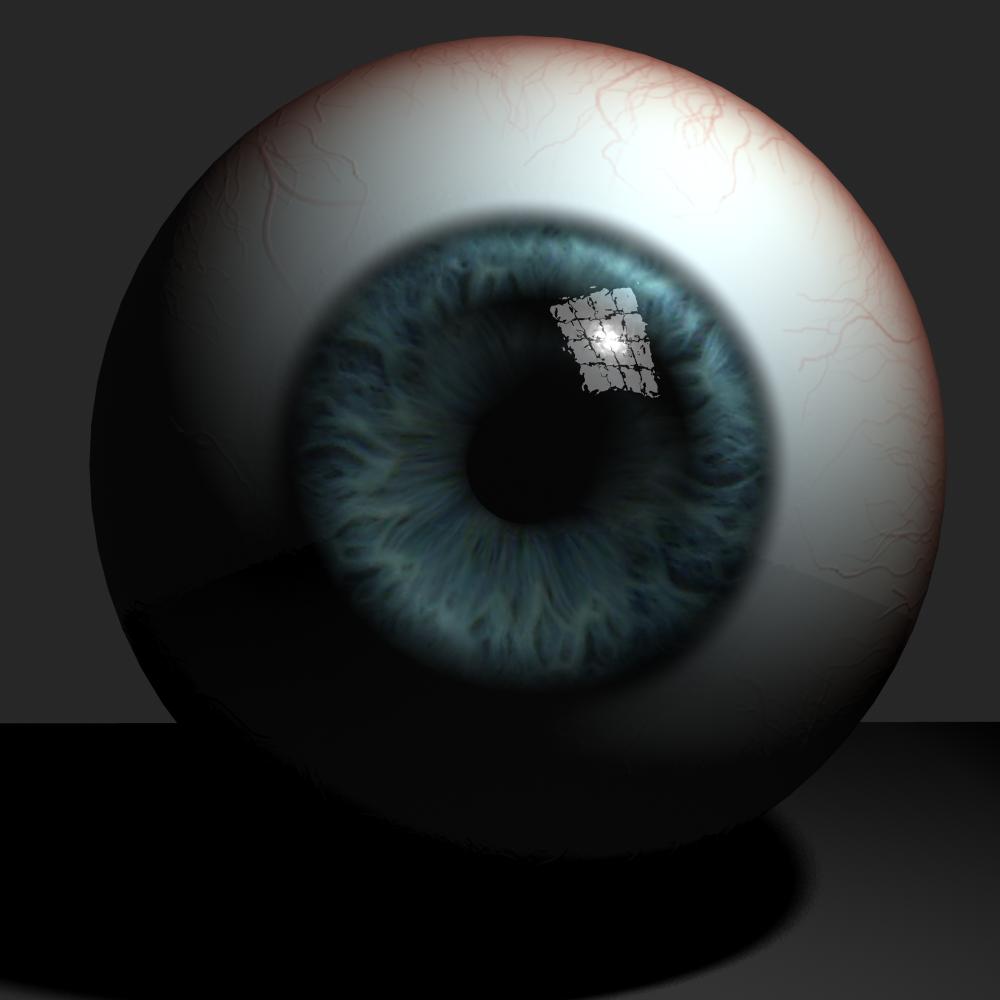
I think he could use a greyer bluish eye. Its too saturated right now and makes him look cartoony.