Bat-stuff + ZB4 = Goodness
Awesome stuff Borden and thanks for the tutorial.
Bat-stuff + ZB4 = Goodness
Awesome stuff Borden and thanks for the tutorial.
Nice work mate, very nice indeed 
Just stunning work mate. More please! 

Thanks, here’s the original modo render without added effects.
It took me an hour and a half to render it.


Hoho, great work and mate. Congratulations sir! small_orange_diamondsmall_orange_diamondsmall_orange_diamondsmall_orange_diamond
bravo!!
Thanks:)
Wow, great works man. really nice renders
Thanks:)
Come on! Come on. I WANT YOU TO DO IT! I WANT YOU TO DO IT! cmon, HIT ME!
Yep best chase scene ever!
First of all the bat motorcycle and batmobile are fantastic and very inspiring. they are great examples of hard surface modeling possible within Zbrush. Thanks for making the effort to explain some of your techniques for creating low poly objects with retopology.
I have a few questions:
[attach=225507]01.jpg[/attach]
[attach=225508]02.jpg[/attach]
will appreciate it if you can elaborate a bit on these points.
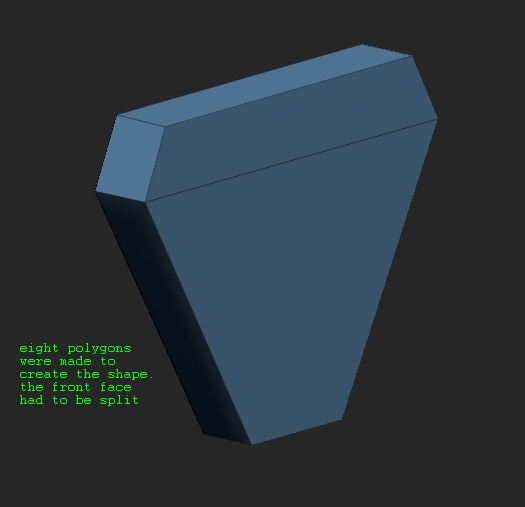
I don’t think you have enough polygons for the clip brush to ‘cut’ the way you want it to. The clip brushes don’t move points, instead, they cut away the excess points. Since you only have 8 poly’s there simply is not enough data for the clip brush to cut anything.
looks really good…
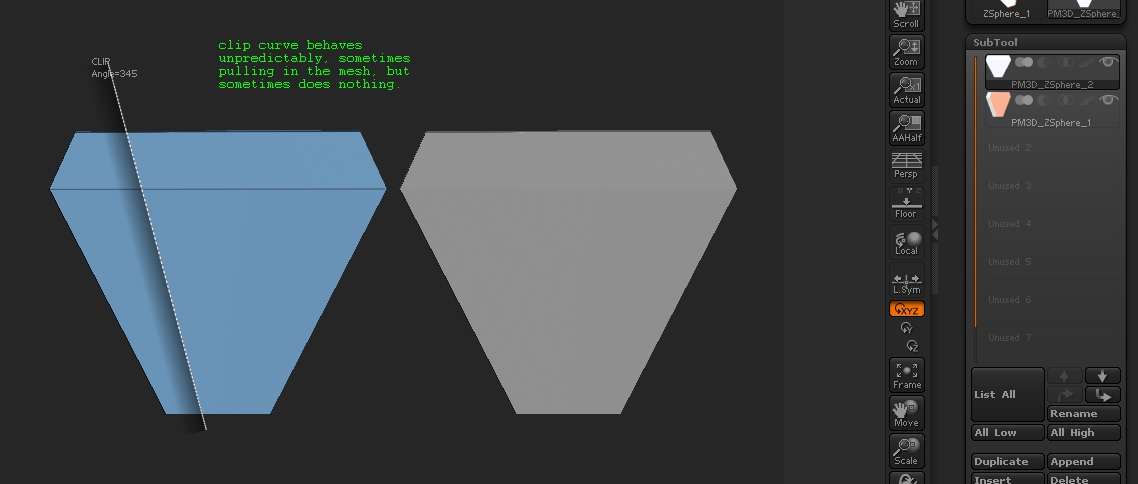
@Manderero. if i am not mistaken clip brushes don’t remove any geometry ( mentioned in the documentation) , they simply squash the mesh on a plane which you set using the clipping brushes. i know this is too low poly for even squashing, but the way clip brushes work, the three vertices to the left of the dark clip plane should be pulled in to line up with the plane drawn by the clip curve brush( works sometimes , see pic ) But then borden used some other technique, mentioning the clip rectangle which i am unclear about.
[ ](javascript:zb_insimg(‘225524’,‘03.jpg’,1,0))
err…perhaps this should be in the q and t section…but what am i to do.
Great Job overall. Thanks for the tutorials too.
As for my first question i guess the topology > skin thickness was used to add faces to the back and side automatically.
Looks Great, any chance of a reupload all links are dead… Thanx