Made in Zbrush 4, using shadow box, clip brushes and retopology.
Rendered in Modo
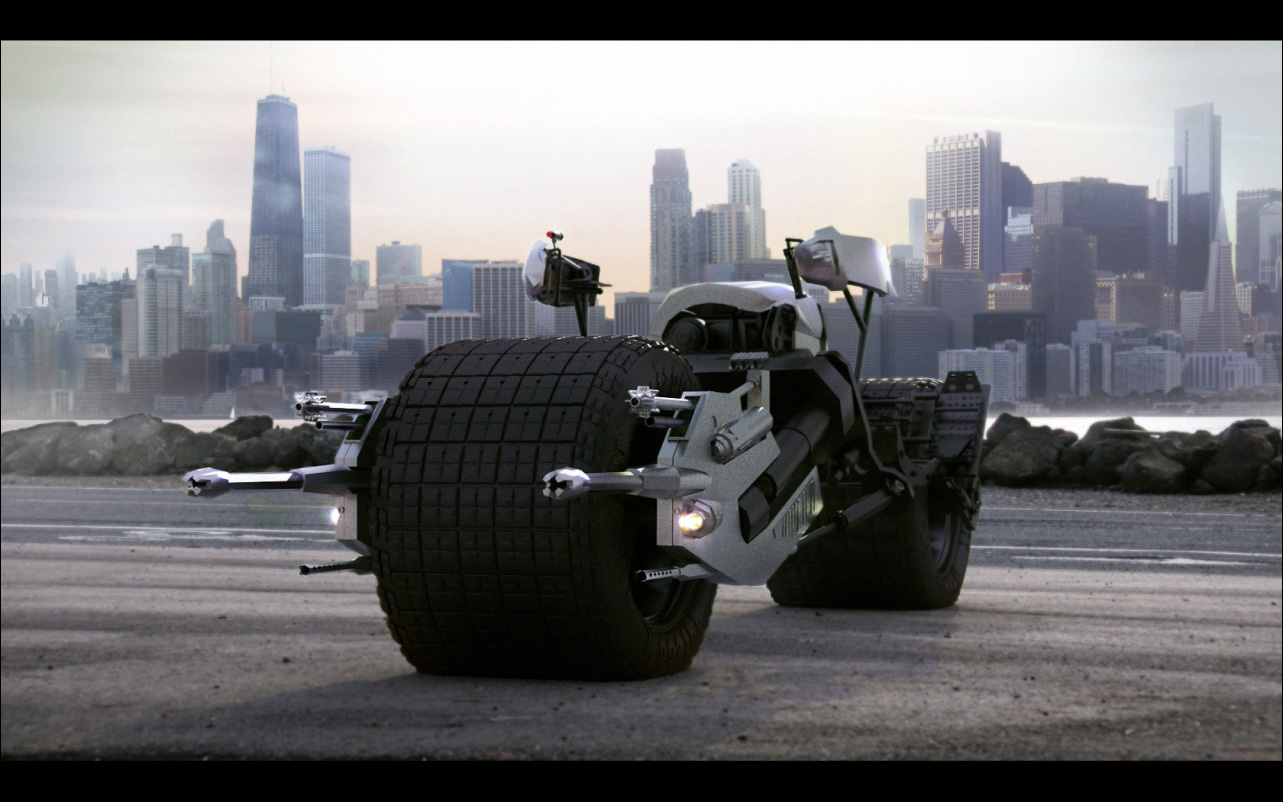
Final render:
Attachments
Made in Zbrush 4, using shadow box, clip brushes and retopology.
Rendered in Modo
Final render:
Great work, nice to see more people using the ZBrush Modo route, did you use GoZ for this project?
Ziggy
Thanks, no I made the whole thing in Zbrush, then exported it as obj files and started making the HDR render in Modo
awesome render…great use of the new tools. small_orange_diamondsmall_orange_diamond
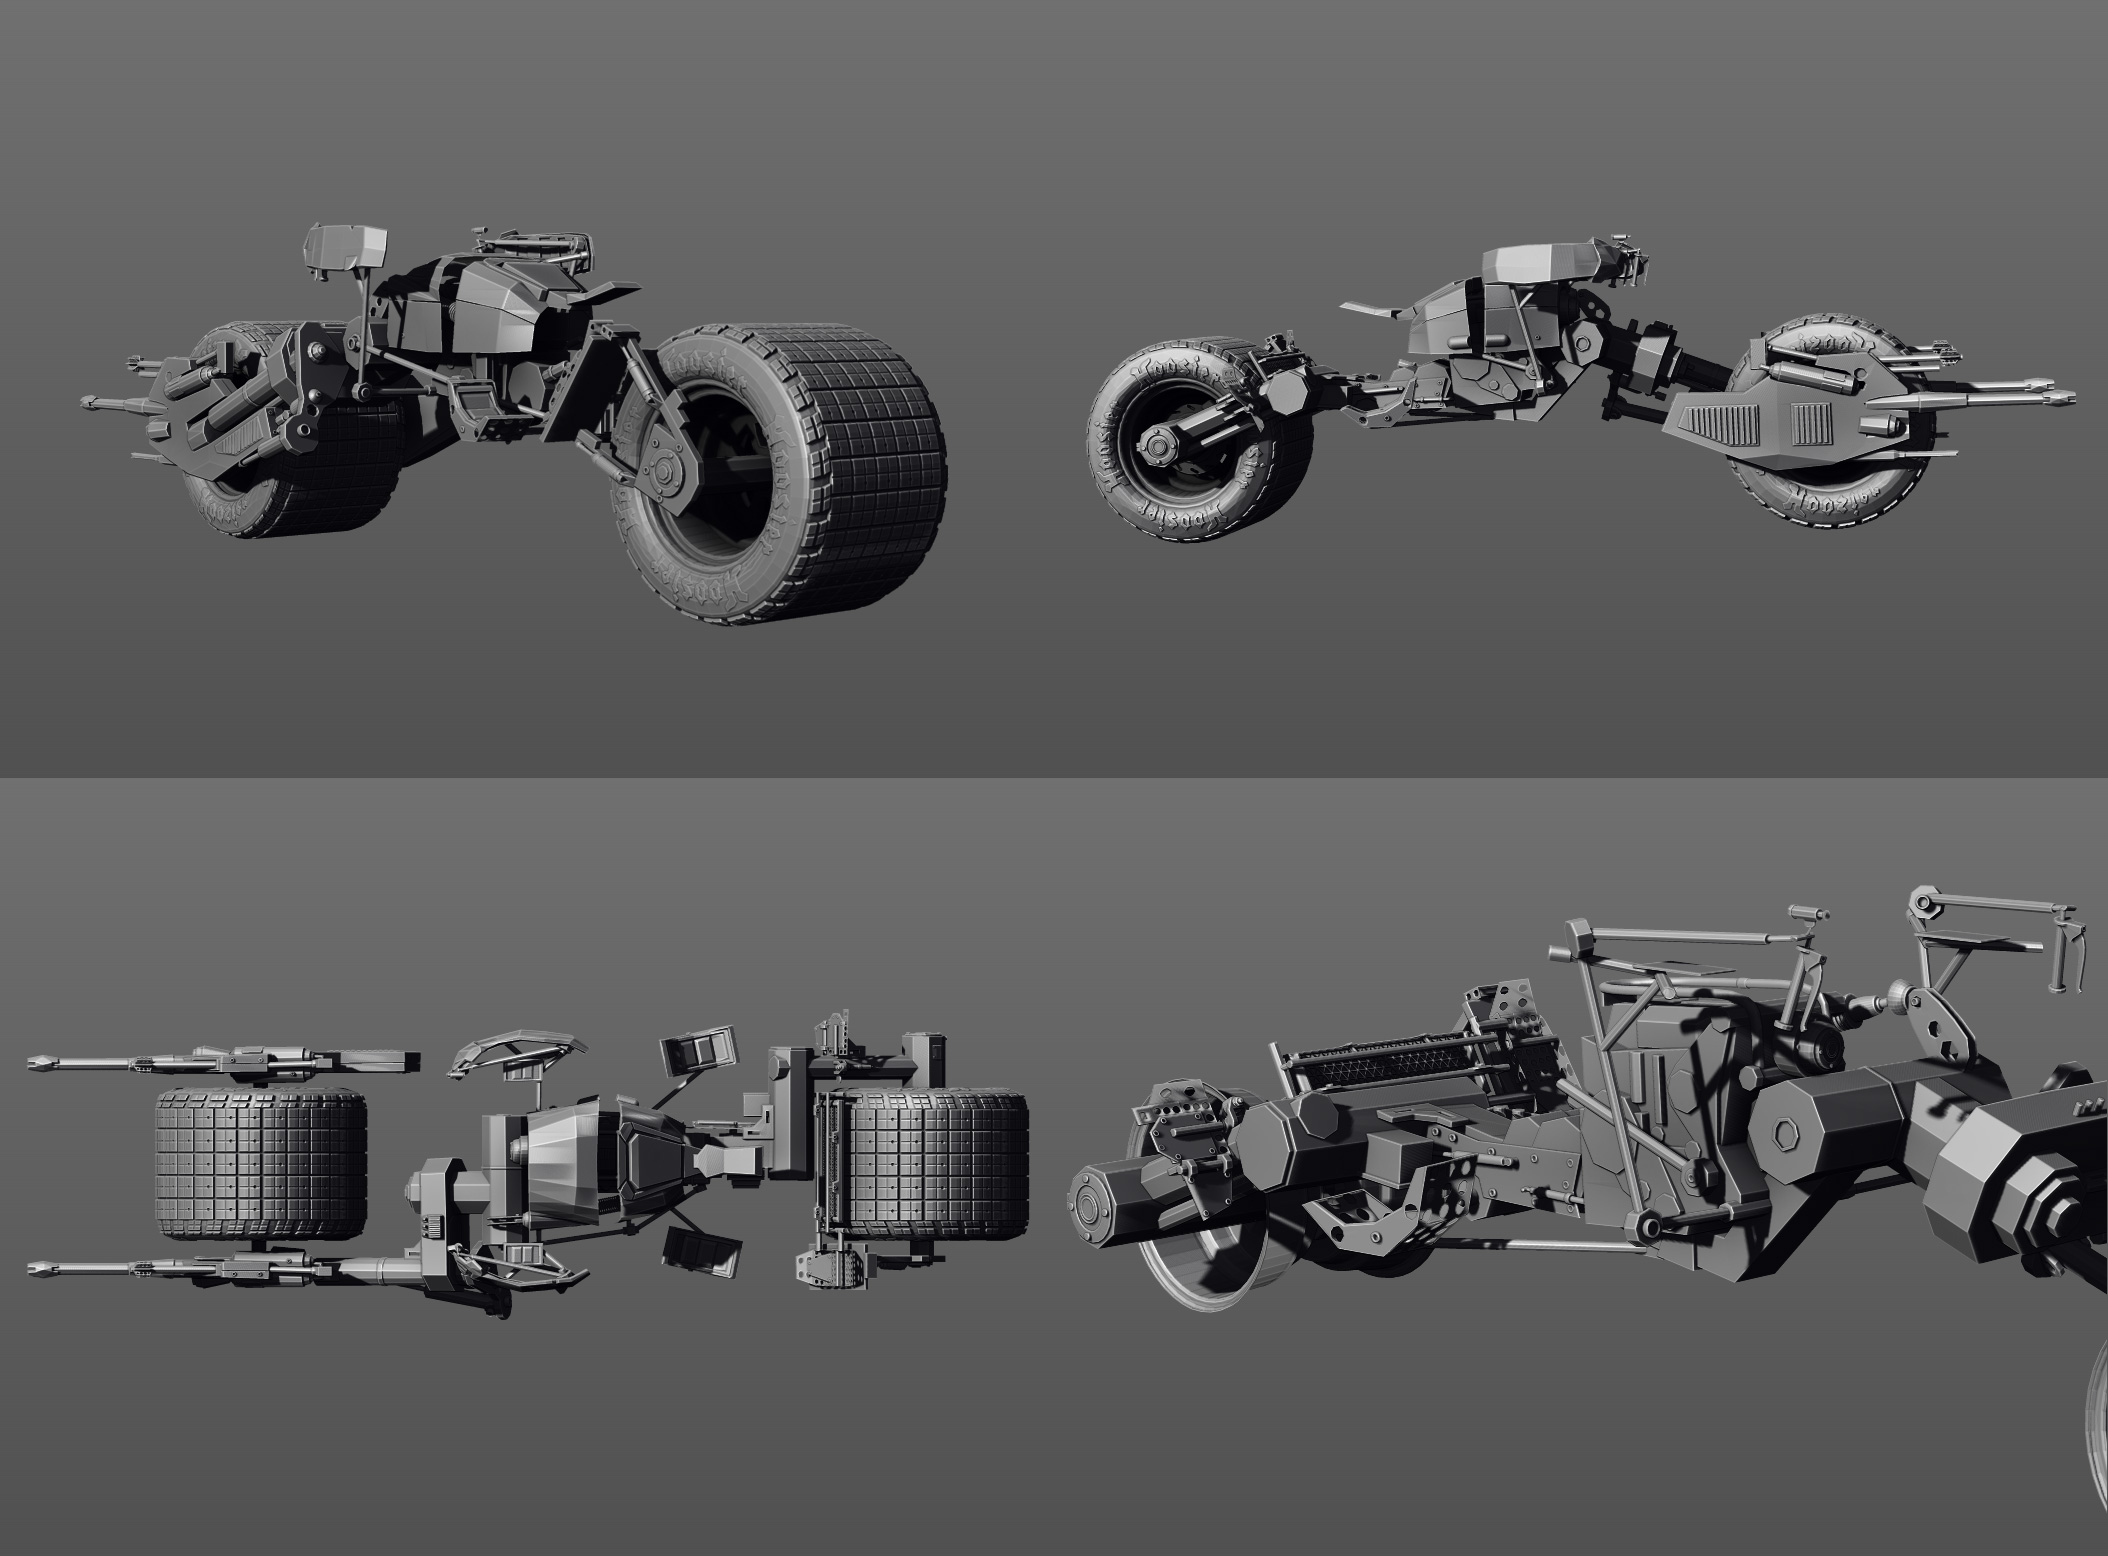
Thanks, thank god for the clipping brushes Pixologic made.The whole thing was very big and 1 part was enormous, 60 mb or something and then with retopology I was able to get the whole batpod under 2.5 mb.The great thing about the clipping brushes is that it works great on low polly objects too.
Gr8… 
Nicely done. Love the model & the render 
Thanks, glad you like them!
wow! gr8 hard surface modeling. My question to you is how do you manage to assemble all the pieces out of shadowbox? how do you go about resizing and positioning things to make the composite model? is there a simple way to do it or is it done manually, piece by piece?
Nice modeling and compositing.
Thanks! Well, piece by piece, but I can make the seat of the batpod out of this piece by duplicating the retopologysed subtool and use the clip brush on it and then mirror and weld and merge visible.I’m gonna post detailed tutorial tomorrow.
I’m gonna show you how I went from having a 135000 polys tool(A) to 70 polys tool(b) with shadow box, retopology and clipping brushes.
i look forward to that post
Definitely interested in this one…
Yes looking forward to that bro! =) Very nice work!
wow!!! I´m ready for your tutorial
A tutorial? Oh, goodie, can’t wait!
Hard surface Zbrush 4 tutorial.
First of start with loading “ShadowBox512” tool (pic01) and by using masking draw the shape you want (pic02),if you have reference use it.
After you’re happy with your mask (pic03) press “Make PolyMesh3D”.Now use the clipping brushes
(ClipRect and ClipCurve) to make the corners even sharper, now you have a nice hard surface tool(pic04).But it’s too large in size, so
here comes retopology.From the tool pallete select Zsphere (pic05), then click on “Adaptive Skin”, “Rigging” and “Topology”.
In “Adaptive Skin” set the “density” bar to 1 and click on “Use Classic Skinning”, then in “Rigging” press “Select Mesh” and select
the “PM3D_ShadowBox512” ztl that you created in “ShadowBox”.The tool you selected shoud be transperant, now using the “Scale” button
click on the “ZSphere” and drag until it becomes a small dot in the center of the selected tool (pic06).
Click on the “Draw” button and leave only “Zadd” one and set the “Draw Size” slider to 1.
Now in “Topology” click on “Edit Topology and you’re ready to start creating the lowpoly mesh.
You’re tool should look graysh, now click on one of the corners and connect it to another corner.Do the same until you finish connecting the points (pic07).
Check your result by pressing “Preview” in the “Adaptive skin” pallete, when you’re happy with you’re result, select “Make Adaptive Skin”.
Then select “Make PolyMesh3D” in the tools pallete, now you have a nice low poly mesh (pic08).
Press “Duplicate” in the “SubTool” pallete, now move the duplicated tool
to the side using the 'Move” button and by using the “ClipRect” brush get it into the shape you want (pic09), then click on the “Geometry” pallete and click “Mirror And Weld” (pic10).
Now repeat the last process untill you get the shapes you want (pic11) (pic12) (pic13).When you’re done with shape, press “Merge Visible” in the “SubTool” pallete.With the merged tool go to
“polygroups” and click “Group Visible” (pic15), you can always press “Auto Groups” (pic14) and hide one part, and edit it, or even mask it and edit the unmasked part (pic16).
You can subdivide the part and start sculpting it anyway you want and you keep your basic shape (pic17).
That’s how I got a Hard Surface 70 polys object with retopology and Clip Brushes (picB) from a Hard surface 135000 object with ShadowBox and Clip Brushes (picA).
simpel easy and effectiv. Great . Thanks a lot for sharing.
Glad it helps, you really don’t need any other programs for creating low-poly objects since Zbrush 4 came out

