After some observation and some serious frustration on my part I have come up with the solution to Symmetry problems with models in Z-brush. To understand this ‘fix’ you have to understand that Z-brush doesn’t care where your pivot point is. It doesn’t care where the center of the universe is. It only cares about 1 thing.
- Average center of x
So how do we achieve that?
Easy.
In Maya or max go ahead and create a box. On the X-Axis place this box far off to the side of your model. Grab your pivot, move it to the center and then mirror that bad boy to the other side. Combine them with your model and Voila, you're french. Z-Brush will now take the average of the 2 boxes creating a 0 between them. Using your grid in Maya and max is a must for this, it is a pain in the butt. When the whole "reset symmetry" button isn't working because your model isn't symmetrical completely, this fix is glorious.
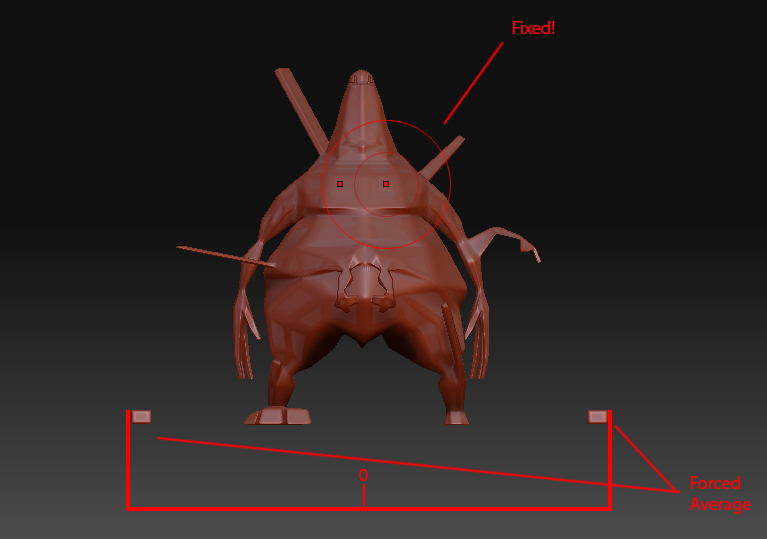
Here is a visual of what I'm explaining.
[]
Remember, if the average of the boxes location isn’t the exact desirable center for your object then you need to move the boxes.
Attachments