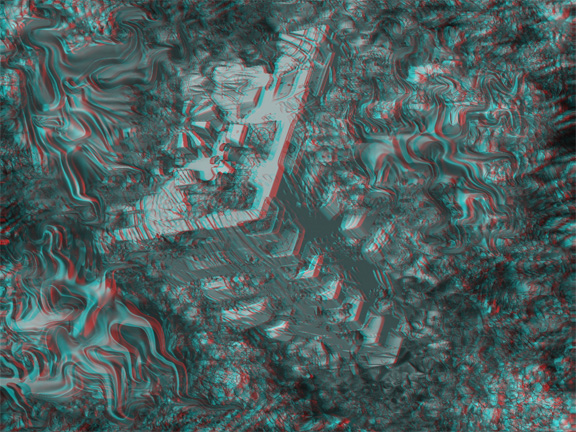
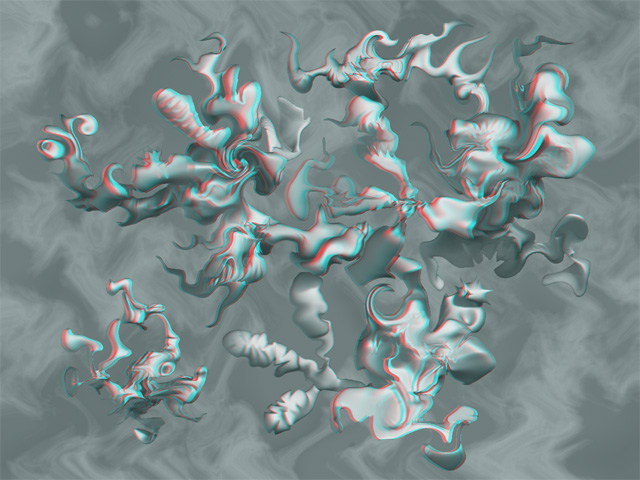
I’ve been experimenting with creating 3D Anaglyphs (the red/blue 3D-glasses) with Zbrush this week. I also discovered the joys of the Stencil. I know it’s pretty dense, but I wanted to see how much detail I could perceive in 3D.
I fingered most of it out on my own, but this thread helped me quite a bit. Thanks cb3d!
If you happen have some 3D glasses lying around the house and want to play with this I would like to insert one minor point here that the above linked thread did not mention. When you are editing the depth image in Photoshop make sure you save it as 8 Bits/Channel (under “Image>Mode”). Otherwise you’ll get an error when you try to displace your image because Zbrush default for depth information is 16 Bits/Channel.
I got my red/blue glasses from a children’s 3D dinosaur book in the bargain bin.
I really like abstract stuff and I will certainly be playing with this concept more in the near future, unless I get eaten by wild dogs or something. All comments and similar images welcome in this thread.
Nice work so far , Notetoself…this is a great thread on it too…was posted some time back but ws esy to follow directions and the results were kewl…I am reposting on your thread one of my images like that…
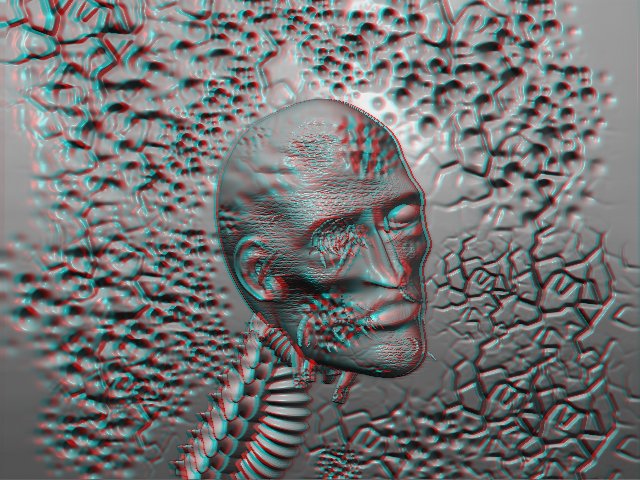
Nice work Ron; A little spooky. I think that guys veins fell out of his body and decided to start living in the table his head landed on. Unfortunate.
I saw your image previously in the thread you mentioned. I actually refered to that exact thread in my first post above. I owe member ‘cb3d’ a part of my body for that info.
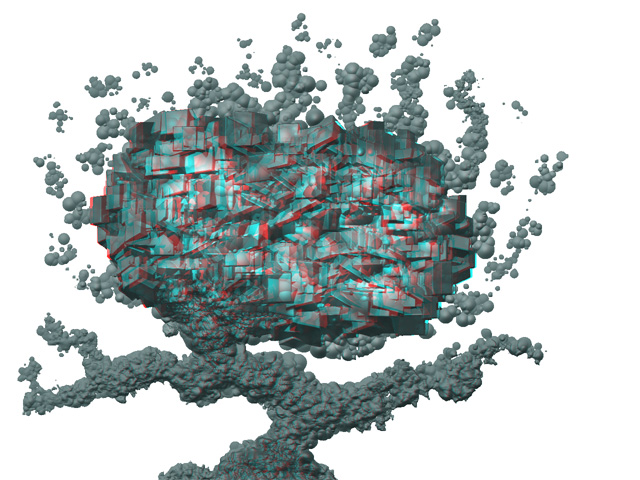
Here is another image. I think this on has moton.
[attach=21165]exphere.jpg[/attach]
I guess there was a surge in the ectoplasm reactor. Could have been terrorist depth charges. You never know these days.
looks pretty kewl…I love these type of 3d images alot…always keep my 3d glasses next to the computer…
sorry bout duplicating the link…my bad…I wish I had realized that, lol, I went searching thru my favorites lists to find that thread…I always have to refer back to it from time to time…I have been glancing thru the Cappiligilonga;lskdjafa link ( ) that you posted…will have to try that software out and compare…went to one of the links that had planets thumbnailed and looked at those…(moons and the sun I believe it was)…
I experimented around back when Cb3d posted the original stuff and was adding text in the images which really popped off the screen nicely…
Have you tried printing any of these out on paper to see how good the effect is, if it still works? I have a crappy printer and didn’t have much luck…
One of the members posted some nice skulls the other day…screen name escapes me…(if it was you, my apologies for my absent mindedness…)
I have a question for you or anyone that might hav ethe answer…
in the link by cb3d, we didnt talk about layers in the process…pertaining to the zbrush image…now if we grab the canvass on layer one we get the color texture for both layers…but in the alpha pallette we get only the top layer…with taht in mind…at this point can we take the texture…hit make alpha …and have the same information but now with all the layers in the alpha instead of just the top layer…if this makes sense…will that work or is something lost in the process…
You know what; forget I even posted that application link. Upon closer inspection the final image comes out much cleaner if you just do it all in Photoshop using the ‘cb3d’ method, and it’s actually very easy. I recorded ‘actions’ in Photoshop now which automate 90% of the process.
I didn’t do those skulls, but I did notice them. Cool stuff. I wet myself a little in fear, but don’t tell the neighbor kids.
I printed one image out just now on my home HP inkjet printer and it looks pretty good. It’s flying up off the paper and all that jazz.
As a bonus of that printing exercise I realized that if you rotate the image 180 degrees it inverts the depth.
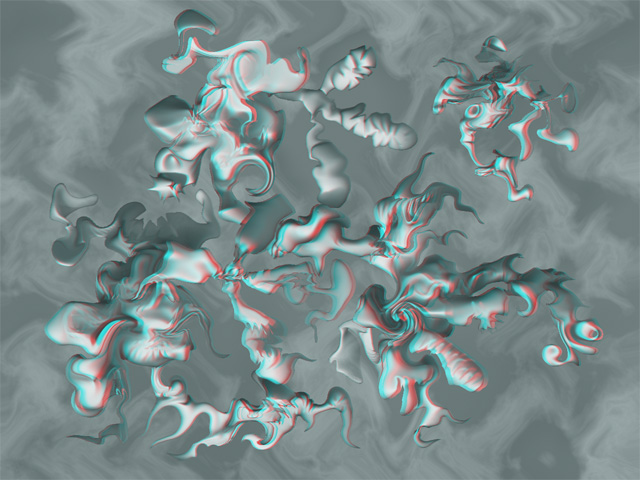
[attach=21168]liquiHole.jpg[/attach]
In retrospect that should have been obvious, but then I’m not always as sharp as I want to be.
The MRGBZ Grabber tool seems to only grab the depth information for the selected layer, but the image on all layers goes into the texture pallet. If you were to then just convert the texture to an alpha you would lose all the correct depth information.
I think you would have to export multi-layer images one layer at a time and do some fancy masking in Photoshop to composite them all. I think that it could get really complicated depending on how you are using the layers in Zbrush.
It is an interesting point you make. There does not seem to be a way to grab the apparent composite depth of all the layers in Zbrush at once.
Note, that looks very very very kewl…part of my problem is I need regular glasses …so I have to work my eyes to pick up on the effect while wearing the 3d glasses…but once I did…wow…this last one really reallllllly popped for me…tremendous depth…so anyone doing this…give your eyes a little bit to get occustomed to your red/blue glasses…
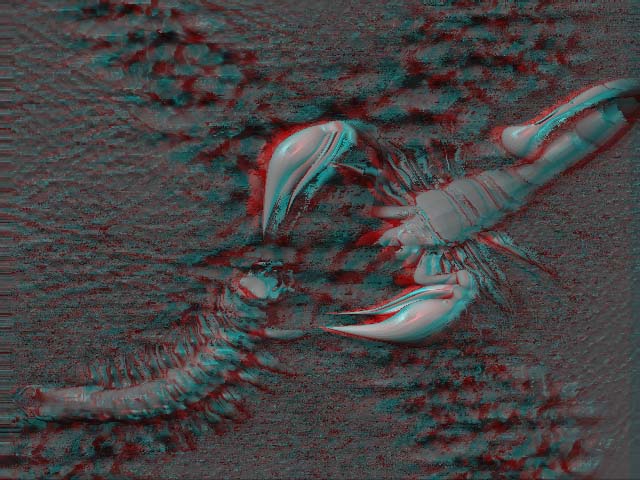
I am working on one right now…but I am pretty far into it to quit…was experimenting with the ? that you answered…will post those results…just a scorpion and centipede thing on the ground…hopefully I will have it posting before the hour is up…bbiab.
I take it back. I messed around a bit more and here is the solution.
You have to merge all your layer into one before you use the MRGBZ Grabber tool. The layer that is farthest to the left in your ‘Layer’ pallet is considered your bottom layer. If you select any other layer a tiny ‘Mrg’ button (Merge Layer Down) will appear under the Create Layer button. Just save your work first (you can’t undo layer merging) and then merge all layers until you have one and then continue as normal.
I did it here. It works.
[attach=21169]artifact.jpg[/attach]
I wear regular glasses too. I just put the 3D specs in front of my regular glasses and it works fine for me. I guess that makes me 6-eyes. I’m guessing that your 3D glasses must not be wide enough to go around your regular glasses.
I’m working through some of my old images and converting them. I’m noticing a lot of places where I could improve the way the depth flows. It’s kind of hard to tell when you are just working on a 2.5D image and not a model that you can rotate. This one is a good example of what I’m talking about.
Was that last ‘failure’ done by converting the texture to an Alpha and embossing the depth that way?
Ok, this is it for my old stuff. Consider my wad blown now. This is all I had that I considered worthy to look at. Again, the depth is goofy but it still looks cool.
yeppers…thats what happened…and now all he11 is breaking loose…things got worse…goign to do a new pic and try again…the depth info after merging is not allowing me to follow the original method…staying as grayscale and registering as a bmp…pffffft…I am not ps guru…so I will start a similiar image in a few…and try again…
Love the last one…it really has a great 3d effect…this is fun…I had been wanting to get back to this stuff for a good while but kept putting it off…thnx for inspiring me to do so…and I will continue to experiment on this thread as long as it’s ok with you. thnx
ron
I guess I could tell you how this makes me feel, but I’d first have to transport your molecules to my dimension. Just thinking about that makes my phase diodes hurt. Take two of THESE and call me in the morning.
are you adding your background after you make the 3d image or all at the same time?
What horizontal position are you using in the Displace in PS? I tried 15 and 10 and 5…still not getting a decent result…grrrrrr…I remember when Charles first posted the thread and it was so easy then for whatever reason…I am finding this difficult to do this time around…tips?
This last image gives a good effect and nice and clean…
and how are you getting those nice recessed looks like on the very last one? takes my eyes a little to adjust to that one but once it does, that diveted / cutout look comes across very effectively
grrrrr…one other problem I keep running into is the depth I grabbed in z and I saved it as depth.psd…when I bring it up it is greyscale …etc…and wont allow me to go into layers and adjust to add the 50 percent gray etc…and if I try to apply it unaltered, Ps say it wont do it because it is a bitmap…
is there a work around for this or am I doign something wrong?
thnx
The 2D background I did add with Photoshop after exporting from Zbrush. I just like to add some texture to that 2D plane to give the image an extra layer of depth.
I actually did alot of work on this one in Photoshop. I actually used the Photoshop “Liquify” filter in conjunction with my pen tablet to distort this image grossly. That part was a bit of a challenge to work out since I had to distort both the color and depth information at the same time.
I have been using ±10 to displace the image. Although, in the last one I wanted the depth to be a little softer so I used ±7.
I actually started to work on a VERY detailed guide to making these sorts of images when I got home from work today, but I lost interest after like hour 4 and had to take a break.
I have noticed that certain types of images seem to come out better than others, but I haven’t quite put my finger on what actually breaks the technique. I think that if you have a large depth contrast in your Zbrush canvas (elements that are way in front of objects that are way in back) then the image seems to have these broken little bits around the object edges. This has to do with the fact that you are really just distorting depth into the image and it’s not a True 3D image.
I’m not sure exactly what you are working with so it’s hard to say what the problem is exactly.
Eventually I am going to upload the Photoshop “Actions” that I recorded and use to automate a lot of the process I go through. One of the parts that I can’t automate is the actual displacement, which you have to do manually. I would load the actions now, but I haven’t made them quite user friendly yet and I fear it would only add to the confusion.
Good things are comming though for all of you people (all 1 or 2 of you) that are interested in persuing this type of work.


 ) that you posted…will have to try that software out and compare…went to one of the links that had planets thumbnailed and looked at those…(moons and the sun I believe it was)…