ZBrushCentral

starters help on workflow (please)

Hello there,

I’m new to using ZBrush (duh)
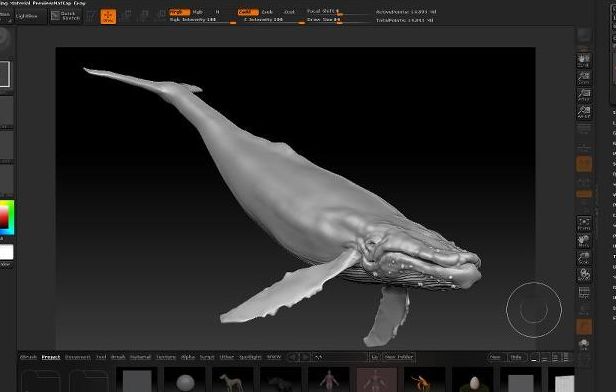
I am trying to create a humpback whale as a learning object which leads to many questions…
Most of them I tackeld online and through this site… I’m just getting lost between the possibilities and workflow complications and could use some advice to keep me going… please be patient to formulate your answer…it will be used wisely and is much appreciated!

I constructed the base model with z-spheres and have chosen adaptive skin to sculpt upon.

How do I control the poly concentration when (in my example) most of the body could be medium dense but the head and eyes/chin need more detail. I get stuck on 5 subdivisions regarding capacity.
(Is it an option to cut the model in parts?.. I suspect I can never get the model seamlessly glued together again… but i would love to be able to do this for the mouth for instance to be able to animate it in 3DSmax later)

somewhere I lost the capability to switch back to z-spheres (to switch pose for instance) how comes?, what shouldn’t I do?

I polypainted the model en exported it to have a texture which I can use in photoshop or 3Ds max but… it can only export from the lowest subdivision level causing the texture to be very course/gross/blurry even though choosing a 2048x2048 texture size, apart from that the texture becomes so uncontrolably distored I have to find the pieces together which makes editing impossible…? I suspect I should texture the whale in 3DSMAX coursely and then polypaint it in ZBrush…?

Please help me on my way!

the image attached is a wip of the sculpting part.

Attachments

humpback.jpg

How do I control the poly concentration when (in my example) most of the body could be medium dense but the head and eyes/chin need more detail. I get stuck on 5 subdivisions regarding capacity.
(Is it an option to cut the model in parts?.. I suspect I can never get the model seamlessly glued together again… but i would love to be able to do this for the mouth for instance to be able to animate it in 3DSmax later)

You can use Qremesher to give certain parts of your more density than other parts, you can find a video for using this function in the Zclassroom.

somewhere I lost the capability to switch back to z-spheres (to switch pose for instance) how comes?, what shouldn’t I do?

You lost the ability to switch when you made an adaptive skin and then switched to that tool which never had zSpheres in it.
You never really want to work on a Zsphere mesh, as you can break it quite easily. The workflow you are currently doing is the right step. You can keep the zsphere rig that you had original to insert into the sculpted mesh to use as a rig later if you choose to.

I polypainted the model en exported it to have a texture which I can use in photoshop or 3Ds max but… it can only export from the lowest subdivision level causing the texture to be very course/gross/blurry even though choosing a 2048x2048 texture size, apart from that the texture becomes so uncontrolably distored I have to find the pieces together which makes editing impossible…? I suspect I should texture the whale in 3DSMAX coursely and then polypaint it in ZBrush…?

You should always export a texture from your highest subD level. Can you post a picture showing why you can’t do this or the error that Z is giving you? You can work completely in Z if you choose and export to Max when you are done or you can work a little here and a little there…it really all comes down to you.

Your ZSphere model should still be in the tool pallette. You can split the model into subtools or groups. You can do local hi res subdivision.