ZBrushCentral

Sony Santa Monica Lunchcrunch Characters

@idlemind - thanks dude, i used the light cap stuff for my lighting. its the regular light plus a rim light in light cap. nothing fancy. I rendered 6 diff materials and flipped through blending modes in photoshop. first time doing that. im trying to do something new with each one so i really dont know what im doing haha.

@BUSNISMANPATRIOT - dynamesh

Awesome work, guys! And thanks for the timelapses. I always love to see how people work :).

Here’s todays…lyonel from the original zelda game. pissed at myself, i forgot to hit record. i wont forget next time.

lyonel_03.jpg
<iframe height=“323” src=“http://player.vimeo.com/video/29503175?title=0&byline=0&portrait=0” frameBorder=“0” width=“364” webkitallowfullscreen="" allowfullscreen="">

absolutly AWESOME!

awesome stuff, lets see some poe’s next! :+1:small_orange_diamond:+1:

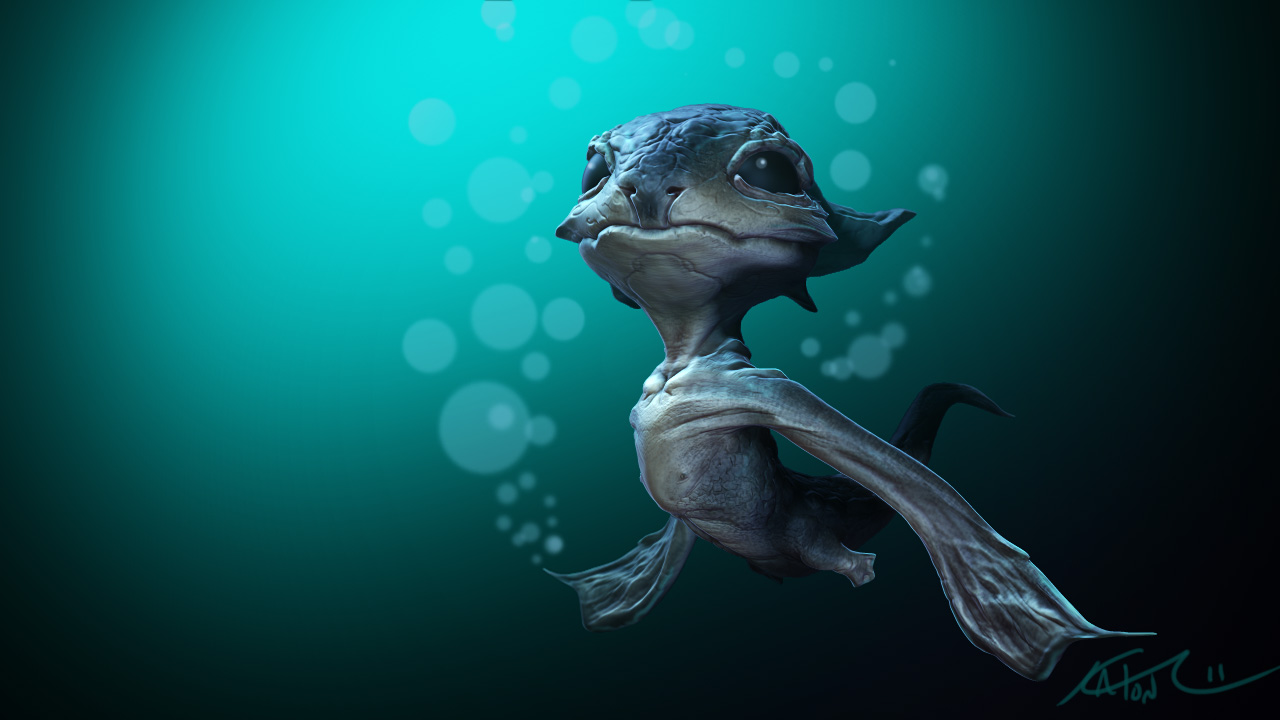
Here is mine today!
ZoraKid.jpg

Attachments

ZoraKid.jpg

Whoa nice stuff:+1: Bear thingy has a great feel

No images, here are a couple timelapses!

You guys ROCK!

hahaha, it seems you spend the day lunching :slight_smile:

What settings did you use on the minotaur guy? He looks specatcular and the render is great.

Awesome!:):+1:

Great stuff. What do they put in your lunch? :D:+1:small_orange_diamond:+1:

Great stuff. What do they put in your lunch?

probably mario’s energized mushrooms :lol:
really cool!

Thanks for taking time to answer my Q. I am pretty happy with myself I guessed maybe you used the new lightcaps stuff having not played around with that yet but I cant wait to try it!

very inspiring thread you did there ! :smiley: i will try to bring my speed sculpt once i get my zbrush 4R2 and it will be my first time to do a speed sculpt video :slight_smile:

First off I want to say that you guys are very talented and this thread is very inspiring. I have a question for “Katonc” how are you able to merge two completely different geometries? (For example in your “zoraKid” time-lapse video you merged the head with a cylinder to make the body and arms one piece.) I’ve tried doing it thru the sub-tools menu where it obviously says merge visible or merge down, but I’m guessing there is more to it, because after I merged it makes the object one, but when I sculpt or smooth it still acts as if there’s two separate pieces.

@ Quintonius - someone correct me if I’m wrong but I think what you saw is made with the new DYNAMESH function in R2 - can’t wait to get my upgrade since this is one of the best functions to merge seperate tools into one seamless mesh to sculpt on.

yeah this is the new dynamesh. I used the meshinsertcurve brush also which is new. These work nice together for blocking in masses quickly. Thanks for the compliments!

inspiring stuff guys… makes me want to do some crunches too