ZBrushCentral

some suggestions for modeling layered armor?

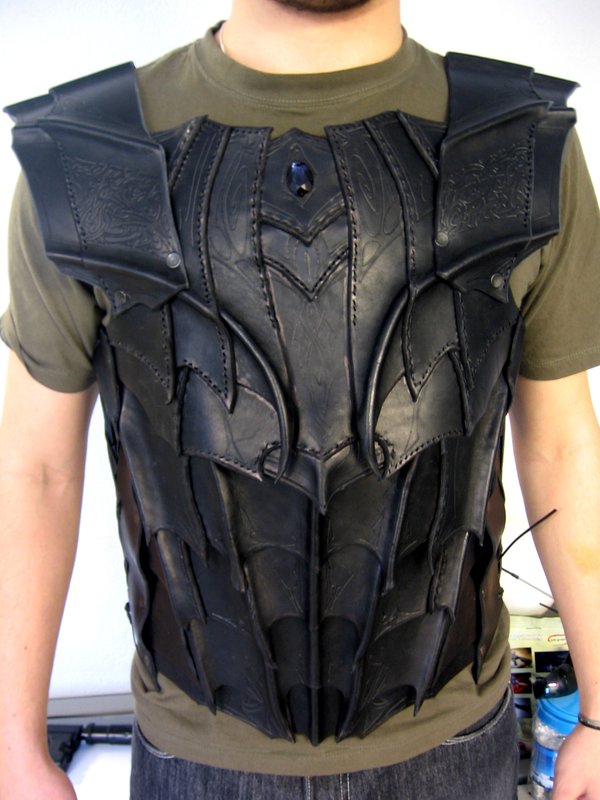
Hi, I’m trying to model something close to the layered leather armor in the photo below.

Drow_armor_Lorica_by_Sharpener.jpg

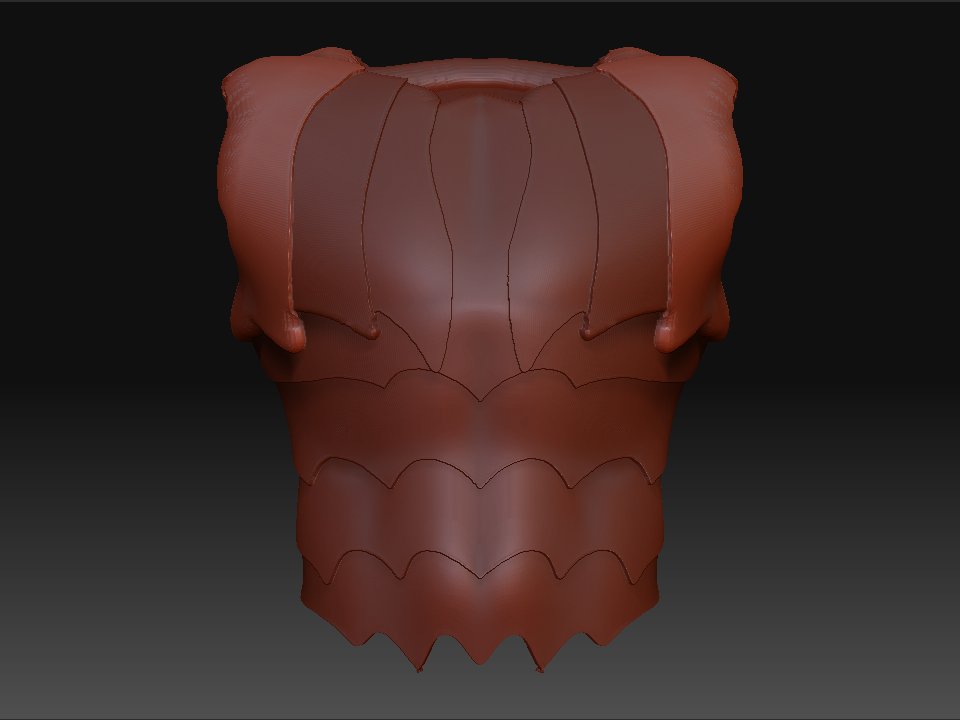
However you will notice that the additive nature of the extract operator is resulting in some of the geometry getting more “rounded” and exaggerated with each extract (see “point bits” of the topmost layers and the rounding around the neckline and arm-holes).

It is also resulting in the file ballooning in size causing it to be more difficult to work with.

Another unwanted side effect of the extract tool is that it adds depth/thickness in both direction at once (in & out) causing the interior of the armor to take on a layered affect which I would like to avoid.

Any suggestions on how to approach this so the layers are crisper and the file size more manageable would be appreciated.

Attachments

armor_test1.jpg

here is the same project but built as a single subtool using the inflate operand.

its looking good but notice how the thickness has built up on the inside of the amor (it’s noticeable around the edges).

this is because the inflate operand inflates in both direction (in & out)

any pointers on how to either avoid this, do it differently or remove (i.e. boolean difference) the extra thickness on the inside?

armor_test2.jpg

Honestly, you really don’t need all those pieces. Most of what you’re doing can be sculpted from a single piece rather than individually modeled.

If you do want to go the individual piece route, try using retopology instead.

I personally would use retopology to create four pieces: abdomen, chest and two shoulders. Then I’d sculpt those pieces to create the rest of the effect.

ok i’m brand new to zbrush so ill have a look at retopology.
right now i have no idea what that is/does.

Your inflation method is looking pretty good. Here’s how you can do it and avoid those thick edges:

Before you start sculpting, store a morph target. Use the inflate deformation to grow the mesh a little bit. It doesn’t have to be much. Now use Tool>Morph Target>CreateDiffMesh to create a new tool. When you select this new tool you’ll see that it has thickness based on the difference between the stored state and the size of the model when you created the difference mesh. More importantly, you now have polygroups for the inner surface, edge, and outer surface.

Now you can use the partial mesh visibility features to easily mask the interior and edge polygroups and protect them while you work. This means that they won’t expand.

ok, so you mean before i inflate or do anything right?
store the morph target right after i extract the initial geometry from the mannequin?

ok why is this?

ok i’m not really sure what a polygroup is, i will look for a tute on polygroups.

ok i am also unfamiliar with the “partial mesh visibility” features so i will look for a tute on that as well.

thanks for the pointers, they really help.
Can you tell i only got zbrush last week?
:wink: