ZBrushCentral

Smoothness when displacing? (Maya)

Hey guys,

I’m having a problem when displacing objects in Zbrush then xfering them to Maya, everything going fine in Zbrush using the Multi-Displacement 3 tool. So i bump up my model quick a bit, detailing it and the such, import the obj file back into maya with the sub division level at 1 in zbrush. So imported into maya i do all the displacement texture stuff, disable maya’s displacement on the polygon, use the .map displacement within the texture, then use mental rays approximation editor to generate it all. So i push it at around 4 N subdivisions which should be plenty to display some good detail. With mental ray set to production…unfortunately this is what it turns out looking like…

Any ideas as to why it might do that? Also i might note the fact that upon importing the .map file for the displacement…it resembles a UV map with details i can see, whereas usually i cant because the gray values are beyond what the human eye can detect…

Any help is much appreciated!

Thanks,

  • Jon

It’s kind of hard to see the problem when we don’t know what the ZBrush model looked like.

However, one thing that seems apparent from your steps is that you’re not calculating the displacement map for a cage mesh, and aren’t applying it to a cage. Instead, you’re applying it to a mesh that’s already subdivision smoothed. That usually results in bloating of the render because the rendering engine applies a subdivision smoothing pass as well. In short, you’re getting: smoothed + smoothed + displaced = render. What you really want is smoothed + displaced = render, with the map calculated for the original, unsmoothed cage.

I tested out that smooth theory cause I did in fact smooth the mesh in maya before moving it to ZB, however I created the model again and subdivided it without smoothing. Sadly, to no avail, this didn’t solve the problem…here is a pic of what it looks like in ZB and maya once rendered.

And here is what it turned out like in Maya

Once again, your help is very much appreciated!! :smiley:

Thanks,

  • Jon

Try describing the exact steps you’re following from start to finish, and the settings that you’re using.

alright here goes —

Granted…I will mention that this DID work before…meaning before this whole post but that was on a different model…so heres the breakdown.

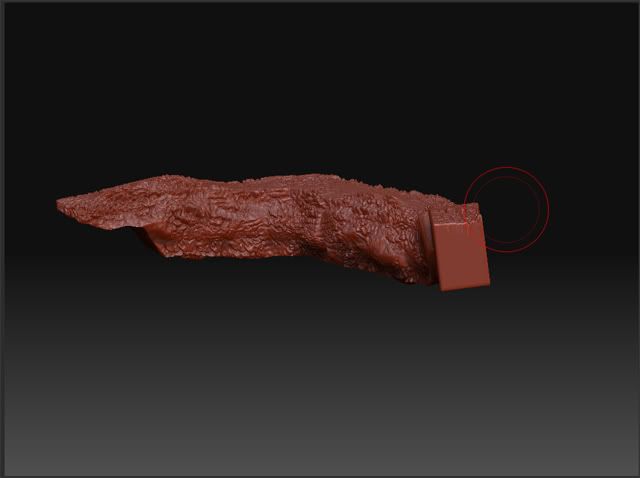
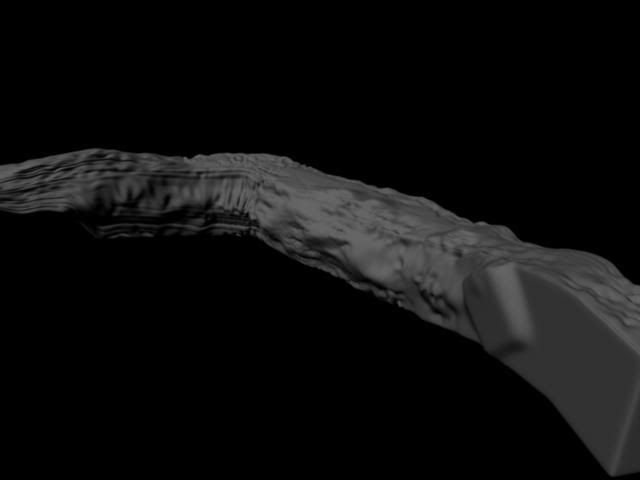
Create the model in Maya, basic model like around say 1k polys. Now if I leave it at that 1k, when subdivided in ZB it will get too distorted because it needs more polys to hold its shape. That said, I Edit Mesh > Add Divisions to it a couple times bumping it to about 20-40k polys. I use the Export Selection > OBJ file, then head into ZBrush. Right away I subdivide to 3 giving me about 350k polys. Then I start painting it up a bit with magnify…rake ect…different alphas ect… so now I have it looking like I want. First I bring the model back to sub division level 1, save it as a ZTool…then export it as an OBJ file. So now I’ve got to export the displacement map so I go to Tools > Displacement and turn “Adaptive” on. Then I go into the Multi-Displacement 3 plugin and check my export options, oh and I also knock “Map Size Adjust” down to zero. So my options in MD-3 tool are the following ----

Channels: 3
Bits: 32 Float
Vert Flip: Yes
Scale: A.D.Factor
Smooth: No
Seamless: No
And all my channels are Full Range and all Res’s are Full

So I start the export saving it as a TIFF. It completes 2 tile passes instead of just 1 (annoying…thanks for answering that other post btw)…so now its exported. I drag and drop onto that custom script in Scott’s thread that turns it into a .map file.

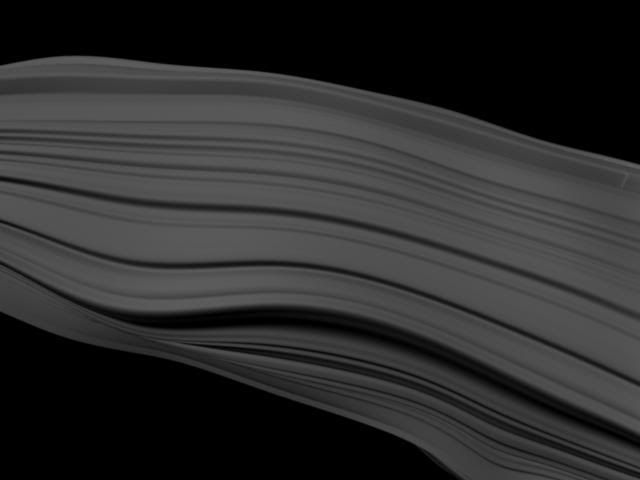
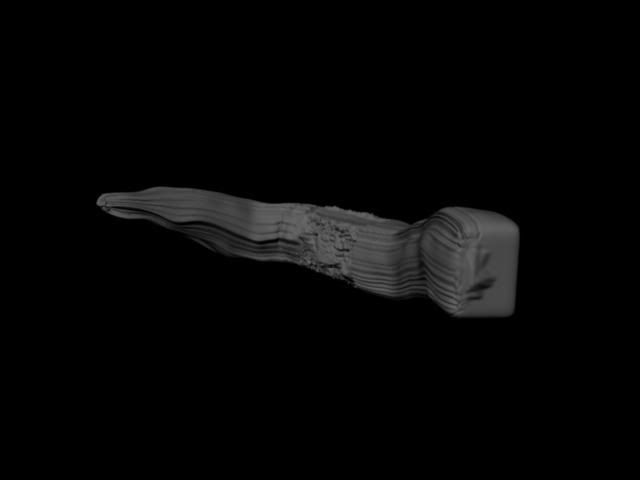
Back in maya I import the file with groups set to false. so this crazy mesh shows up. I go into mental ray settings and crank it up to Production, then hit the Hypershade window. I create a lambert and connect a displacement map. For that displacement map I attach my .map file to it. I assign the texture to the mesh then while on the mesh I turn off “Feature Displacement”. So now I head into Window > Rendering Editors > mental ray > Approx. Editor. On the subdiv line, with the mesh selected, I hit Create. So now it should be ready to render and blow minds…but ohhhh nooo! it comes out like above! Oh one more thing I do before rendering is bump the N Subdivions up to 3 on the Approx. Editor settings. Thanks for taking the time to read all this!

  • Jon

Alright so I rebuilt the entire model from scratch, so now I have a new piece of information that might help me solve this situation. It seems that now the middle renders perfectly, but the outsides have that wierd smoothing effect.

Any Ideas?

Thanks!

  • Jon

I’m guessing we’re looking at a problem with the UV’s.

Alright, understandable.

Well my next question would have to be how do I place my model back inside the 0 - 1 factor? I’m guessing that’s what is messing my disp map up.

Thanks,

  • Jon

That depends on what app was used to do the UV mapping! I can’t tell you how to do it with other apps, but with ZBrush you’d simply apply a blank texture to your model that’s the same size as the map you’ll be exporting and then press Tool>Texture>GUVTiles. Of course you’ll have to export the level 1 mesh along with the displacement map, since the OBJ is what holds the UV’s.

I would also in this case recommend turning on Tool>Geometry>Cage while calculating the map and exporting the model. ZBrush assumes that the rendering engine will apply Catmull-Clark subdivision smoothing to the mesh at the same time that it applies and renders the displacement map. This means you’ll need that cage mesh to avoid bloating in the render.

Raw genius at work…thanks audrick, very helpful my friend.

  • Jon

Glad we got it figured out and resolved at last. :slight_smile: