ZBrushCentral

SketchBook - Rob@t

Hi, I frequent this site quite regularly, but just now created a profile so that I might post some of my stuff to the forums and be more involved overall. :smiley:

I go by Robat over at Polycount and Eat3d’s forums, but ‘Robat’ was taken here, so Rob@t it is.

Anyway, here is some of my work, both past and present. If you have any comments or crits, please let me hear them. I’m eager to learn, and to help out where I can.

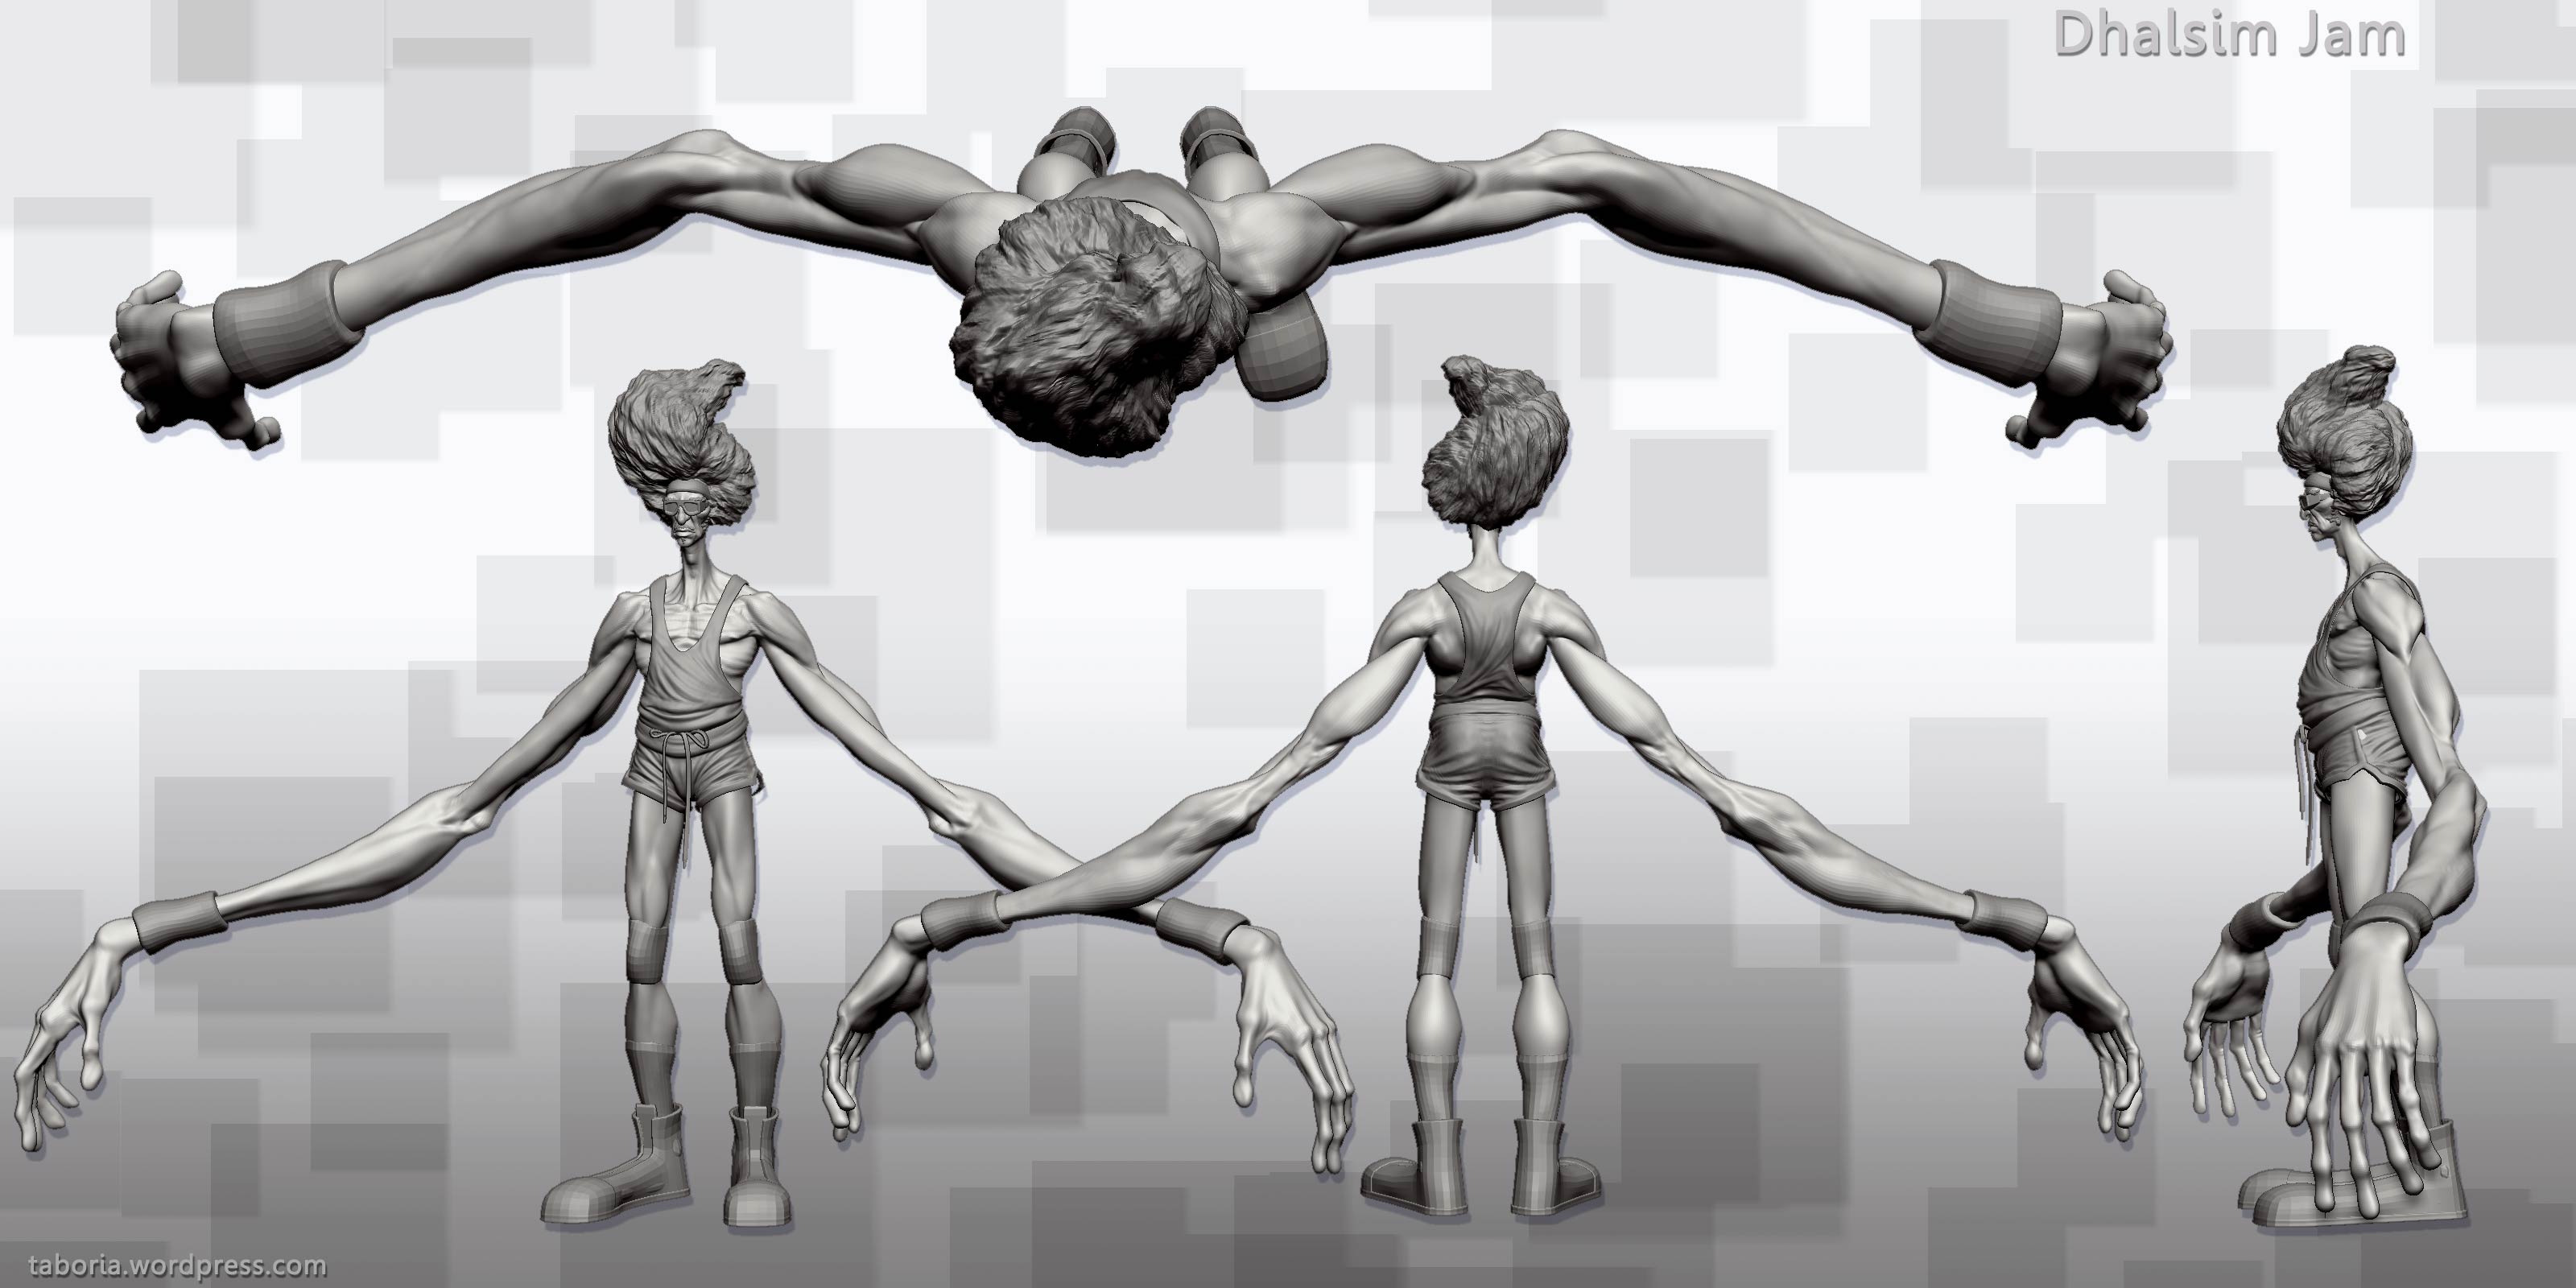
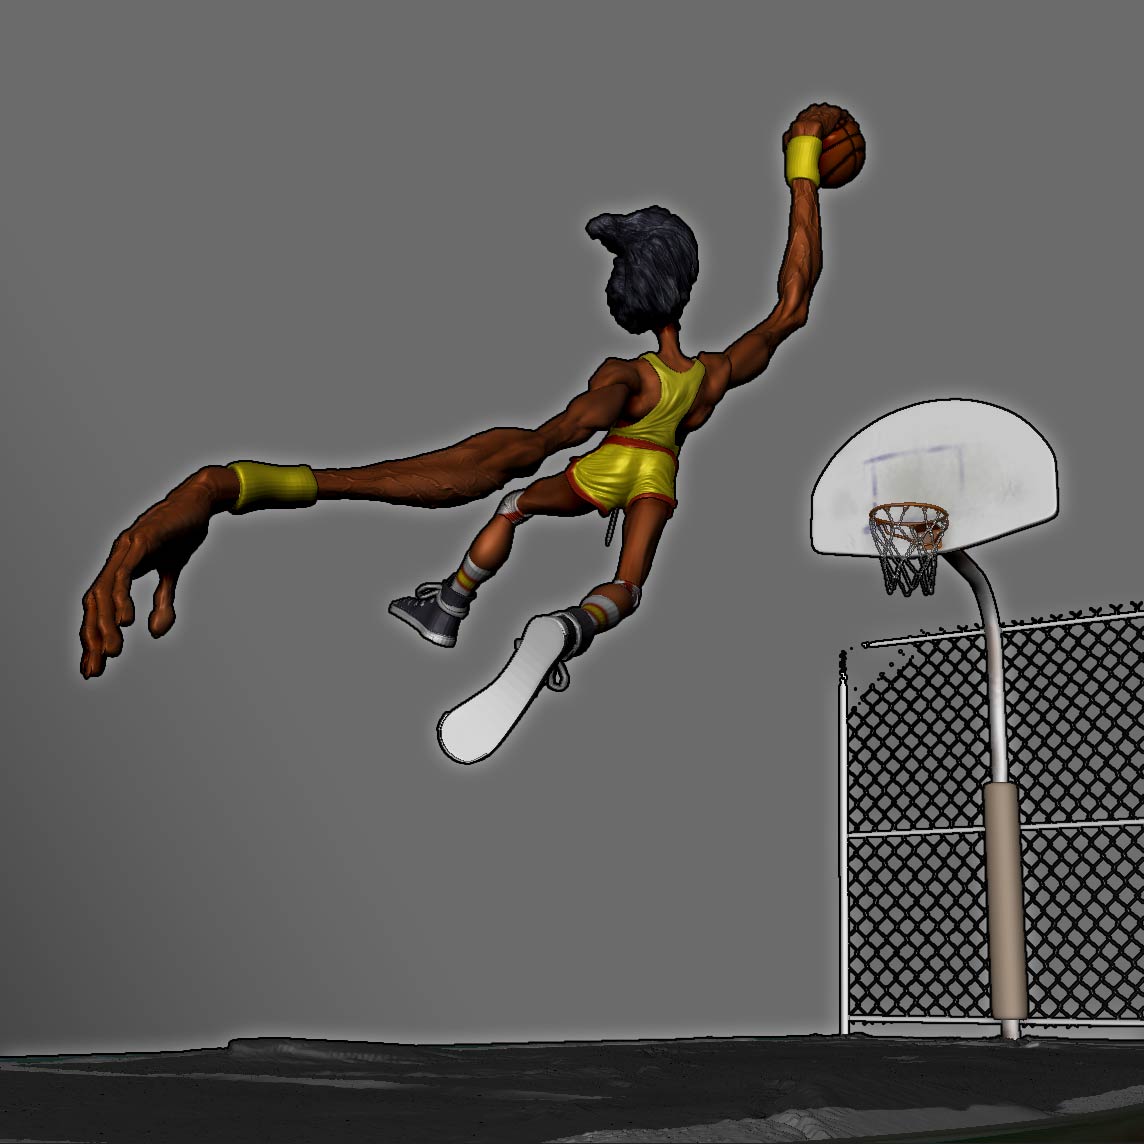
This is what I’m most actively working on at the moment. Hopefully the likeness is decent enough for some to recognize?
BaduUpdate_5-11-2011.jpg

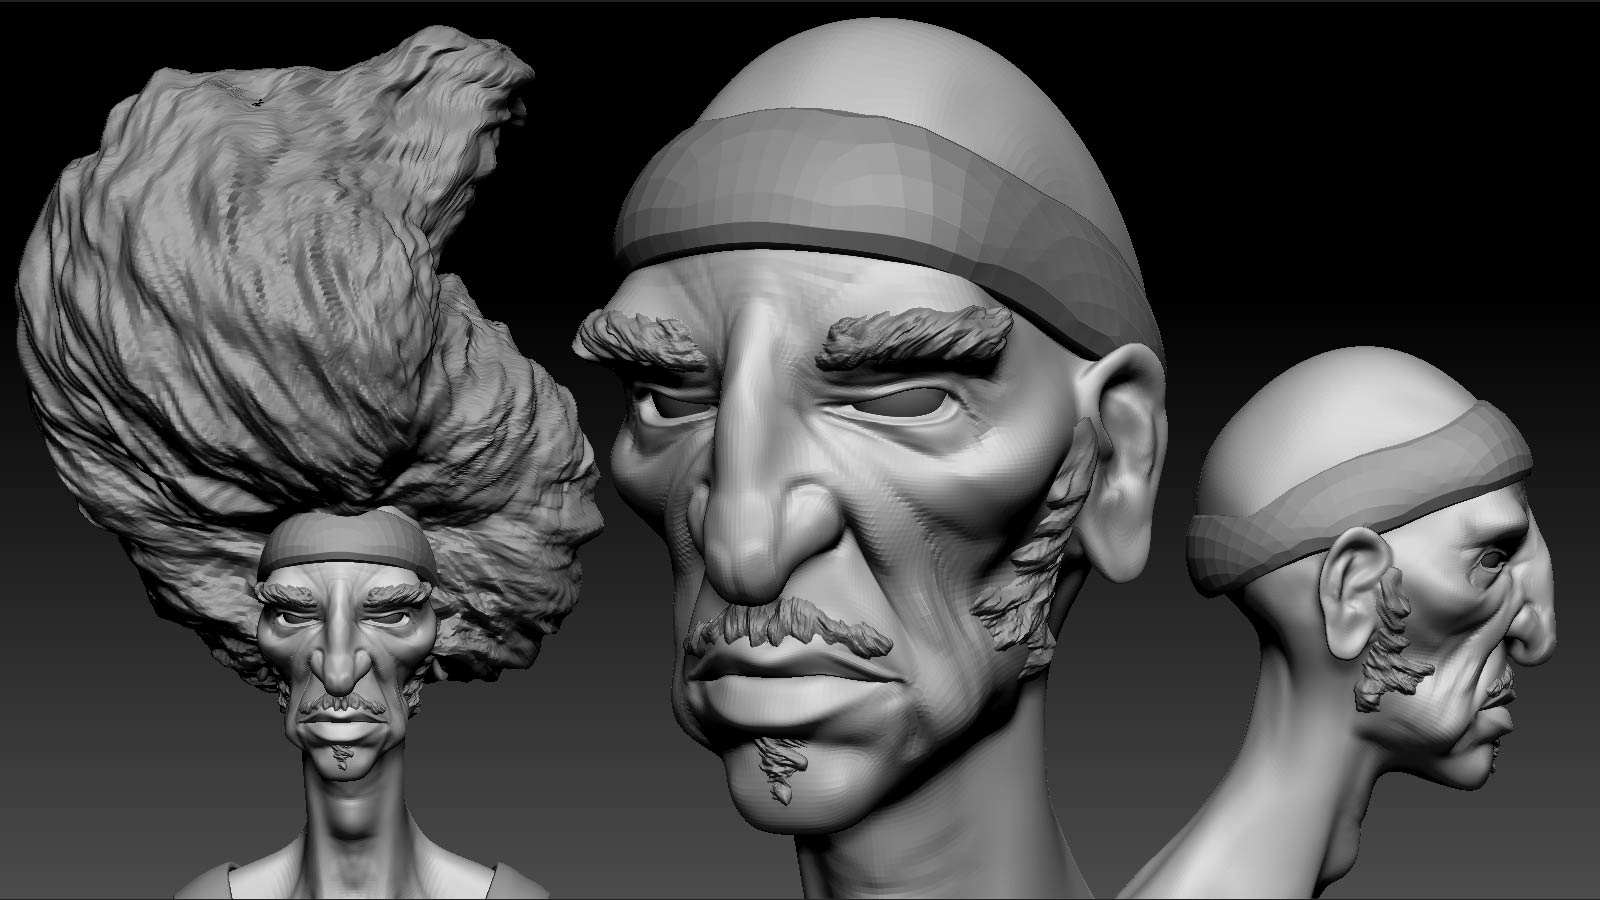
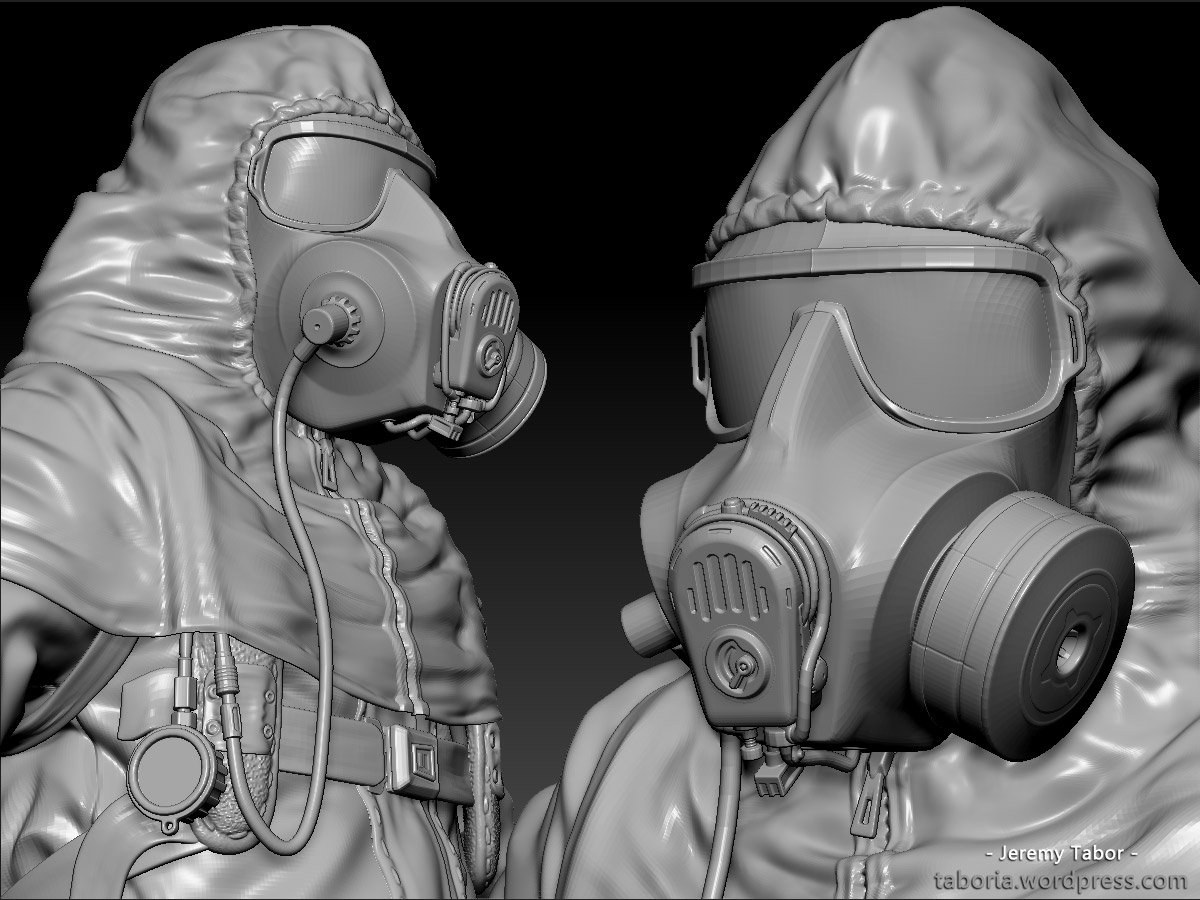
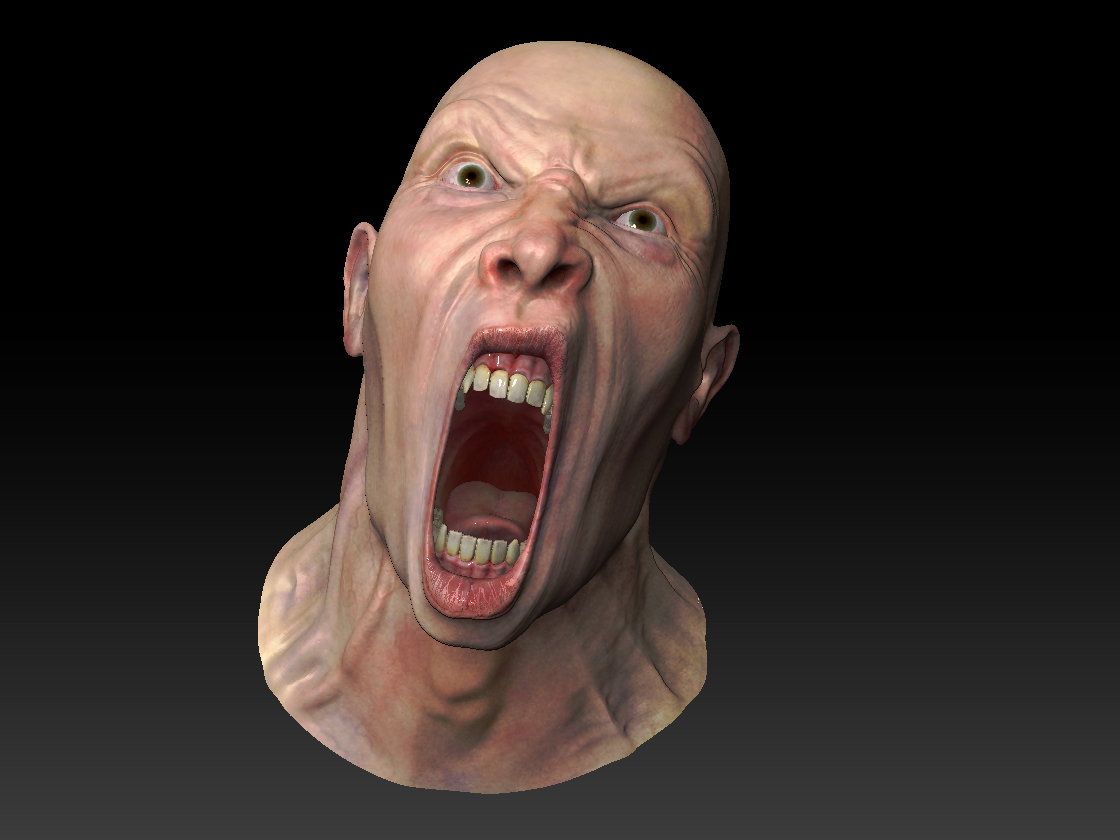
This is about 5 months old now, but was a submission for Eat3d’s Head Sculpt Challenge. Here’s a link to the Final Submissions Page if anyone is interested. I entered the game really late and wasn’t able to get everything that I wanted out of this, but I was able to snag a single Honorable mention vote for my efforts lol. But my intial plan for this, was to be a cosmonaut, mounted taxidermy style, as if some alien had nabbed him. I still have a long way to go with that obviously, and haven’t ruled out finishing it in the future.
[attach=252470]Final Render 01.jpg[/attach]

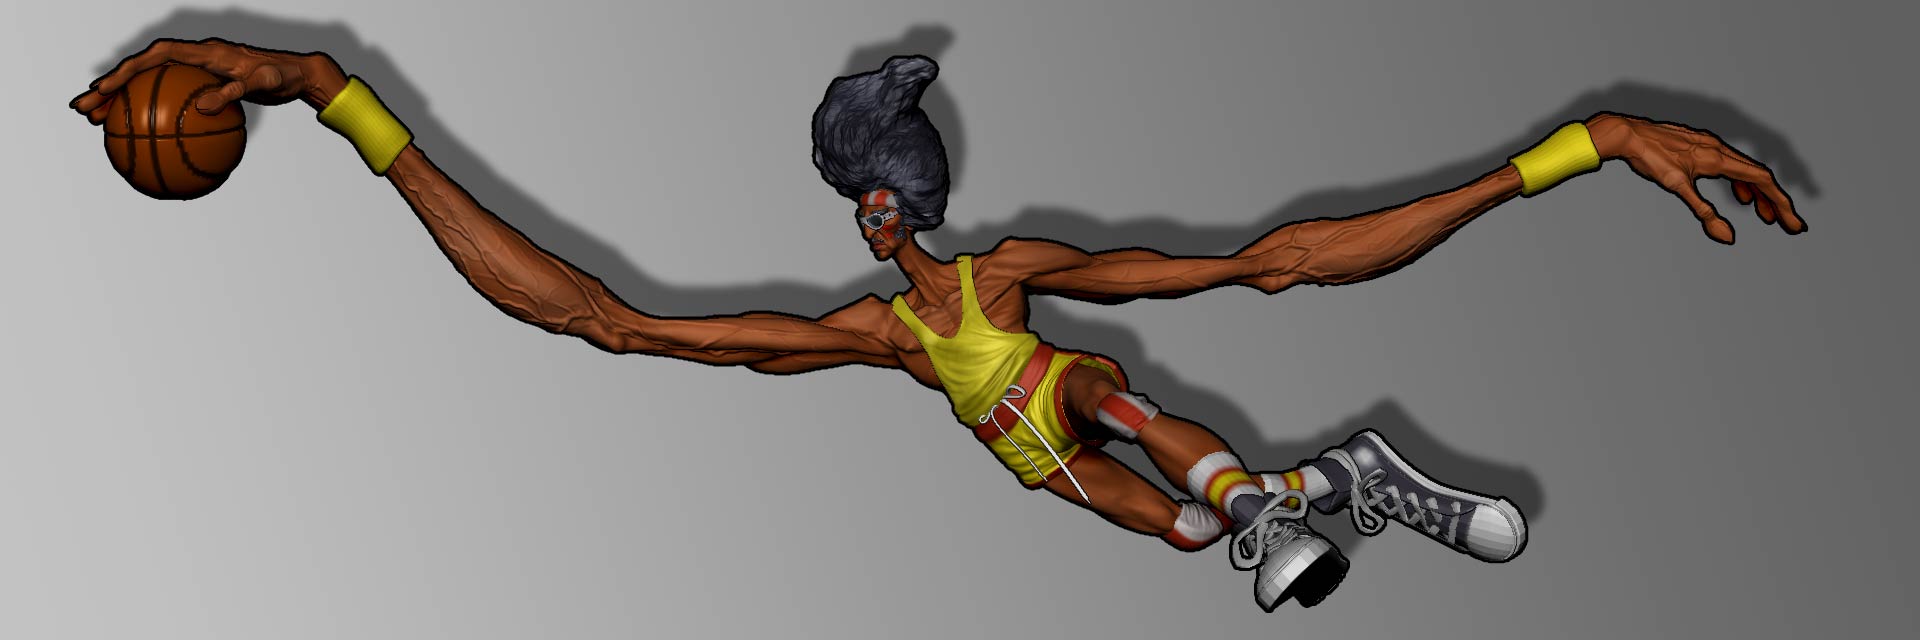
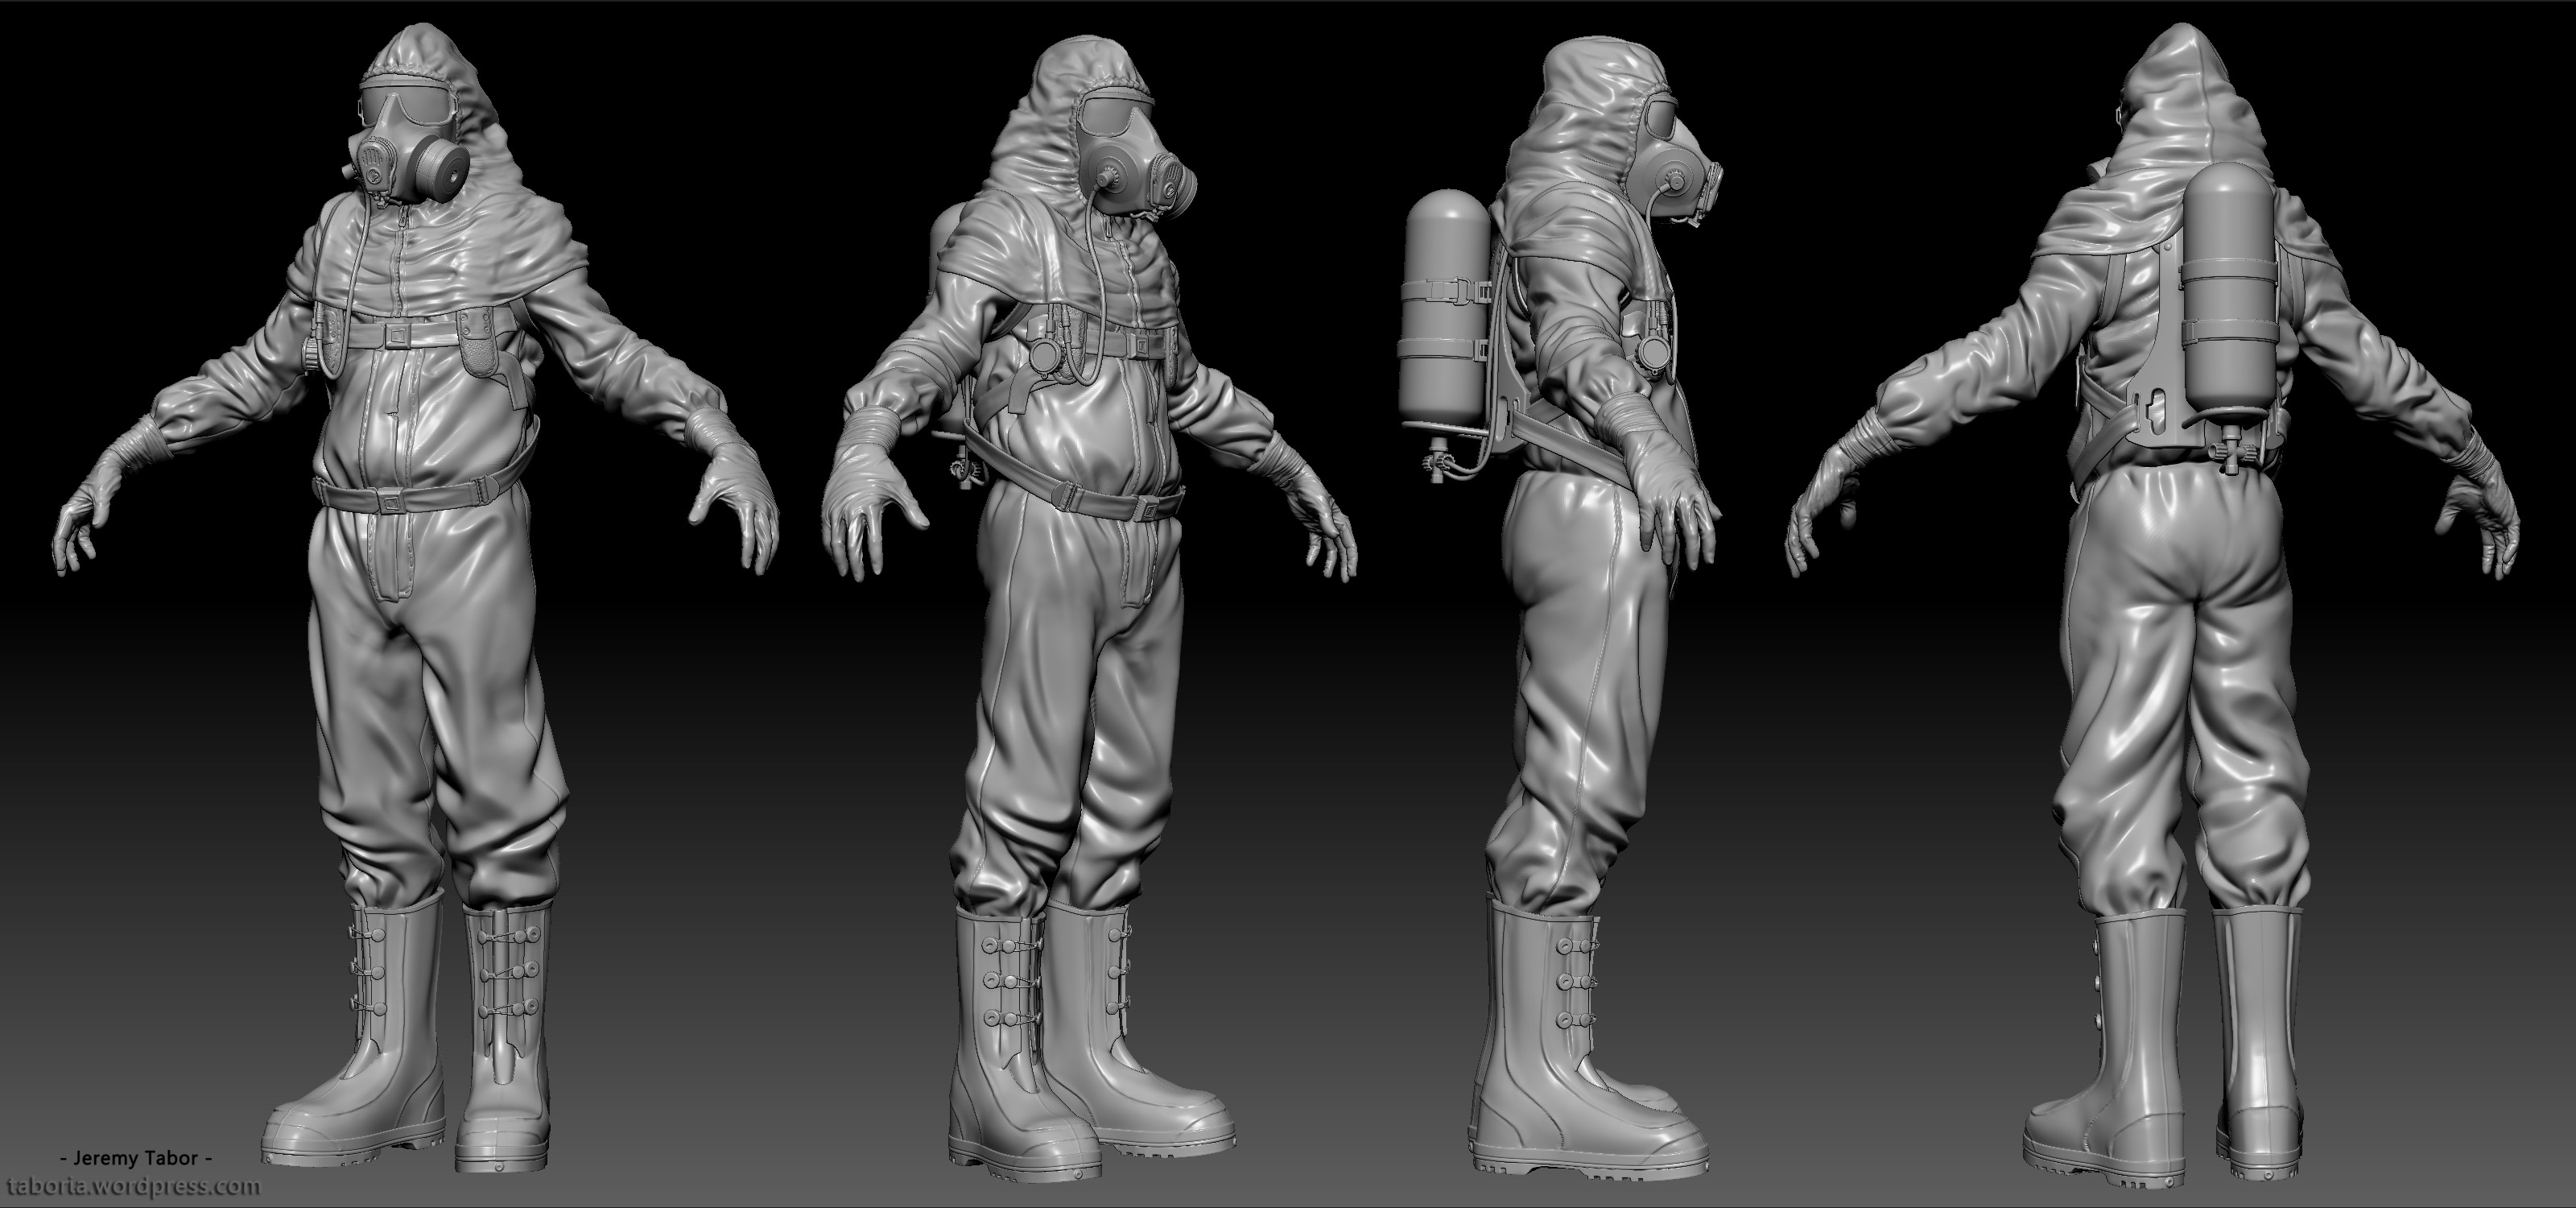
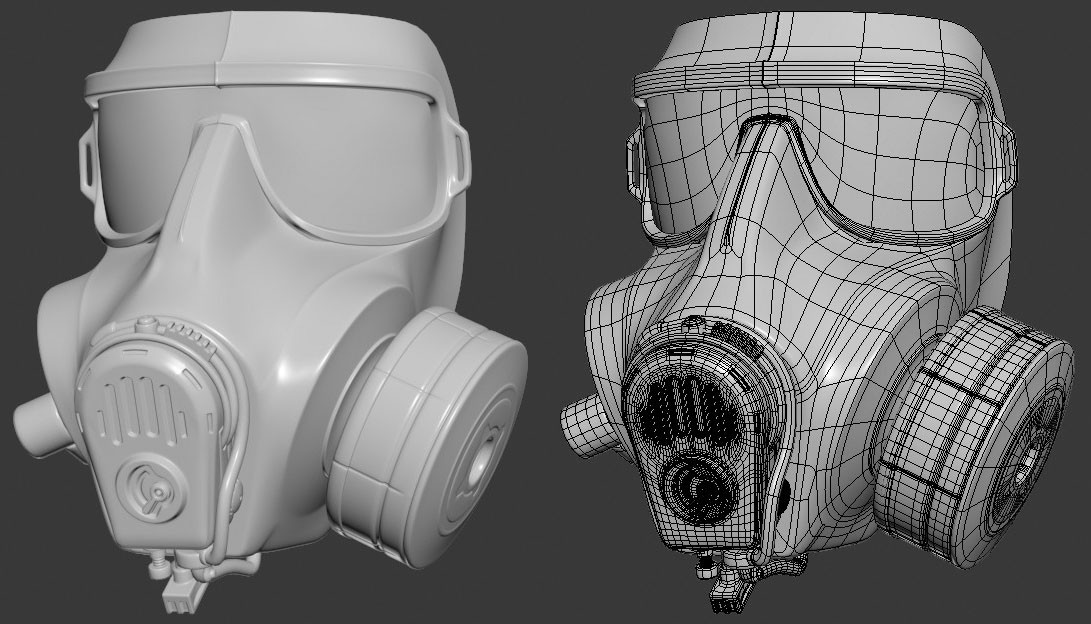
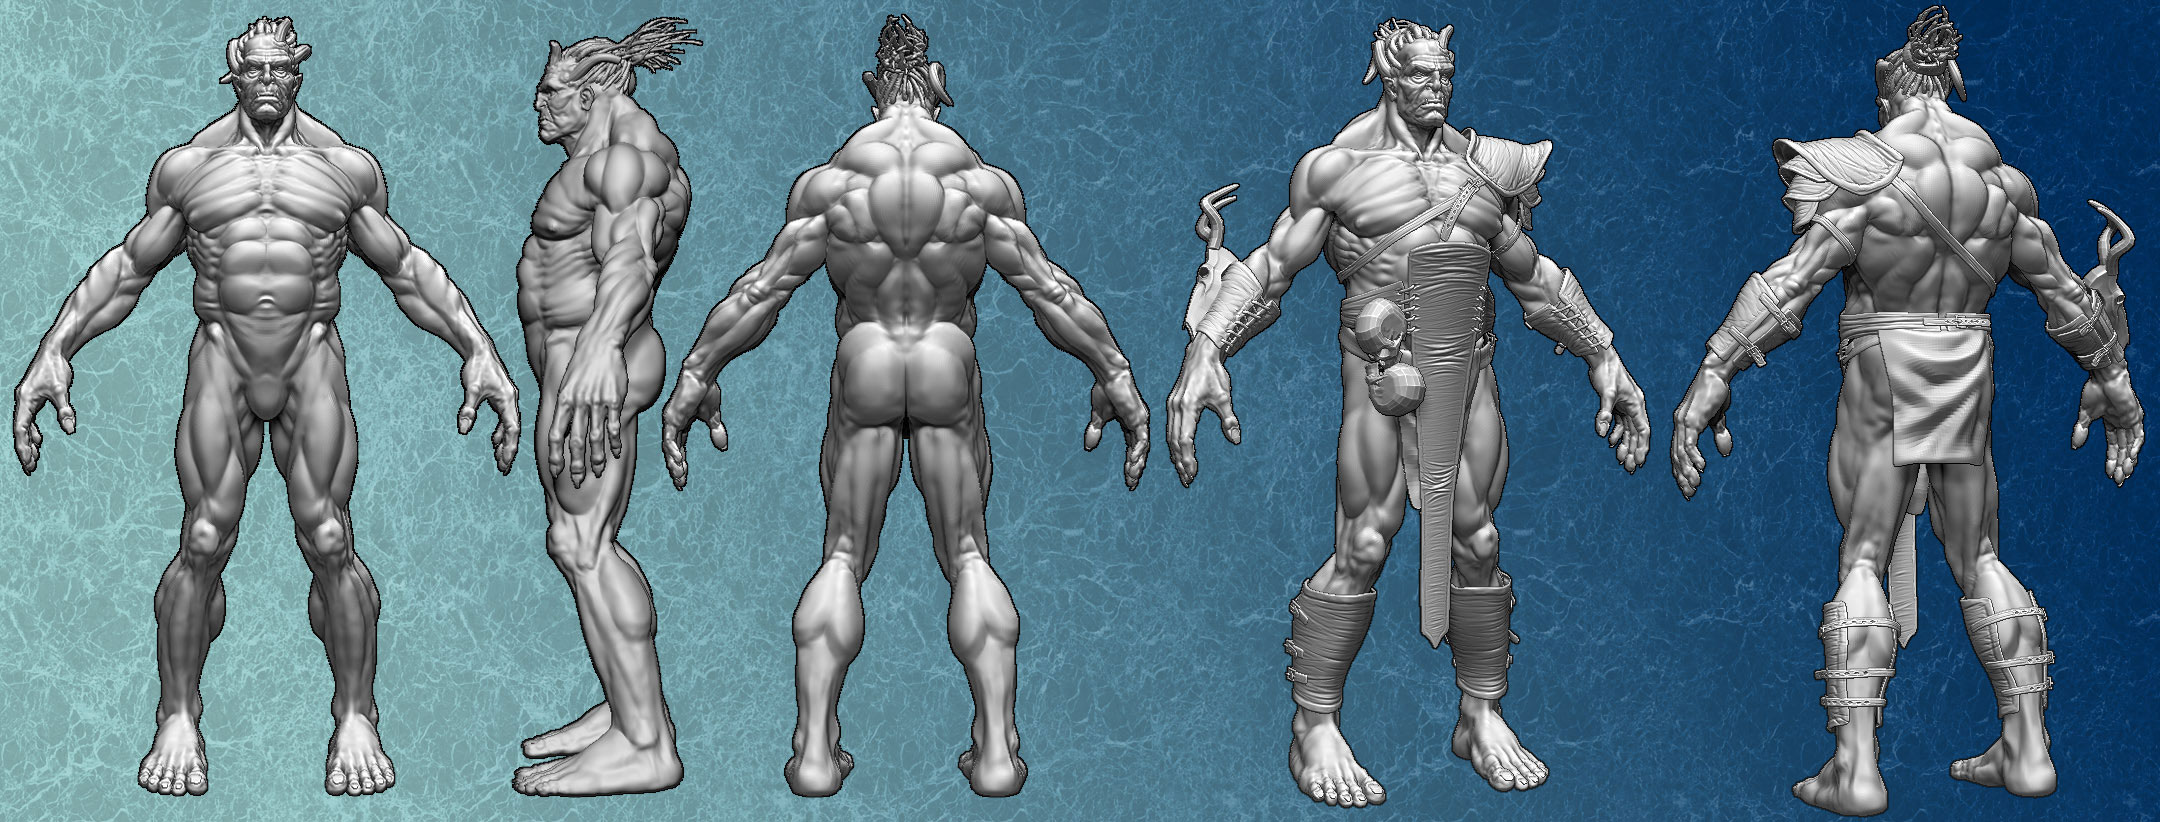
Here is a project I’m currently working on which is in the process of being baked down to a Game-rez model.
[attach=252475]FullBodyUpdate3-7-11.jpg[/attach]

A whole lot more info on these projects along with some others, can be gathered in my WIP blog (linked in my signature) if anyone is interested. I don’t wanna clutter this place up too badly.

Attachments

Final Render 01.jpg

FullBodyUpdate3-7-11.jpg

I recognized who she was from the thumb nail. You’re going for the old school Erykah Badu. She’s the reason I go by the alias of Tyrone. Nicely done. Her cheeks done look kinda lumpy though.
The other pieces are pretty nice too, especially the dread head.

Sweet. I’m glad you recognized who it was. And yea, there are definitely some areas which could use some tightening up. Thanks for the input!

Here’s two more things I’ve done recently which I wasn’t going to put up, but w/e, its a sketchbook, right?

This is something I was working on for the Polycount BRAWL competition, which I obviously did not finish. I still have plans of finishing it up, so anything and everything you have to say about it would be great :).
Here’s a link to the original thread on Polycount where the original concept and some WIP shots can be found: http://www.polycount.com/forum/showthread.php?t=82558
Dhalsim_5-9-11.jpg

Just a zsphere doodle - sort of a cassowary man… thing. Have no real intentions of going any further with it, but still, comments are still definitely welcome.
[attach=252530]BirdMan_4-22-11.jpg[/attach]

Attachments

BirdMan_4-22-11.jpg

Here’s an little update on the Badu sculpt. I’ve taken a break from fleshing out the head-wrap to slap some color on the face to see how that looks. I wouldn’t say I’m happy with the results, but I’ll keep fiddling with it before my next update. :smiley:

//Edit: welp, I’m embarrased :o I keep forgetting I can’t link from dropbox.

lets try this again…

love her!

i love the way you sculpt and also you very original design:+1:,please show more about your work and if possible your workflow…
keep on:+1:

Thankyou both!

@ Andreseloy - I really apreciate the compliments. As far as my workflow is concerned, I’m simply emulating alot of what I’ve seen here and other places.

I generally start very very low rez and push and pull the verts around with the move or snakehook brushes in conjunction with masking.

From there, i normally skip up a few subdivision levels and build up those mid-level forms, and then jump on as high as I need to get the apropriate amount of surface detail in. I make heavy use of layers (probably too much) and try to get some sort of color on the model as early as possible just to see how its reading in every aspect. I normally only wind up with 3 or 4 subdivs on which I’ve sculpted, and the other divisions are normally just for cleaning up various areas.

See, pretty typical approach. I do however almost always work from a basemesh created in another application, such as 3dsMax. And then I will frequently flip back and forth between programs throughout the sculpting process.

I’m looking into starting to record my process as to make me a more efficient modeler, and I’m sure that will provide a look into more specifics of my ‘techniques’. So if I start doing that I’ll be sure to throw them up here :smiley:

I hope that gives you a good idea, If you or anyone else has any more questions, gladly ask them. I’m more than happy to help since i wouldn’t be nearly as far along without help from all the resources out there, I just don’t want to clutter the forums up too much with all my blabble, unnecessarily :slight_smile:

Anyway, I’ve made some time to work more on my Dhalsim character since I hadn’t done anything with it in several weeks.

Heres a look… (pardon the massive image)
FullDhalsim_5-27-2011.jpg

Any C&C is greatly appreciated. Thanks!:smiley:

Attachments

DhalsimFace_5-27-11.jpg

Hey Everybody. I’m stopping in to give an update on an old project, and introduce a new one.

This particular post is coming a few months late, but here is an update of where I got on the Dhalsim Sculpt before I put it on the shelf to work on a few other things more relevant to my portfolio.

[attach=267406]Dhalsim_Renders001.jpg[/attach]

[attach=267407]Dhalsim_Renders003.jpg[/attach]

This next project is the beginning of what I hope to be a strong portfolio piece.

[attach=267408]Tabor-HazmatSculpt_8-16-11.jpg[/attach]

Tabor-HazmatMask_8-16-11.jpg

As always, any feedback would be great on any of this stuff.

Thanks!

Attachments

Dhalsim_Renders001.jpg

Dhalsim_Renders003.jpg

Tabor-HazmatSculpt_8-16-11.jpg

all this work is amazing but i love the hazmat guy do you mind giveing a quick rundown on how you made i was planing on make something like that and it would be very nice to see how you when about doing it

i find you have great skill on folds

Thanks :slight_smile:

And sure, no problem. A good technique for achieving nice thick folds, is by way of the snakehook brush in conjunction with some masking. Just mask off wherever you want a major fold to go, invert that mask, and then using a large drawsize, fold that material on down on top of itself.

After blocking everything out, I try to sell the layered feel by masking off more areas and lowering them so that they were physically overlapping the underlying fold, just like would happen in real life. Another trick is the ‘Gravity Strength’ button, located in the ‘Depth’ dropdown in the ‘Brush’ Tab. This feature allows you to have gravity automatically factored into every stroke. I usually avoid technique for my mid-level sculpting and only use it for blocking in major forms, however.

For this sculpt in particular I used the standard brush and slash 3 brush almost exclusively. For the slash 3 brush i lowered the z intensity to about 30 and used large single strokes to define the directionality of the folds.

Anyway, thats about it. Just experiment on a sphere until you establish a procedure for making the folds which you can consistently replicate, and then apply that to your model.

Oh, and I whipped up a quick stitch alpha for anyone who wants to try it out. It’s certainly nothing special, but if anyone can get some good use out of it, be my guest :slight_smile:

Just click the thumbnail below to download the .psd

[attach=267423]stitchAlphaThumbnail.jpg[/attach]

Attachments

stitchAlphaThumbnail.jpg

Wrinkle master!

thanks alot for the help but i used [sewys] clothing brushs to make clothing and i was looking for an alpha like that thanks il be sure to mention your name when i use it

one last thing do you use 3dsmax to block out the charector shapes or a zshepre?

haha great characters :smiley: :+1:

Awesome dude! I’m working on rubber folds at the moment and this has some great reference and tips for me. You’ve got a bold style, love it! :+1:

Thanks everyone! I’m glad you guys get a kick out of it :smiley: This stuff has been really fun to work on.

@ 3d-User - Yes, I use 3ds max as a base in most cases. I hop in between both apps very frequently in the early stages of the model, however. If something makes more sense to generate in Zbrush, then I do that. for instance, all of the clothing elements on the Hazmat character except for the boots, were a result of mask extrusions within zbrush. Alot of the stuff on the Dhalsim sculpt was the result of Zspheres. But generally, I do like to start with a basemesh of some sort, just to establish a topology I’m comfortable with.

And for that alpha, after some playing around with it, I typically use it in conjunction with the default ‘Tracks1′ brush and a Z-intensity of around 10-15. I hope it does some good. I’m rather inexperienced mocking up alphas in Photoshop like that, normally I just ‘grab doc’ from a sculpt, but regardless, I hope it works out for ya, lol. :slight_smile:


And just a quick sidenote. I noticed that the link to my site in my signature was broken. But now its back up if anyone had tried before.

I’ll be back soon with more updates!

Awesome job! Specially the last one!

How do you do folds? I can`t do such beautiful detail to my pieces :~

Man, this is really beautiful portfolio! I am jealous :wink:

I am just starting up with ZBrush myself, I have been a 3dsmax guy for the most of my 3D past. I am curious about couple things


  1. When I look at your Hazmat model, the mask looks very well defined with all the tiny creases, topoloy is perfect. Will I be right by saying that you have poly-modeled this part in 3DS Max and then “polished” in ZBrush?
  2. At the moment I find it much easier for me if I start of making a nice base mesh in max with proper topology flow and then go to ZBrush to make all the details. But I am sure this is what all the beginners say :wink:
  3. I am working on a model at the moment and I would like to make something similar to your stiches but with a bit different alpha I made. How do you make it follow the cursor, When I try to draw with it it just turns in wrong directions.
Cheers

@ V-rag: Thanks man, and really there’s nothing too hard about the process I use. I’m sure you can do it :slight_smile: I’ll just quote myself from earlier in the thread, since it goes over my process…

@ vertexfusion: Yea, I was in the same boat. I’ve been using 3ds max for a few years and seriously got into zbrush about a year and a half ago. It’s a fun ride :smiley:

For the mask, It was pretty much done all in Max lol.

[attach=267498]HazmatMask.jpg[/attach]

As far starting with a base mesh made in another app, there’s absolutely nothing wrong with that mindset. :wink: It’s all about results, and whatever you can do to get the best results will ultimately be the approach your going to want to go with. So play to your strengths. If you have a solid base in 3ds Max, that’s great! it makes you a more versatile modeler.

And to your question about the alpha. I usually use my alpha along with the ‘Tracks1’ brush, and as long as your alpha tiles vertically, it should work out for ya.

Attachments

HazmatMask.jpg

But do you use any special brush or technique?
I usually try to make folds using the Slash2, but I can`t achieve this level! D:

nope, there’s nothing specific that I do that’s different from anyone else :slight_smile:

The brushes I used for the Hazmat character where ‘slash 3’ and the ‘standard brush’ which are both included by default with zbrush 4. Really, the key is just to use nice fluid brush strokes.

One thing I will say is that a tablet of some sort is almost essential to this, so I would say that if you don’t have one, that be an excellent purchase.

Good reference is also important. Thinking about the thickness and composition of the material will clue you into how the material will react. For instance, the rubber suit of the Hazmat character won’t pinch sharply, just because of the nature of rubber, where as if I were sculpting a tailored suit, I would probably make more use of the planar brushes to establish a more crisp and stiff feel.

I hope that helps. But there really isn’t much of a trick to it, other than just studying your subject and executing the technical approach which you establish.