ZBrushCentral

Sketchbook Part 2

very nice work Framedworld!

not only your sculpting skill improved alot since the last time i saw your work (that was at least 4 months ago), you also able to present your models with some really good rendering and texturing lately, and it’s making your models so much more enjoyable~

did you take certain course about rendering? Anyway congrats on the new works!

Nope, I just haven’t used mental ray in a while. If you’re talking about the guy in the chair with cigar and cat (I got editors choice on CGhub for that) or my devil then that’s a technique I did in photoshop based on golden age painters I admired. my newer stuff is on my blog, which is on my site www.matthewkean.com.

I appreciate your notice truly, thanks :slight_smile: I guess I’ll stick to mental ray.

man this is an awesome sketchbook, love the “photoshop painted” ones, nice man! work hard!

thanks man :slight_smile:

I think I’m finally getting somewhere with the metal. Thanks to Zaps advice that metal is refractive, not reflective. genius that man is.

BPR_Depth.jpg

time to pose him :slight_smile:

Christ your thumbnail does not do this justice. Nice sculpting! bring the lighting up a tad just to bring him out from the background.

@Toxic929: ha thank you :slight_smile:

render test, trying to find a final image

alien.jpg

i like this one :slight_smile: and, as you write “trying to find…” i thought i share what i am thinking when looking at it your image. i like the mood, the expression, and that the background is only indicated, to suggest… i would try to make the light area on the background even a little lighter, for one to explain the strong backlight we can see on the back of his head (great to show the form !) and to make his dark shilouette even a llittle stronger and “pop” more… and, perhaps, i would try a softer blur on the background… just to give you ideas for finding final… really love your character, and the dress you made is so nicely retro. reminds me on my youth watching starship enterprise :slight_smile:

okay so I tweaked it, im going to go in and do a giant render today, and hopefully finish the zombie kid as well.

show.jpg

Attachments

monster-final-renders3.jpg

Final:

kid1.jpg

Smaller Version:

BPR_Depth.jpg

Looks great bud ! Colors are awesome.

Thanks buddy

Though I never did a lot with the vector displacement tests (I used them, but never did any pretty images with them. I did test out curves to maya with this simple test:

bee.jpg

attached is the view from zbrush

Attachments

hm.jpg

bee good

Glad you like it

a quick 30 min hand study

hands.jpg

I’m also on Creature Spot now, so I’ll be posting some creature sketches soon, though I do already have “creature” and Zombie boy and alien (above) on there already.

Attachments

hands.jpg

Saw the image thumbnail and liked it immediately.

Awesome! I love the hand study! Keep them coming! :lol: All the best, David :smiley:

@Chalkman: Thanks

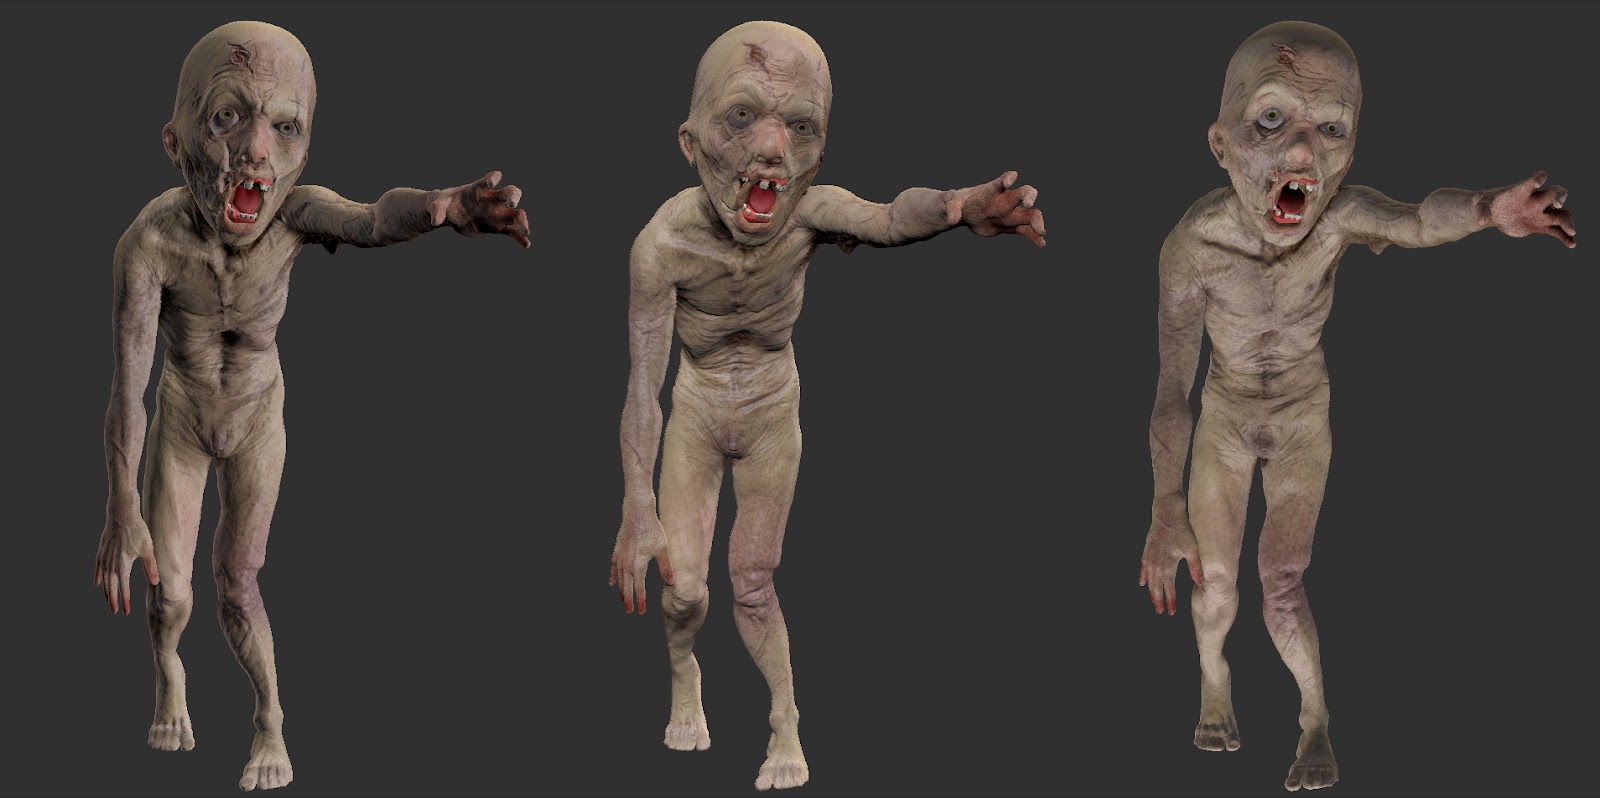
After tweaking a bunch of stuff, I decided to do a quick break down of how I went about doing this image.

After doing the Alien and Zombie Boy I received a few emails asking me about different techniques I used in making it, so I figured to answer any and all questions I would go in and break it down from beginning to end.

Modeling

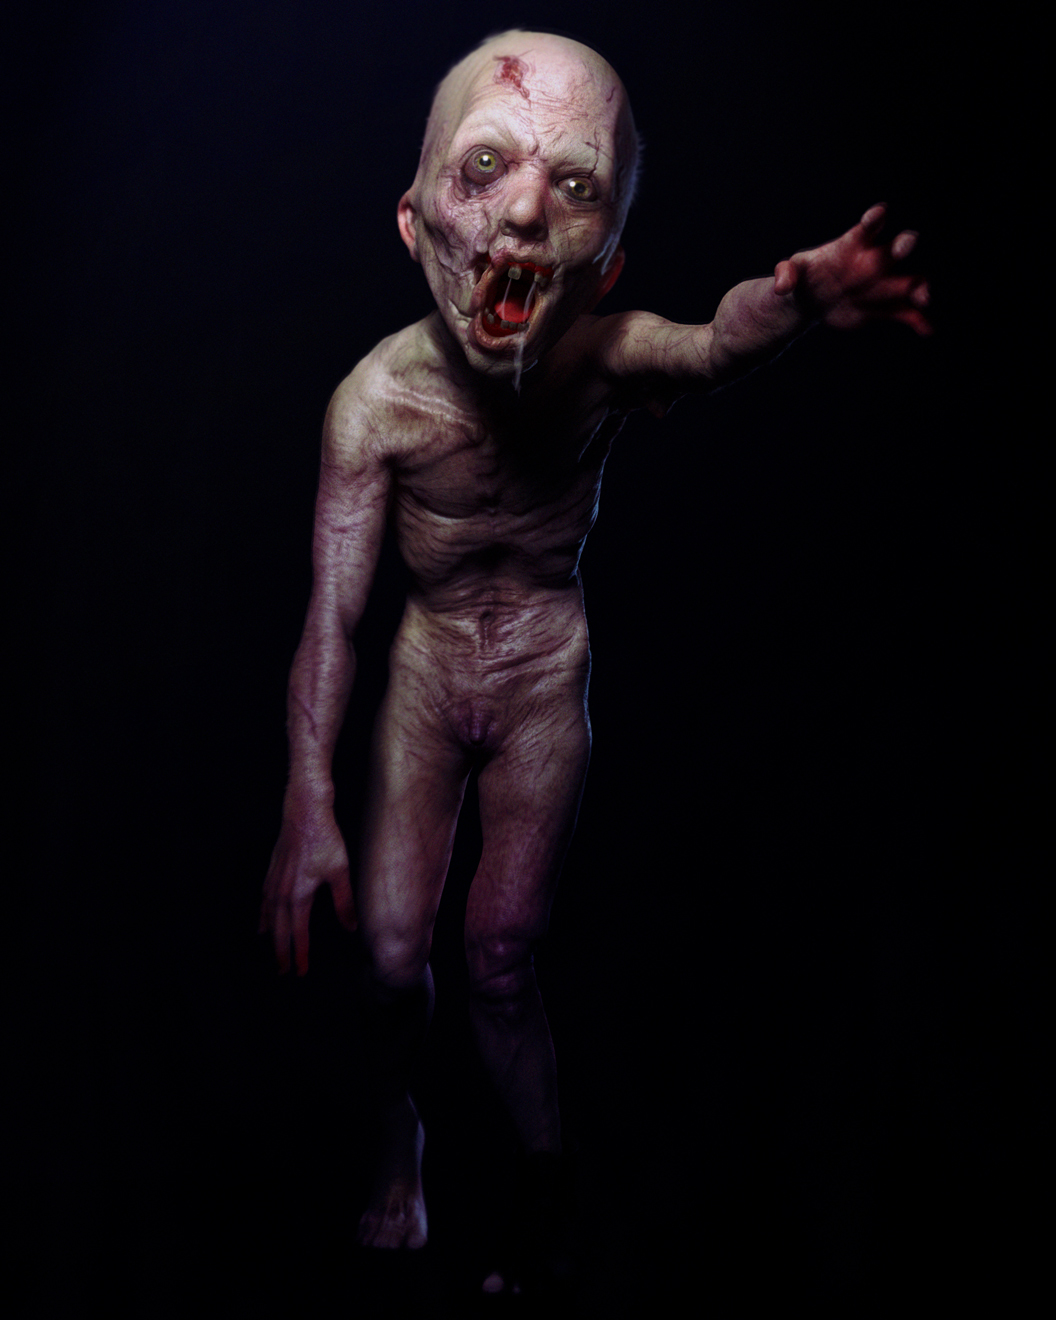
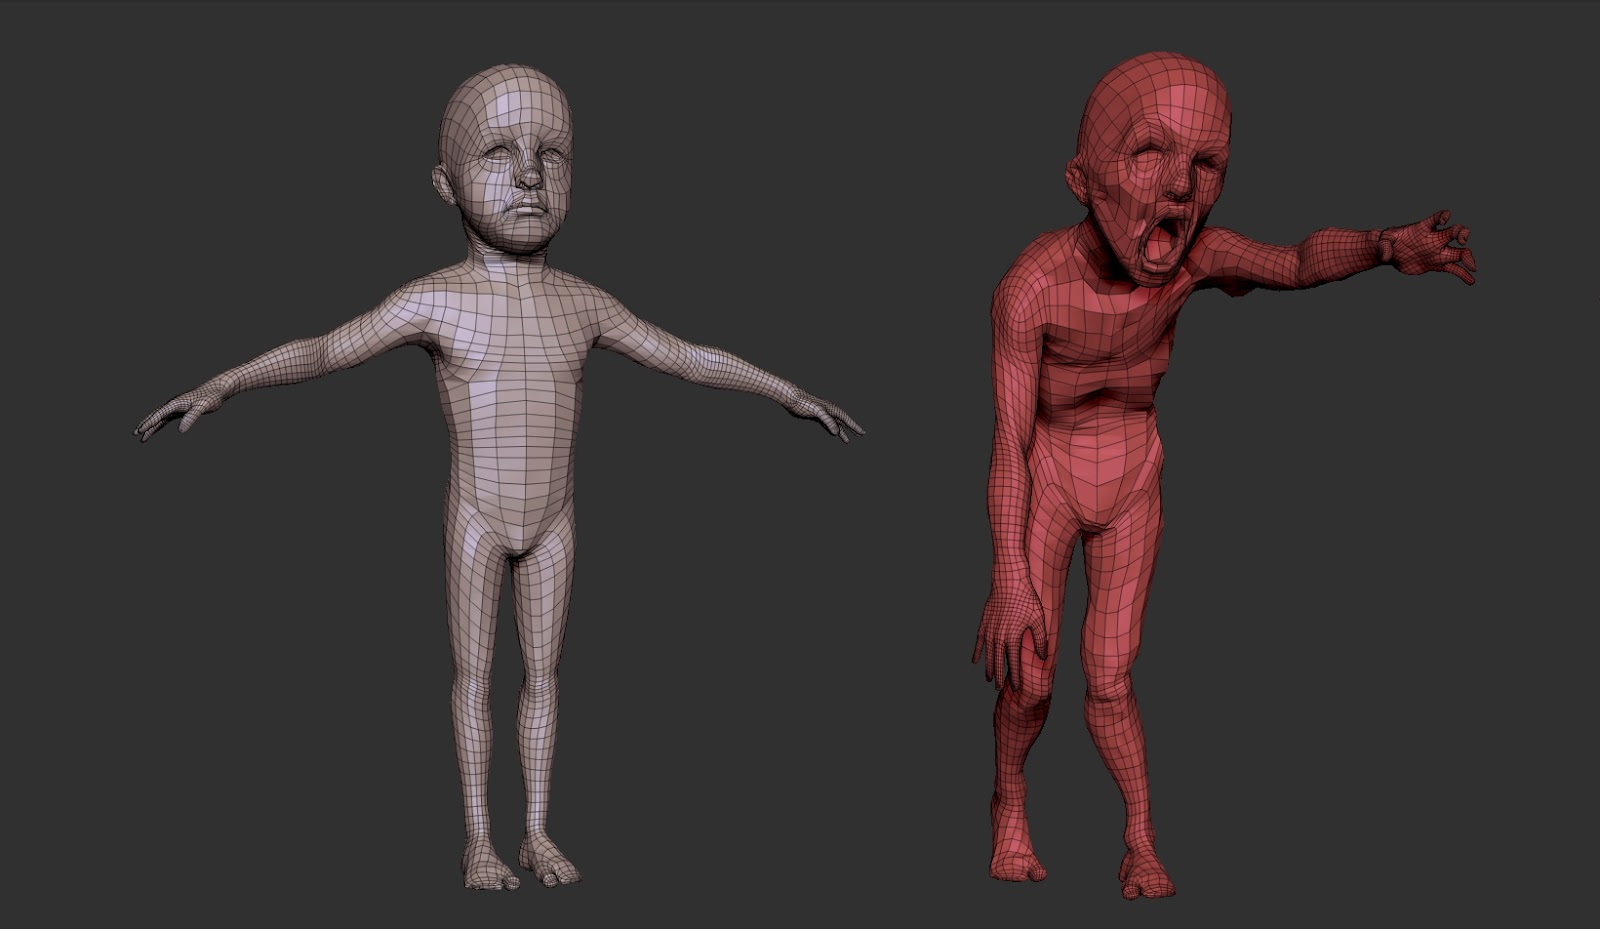
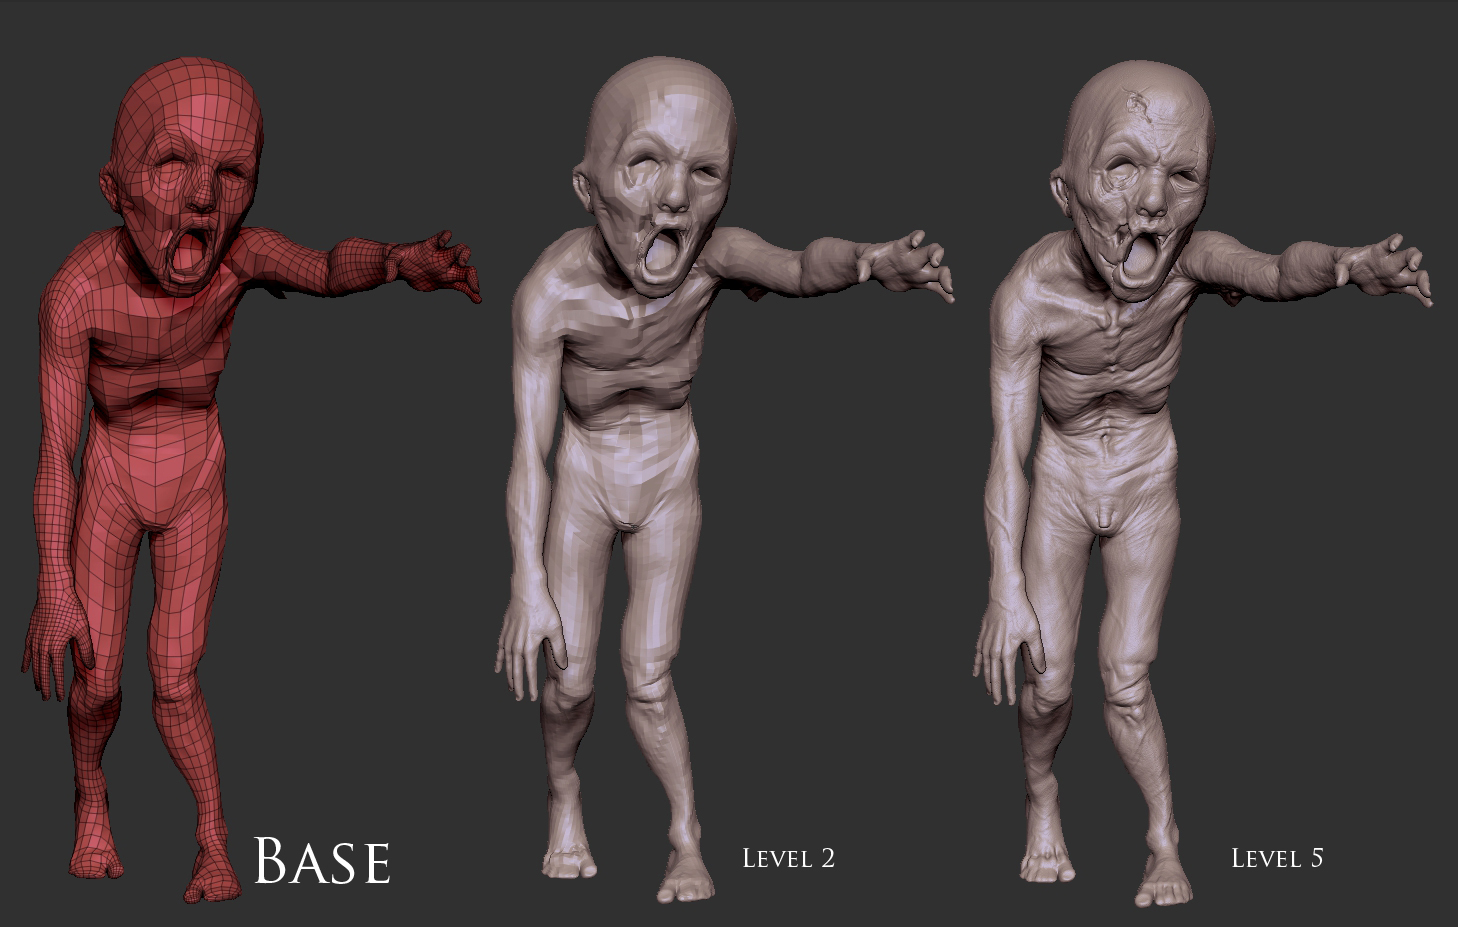
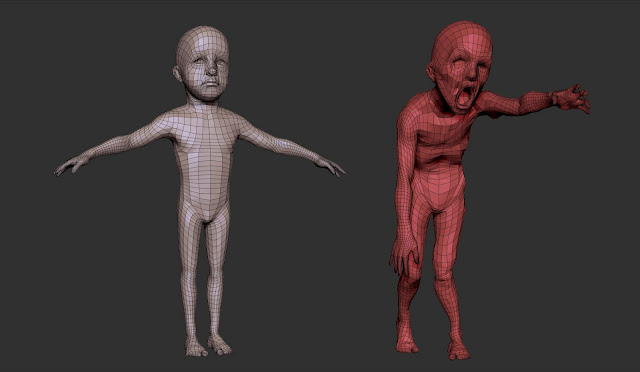
So first I started with the base mesh of a kid project that I did, and modified to to how I needed it to be I immediately saw this staggering zombie lurching forward in my head.

ZBrush+Document.jpg

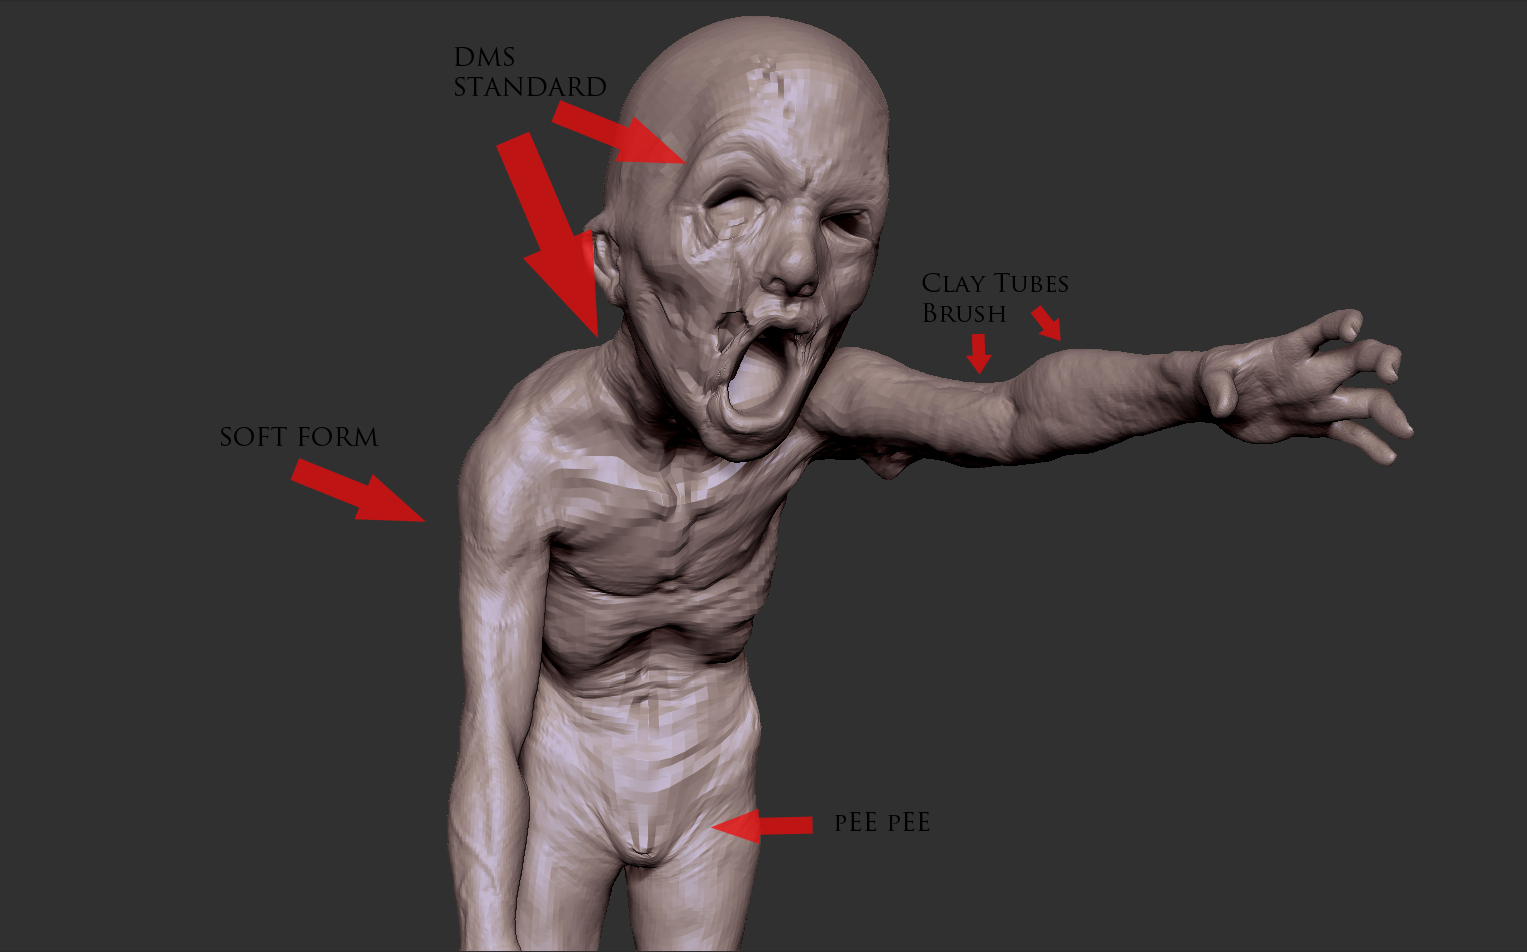
And so began detailing the thing. I wont lie, I don’t like using a lot of brushes. I do love the clay buildup brush. It allows me to work fast and frenzied. I set this to a low intensity and really grow the form. I tend to go in periodically with the DMS standard brush, and chisel in details that I know will be needed later one. once everything is really set, on the lower levels I go in with the soft form brush and build up what I missed. I don’t like using the inflate tool too much, only because it tends to get tricky to use on higher levels.


brush.jpg

step+2.jpg

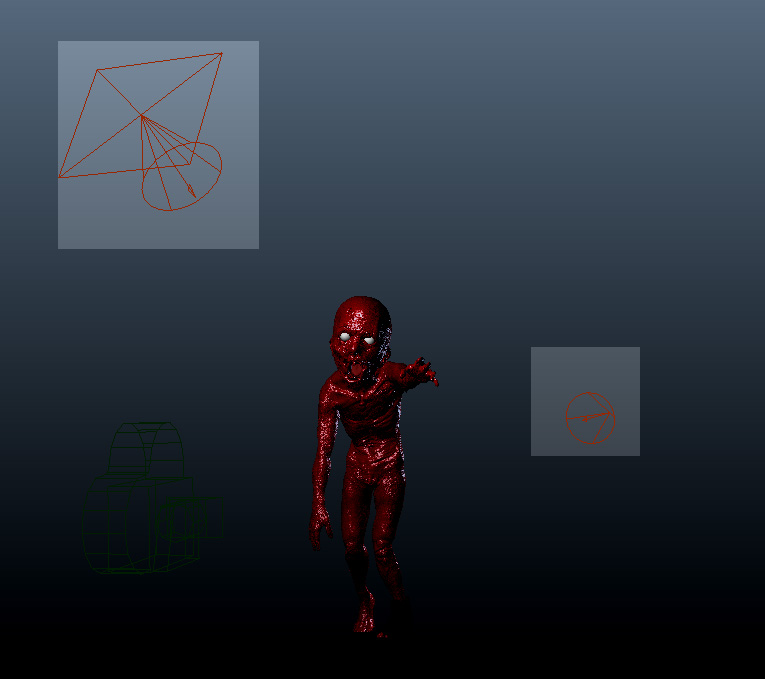
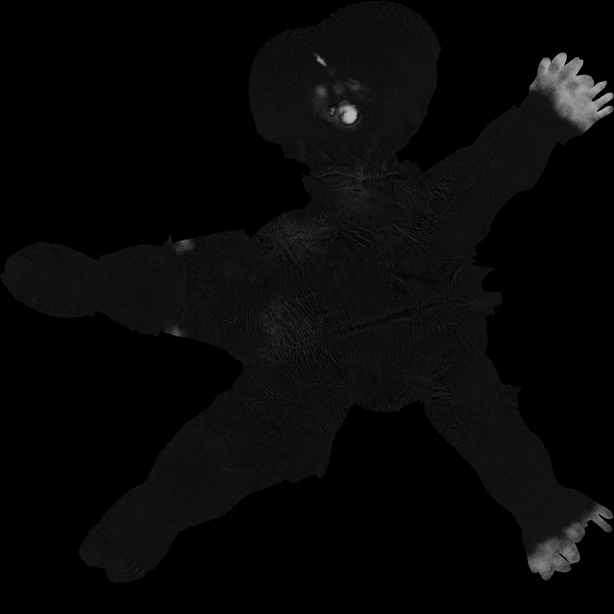
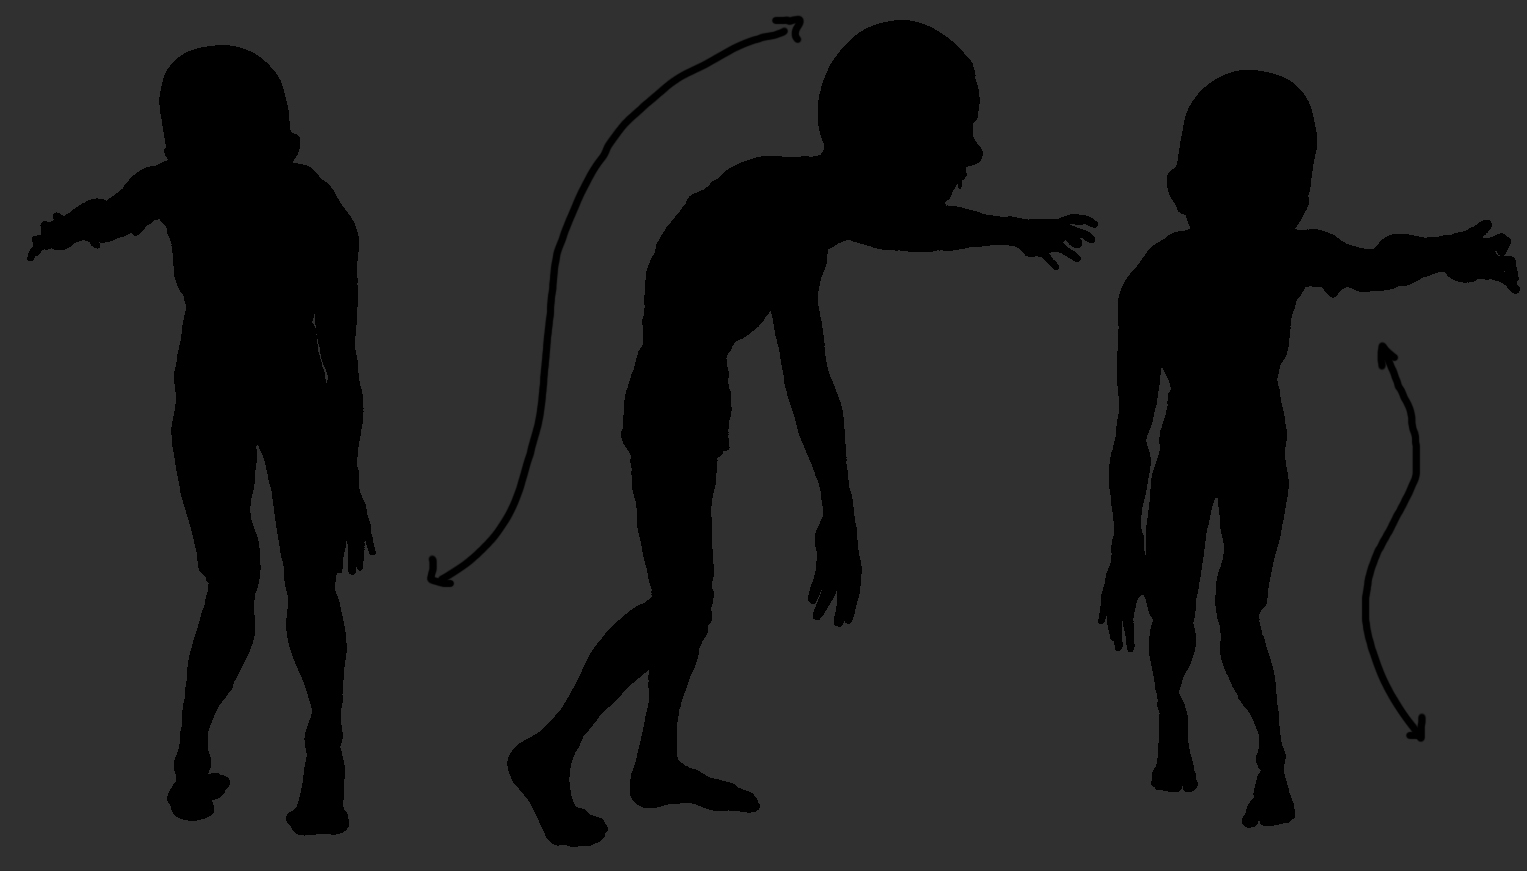
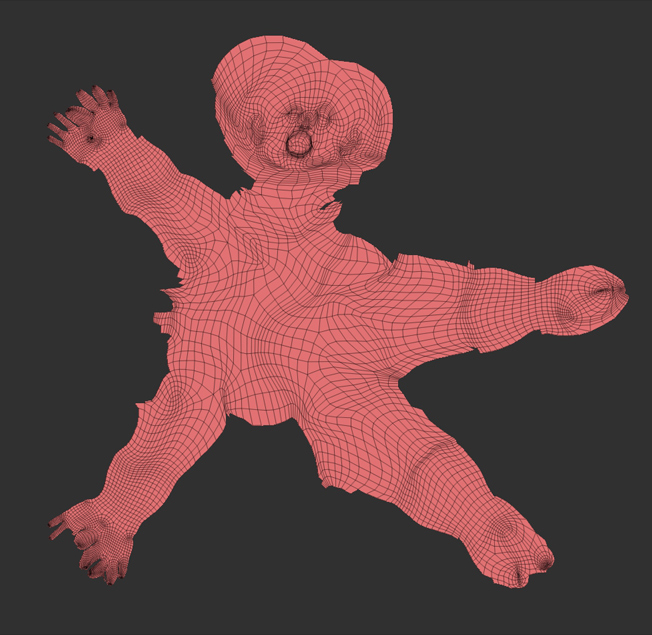
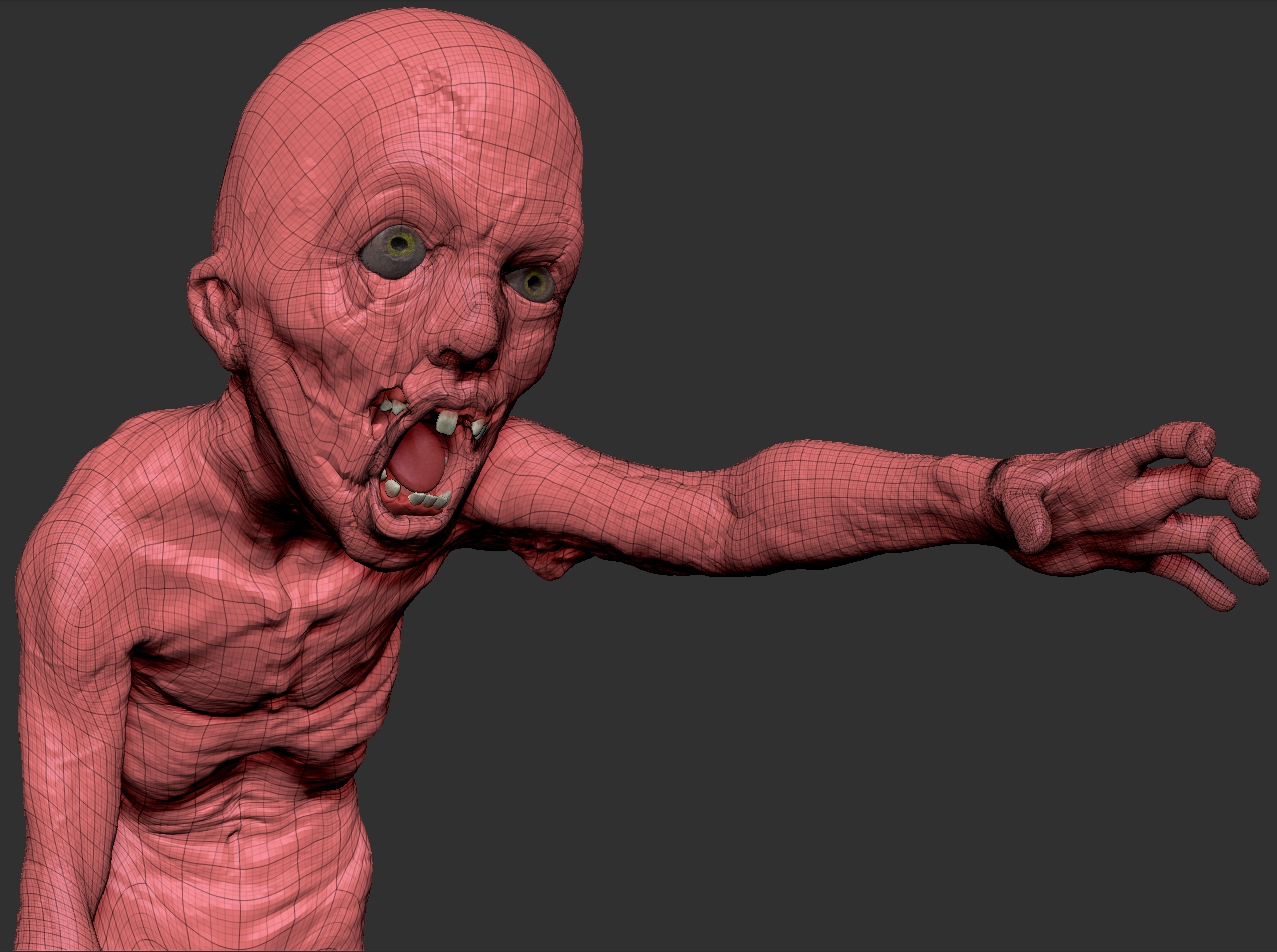
Now its very important to note at this point and all points in the process that I’m constantly looking at and adjusting the silhouette. This is probably the most important part of the sculpting process, as it will determine how your figure reads when compared to any background.

This image below shows perspective turned off, my mistake I admit, so its not a real example, but I do want to put something here to illustrate the point. It really is important.

sill.jpg

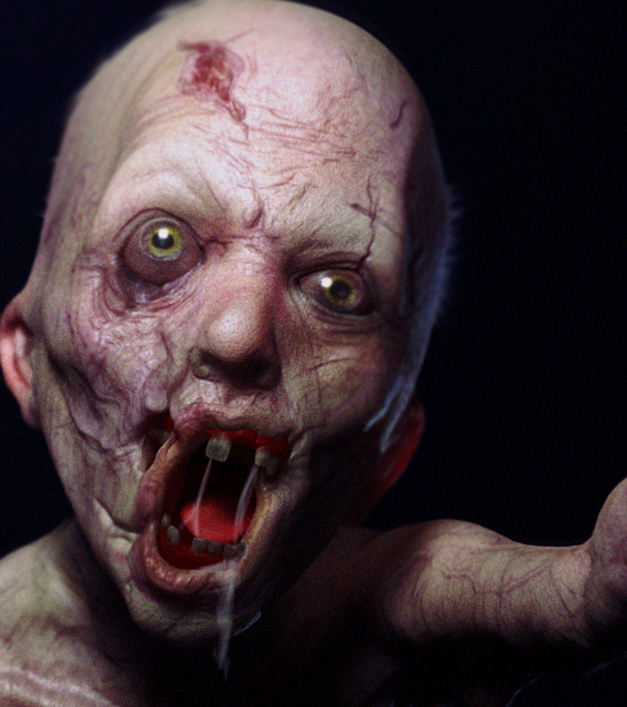
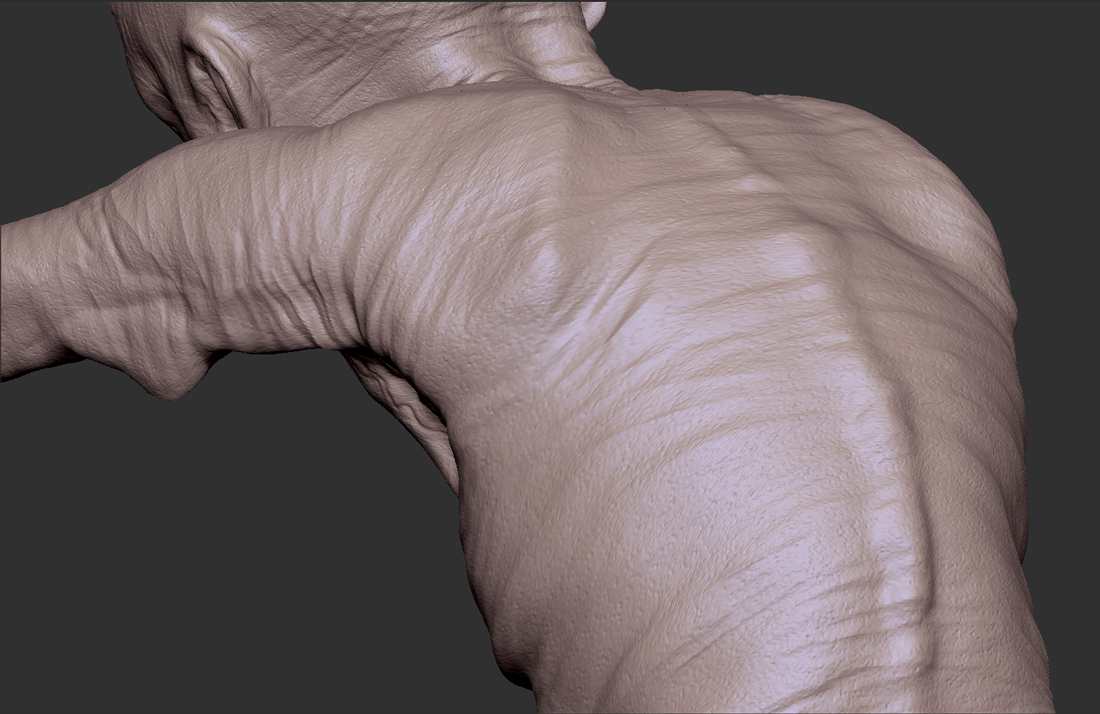
As for pore detail, those that know me know I can be a bit of an impatient person when it comes to stuff like that (something I’m working on as an artist.) I do relish in use of the surface noise plugin in zbrush. By masking off and applying different variations of noise, I can quite quickly lay down a dynamic looking set of pores.

I then set the clay polish tool to -1 and surface to +1 and it gives me a natural blurring of the pores into the skin.

detail.jpg

Texturing & UVs

Texturing is something that I truly love in zbrush. Mudbox fanboys will piss and moan about per poly painting, but the speed at which I can paint naturalistic textures is something I love. To make it simple, my texturing process for all of my models is the same. I start with a dark color, and work lighter. Its an additive process that I feel really works well.

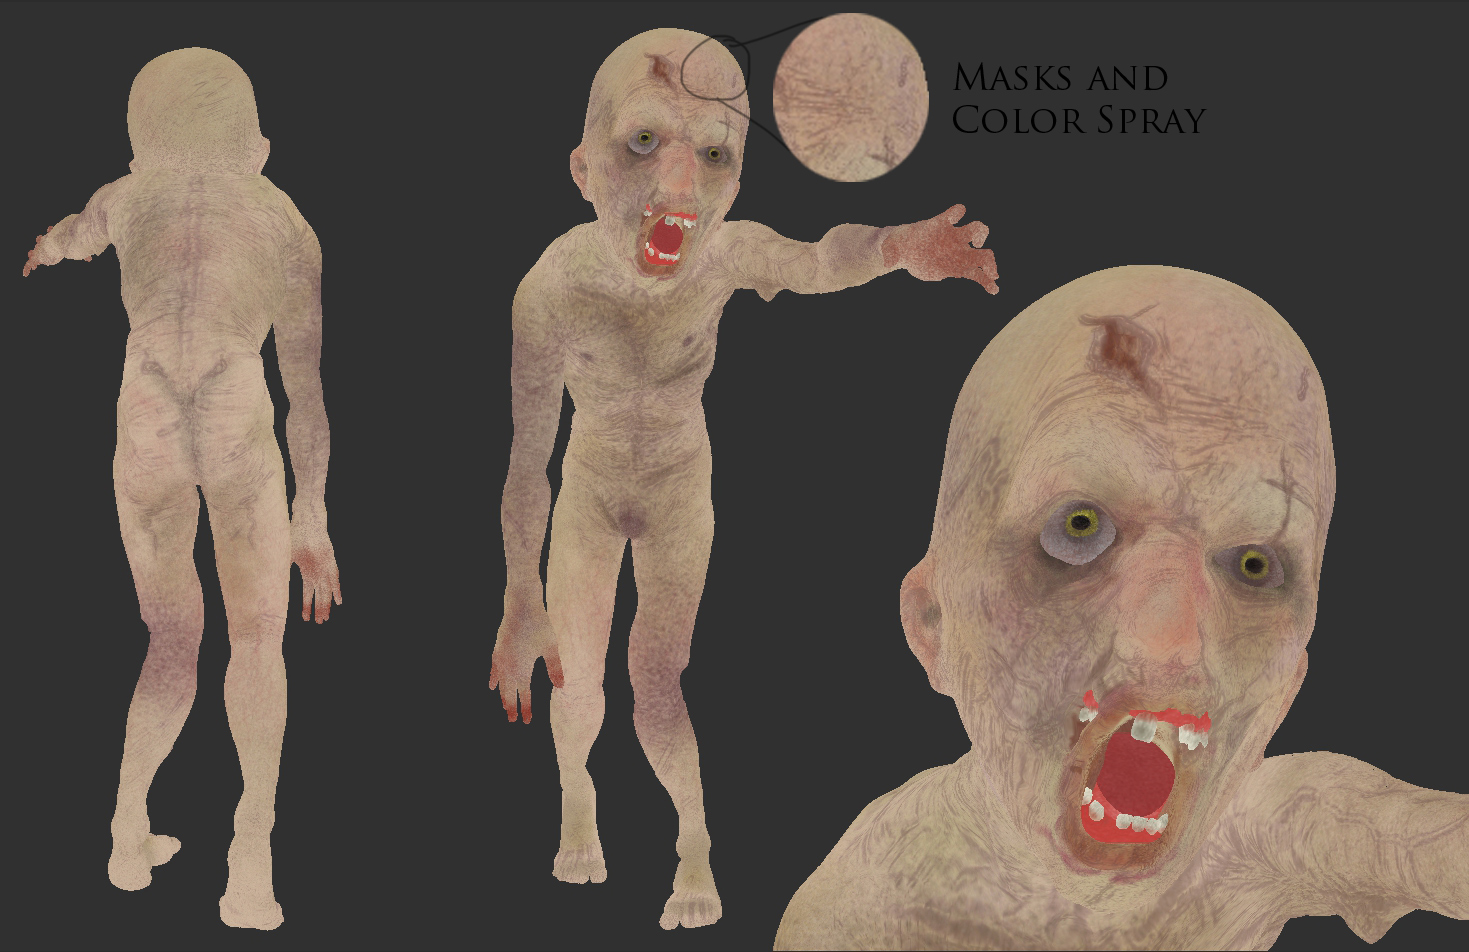
As for painted skin textures (as many asked about the alien piece I did) the trick is to not pain solid colors. Granted looking at it now I probably could have pushed the textures a bit more, but in any case the brushes used was a standard brush set to color spray, with a speckled alpha.

I set the spray to around .7 so that I get an even coat, without seeing the actually edge of the apha, or seeing it repeat.

I like to mask off, the cavities, and fill with a 3% dark tone, its not really visible but does get picked up in maya.

The teeth and tongue were done the same way.

tex.jpg

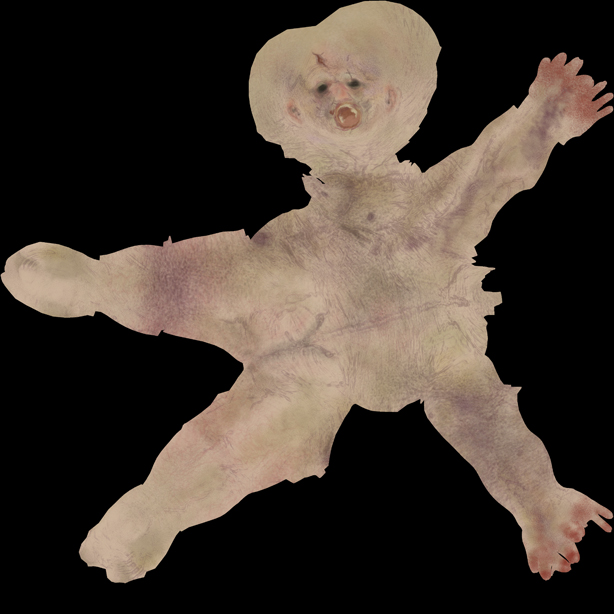
At this point I’m ready to UV. Using the plugin UV Master, I do a quick and dirty rip of the mesh. It was good enough for me to edit. I know the head is oddly placed, but it worked for what I needed it to do.

vu.jpg

Attachments

ZBrush+Document.jpg

light1.jpg

4lvl.jpg

Planning and Maya

So now with texture at hand I begin looking for a set up that I feel is what I want in my final image. I decided to go with the center one in this case.

light1.jpg

Taking a cue from the “Make it look real with Mental Ray” tutorial, I then exported a normal map for the 4th level of detail. I then created a low res displacement map (about 1024px) for any detail lvl 4 and beyond that needed that extra pop.

4lvl.jpg

And then it was on to maya. With everything ported in I began first with lighting, to recreate what I did in Zbrush. I came up with using two spotlights, one with Area light turned on. Its a bit different than using an area light, I feel I can get a sharp/soft mix that I want quicker that way.

maya.jpg

I then assigned the Mental Ray Fast skin shader to pretty much every thing haha. I didn’t touch the values, I could have but in in seeing so many Vray renders with default settings I said “why cant mental ray?” Master Zap took a lot of time making sure those values matched what was accurate for flesh, and so I only scaled the effect to fit the character and lowered the sub-dermal weight (as he was dead)

some texture samples :

e.jpg s.jpg

Finally I rendered with FG on and a simple color for environment. Then I took it into photoshop and finished it.

I now adjusted said image here (just adjusted curves a bit):

kid1.jpg

The original is a few posts up, but here is a 75 percent crop (this is a big image)

BPR_Depth2.jpg

Attachments

BPR_Depth.jpg