amazing work. Looks like he has a sucking mark on hes neck 
Superb! TOP ROW for sure
Now it’s perfect! Congrats with great result of rendering!small_orange_diamondsmall_orange_diamond
Fantastic! Very well done. BRAVO.
nice render hossein  congrats man
WOW!!! Simply WOW.
Holy ****
Wonderful job mate! Incredible likeness! Keep it up!
aidin-crow, Thanks dude!
Robert Z, Thanks!
Jet3D, Thanks!
Lepra, Thanks 
LeoAMD, Thanks man!
Digitalmax, Thanks!
Ross_DD, Thanks!
living_for_cg, Thanks Ali!
Cinoklu, Thanks dude!
Thuxedo, Thanks
pimeto, Thanks man!
Superb !! GG
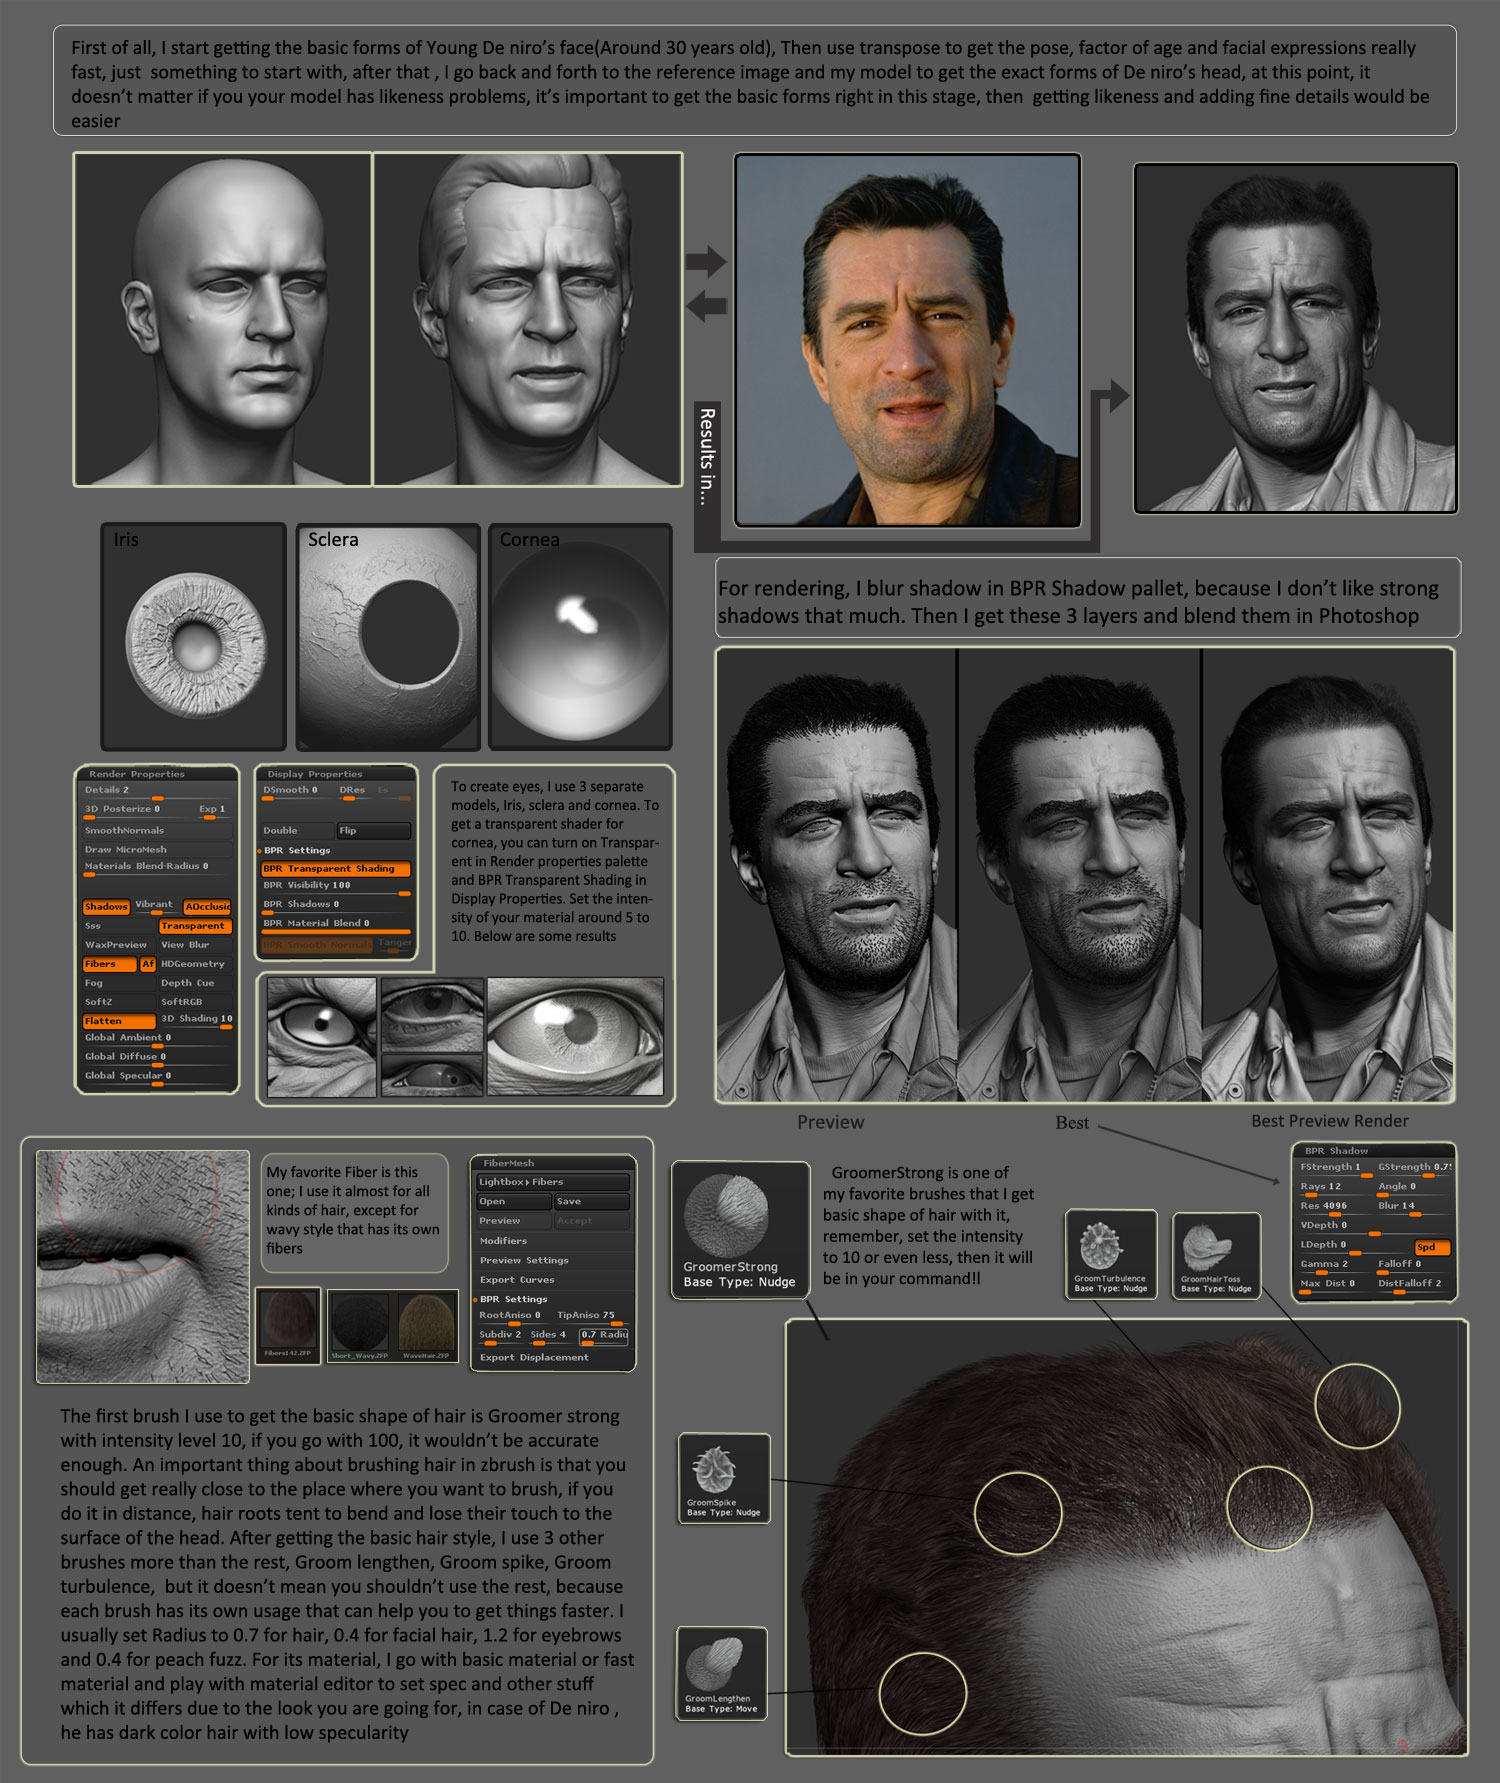
Thanks Cedcrx, I would like to talk about how I work with fibermesh to create hairstyles, the first brush I use to shape the basic shape of hair is Groomer strong(1) with intensity level 10(2), if you go with 100 , It wouldn’t be that cool. An important thing about brushing hair in zbrush is that you should get really close to the place where you want to brush(3), if you do it in distance, hair roots tent to bend and lose their touch to the surface of the head. After getting the basic hair style, I use 3 other brushes more than the rest, Groom lengthen, Groom spike, Groom turbulence(4). Creating short hair works for me this way but I have still some trouble creating Long hair, Specially those of women that have lots of complex stuff, As I told you, it is not a difficult thing to work with fibermesh, hope you find it useful, cheers:


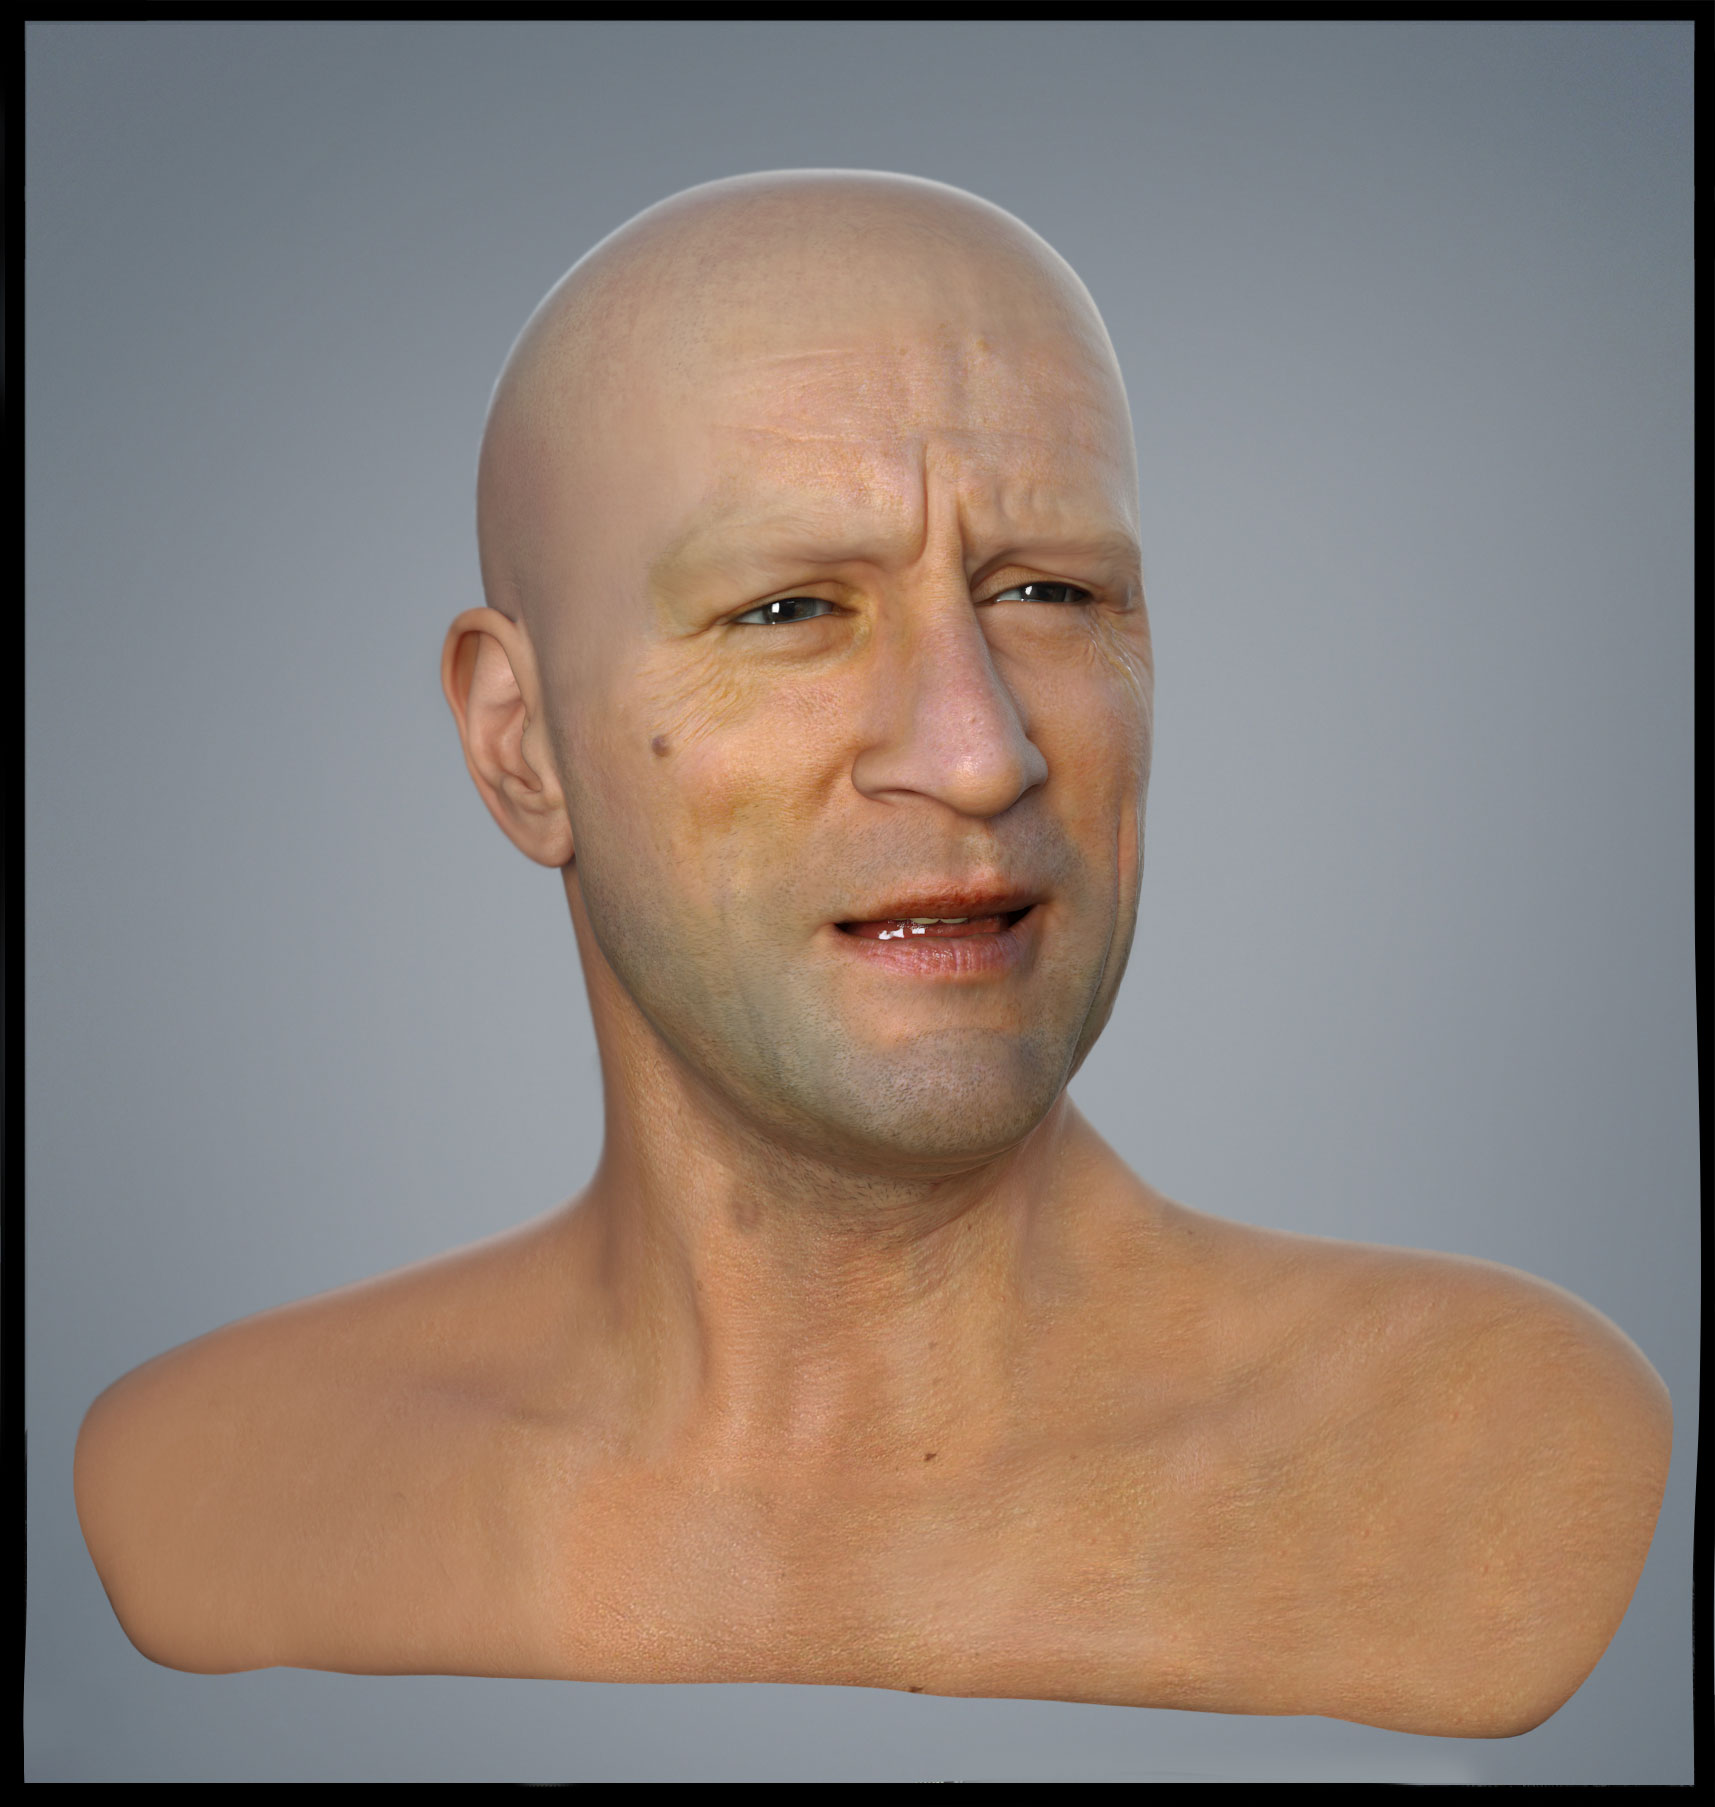
Render from different angle:
Attachments
1 Like
Thanks Hossein , omg that’s amazing i have never imagined that the Groom strong brush will give me a nice result i used it before but with high intensity and it gave me Tri polys and errors in rendering but after seeing your breakdown
i gave it a test on the angleina jolie project that i made and its pretty amazing , look at the result here and the hair was long little bit


I really didn’t know how to thank you for this but i gave it a try according to your efforts so i start working and show you the result
Thanks Hossein again ! always amaze us with your stuff
Attachments
I am really glad it was helpful for you. I am gonna create better and more helpful breakdowns soon, cheers
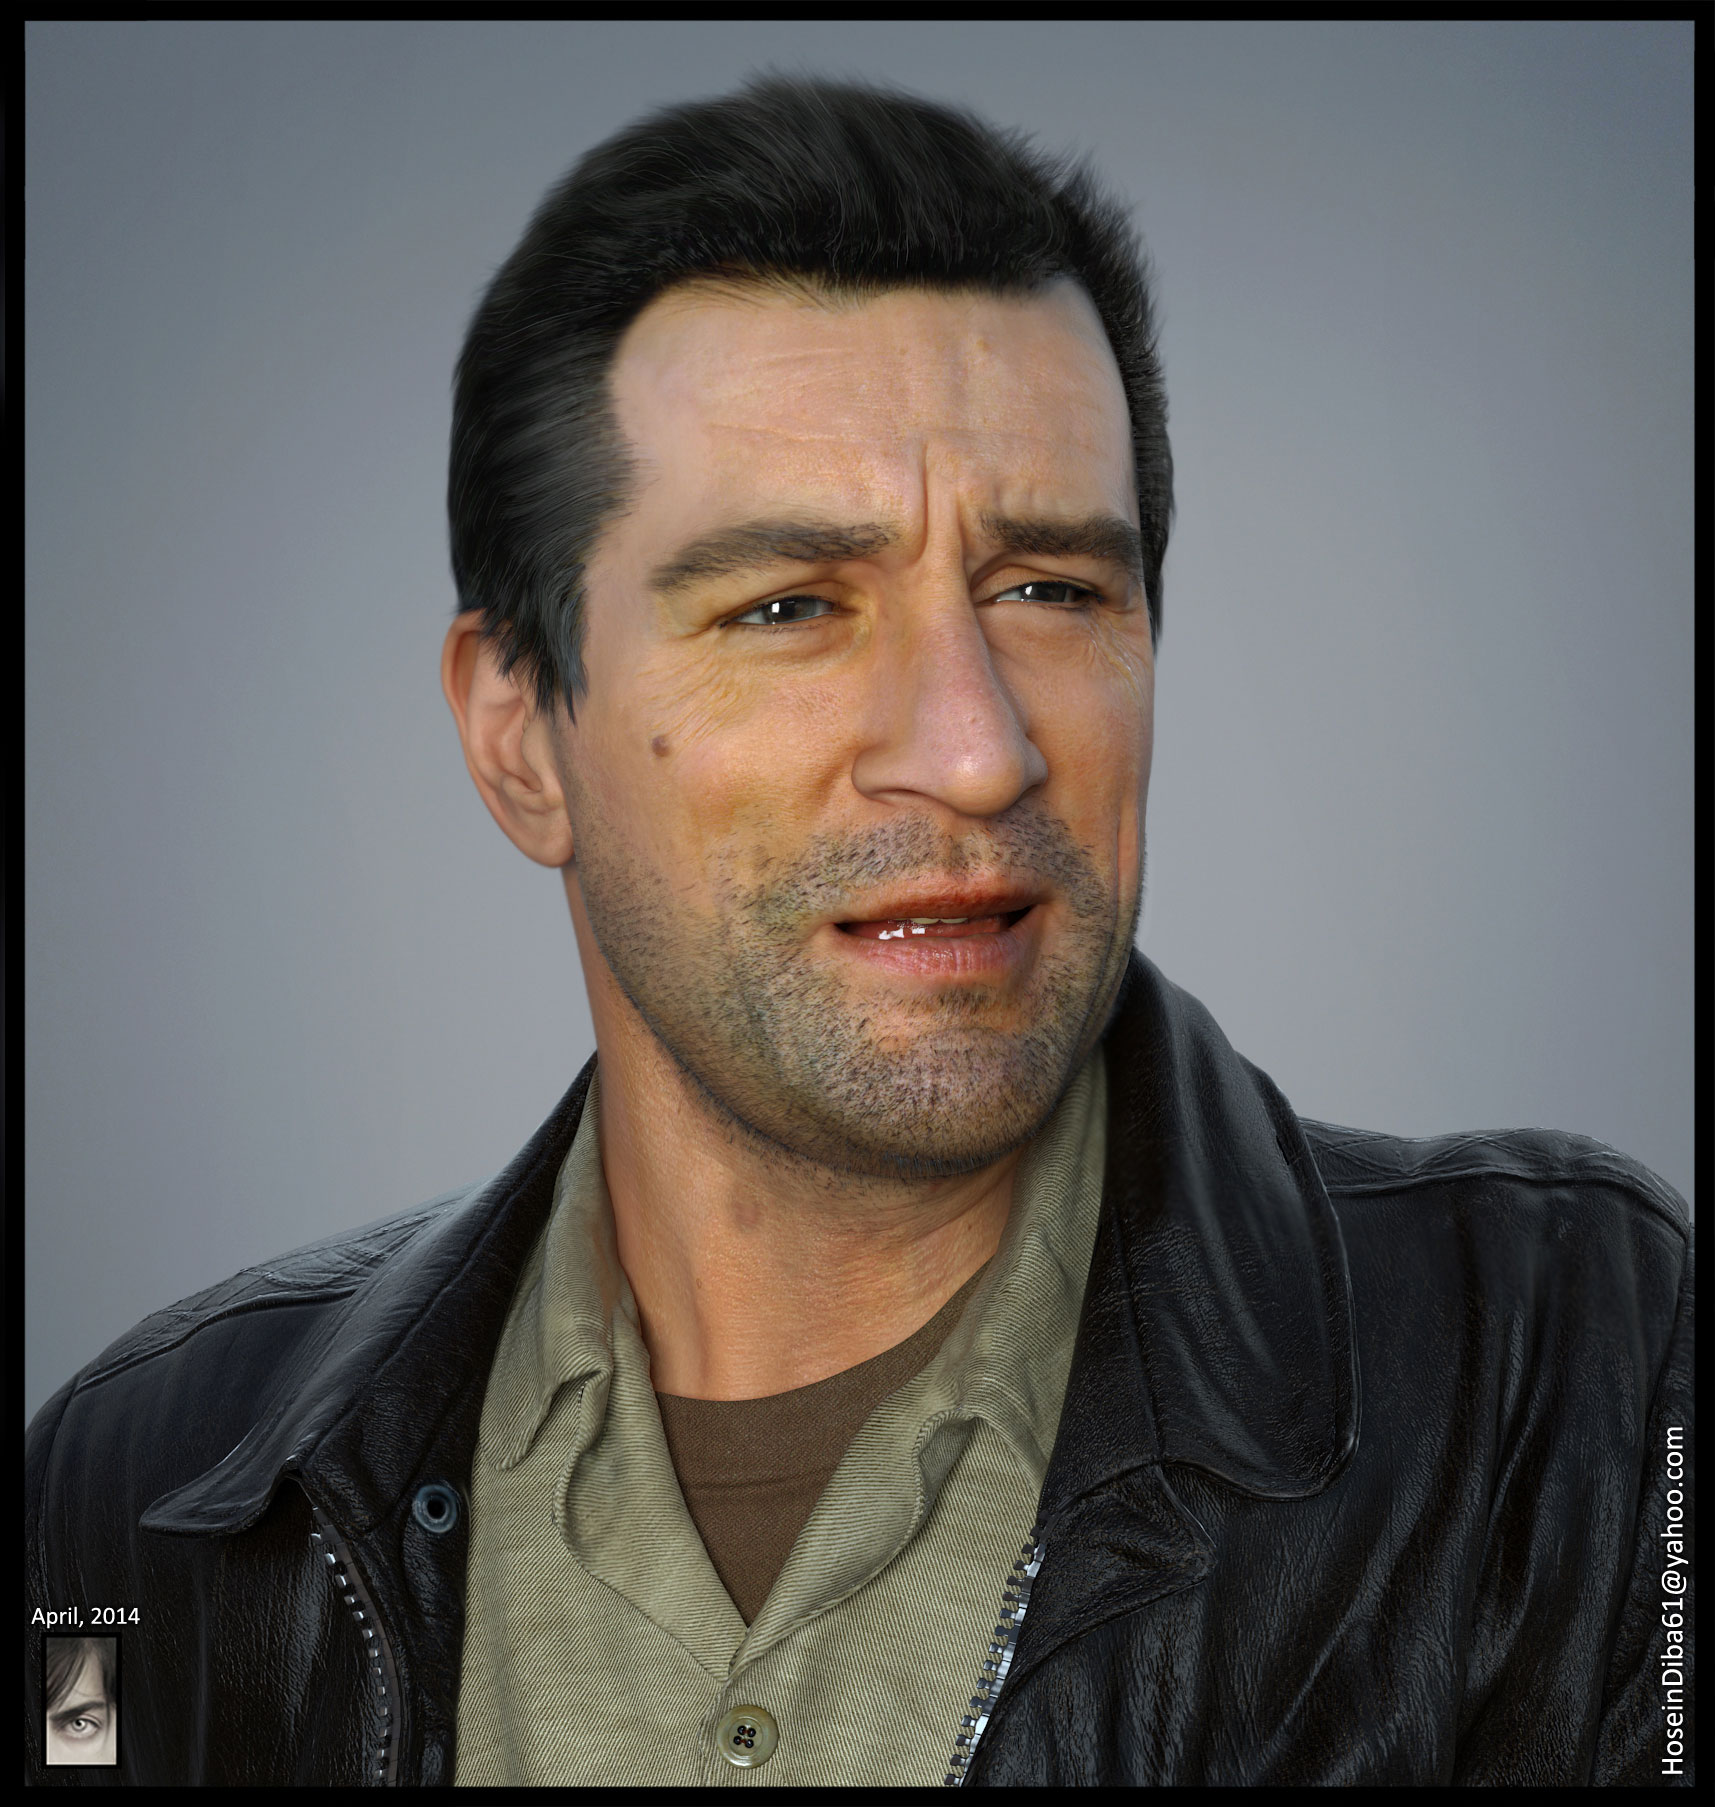
here is a breakdown of my workflow of De niro, I would like to thank my dear friend and great artist, Majid Smiley who helped me organize it. I tried to cover the important things, hope you find it useful:
Attachments
AMAZING,AMAZING,ABSOLUTELY AMAZING.Top Row for sure.thanks for breakdown man.

could you clarify what you mean by " set the intesity of your material around 5 to 10" in this section of the breakdown
not sure what you mean?
COOL work really…waht about lights settings? Some infos would be appreciated
Keep up the great work
Diablo, Thank you!
BlackMath, I meant intensity of your transparent material should be around 5 to 10, so that you can see iris and sclera clearly with a little bit of specularity on them.
LVXIFER, Thanks, lighting set up are default setting of zbrush, I just change the place of light.
genius! Your work is my reference now LOL…just amazing