Attachments

I think I am stuck. I need help. 
I am trying to make a low-poly game model. I followed the workflow of Ryan Kingslien’s book, Realistic Game Characters up until Chapter 7.
Now I have this polypainted Zbrush hi-poly model with 101 subtools, and each subtool has its own texture map. Thus, I end up with a low-poly model that has ridiculous amount of texture maps in 3ds MAX…
I tried rearrange all the UVs into one single texture by hand inside 3ds MAX, and then rearrange all the texture maps by hand in Photoshop folowing this new UV layout.
However, this stupid method of mine is way too time-comsuming, and I can’t perfectly line up all the normal maps in Photoshop using this method, resulting in ugly normal seams…
Is there a better way to rearrange/reorganize all my texture maps across multiple subtools(diffuse, alpha, normal, specular)into one map at this point? Or is it too late?
HELP~

Export each subtool out in its lowest subdiv then arrange the uv’s on to 1 or 2 uv maps, then save those objects so yeah you’ll have 101 new files, import them back into zbrush, this is where the awesome plugin MULTI MAP EXPORTER comes into place, as you select the option to merge each texture together to form your texture of all the different objects
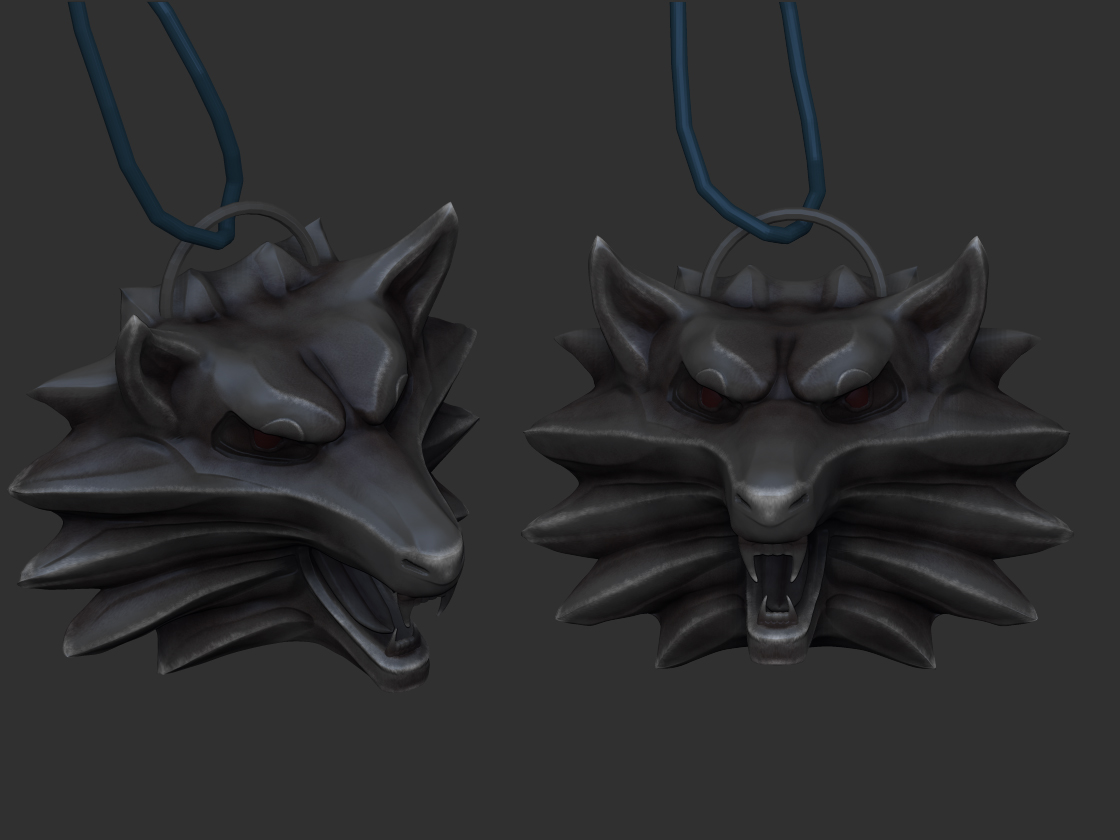
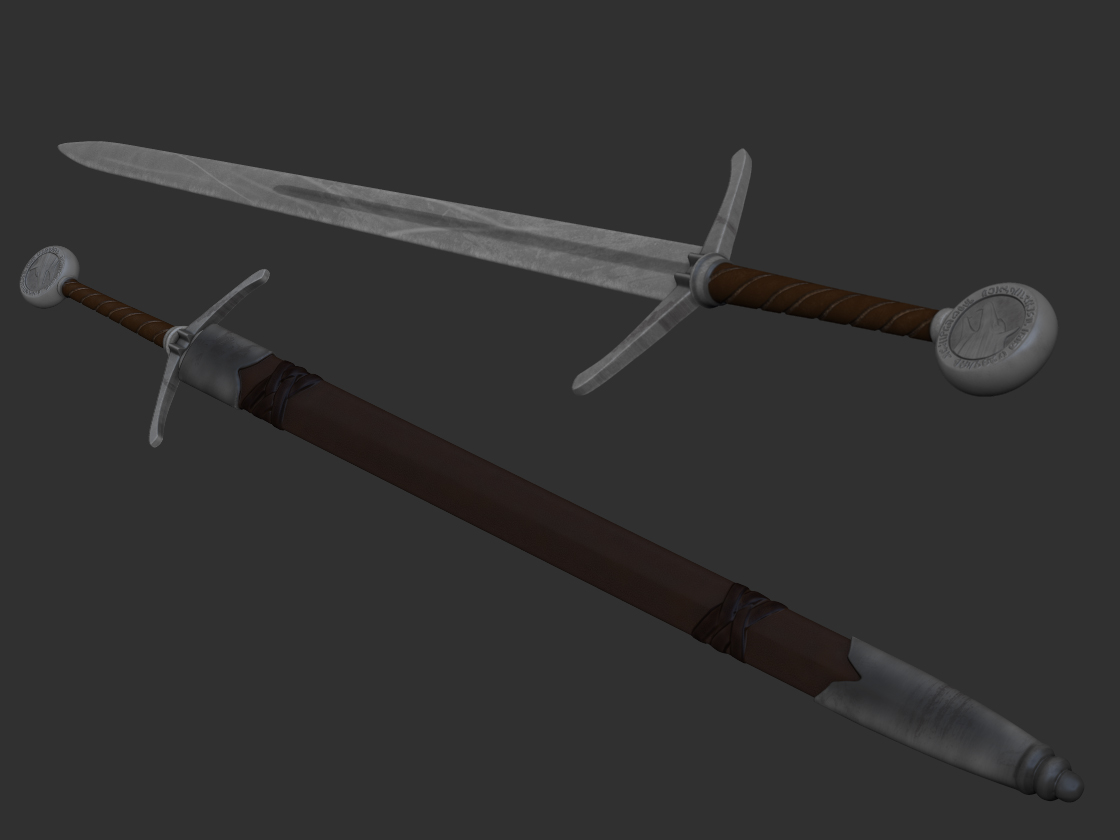
Good job on the Withcer! 
Try fixing sword and head proportions and ma by desaturating a bit head texture.
@Sparky3d: Thank you for such a quick response, Sparky3d. I’ll try that method tonight. Thank you:)
@zerratu: Wow! I didn’t expect someone from the Witcher 2 dev team would click this thread. Thank you for stopping by and the suggestion. I’ll definitely try fixing the proportion of sword and the head texture.
Havn’t updated for a long time. Been busy learning new things.
I got my Zbrush 4R2 three or four days ago. Just finished reading through the docs and played around with the new LightCap feature for a bit.
The new renderer just blows my mind! It made my old ugly model so much prettier!


Very nice model:)
You may already know that, but just in case…
The shadow strength in the render palette controls the strength of the shadow applied to the ‘floor’, while the shadow strength that is applied to the object is set in the material environment subpalette and it can be adjusted per-shader.
it’s a great job, but the lack of eyebrows and the rather prissy lips are spoiling it for me. not liking the hair either. give it a few extra passes man and i think you could get top row. the clothing is really excellent btw.
@Support
To know the the function is one thing, to remember to use it when I need it is another. Thanks for the pro tip. And it’s a pleasant surprise to have “support” commenting on my model. 
@magbhitu
Wow! That’s a huge compliment! But I know I still have a long way to go to achieve top row quality.
Thanks for the critics and encouragement, I’ll definitely keep working on this model to see how far I can take it.
The “Witcher” looks great! Nice job.