Thankyou very much for taking the time to have a look and post your comments everyone. 
Dingle001 - Thankyou for those very kind words and feedback.
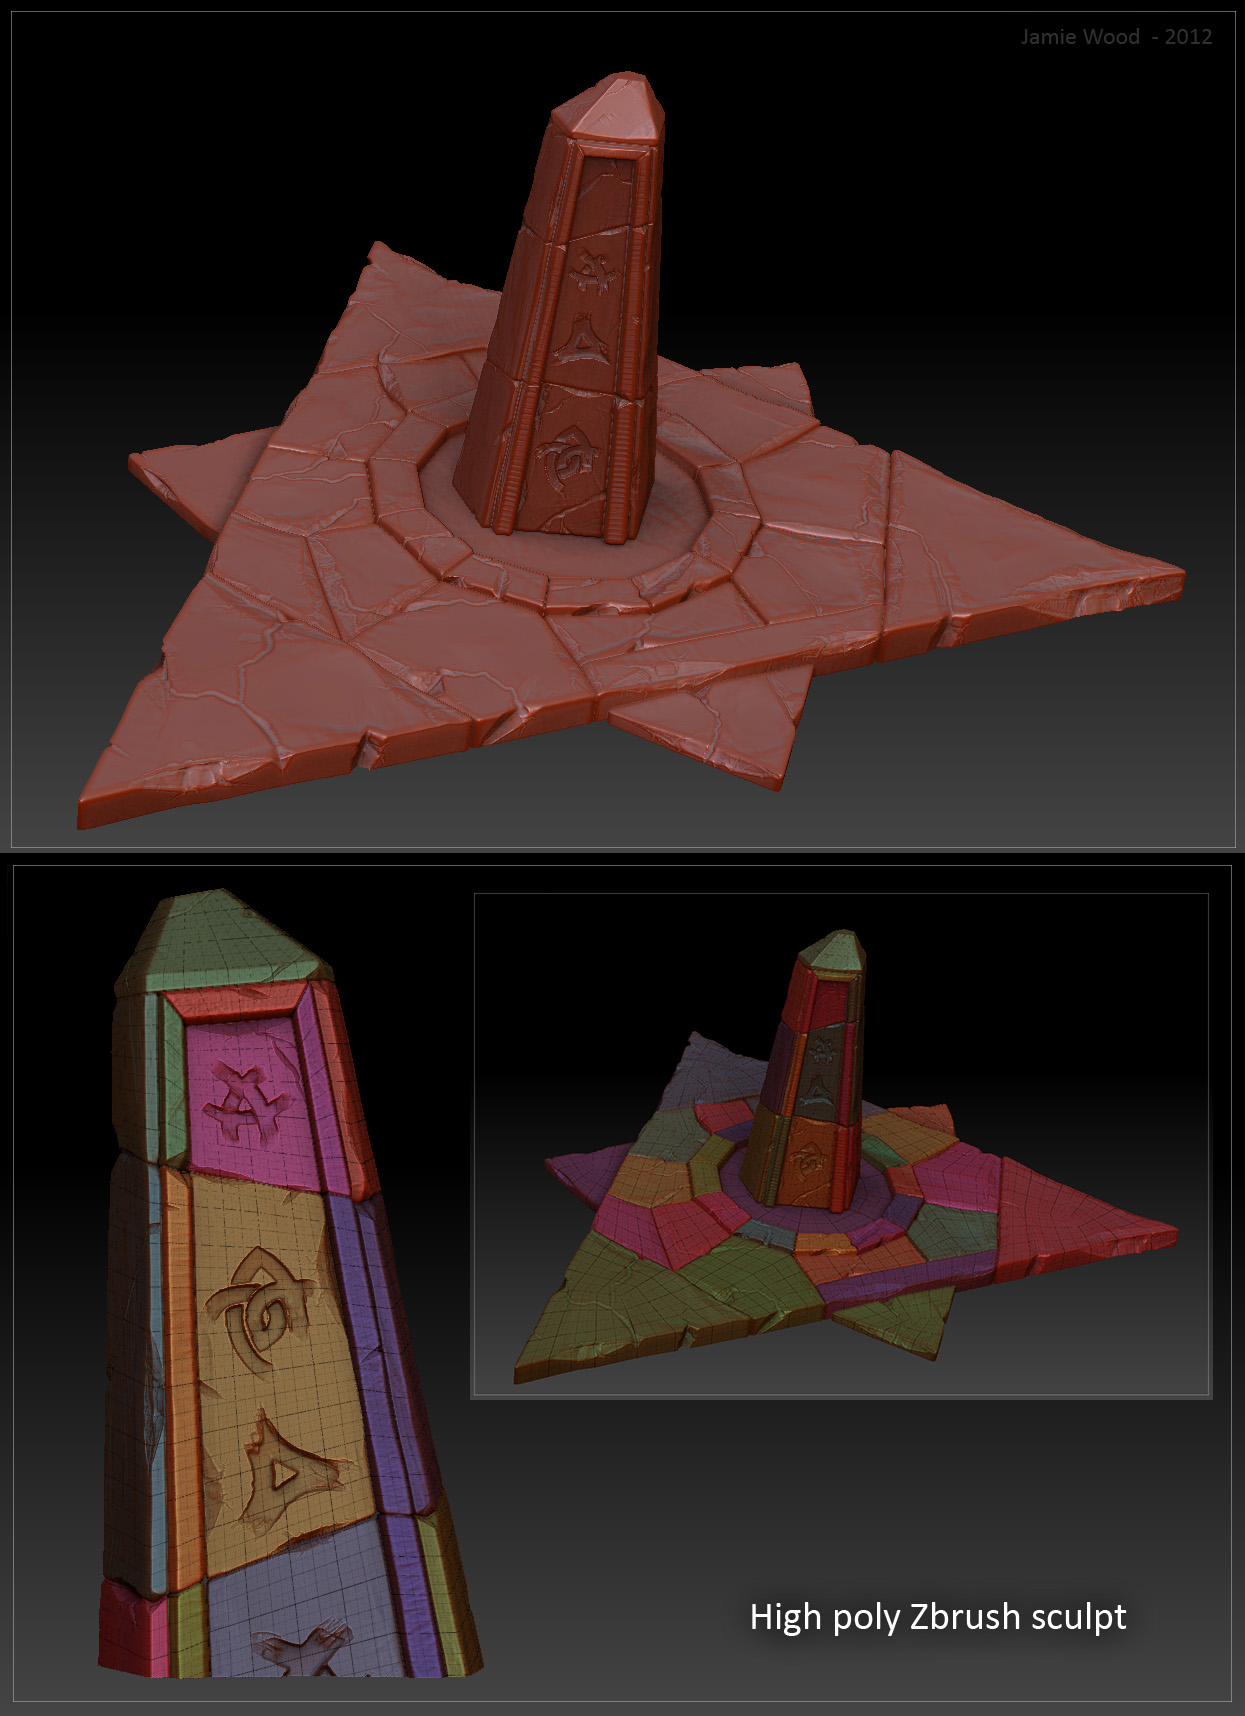
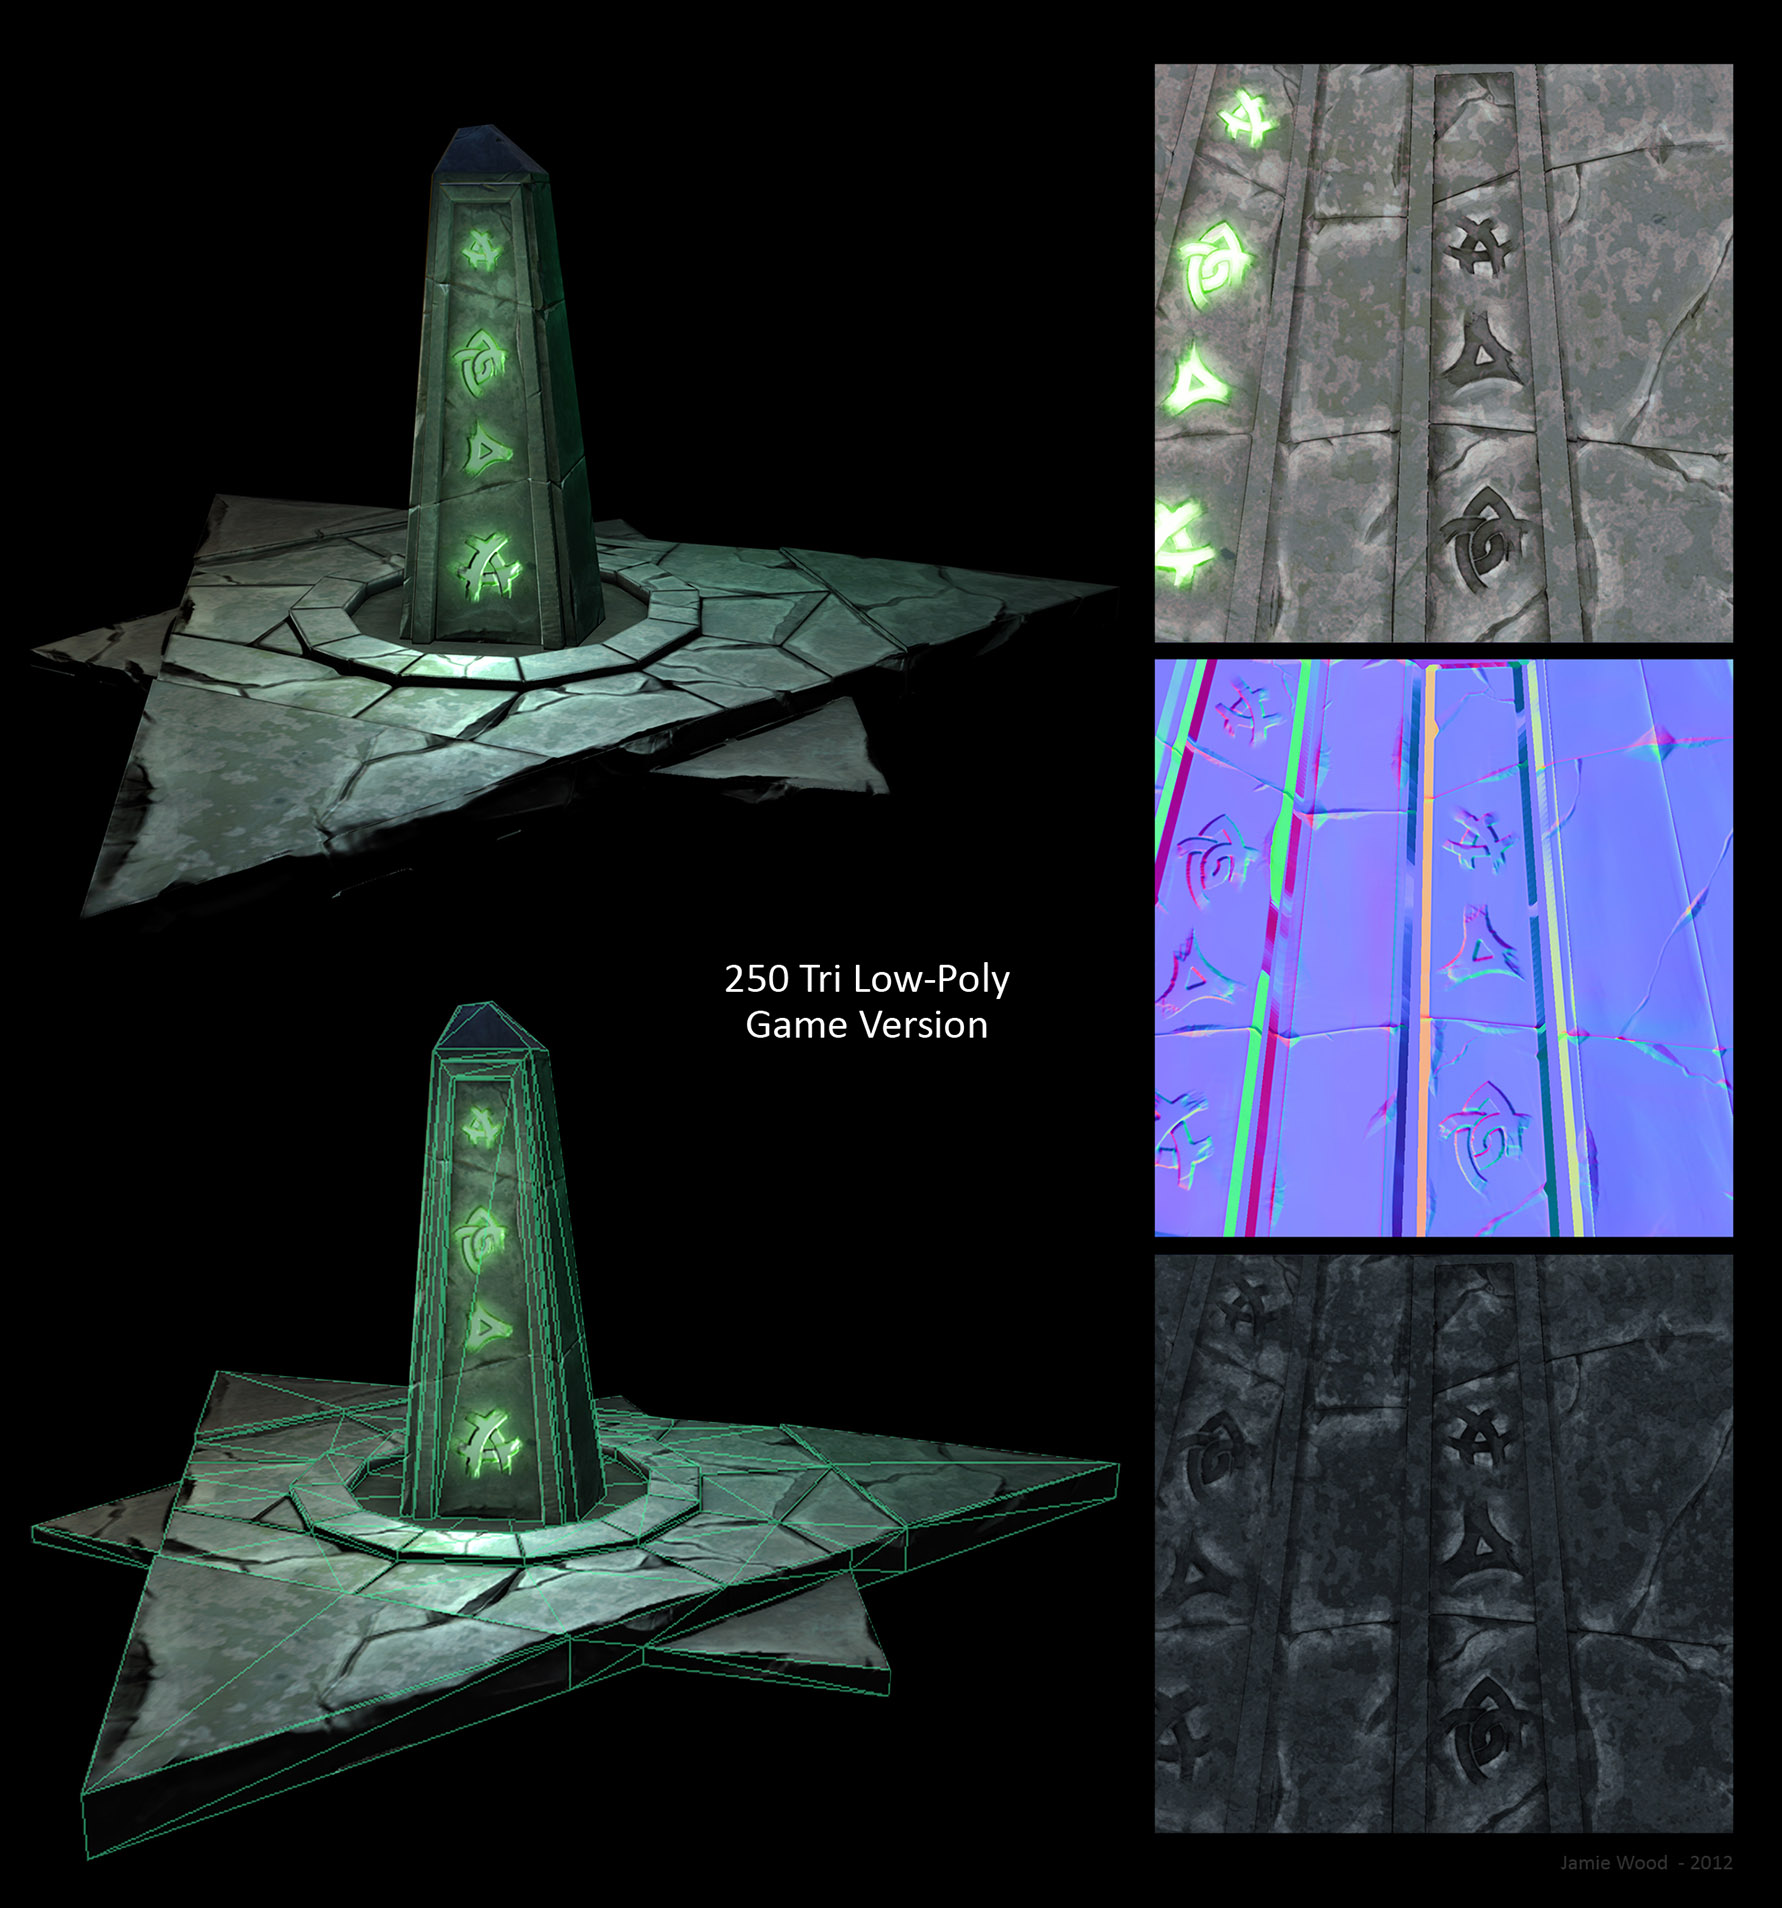
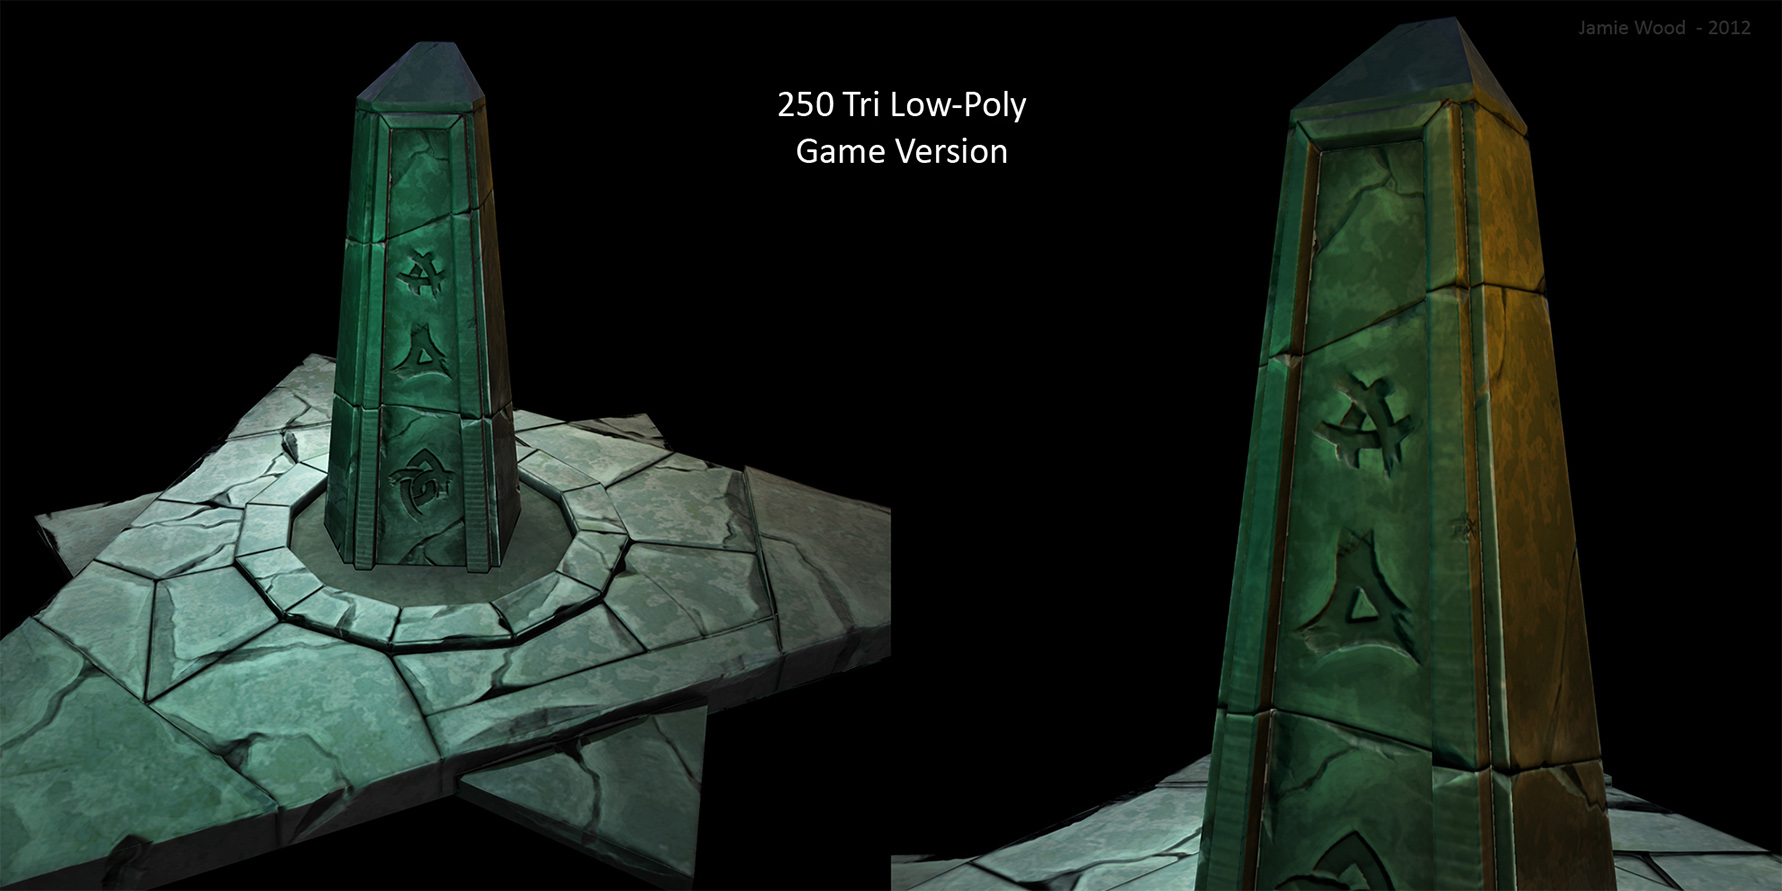
GX@W and FairCat - The creation process/workflow is pretty simple really for this. I firstly made a base mesh in Maya, neat and in even sized quads, then imported to Zbrush, importantly with each ‘brick’ as a seperate part of the mesh (not connected edges/verts) and did an auto group within Zbrush to split it into the polygroups you can see in the screen grabs. This allowed me to sculpt each stone individually (hiding by polygroup crtl + shift click) and still keep the neat joins between them. For this I used some custom brushes I made in Zbrush which were basically grabbed alphas of single cracks which I had sculpted independently. Once the high poly sculpt was done I decimated it down before exporting it back to maya. I then made a low poly version to fit the high poly sculpt and UV unwrapped it, and using ‘Transfer Maps’ tool in Maya baked normal and Occlusion maps from the high poly version. All that was then left to do was Paint the Diffuse texture (mostly just picking out highlights and adding variation and to paint a Spec map. Hope that all made sense…
I will be sure to add more WIP screens as I develop this project further - expect more props in this style and hopefully eventually a finished game environment
Thanks again,
Twocats.