ZBrushCentral

Sebastien's projection master tutorial problems

Hya everyone!
Im trying to folow this set of tutorials and am stuck in the first part of the first video:
http://www.pixologic.com/zclassroom/homeroom/tutorial.php?lesson=sebastien

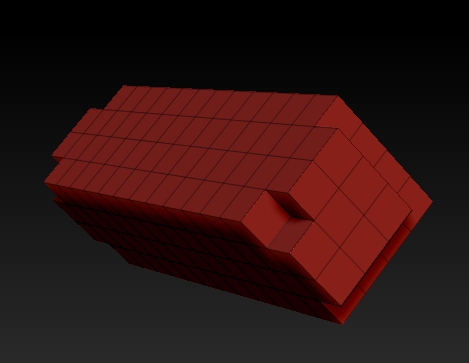
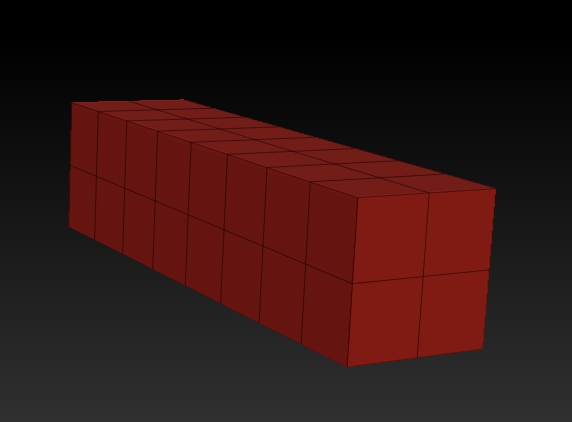
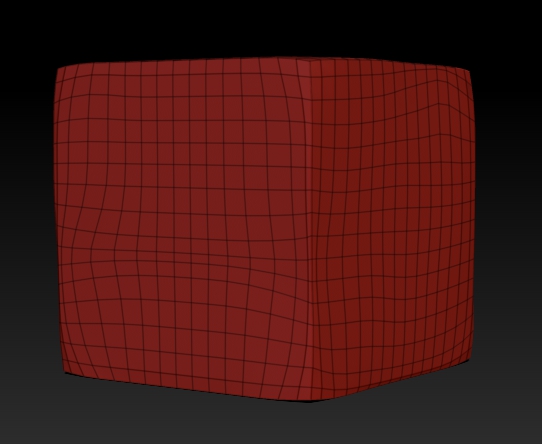
The first thing I noticed is that the pallets are not only different (I do not think this is even ZBrush 4) the narrator is saying things that are not happening (X and Y position instead of X and Y size in Initialize, and 16 is the lowest resolution possible in Unified Skin), and the results come out wrong when you try to do it anyway:

I guess my question is… I dont know what my question would be other then: now what?
This is sort of step one…

Cheers and thanks!
Mealea

Attachments

bloodyhell.jpg

I think I have answered part of my question:
I tried the same process in 4.0 instead of 4R2b and it worked perfectly (menus are still different but that isint the actual issue), Now I just need to know why and if there is a workaround in 4R2b.

Tada!!!
Here it is:

bloodyYay.jpg

Hi Mealea,

Try setting your resolution to 32 when making the unified skin.

Hmmmm! Thanks!!!
That did the trick!
Its got more polygons but I dont think that matters right? Im going to up them anyhow…
Why does that work and using 8 does not? The results I just got look like a multiple of the one I managed in 4.0 (Im guessing here, but thats how it looks).

Now… in your little icon I see what looks like rope, and eyesplice and some whipping… I need to have a look at that…

GRIN!
Thank you again, thats going to make this process a little easier. I now have 20 or so pillars, they are sort of fun, but switching to 4.0 and back just for a little rectangle base mesh was cutting into my fun.

Cheers!
Mealea

Funny.
Made same tutorial yesterday with not one problem in 4R2b.
Was so easy I even don’t remember the settings :smiley:
No - I tried several settings, please don’t ask me what I did and it was there.

O.K. Tried it again.
Initialize size x & y =5, unified skin 16 no smooth - done. Four quads.
To be honest - I didn’t even watched which numbers they used in the tut :wink:

I am a beginner, but so far as I understood zBrush, everything is relative to model size .
I don’t know how to measure a model in zBrush.
(Once in edit you can see units in menu below alpha brush etc) http://www.pixologic.com/docs/index.php/ZBrush4_Transpose
So far I learned yesterday here at brilliant zBrushCentral:
Look at Tools / Preview to get an idea how big your model is.
This is also helpful for dynamesh subdivision too.

Thanks zber2 for this tip!
http://www.zbrushcentral.com/showthread.php?165849-problem-with-dynamesh&p=926605&viewfull=1#post926605

Btw. zb4R2b works like a charm on my systems. This have to be said once inbetween all unlucky experiences.

Thats wonderful and implies there is hope, I have crashed so many times today I lost count at around 15 or so.

Thanks for the links, that is some interesting stuff, I never understood what the preview window was for. The unit thing is interesting too but I have a lot of trouble with the transpose tools, they crash me a lot and mangle what ever I am working on most of the time.
Now I’m stuck on the arch part, after I mask off the bottom and try to squash it with the deformation pallet I crash (luckily with a recovered file, I kind of like what I came up with!), so its back to 4.0 to see if it works there.

And here I go!

and that failed…
Evidently 4.0 cannot open 4r2b files or something…

I just did a quick test with different settings; if you set the initialize x & y size to anything less than 18 then set the unified skin resolution to 16 with smooth set to 0 it gives an expected result.

I’m setting initialize X and Y to 20 and the rez to 16 (I have no choice in r2b, in 4.0 I can do a rez of 8 and that works) The funny thing is now that I have the thing from 4.0 and its the right shape from the tutorial I realize it doesn’t matter, but I am still puzzled about the weird result I got in r2b…
But like I said, it doesn’t matter cause its going to be blasted into millions of polygons soon anyway.

After screwing about for a bit I thought I would be clever and try doing a low rez dynamesh at like 8, turn off blur, and turn on projection, this did something so odd I simply cant stop laughing:

WhatTheHeck.jpg

Now I know why I am supposed to be following instructions.
It seemed like a good idea!

Anyhow I’m stuck at a new part and am hammering away on that, the arch bit of the tutorial, somehow I cant do the part with the deformation pallet, it crashes every time…
I need a bigger hammer.

I will get this even if I dont sleep for the next month, I looked at this tutorial ages ago and it was way over my head but now I understand it and my only obstacle seems to be versions of ZBrush and general stupidity on my part…

Thanks again for the help!

(I’m going to be having nightmares about splicing ZSpheres!!!)

Yes it is a bit weird that any initialize seting above 17 for x and y gives strange results with a resolution of 16 on unified skin. Anyway as you said you’re going to subdivide it to a high resolution so it doesn’t really matter what the settings are as long as the basic shape is correct.

Dynamesh is fun, but don’t forget you can use clipping brushes etc. and remesh with project turned on to form the shape you want. I used it for the cannon’s trail piece, which started as a dynamesh sphere. I pulled it to rough shape using the Move brush and then cut it to dimension with the clipping brushes. I had the dynamesh resolution set to 512 when I did that.

I remember re-watching that arch video several times before getting it figured out.

Let me know if your ZSphere nightmares yield any good splicing ideas:).

helpful:
http://www.zbrushcentral.com/showthread.php?20370-TUTORIAL-Box-Modeling-and-Precision-Texturing