ZBrush 3.1
Max 2009, mental ray
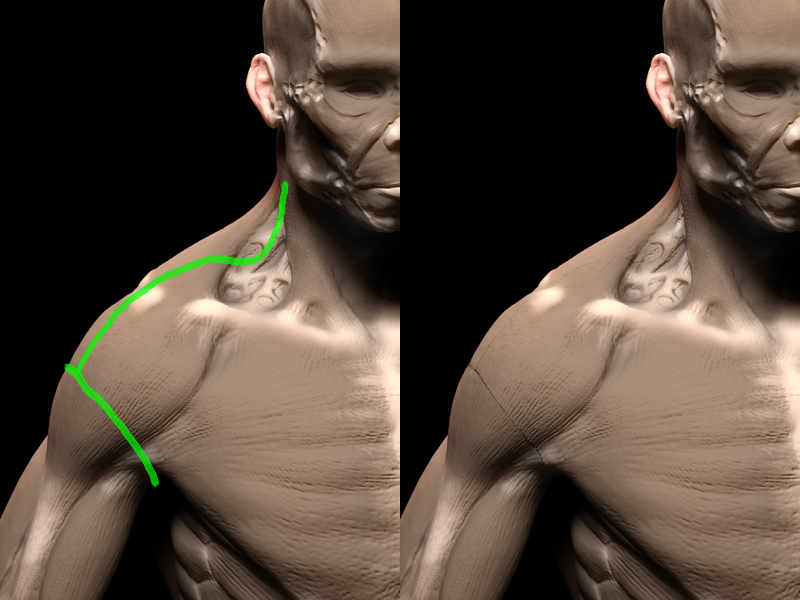
I’m having trouble with seams in my displacement maps. I have tried increasing overpaint border in multidisplace3, I have tried with adaptive on and off, and I’ve tried with SmoothUV on and off. I’ve also confirmed that my UVs are clean and distortion-free.
In my search, I found the “Lord of Darkness” tutorial, where he states
I also made sure I had the desired detail in the seams between the disconnected UV groups. Basically, I wasn’t going to add anymore detail to the area around and on the seam between separated UV groups. Because once I start breaking off to separate surfaces, the seam had to remain similar for all the different parts or the extracted displacement would show gross differences in the mesh along the separating UV seams once I render in messiah or any other application that supports multi-UVs and multi-displacement.
He later confirms this…
I made sure not to sculpt on or get near the edges, like I stated previously, if I did it would screw up the continuity along the UV seams when I assemble the multi-displacement maps in an outside renderer like messiah.
Now that tutorial was posted in 2005, so he was clearly using an older version of both ZBrush and Max. The question is, is this still the conventional wisdom? Do you still have to walk on eggshells around UV seams, or has this issue now resolvable? I haven’t found a solution but others seem to have, as I see renders out of Max without nasty seams all the time. It’s frustrating.
The consensus seems to be to turn Adaptive on and SmoothUV off
In Max the model is an Editable Poly with 2 subdivision levels
I’m using render time displacement instead of a displacement modifier.
3D Displacement Map’s Extrusion Strength is set to 2.2
RGB Offset on displacement maps is set to -0.5
Turn Blur on displacement maps down to 0.01
Edge Length 0.5
Max Displace 10
Max SubDiv 16K
What am I doing wrong?

