|
|
This is going to be a bit disjointed, I need more coffee and what you want to do has so many possibilities its amazing so I will try to go over a good bit of everything, from this you should (I hope) find your own workflow.
You can do this in a lot of different ways, Extracts are great, and after you do the extract try using PolishByPolishBy Feature its fantastic and you should play with it a lot trying it out at different times.
In the Extract Pallet:
- Turn off smoothing (Smt) by setting the slider to Zero.
- Set thickness to 0.0004.
- Turn off or on TBord as needed (this makes a crease like edge that can be annoying or helpful depending on what you want).
- Keep Tcorn off, its makes triangles on the corners, this is also optional actually depending on what you want.
Once you hit accept you will have a new subtool, switch to that and turn on PolyFrame (Shift F).
You will be able to see that your extract has three polygroups, inner outer and edge, you can now select these individually by holding down Ctrl and Shift and clicking on them.
So, if for example you want the extract a bit thicker rather than make a new one you can select the outer PolyGroup and use Inflate in the Deformation Pallet. If you do a bunch of these panels at once you can select the edge group and inflate that in or out to make them closer together or further apart.
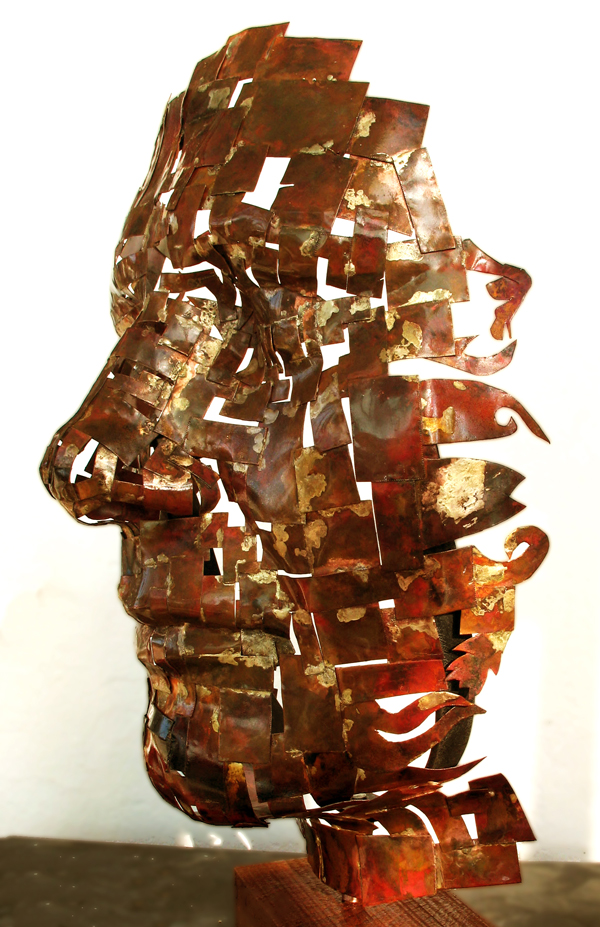
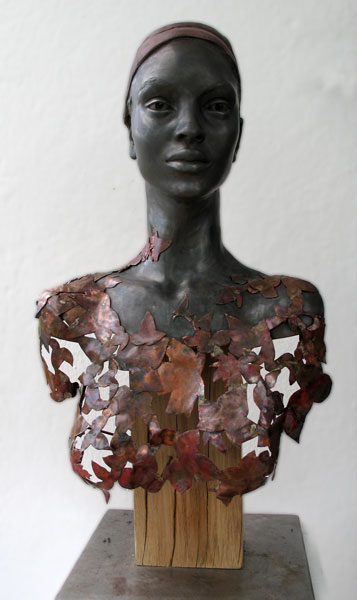
To do the trick with the leaves overlapping you can do all this by drawing your leaves and using them as alphas to create masks that you can extract using the same stuff above.
One method of making the masks into something amazingly useful is to go into the PolyGroup Panel on the Right (Under Tool) and once your mask is drawn hit the FromMasking button, this has a smoothness slider, if you want VERY sharp edges keep that at Zero, this will likely look a bit jagged so you might want smoothing or you can use PolishByGroups …
Now…
Once you have all your parts:
To move them so they overlap!
That is the seriously fun part and there is a VERY cool trick for that and its VERY easy to use once you know where on earth it is.
- Look in your Brush Menu under AutoMasking.
- At the bottom of the Auto Masking Pallet you will see the Topological Button, turn that on.
- Now select the Move Topological brush and with PolyFrame on (so you can see) move one of your PolyGroups around near the edge of another group.
If you do this on the edge group of your extract you will be able to manually pull your leaves (or whatever) anywhere you want and create the overlap you are after.
If things are getting lumpy you can use PolishByFeatures in the top of the Deformation Pallet to smooth stuff out, you can also do this with polygroups turned on or off at will selecting just the areas you want to fix.
There is an exquisite video for this bit of stuff only its about PanelLoops instead of MeshExtracts but the same information applies to anything with PolyGroups.
The video is here, watch Panel loops Basics Part Two:
http://pixologic.com/zclassroom/homeroom/lesson/panel-loops/
I hope this helps!
Also this is a very cool project you are undertaking!
Good luck I would love to see the results!
Cheers!
Mealea|


 ah too bad I heaven’t thought about it too. There’s so many new ways of doing things with new tools in an that it’s hard to think about all possible solitons.