Sorry, another edit - Another thought: as you have the arm at the moment, the shoulder and head of the monster would be just about where the narrowest part of the toilet is - maybe you should lower and enlarge the arm a bit so that it’s believable that the monster’s head and body are actually beneath the floor.
Oh! and I think the arm looks short because it is pointing towards the camera. 
EDIT:
ARRRGHH! we’re posting out of sync!!!
But again, sound advice thank you.
That’s pretty good modeling for starting out with a cylinder primitive. I also noticed that you said you had to add a “silo”. Is that what we call a “tank” for the back of the toity?
I just think it’s funny seeing all the different names other countries have for things and yes, we do call those toitys over here lol. Pronounced “toy-tee”.
Toity is short for “toilet” which in the south is pronounced “turlet”
And yes, we laugh when we here it pronounced like that too. Since I live in the south now, I can’t laugh at it anymore.
Ha ha ha! I remember going to California for a holiday, I soon learnt a toilet there is called a “John”.
I learnt that after asking for the “loo” as we brits sometimes do when we’re not paying attention.
The worst is you call trousers “Pants”. In the UK that means underwear (not boxers the other kind).
A rubber in the UK is something we rub pencil marks out with, in america it means your gonna get lucky and need a rubber to stall Darwins theories. heh! Funny what having a big sea beetween two english speaking nations can do.
Some more work done on the arm, better bending and rotation of the forearm. Trick or treat bucket is done and some lighting added.
Also added some colour to the arm and some purple veins.
Still need to do some hinges and the rest of the toilet.
Forgot to post a progress of the T or T bucket, will get that done and up soon.

That’s much more like it, Mark! The arm doesn’t look so unnatural now.
I agree with Slosh - it’s looking much better.
hey mark thats looking good … just add some color variation to the texture n it will look even better, good luck
Thank you slosh and Dondemaker, your advice really helped me improve this! 
nightwoodwolf: Indeed I need to add some more contrast to the arm and some shading to the toilet to make it more ‘used’ in it’s look.
I have an urgent issue that is stopping me progressing on the rest of the scene [color=red]here <EIDT SOLVED NOW THANKS>
Any help on this would be REALLY kind. Thank you.
Sorry I said this had been solved but it hasn’t PLEASE HELP if you can, I have added some more info [color=black]here (SOLVED NOW). 
This is really holding me up, I have spent at least 2 hours just trying to solve this issue.
I know it’s me doing something stupid, but I can’t find out what!
SOLVED IT!!! :D
Try removing zapplink, then initialize zbrush. Then try and do it the standard way.
Good luck. This scene is gonna be cool.
-3Dean
Ok got it, it was a setting for my UV’s. A personnal thank you to Altermind for helping me out there, will get on with some more making tonight when I have recovered from this episode! 
glad to have helped… I really like the concept. looking forward to seeing the finished result 
Hey Dustbin 1_UK!
Just wanted to shout out some more support! you’re entry’s really taking shape and reminds me of that 80’s movie Goulies!
One thing i would do is maybee turn the pumpkin slightly so you can see more of its features, just a thought?
Also Many thanks for the tips regarding polypainting! I love this site for it’s creativity and all the help!
Can’t believe I’m still up at this hour ZBrushing! Well actually I can, It’s addictive as hell plus I’m realising I probably bit off a bit more than I could chew but I’m learning loads!
Thanks again!
Keep on Z-ing
Fishadder
Thank you fishadder, your comments mean alot to me. Glad to hear your having as much fun as I am! I think this is not really a competition but a gathering of people who love art and love fun.:D
Here is my last update for the day. Now I’m off to bed. 

Actually just before I go to sleep, I want to put water in the basin, as if the arm is blocking the flush. Has anyone had experience using transparent materials?
I like the wood lid and porcelain! Nice materials.
I think for a transparent water effect you’d have to use multiple layers and turn off ‘flatten layers’ in the render options in order to use the transparency controls in zmaterials.
Lookin good! I like the wood texture. I have toilet seat like that at home.
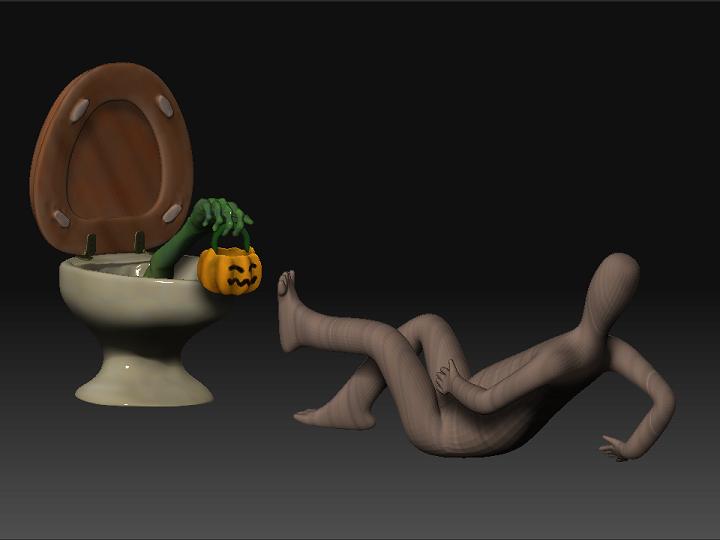
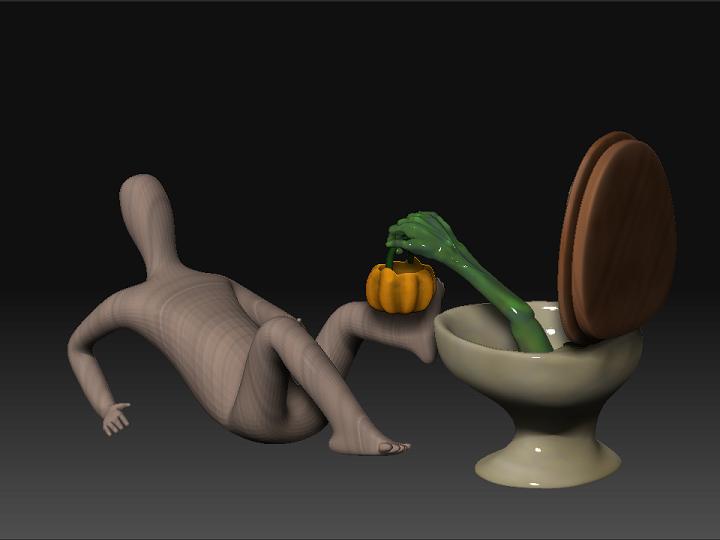
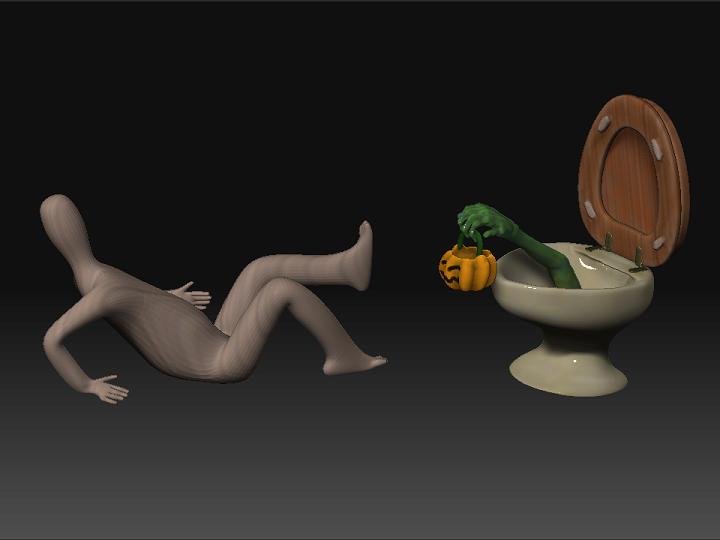
Ok need a little help, I VERY QUICKLY made these composition shots. And I am REALLY struggling to find the right angle for this.
Any help with this would be welcome.
Attachments
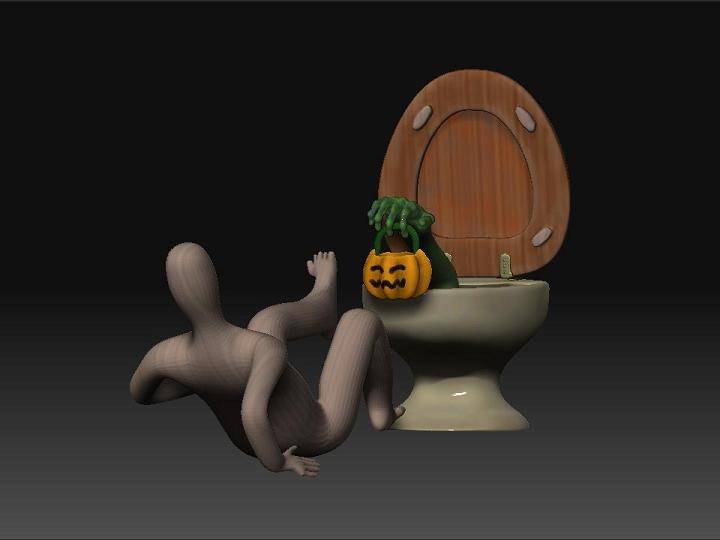
What about a higher camera angle to highten the horror like from up in the corner of the room. I initially was gonna say either the one from slightly behind the victim so you share looking at the monster or the one slightly behind the beastie so you can see the shock on the guys face but then read your post about flooding the room and thought that would look great from a higher angle, with reflectiona!
you might have to show a bit more of whats in the toilet that way but you could just have the arm coming out of murky water you can’t see through - I love the Jelly Bean material for shiny yet opaque thick gloop! I have no idea how you would flood the whole floor though but GOOD LUCK!!!
Fishadder