Hi Santis…HEY…Thanks for stopping by my thread…hope your spring is off to a good start…
On your new head,you might want to fill out and give him a little more jaw muscle…under his ear…looks kind of hollow there at the moment…Also his collar bones might be thicker and have that slight S curve/shape to them…Just minor stuff that might be useful to you…
CHEERS
Hey Santis!
Great scketchbook you have here man, love it,
Keep it comming
Cheers
I think it’s great!!! those horns are really cool!, i watch your skethcbook and it’s awesome!, i love the skeleton bust printed!small_orange_diamond
SpiritDreamer: Thank you 
Well, it was actually snowing all day yesterday so not exactty :p… But today is very springy 
You are absolutely correct, it’s weird how blind you can get, and start focusing on the wrong things when working too intensive on a project.
His jaw should be thicker, especially considering his temporalis is completely pierced by a horn 
Fernando Kuhlmann: Thanks bud, glad you stopped by
manzarek123: Thanks a lot! I’m very glad you like them!
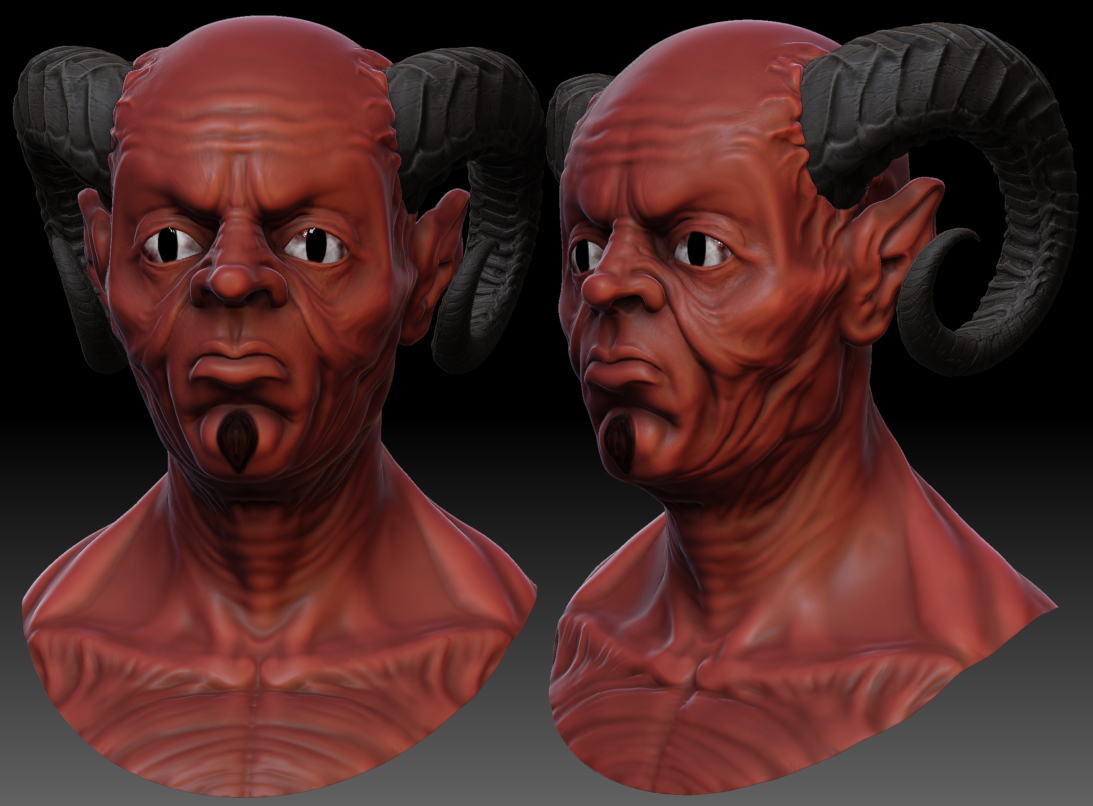
I tweaked the devil some this morning, please tell me what you think.
I’m not sure about how to fix the horns, I at least made them thicker and changed the placement a bit.
Tips on the horn transition (or anything else) will be greatly appreciated
Attachments
Hey Santis!
Yau have a great model here, congratulations!
About the horn transition, for me it looks already very nice,
The only thing i think could be added is some skin texture to make it blend better, the skin texture (rinckles) can be “heavier” close to the horn and then
fade out towards the head,
The way i usualy do this is a mix of sculpting and drag some nice skin alpha
and some smooth in the end to finish it,
Then you can mask it by cavity, and paint it to bring the details out,
Try painting with the cavity masked and also with the cavity mask inverted
to see what works better,
But again, it aleady looks realy cool
Other thing i think you could try is to make the Black part of the eye rounded and much bigger, leaving less white there, mybe go for a full black eye, with some tone variations,
Keep it comming man! it looks great
Cheers!
Thanks for the tip! 
I already have wrinkles in the face made the way you suggested, but maybe they are to light. But I agree with you, it sounds like a good idea to create more heavier wrinkles around the horns
Btw, I saw your stuff at stoneking.com earlier, very impressive stuff, looks like a lot of fun :)
Hey Santis! Great to see a new model from you. He`s already looking cool. Are you going to break up the symmetry a little bit?
Maybe try Googling some deer / goat skull images: they show you various ways on how the horns flow out of the skull: some look like they are just “glued on”, others seem to flow beautifully out of the skull, making horns and skull into one strong visual shape. While experimenting with the shapes, step back on the subd’s so you can only see the big shapes and flows. You could give this guy some interesting brothers and sisters .
No need to get nervous (shaky hands = no good for sculpting and polypainting) . How’s the Z-stuff comin’ along?
Moni-Poroni: Wow, that was close to getting post number 2000 
Thanks! Yeah, maybe I will, just improvising and having fun, but it sounds like a good idea. And congratulations on becoming an aunt
Etcher: Haha, that sounds like a great idea, giving him some siblings;)
But once again the time is running away from me, so I have taken a short break from Zbrush, but later this week I will be posting some updates again. Don’t know how much further I will take this guy though, I have to do some more anatomy stuff soon:)
An even more important question: how are YOUR Z-stuff coming along?
Great work you have here - absolutely love Skeletor and the goblin.
I know I’m a bit late to the party, but thanks for the skull - it’ll do me a world of good
Oddin: Thanks a lot man!
I appreciate that you like the skull, it motivates me to give away a more generous christmas gift this year

Talking about the skull: Here is an Obj for all the mac users:
I must say - your skeleton bust gives me an interesting idea. I think I might try to use that as inspiration to create a skeleton bust - but more of an alien bust as opposed to human. Could be an interesting study… The more I think about it the more I like it. BTW - Thanks for the free tools! This is a nice sketchbook you have here! Very good work!
Capa: Thanks
Good luck with the project, sounds like a cool idea
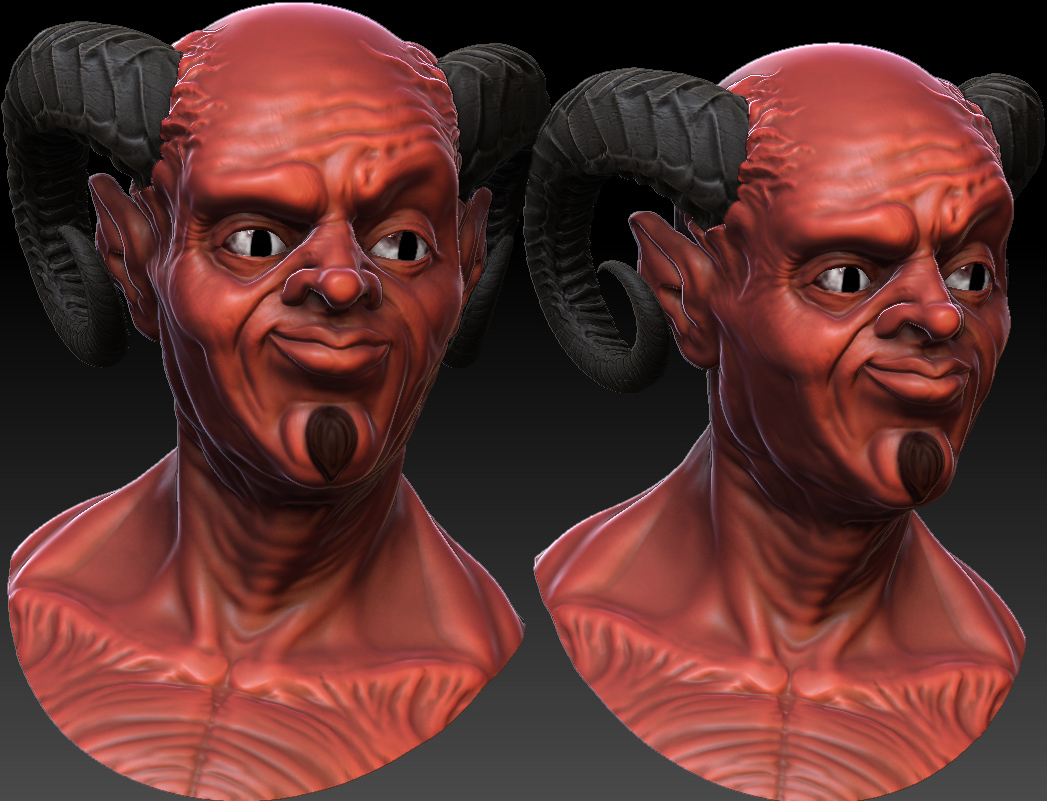
So this week I had some more time to do the final work on the devil character, I did some more sculpting on him, symmetrical and asymmetrical.
C&C as allways very welcome
Attachments
Looks good, i really like the expression.
Great work man! the horns rock!
i think his eyes need an iris. thats the only thing that seems off about this model.
sweet devil head, I like the expression you went for
I really like the expression so far.
-Storm-: Thanks a lot, glad you like it!
Energise: Thanks Jonas!
Glad to see you here again, have you been taking a break from Zbrush?
mjolnir: Yeah, you might be right… Wont have time to give him one now, but maybe in the future if decide to take him further. Thanks for you input
DAYAS: Thanks you, glad you like it!
Moni-Poroni: Thanks, glad you like it!

-
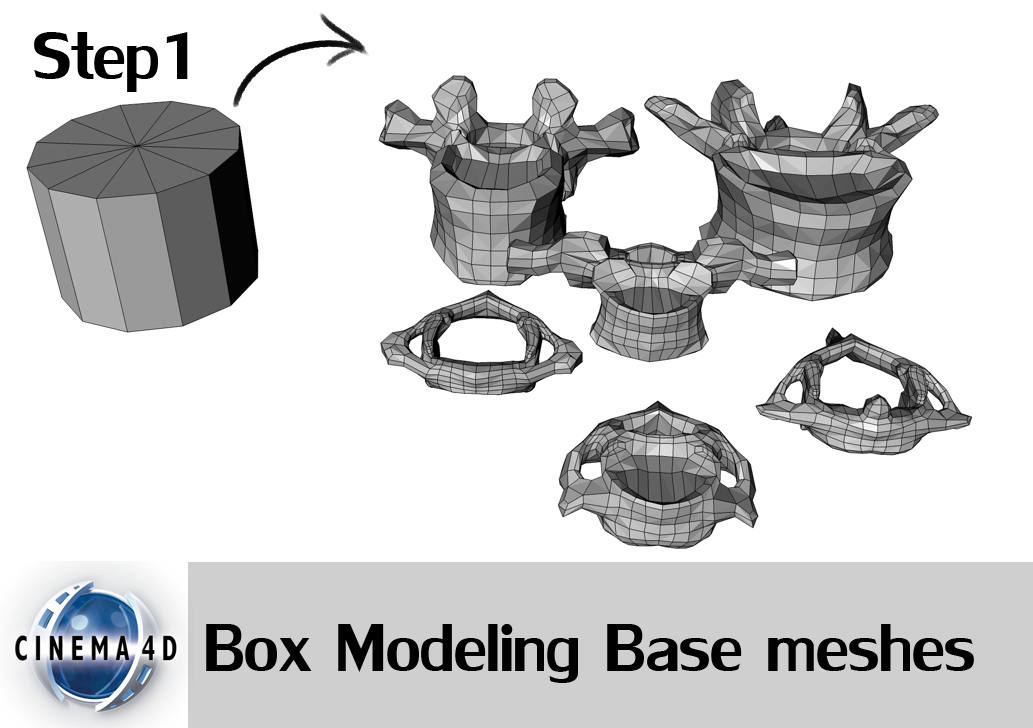
I start of by modelling a rough mesh in Cinema 4D. Once I had the first mesh done I used that as a starting point when modeling the rest of them.
-
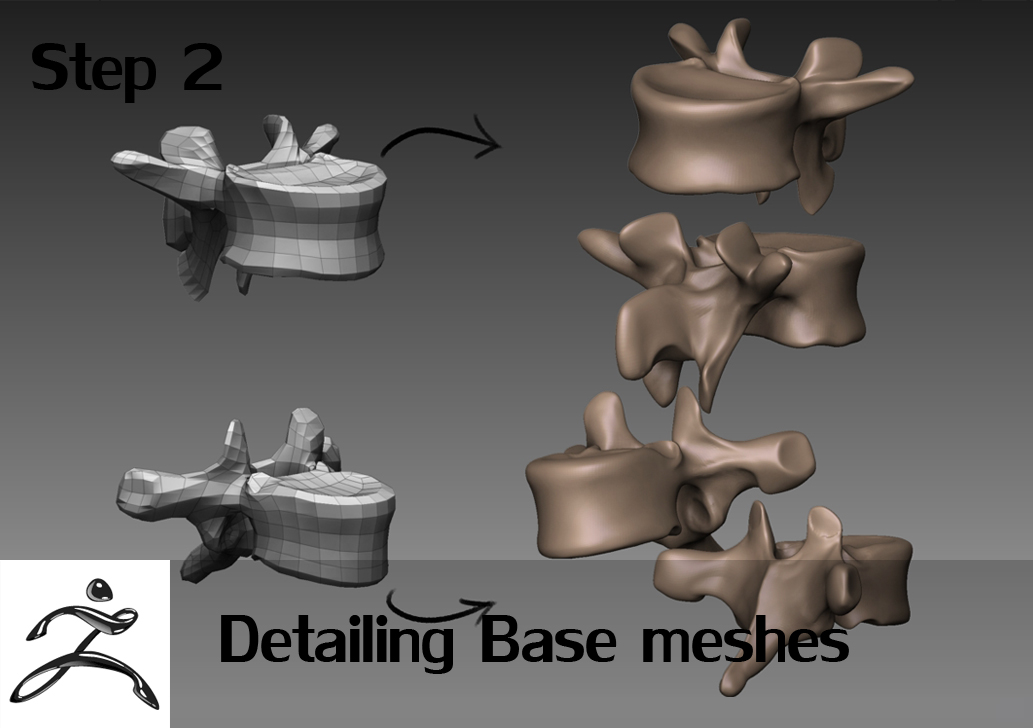
I subdivide each mesh and define it’s form even more inside of zbrush.
-
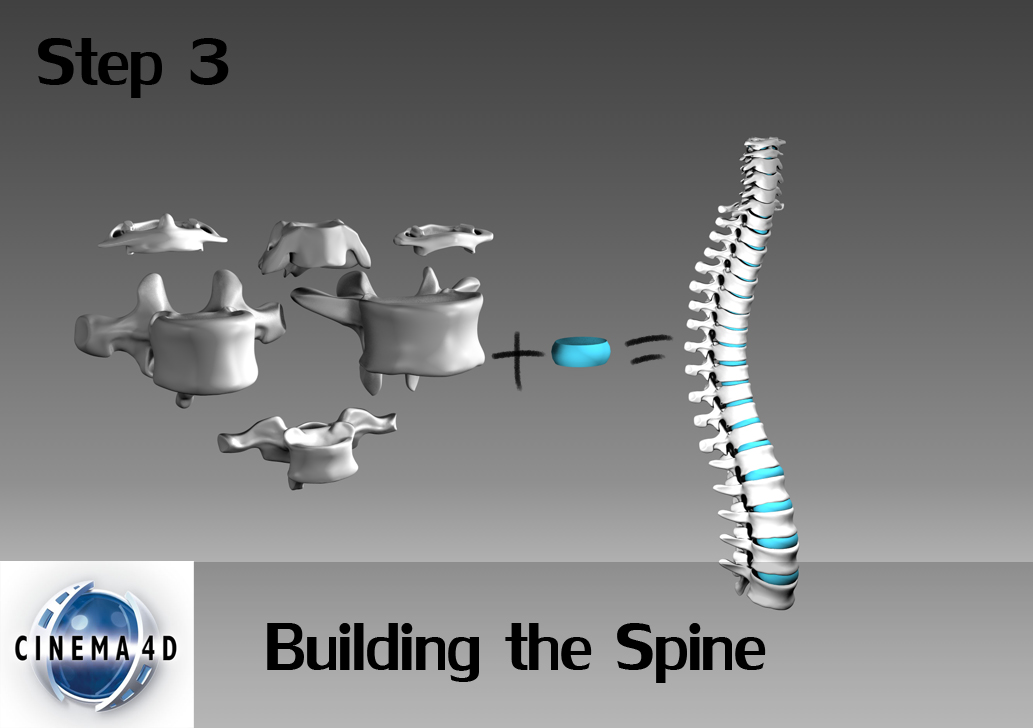
I then use these highres meshes inside of C4D to build the spine. I do this using move, scale, and rotate to roughly place them in a good relationship to each other. In some extreme cases when they are too “off” I use soft selection to alter the shape of them.
I also added a spine disc between each vertebra. -
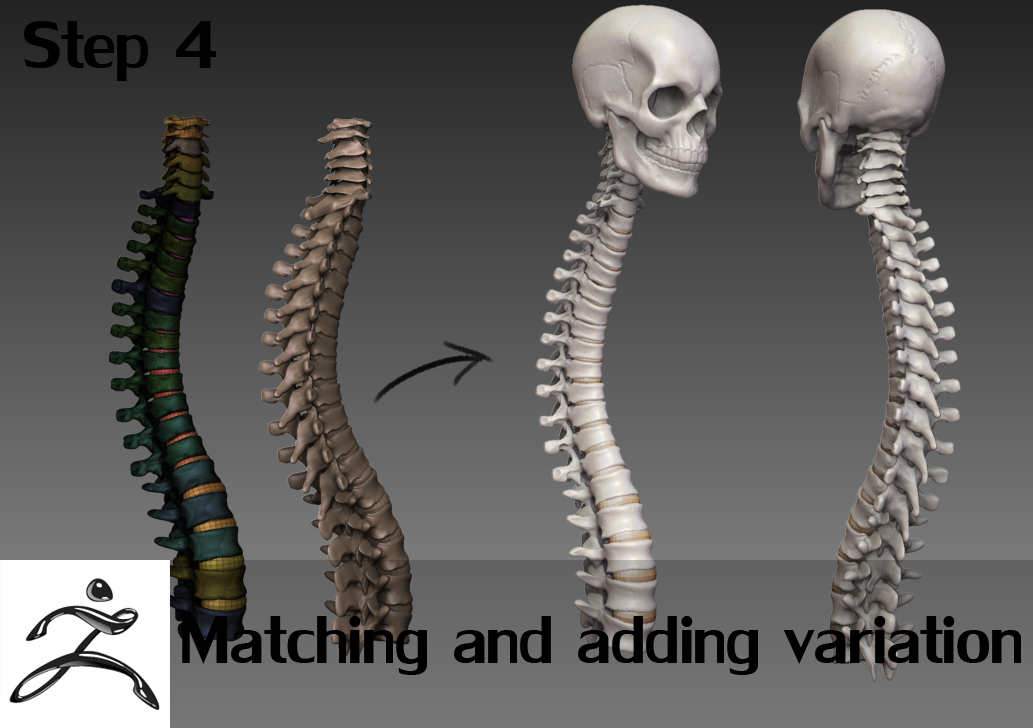
Then, back in Zbrush I import all of them as one tool, but each mesh gets it’s own polygroup, so masking and hiding the surrounding vertebras to the one Im working on is very easy.
A very handy function to use when doing stuff like this is Mask by polygroups found under Auto Masking in the Brush palette.
I then go over all of the segments to add some quick and unique details, I also match them as good as possible to each other and the spine discs.
I also imported the spine a little of it’s own symmetry line so that everything I did in this last stage became slightly asymmetrical, giving it a more organic look.
Next up, the ribs!
Attachments