ZBrushCentral

Robo: Pixologic Event Dallas

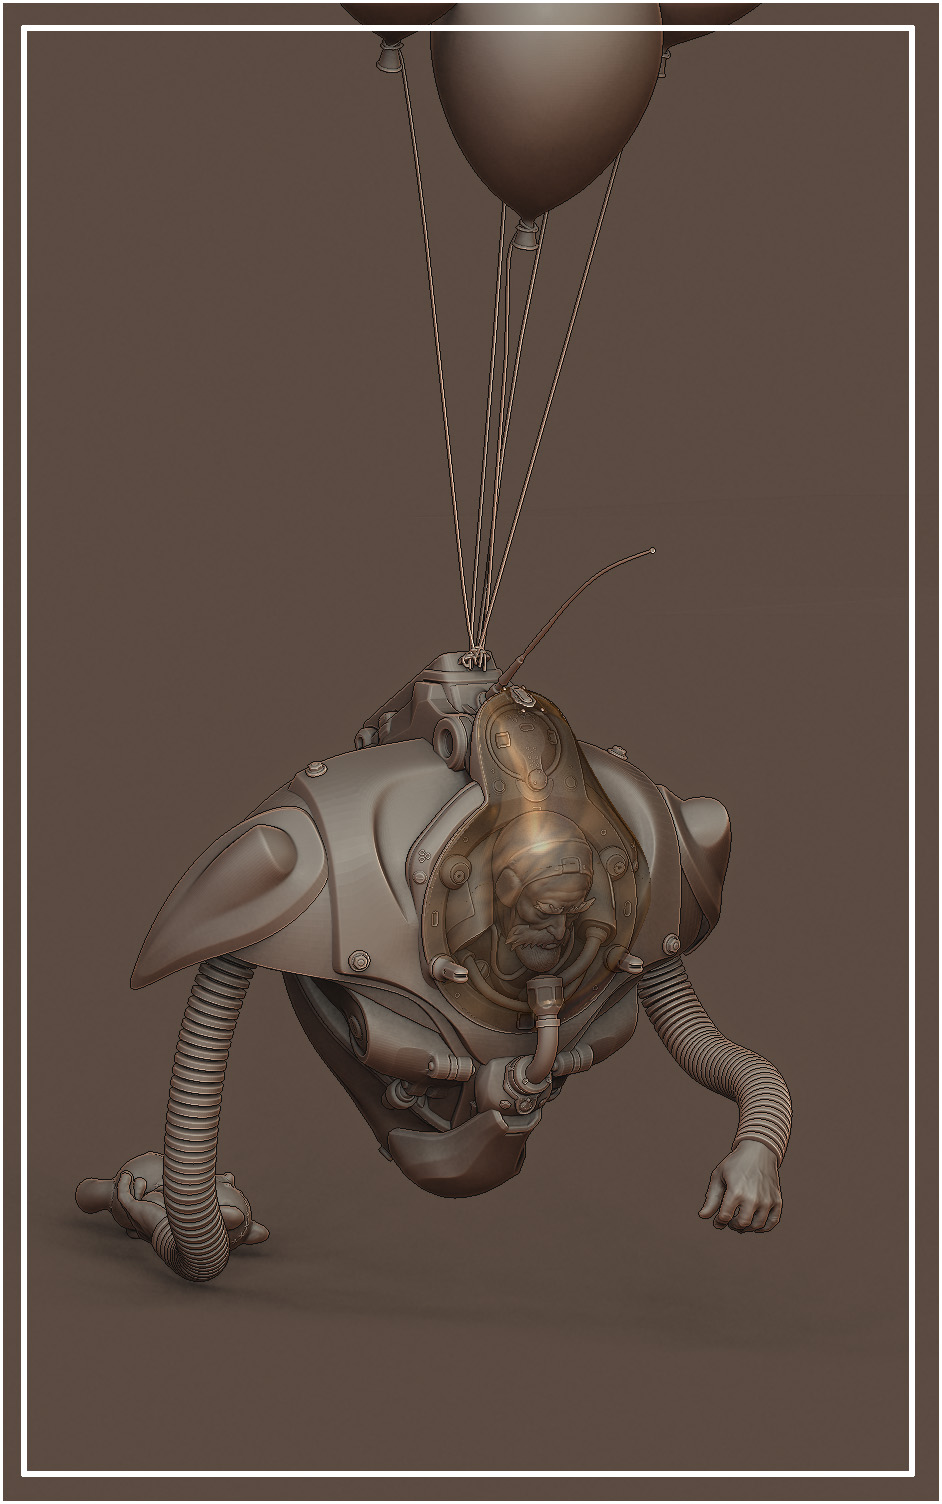
Just wanted to post up a character I did for the Pixologic Event in Dallas with Greg Punchatz, and Jesse Sandifier. About a day’s worth of work, trying to show how to set up hard surface objects from Max-Zbrush. Also showed how to seperate your subtools to have transparency ( helmet ) using different materials. Nothing to special, but wanted to share so thanks for looking:).

Spark

ZBC1.jpg
[attach=187146]Robo.jpg[/attach]

Attachments

Robo.jpg

I have a question, which zbrush did you use?
when I worked on 3.1 PC version, I figured out how to create awesome affects with transparent subtools. I could create glass armor and have it look like a maya render.

When 3.12, and then 3.2 (mac), came out I could no longer do it. Settings/sliders had changed in such a way that I could no longer create the awesome visualization.

In the image above were you using 3.1 for the PC, or 3.5 for the PC? I am curious to know, perhaps when 3.5 comes out for the mac the modifying sliders will be back, and I can do it again.

Thanks in advance!

Very original.
And yes how exactly do you set the transparency ?

great sculpt…i wanna also know how to make transparent subtools… :smiley:

I also would like to know how you achieve the transparency, but with the added question: is it easy to do a Zbrush render and have the materials under the transparent parts show through? Or is it like before, you have to do separate renders beginning with the innermost parts?

Thanks, and that’s an awesome sculpt! :+1:

Brilliant! Nice work Brett. :slight_smile:

Hey guy’s I am attaching a PDF of the walkthrough if anyone is interested. I do these to help remember important techniques that I sometimes forget over time ( Zbrush has just to many cool things to remember!!! ) Also, thanks to my good friend Gabo1991 for all his help, and showing me all the cool things about this awesome program.

http://www.bbriley.com/images/news/Render_Tutorial.rar

Spark!

bLawless: I am using the latest Zbrush at the moment for the PC. Hope you can use this Mac side:)
RamRam: You can also go into the Preferences, and open the Draw tab to change the front and back opacity level to increase the subtools opacity. Helpfull in seperating the subtools even more, hope that helps as well.
0/MI: Thanks!, and let me know if the PDF helps.
EricShawn: I used the layers to seperate the parts from each other for the render, the walkthrough isn’t that hard, and you can do that for more than one subtool. I still would render out different materials on the objects, along with Zdepth and use Photoshop to help push the picture farther.
Sandpiper: Thanks buddy!, and post up some of those sweet sculpts you did for the event as well:)

Thanks! Though sadly I can’t open a rar file. I’m on Windows 7. Can you link it unzipped or put it in a zip file? Thanks!! :slight_smile:

Very cool concept! Love it!

http://www.rarlabs.com

when somebody is nice enough to upload something, it’s good form to do the legwork required to actually open it rather than pester about file formats and whatnot :slight_smile:

thanks man! cool :slight_smile: :+1:

Hey Brett,

interesting character. Would have really liked too see the presentation. I’m sure I would have learnt a hell of a lot.

@testure: Wow. I was polite. Snooty much? :confused:

Thank you!

I can’t open a rar file. I’m on Windows 7

http://www.7-zip.org/ (free)

Very cool model Brett. Love the concept, the framing and everything. It’s refreshing to see something different.
Thanks for the tutorial.

Thank you, Dustin, that was helpful and 7 Zip worked (and is free! yay).

Thank you Spark! for your excellent thread, model, and tutorial. Really great. :+1:

And I would also like to apologize if I was out of form earlier. To everyone.

Yours,

Eric

great work! edit: didnt see it was done in 1 day for an event. impressive and great tut

Thank you Spark! for the Tutorial!! :evil:

Amazing, i really love the ambience!!