ZBrushCentral

Rhino3D > Zbrush, edges disappear on Divide

Hey all,

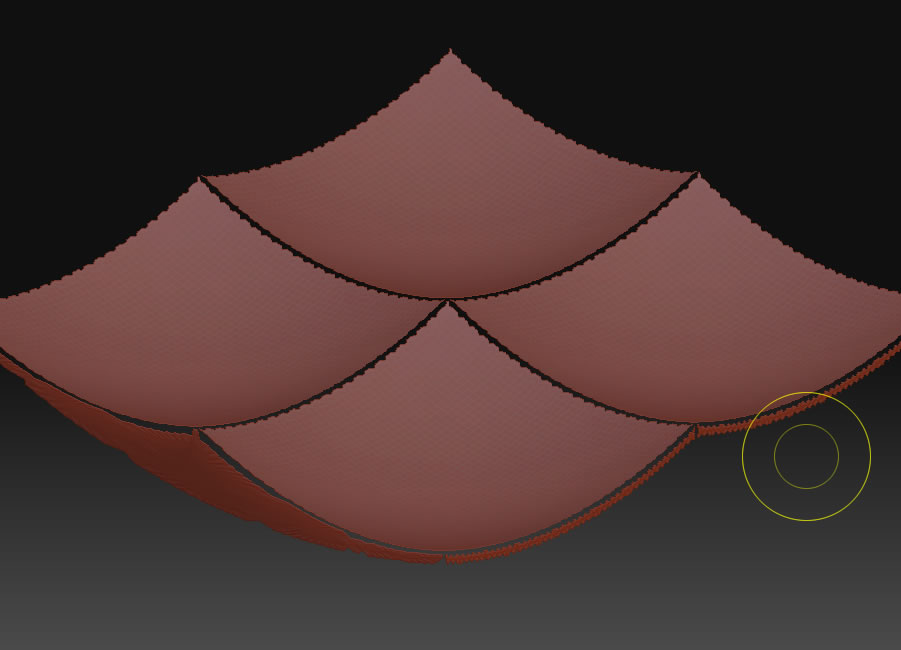
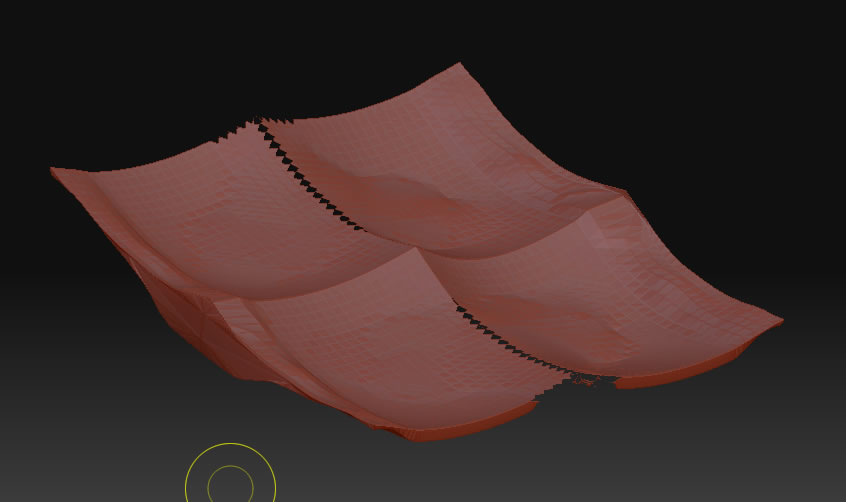
I exported a Rhino3D model as model.obj and then imported it into Zbrush. It looks great when I place the tool on the canvas, but when I go to Divide the model, the edges recede and everything breaks apart?

EDIT: Ive also attached a pic of what it looks like after a few passes of the clay brush.


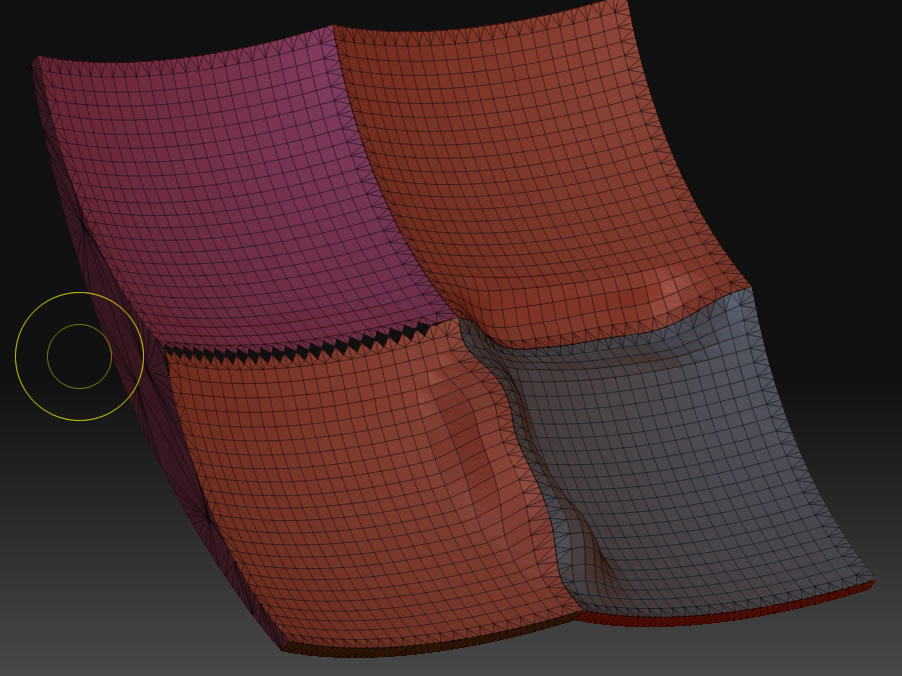
  1. How can I create more volume for that flat, front surface face which seems to completely break down if I try to sculpt on it?
  2. The inner-edges of the model break apart only when I hold down SHIFT while using the clay tool, normal use is ok; why would this be?


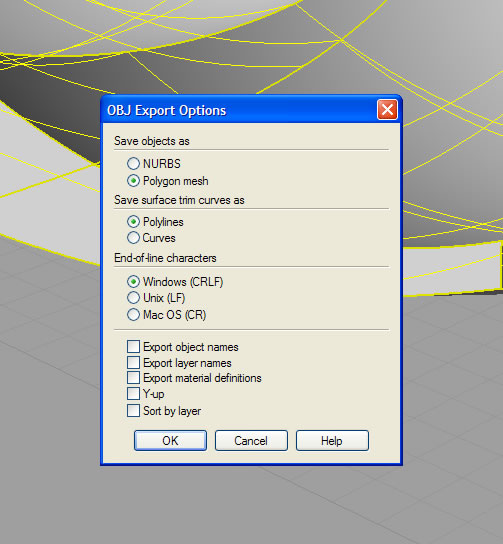
When exporting from Rhino3D I configure as follows:

Save Object as:


  • NURBS
  • Polygon Mesh
Save Surface Trim curves as:


  • Polylines
  • Curves
End of lines characters:


  • Windows
  • Unix
  • Mac
Export Object Names: NO
Export Layer Names: NO
Export Material Definitions: NO
Y-up: NO
Sort By Layer: NO

Cheers,

Haus

Attachments

model_edge_failure.jpg

export_options.jpg

with_clay.jpg

from the looks of it rhino isn’t welding those edges together. To test this, import the object

then go to
tool>polygroups>autogroups
turn on frame mode (shift+F) see if everything is turning different colors, or staying one solid color. I don’t use rhino so I can’t help you on that end though.

Thanks, see attached result.

I can add/dig the model with the regular brush, but when I hold SHIFT it breaks apart.

I also used a command called “Duplicate Boarder” in Rhino which lets you see if there are any gabs in a model, and nothing came up on the original nor the mesh which I exported into ZBrush.

Attachments

frame_on.jpg

I’ve had similar problems in the past. I’ve been using re-topology to resolve the problem and get a better evenly distributed mesh in Z-Brush, which is better for texturing etc.

Based on what Goast666 is suggesting I have an idea, but don’t know if it will work as I have not tried it yet but…

Have you tried converting your NURB model to a MESH model in Rhino? It typically creates a triangulated mesh, but you can quadrangulate it by typing “quadrangulateMesh” into the command bar. You should be able to weld the seams using the “Weld”, “Weldedge” & “Weldvertices” commands. Then export to Z-Brush as you have been…

Trouble with the mesh created in Rhino is that the polygons are not always very well distributed on certain surfaces…

Please let me know how you get on if you try the suggestion out… as a fellow Rhino user I’m interested in other peoples take on resolving problems!

Here’s another possibility…

There’s a 'Weld Point’s slider in the Import menu (you need to be in edit mode
with a polymesh).

In theory it should weld such a mesh together during import. But I’ve not
tried it myself.

Maybe import the mesh, then get the Import menu, and import again with
‘Weld Points’ set to non-zero?

G.

When using quadrangulateMesh it doesn’t seem to visually change anything; ie, like simplyfying everything to rectangles. WeldEdge does work, but you must select each little line (one side of the mesh polygon) along the edge you want to weld. WeldVertices worked the best, because you could just type this command, fence-select the entire model, and then it would weld everything together. I would then just import the .obj into Zbrush and its OK.

Thanks for the help! I wonder if there are any refinements we could try to make the mesh better?

On startup (Default Zscript screen), press escape (other). Select the PolyMesh 3D button (the star in your ztools) this will allow you to select import in the tool bar (right hand side, bottom). Turn Merge on, put Weld to .01 (I will usually also turn on Tri2Quad as well set at 90). Now you should be able to subdivide your mesh without it blowing apart. Also, you may want to turn off the Subdivide Smooth Modifier (SMT button). This will prevent distortion of the model as you subdivide (especially if you have hard edges). I found this info through another thread and it has served me well for working with rhino files. I would recommend first meshing your model with the mesh command in Rhino. This way you can control the density of your mesh better before exporting an obj. I have not, however, figured out a way to mesh directly to Quads. Maybe there is a way, but I havn’t heard of it yet! Hope this helps someone…

~Dylan
GROWit3D.com

thx Dylan your a lifesaver :+1:
cheers

Turn Merge on, put Weld to .01 (I will usually also turn on Tri2Quad as well set at 90). Now you should be able to subdivide your mesh without it blowing apart
I can’t seem to find “Merge”, where is this feature?

here it is

cheers

[e2.jpg]