One thing, what I learned in topology tutorials, is instead of just trying to figure it out in the topology tools, where it’s kind of hard to edit the new lines if you have to change a lot, is to first plan it out with polypainting.
So, actually paint lines onto the model where you expect to put the new topology lines. This lets you quickly try a few things, erase, and try again. Once done, then doing the actual topology lines will be easy to place since you have a template to follow.
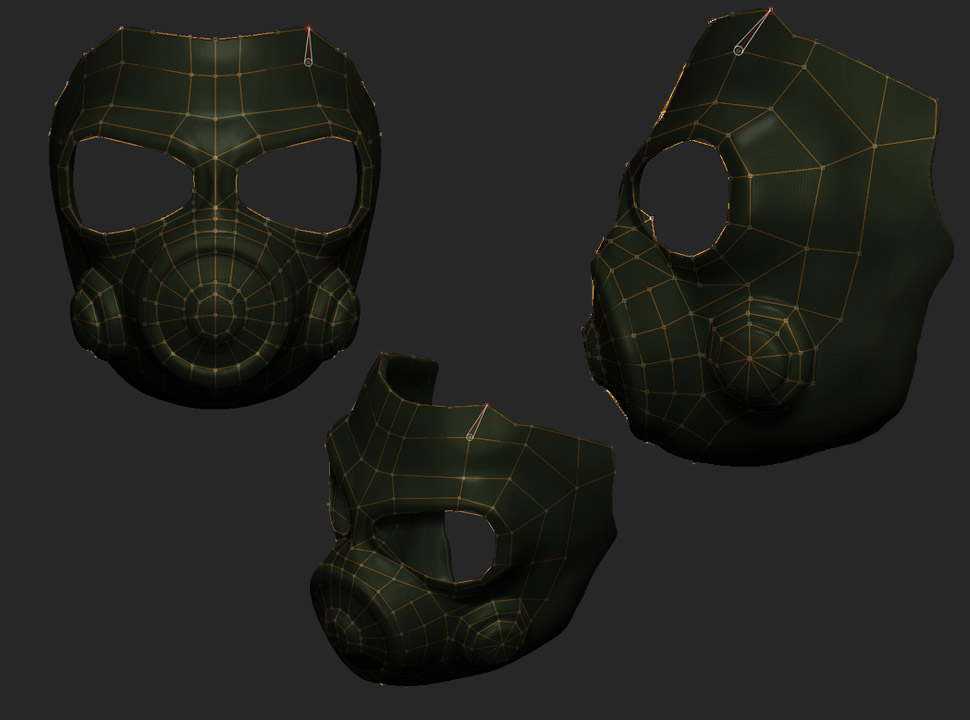
So fare I see some trouble brewing on yours so far. You got some odd distorted 4 sided polygons in many places. You have 5 sided ones, which you want to avoid (it might convert it into more faces for you). And between the eyes, you got 6 lines meeting at one point. That’s going to be difficult to sud divide and smooth in zbrush without it pincing into a point. Even 5 lined points can cause that, but normally, you try to not go over 5.
I took you first image into photoshop to just try some new topology in that area. And notice how I keep a clean line through the mesh, so it can by symmetrical right in the center. And the extra polygons in the middle between the eyes would let you easly move the top of the eyes down to make more expressions, like if you wanted to make it more angry looking. At the moment, that point with 6 lines would limit you.
(since I couldn’t see all angles or represent those area, I just did what was showing in a simplistic way)

So imagine painting something like that directly on your model.
Here’s an example of my first try using the topology tools. So I planned a bit with painting on the model and you see the topology lines simply tracing it:
http://other.toonguru.com/3D/zbrush/brisby_wip_008.jpg


