Hi! I want to skin Zspheres in such a manner that the resulting mesh retains the look of Zspheres . Could anyone share some adaptive or unified skinning settings for doing that. I did a search but couldn’t find the thread which had settings to do this. I remember some fantastic Zbrush models made by someone by skinning complex ZSphere chains, with no additional sculpting. please help.
Maybe this help:
http://www.zbrushcentral.com/zbc/showpost.php?p=413028&postcount=109
http://www.zbrushcentral.com/zbc/attachment.php?attachmentid=59959

Thanks for replying. those are interesting threads. I haven’t really tried them yet. they aren’t really what I am looking for. I am trying some settings. So far this is working for the zsphere model I have made. I am not really satisfied with the results.
Sphere density 10
Skin Smoothness 100
Resolution 300
Any ideas?
If you are wanting the skin to closely match the ZSphere structure, why are you reducing the Unfied Skin>Sdns setting? This artificially removes linking spheres from the skinning calculation, which is why you’re getting something that’s even lumpier.
Leave Sdns at 100.
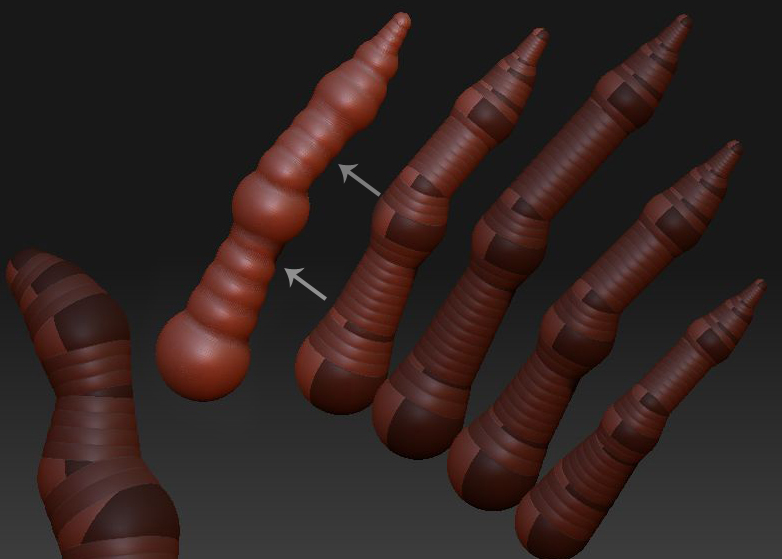
Thanks for your suggestion Aurick. Actually I want the skinning to have those lumps ( those overlapping and tightly packed ZSphere chains) to be visible in between the ZSpheres that make the joints. Reducing Sdns brings out that abacus like repetitive pattern, which I want for this model. Something like the vertebrae of a spine, only tightly packed.Hope I am making sense. I was looking for a magic setting Any tips to get that effect?
managed to find this link. I had seen the same models here in ZBCentral.
http://kei-sawada.blogspot.com/2007/08/zbrush.html
Incredible stuff. first he has thin ZSphere chains, then they bulge out, and they look exactly like the underlying ZSphere structure.
that is the look I am going for. If anyone knows the settings ideal for this kind of skinning plz let me know. thanks in anticipation.