Thx for the help on this issue. You were right it was the uv. i ended up just putting the hand in its own uv space scaled it up and it worked fine. Appreciate the help 
Hi Ryan,
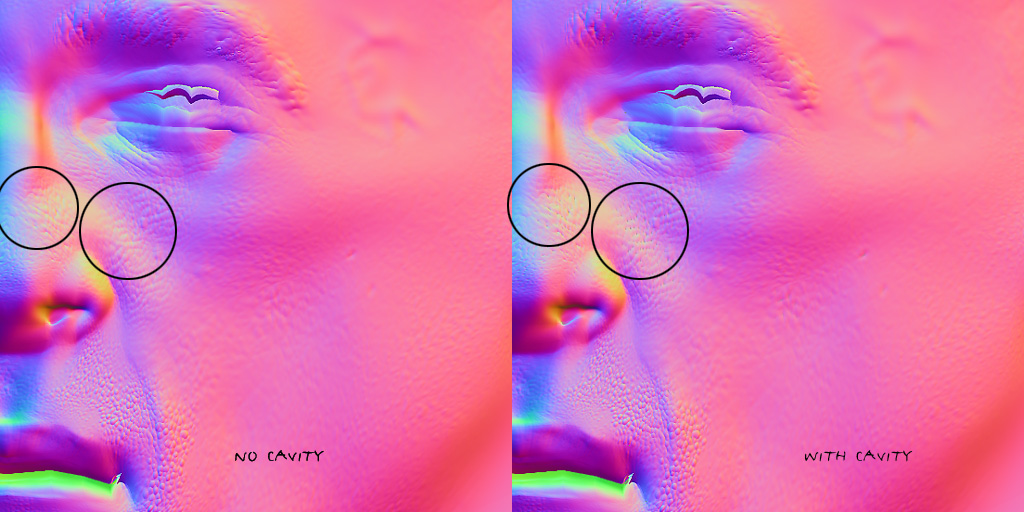
sorry for the late reply…I attached some pics. The question was is there actually a discernable difference between normalmaps with or without cavity intensity on in Zmapper.
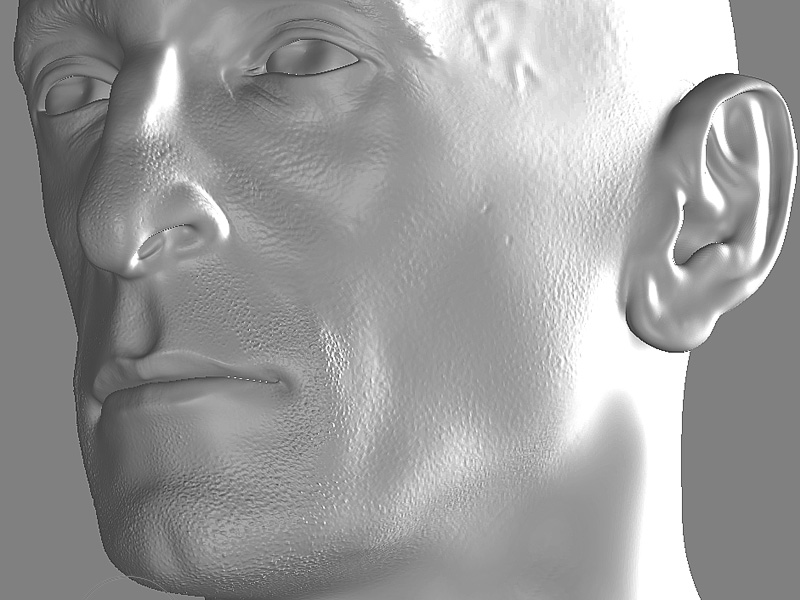
My model has plenty of hifrequency detail as you can see…and the normalmap has all this detail in there…so that’s lovely…I compared the two and now I notice that the normalmap with cavity shading on…does sem to have a little bit more detail (see within circles)…so I guess it does make a difference…just very hard to spot when you casually look for it. Maybe I should put the cavity blur to zero to see the difference more clearly.
As for the interface…about nothing happening when clicking the normalmap or create cavity map button…I was just talking about the fact that there is no
“rollover” or “mouse-down” effect…when you click…which can be a tad confusing when first used. So it starts calculating the normalmap allright…but
for example…my first go…I “thought” nothing happened…because of the lack of a “mouse-down” effect…so I clicked 3 times…and then ZMapper starts calculating the normalmap 3 times…
 cheers
Attachments
When I first loaded zmapper this morning it displayed properly, but now when I open it up to use only the first half is visable- any ideas?
Ryan: I don’t think the messed up UV groups have anything to do with how close they are to the border. Consider this simple example:
This is a simple grid made in XSI. One texture projection, scaled by 1.333 to offset the UVs so that the first grid row border 0-1.
This is what Zbrush makes out of that. 6 seemingly random UV groups, and they don’t even correspond to the offset around 0-1. I looked at the .obj in a text editor, and all UVs are described as one group in there.
It looks like something is getting messed up on import into Zbrush?
Hi Guys, maybe it’s late and i over read or somthing …
from Zmapper to Maya 7, how do i get the placement correctly of the normal maps? it doesnt match up to my original uv layout.
I inverted before i exported so it’s the correct way up in MAYA 7 but i cant seem to get the texture to fit width and size ( at first it’s tiled all over) but the repeat UV is on 1??? i found that quite weird
do i link the normal map to the shader node as a bump map?
Thanks for your help in advance and i wanna give big UPS to this prog cause it rocks, i am barely scratching the surface with it but i plan to go alot further with this in the near future, just gotta get out of the starting blocks
EDIT
I can see how the program is probably functioning here comparing the original low to high and capturing that difference… I think I have a workaround now but I would still be interested in knowing if your detail must be on level 2 or higher. Thanks again!
END EDIT
quick question. Maybe I am not understanding the workflow for Zmapper but will it allow you to transfer the detail in a high res mesh with just one subdivision level to a low res mesh? I would like to use it to transfer scandata from a highres mesh onto a lowres cage but it appears that when I load my highres I must subdivide once to make the projection work and then I am not getting any of the detail from the highres to the map… any ideas? I can see how it would work best when detail was sculpted in ZBrush but in this case the mesh has been cleaned in ZBrush not sculpted.
Thanks in advance,
Scott
hi guys, for some reason Zbrush completely crashes on me, its doesnt when i create a mesh in zbrush only on the mesh ive imported, my settings are fine, i dont know what could be wrong, even my UV’s are clean.
PLease ghelp, because when i first got zmapper it was fine now i cant get ti working again.
but i can generate a normal map the ol fashion way, via tools, Normal map
Sorry I posted in the wrong place before. I have a Dell Windows XP. My problem is within Zbrush itself. Zmapper, along with Zapplink and displacement exporter will not show up on the Zplugin window within zbrush. The other plugins I have put it work fine. Any help would be greatly appreciated because I want to test this baby out:D
This looks like a bug in ZMapper, because it keeps happening in the same way.
I have a multires mesh loaded, alpha applied, bring it down to subD 1, and SAVE the tool (the saving is what sparks the problem). Go to Zmapper after the save and it says “…subdivision off-line…” or something like that. I forget the exact message but could reproduce it.
So, Z mapper won’t initialize after the message. Then i go and turn up the subD levels, and then bring them back down. I guess this brings the subdivisions back “online”, because then when i go to ZMapper, it opens as usual. Then, when i go to create the Tangent Normal map, pressing the make normal map button crashes ZBrush (that nasty windows message asking one to report to microsoft…as if).
This crash ONLY happens if I have saved the tool before I initialize Zmapper, as described.
BTW, the documentation for ZMapper is superb, best I’ve ever seen since Lightscape (remember that one?). KUDOS for the whole thing.
thanks,
NJ
my specs:
Pentium M 2G, 2G RAM, WinXPpro svc2, ATI Mobility Radeon 9600/9700
Hello…i use following method:
- make lowpoly head in max
- export lowpolyhead as obj to zbrush with unwrap/flatten mapping
(i remember to check texture coordinates in obj menu) - import lowpolyhead into zbrush, start subdivide, model highres
- then i subd 1…create a texturemap of 2048x2 or 4096x2 for the normalmap
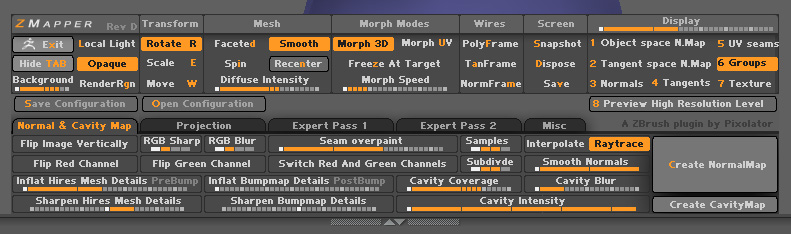
- i go into Zmapper
- in display i choose tangent space normalmap…then i go to Normal & Cavity map slot in Zmapper and press “create normal map”…it now creates my tangent space normal map…i should think
- i exit Zmapper, flip the normal map texture vertically and export is as tif-image
- i also export the new subd 1 version of the head
- i go to max…import the subd 1 head from zbrush…add a new material
- in material i go to bump slot, i find Normal Bump, in upper slot i add the tif normal map generated and exported from zbrush
- in Normal Bump menu under “Method” its set to tangent space which should be fine since its a tangent space normal map…only its not
- when rendering the normal map on the lowpoly head looks like crap!
Why won’t it show tangentspace normal map properly?
I actually can make this process work when i use Zbrush’ old normal map functions and just stick to object space/local space normal map…then in Max’s Normal Bump menu under “method” i tjek the “Local XYZ” and it displays the normalmap perfect on the lowres model in max render…
Sorry for the looong explanation…but then i hope for better directed answers HELP ME! IM NO TECHNICAL BRAINIAC! Thx!!!
Sincerely, Bokaja
Hi I’ve been looking at zMapper docs and have a question…I have a mesh about 255000 polys but no UVs and a matching clean lo -res object, which fits over it very tightly (the lo-res one has UV data) Is there a way to calculate the normal map differnce bewteen the two objects and the result goes into the lo-res UV layout?
I get the impressin you need clean UVs on your hi-res object before doing anything?
Thanks
I keep gettin the same message, over and over… Can I fix this problem? Thanks in advance
-Ivan

Am still getting the same messages over and over… How can I fix it up? Thank you in advance.
Ivan
Azt3k_soljA -
Please post your system specs.
Ryan
argonaut…
they won’t show up in the plugins folder…
de is in your alpha menu and I forget where zapplink comes from but check the zapplink thread’s directions in the first post…pretty sure it tells ya where to find it.
Not all plugins end up in the plugin folder…some are designed to go to the menu where it’s logical use dictates.
Hey guys… another new zbrush person here (lots of lightwave and poser under my belt).
I’m having some terminology issues, and maybe someone can set me straight.
I dowbnloaded and watched the video tutorial a number of times.
My goal, was/is to use zmapper touv map my lightwave models. (Lightwave doesn’t have a good pelt mapper or unwrap model feature.
it looks like zmapper will handle, that, and then export my obj so I’ll have it with good peltmaps.
The video and everyone here keeps referring to normal maps… are uv maps and normal maps one and the same?
I have a simple biped to test, but am unsure of what options to use.
Is there a simple unwrapping tutorial anywhere? the video is great, but jumps through so many different options, that by the time I’m done watching it, I’m back to square one again.
If you’ve seen Max’s new peltmapper, that’s the goal I’m trying to achieve. It doesn;t have to be 100%… I can always stitch the uv maps in uv edit pro, or in lightwave once I have a decent unwrapping.
My final goals: Create a grouped obj in lightwave, use zmapper and zbrush to uvmap, create texture and displacement/and or bump maps, then import that whole mess into Poser, and rig the character.
Thanks for any help!
Garee- ZMapper is not a UV mapping solution. It is a normal map generator. To learn more about normal maps check this link out:
http://en.wikipedia.org/wiki/Normal_mapping
Cheers,
Ryan
True, but my experience is that you cannot apply a bump map to geometry without a uv map in place… and some of the normal maps projections look exactly like uv unwrapping.
Does anybody know what “mode” under expert pass 2 does? It seams to affect the tangent and binormals quite much.
in max if you’re using directx to render things in the viewport you should be able to preview the normal map inside the viewport without having to render, should make things a little easier, to enable that just check “DX Display of standard material” under the DirectX Manager tab in the material editor and then click the show map in viewport button.
Your workflow seems fine, and should totally work, heres where I think your problem is, since different programs and engines use different standards for normal maps sometimes you will get issues with y (green channel) facing in opposite directions, easy way to test this is in max inside NormalBump check “Flip Green (Y)” and render/click display in viewport to refresh. if that fixes it then thats ur problem basically all you have to do now is open up your normal map in photoshop and invert the green channel. Also zmapper is very modular and what you can do is load different configurations for it, it comes with 3dsmax 7 config already all you have to do is before you render your normal map click open configuration and load the 3dsmax 7 one, which will make the zmapper settings the same as they are in max.
hope this helps.