Has anyone noticed this? Using Zbrush 3.2, I have a tool with one subtool, (an eye) I clone it so that I can append and mirror it, but when I append it, all my other tools disappear. I can still draw the tool on the canvas and put it in edit mode, and extract a map, but I can’t see the tool or any subtools until I delete the last appended subtool. Very odd.
ZBrush > Modo displacement problem. Just started the project yesterday afternoon, but it is on deadline. Help!
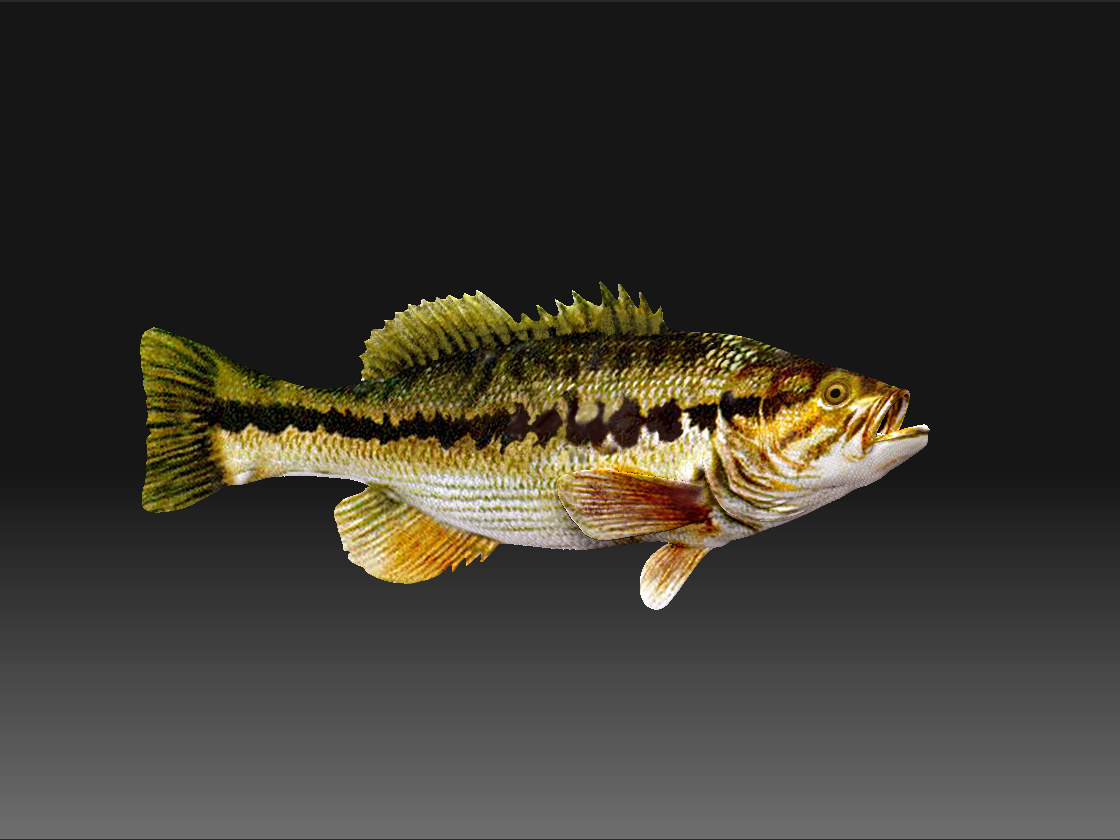
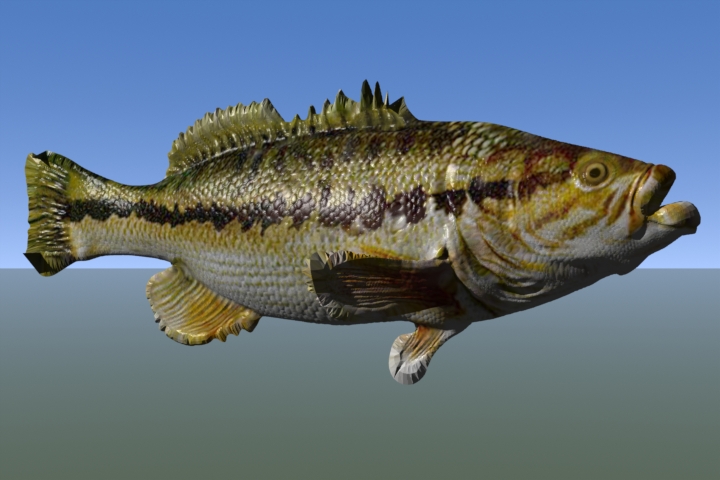
Perspective is off in ZB, but on in modo, it’s the lips and fins that are buggin’ out not the overall shape.
Base mesh made in modo, all symmetrical quads, a few poles but no ngons, tris, or holes. 4k puvs, displacement, and texture from polypaint. I’m getting fat blown out fins and lip on the fish in modo, but don’t know what it’s a symptom of. Any takers?
I’m still noobin’ it out. ; ) I’m searching for help on Luxology’s forums as well.
ZBrush sculpt:
Attachments
Hi jamespthorton, I don’t know how this works in modo, but when this happens to me in Maya, it’s usually an issue with the Alpha Gain and Alpha Offset under the Color Balance submenu on the Displacement node. When you save your displacement map in Zbrush, under the alpha palette it will give you an “alpha depth factor” which is a number it uses for the alpha gain settings in Maya. Sometimes displacements puff out a bit anyway, so I sometimes have to make this number a bit lower to approximate what I have in Zbrush. The Alpha Gain is the same number as the alpha depth factor, the Alpha offset is the negative of half the alpha gain.
if alpha gain is: 0.024
the alpha offset is: -0.011
Oh, in case anyone else has my problem, with subtools causing your main tool to disappear, the cause was exactly the same as the export settings problem everyone was having a while back. I just set my tools back to the original scale and offset settings and they stopped disappearing.
Interesting snuke…I’ve had problems with tools disappearing when using transpose master, and a couple other times (don’t know how I did it, wasn’t really replicable), but I always had to close and reload from previous save. If it happens again, I’ll give your remedy a shot. thanks!
jtruthnick, I was going to mention that I thought it was an issue with using transpose master as well, because I had used it on this particular model, but it didn’t seem logical that it would only be in that case that this phenomenon happened. Maybe you are right! Validation!
Snuke, thanks for replying. 
I’m using GoZ, which syncs it all up. Alpha Gain in Maya I think is like the hi and low value in modo, which adjusts the intensity of the displacement. What I have here is good displacement in some parts, but really bloated displacement on the edges, not a consistent bloat. Lowering the intensity makes good detail go away, plus doesn’t even fix the bad displacement.
I’m clueless! The base topology is basic and clean as far as I can tell. Just 200 symmetrical quads. I’ll try to adjust the original mesh some, then project the high details, but I’ll have to find some retopology tutorials.
Hey no problem, that sounds about right, using goZ is just supposed to do all that for you, that is why it is so great! If I goZ to Maya, those numbers are already in place. I just adjust them sometimes. I have had that problem before with only certain parts bulging out, and this may not be the answer you are expecting, but you can probably get the detail you want by simply using a normal map instead, or using both together, and just dropping a bit of detail out of your displacement map by lowering those “hi and low” values like you said. A normal map usually does the trick, unless i need the edges to displace, in which case I’ll just supplement it with displacement.
Oh, also doing a “reproject higher subdiv” may help. Just make sure to save a morph target, in case parts get blown out, you can use the morph brush to get them back where you want.
I actually want the fish in the foreground, so it needs all that good displacement detail. Yeah I just learned about reproject higher subdiv in the “did you know” tutorial forum last night actually. I’ll give it a go, although the polys aren’t really stretched or distorted too badly anywhere. Thanks again for the help. 
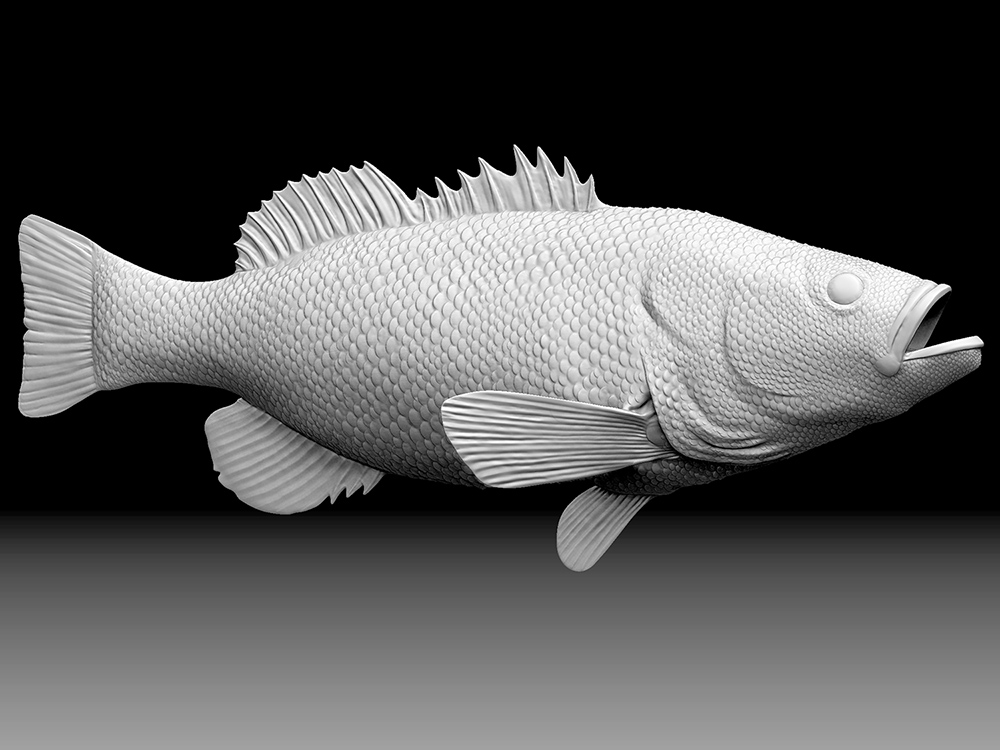
So I’ve gone on to continue sculpting, this was a test render. My assumption is that something is wrong with the base mesh that can be fixed. Hope I’m right. 
I noticed one strange thing. The original base mesh in modo was closed. After sculpting, using GoZ, then disabling the displacement in modo (to view the base mesh) one polygon under the left fin was missing. :qu:
Another odd symptom was that in modo, with the displacement active but without entering SubD mode (which is how you view disp detail) the base mesh looked blown apart. The polygons had separations between them. Hitting ‘tab’ to enter SubD mode connected it all again, but it seemed bizarre.
It will be a good day when I figure this all out. :idea:
, :mad: , , :mad: … 
The super noob has figured it out and, as expected, it was the indian not the spear!!!
For the record, a 200 quad base mesh was not enough to support this resolution of displacement. That I did not know. I simply deleted the first two subdivision levels, which brought the base mesh to 3200 polygons, hit GoZ and viola! I hate being a rookie…
I am having trouble with some of my models with GoZ and Maya.
I have a high detail sculpture which i made maps for and then made the GoZ button but Maya has script data loss errors and the model doesn’t appear there. Sometimes, even, i get the model but without a material applied to it, only wireframe.
Does anybody know why this happens?
Since i am new, I also have uncertain things with the mapping process.
Just wanted someone’s opinion this, and if it is the correct way of applying maps in ZBrush for Maya.
I work on a Mac 10.5 and with ZBrush 3.2.
So here i go, (currently using the Demohead):
After complete detail sculpting and poly painting i;
Make new texture from poly painting at the highest subdivision level.
I make a displacement map at the lowest sub with the following settings:
Adaptive = on
SmoothUV = on
mid = 0
Scale = 1
FlipV = on
3 channels = on
32 bit = on
DPSubPix = 1
I make a normal map on the lowest sub-level.
Before i go to Maya, i delete the lower sub levels 1-2 or 3, if they are very rough or ‘‘square’’ (Not yet sure if there is any need for this)
And i press the GoZ button.
I get the mesh with all the maps as well.
In Maya, i make the mentalraySubdivApprox1 to 0
In the render view i seem to get the right look in details.
Looks good, but doesn’t mean that it’s the right way.
And i wonder if i can start thinking towards rigging, binding skin and eventually animating?
Is there something here i am forgetting or could be doing in a more simple way?
Thanx, in advance.
I don’t use maya, but in modo, your mid value should be 0.5, so that the displacement can add and subtract from the base.
Nevermind, the indian’s at it again. I thought I was in, but now only the top of the dorsal is still bloating, just a lot less. It’s very close, but I’m still trying to figure out how to throw this spear. Now I’m onto trying retopo to see if it helps, and I’m having about as much luck with that. :lol: I’m just no good yet :td:  :td:
:td:
Why didn’t I listen to you Snuke? You sounded so confident in your advice, and I just didn’t catch on!
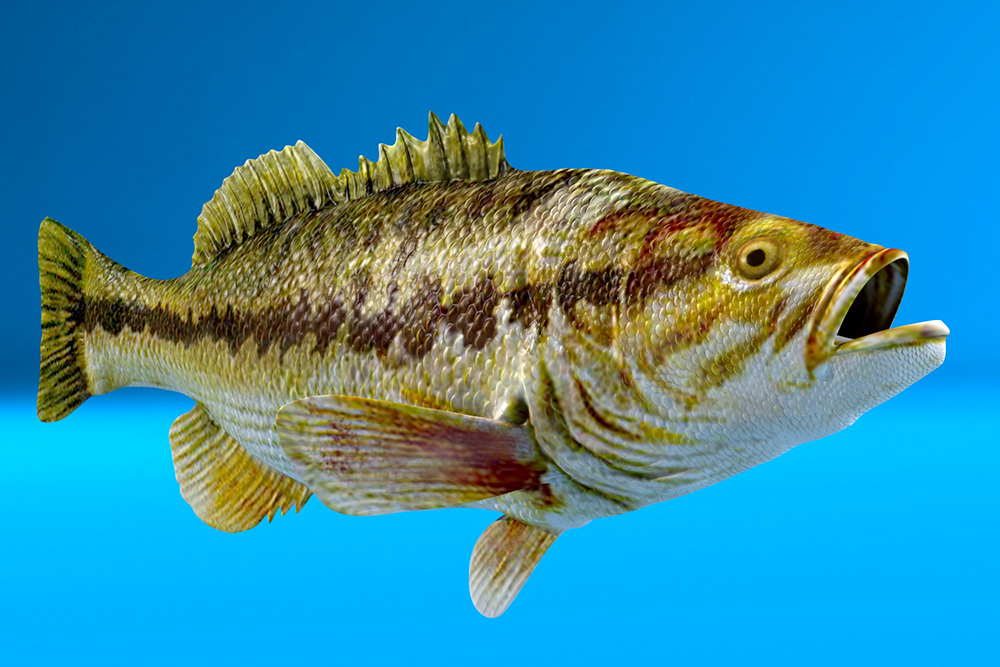
When I thought this wouldn’t work due to a weak silhouette, the base mesh was around 3k. Then it dawned on me that modo can handle a decently heavy mesh if it doesn’t have displacement. So I got rid of subdivision levels until the base was about 50k, and followed your suggestion. The normal map rendered beautifully at a blazing speed.
This image rendered originally at 1000 x 1500 w/ some environment and global illumination rendered in 18 seconds! Whoa! Then I doubled the res and it only increased to 45 seconds!
The beauty of it all is I use the renders for artwork, and loosen them up a lot. I can easily spice up the silhouette with the Photoshop’s liquify filter and freehand painting. This, ladies and gentlemen, is an acceptable solution. (sigh of relief) Thanks for helping Snuke!
As you can see, it still lacks a perfect silhouette, and I need to tweak the render a lot to achieve the same depth. But given the time I could save rendering these normal maps, it might be more efficient to tweak the edges in post work anyways. I’m shocked at the speed!
Original wip sculpt
Attachments
Lighting is important. I think with a subtle area light to the left all those ZDetails would show. This is close enough for today. 
Glad to help! Render looks really great!
Better than my fat lip fish on the previous page! :lol: Still needs a lot of love with sculpting and rendering, but it’s a wip. I hit the brakes on it when the test render screwed up. It’s difficult to justify more sculpting when the test render looks like it’s had collagen injections!