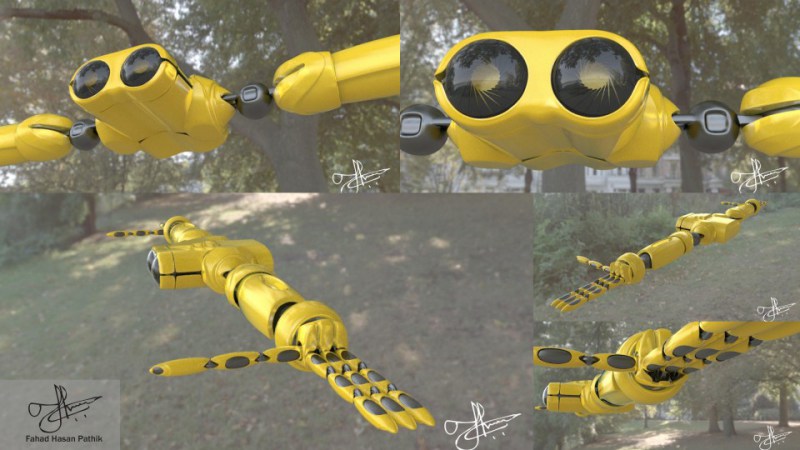
About the dream:
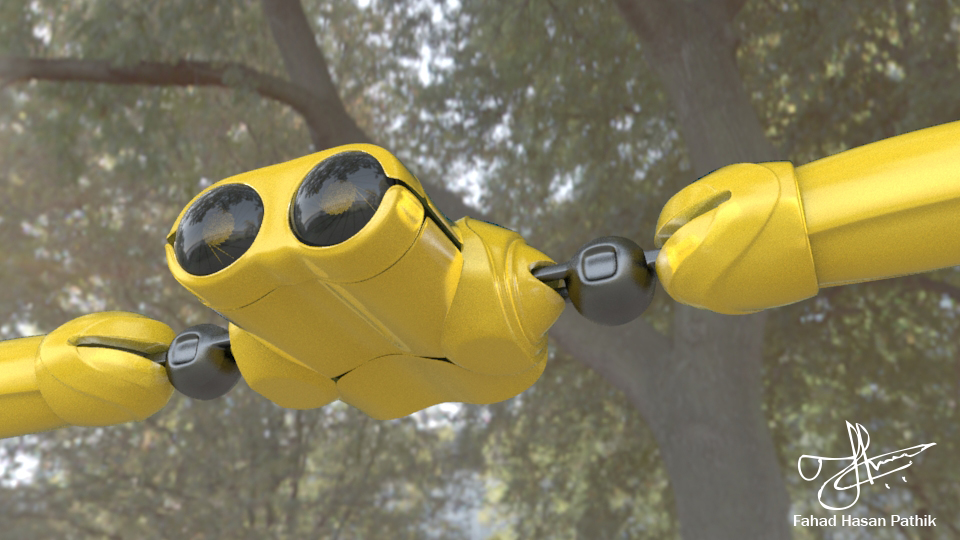
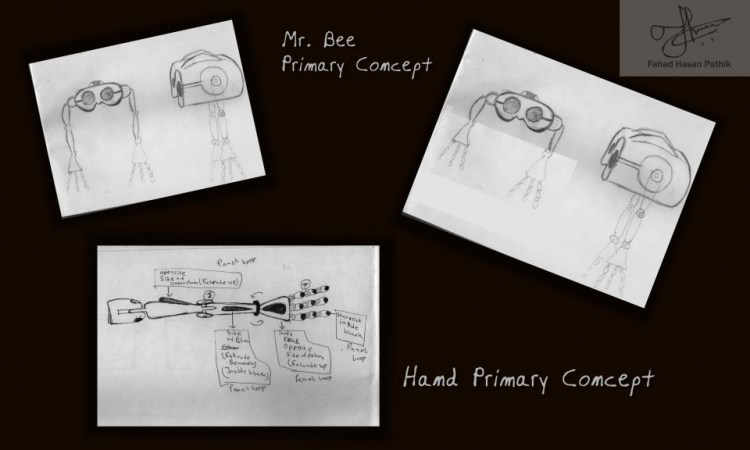
For several nights I was dreaming a wonderful creature. Well, not a creature but a live machine. It was an adorable flying robot. Small, gentle, friendly, kind of a cute one. It was yellow with black stripes, more like a bumble bee. I ghastly remember this flying robot was playing with me more like my cat. So, I wake up every morning after that dream and had decided to take it to the next level. I cross all my professional busy schedule and start to recap my dreams. The figure was not that sharp from my dreams but after doodling with some sketches the primary silhouette was like this.
SKETCHES
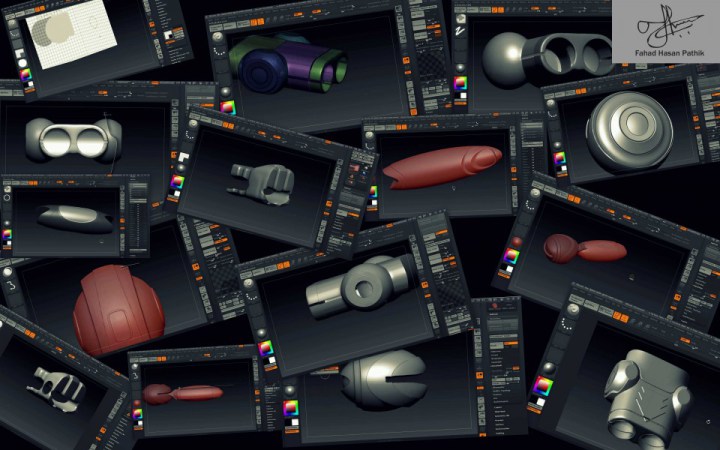
Conceptualization in Zbrush (Hardsurfacing awesomeness):
Just for concept I pick up this sketchy guy and get settled to my desk. First I tried with Maya to make it up. But it had become more technical rather than fun. So I shifted my conceptualization base totally to Zbrush and start doodling with my character body parts in Zbrush. Zbrush’s handy HardSurface tools just amaze me with such flexibility that now I have decided to make every conceptualization in Zbrush.
Zbrush WIP
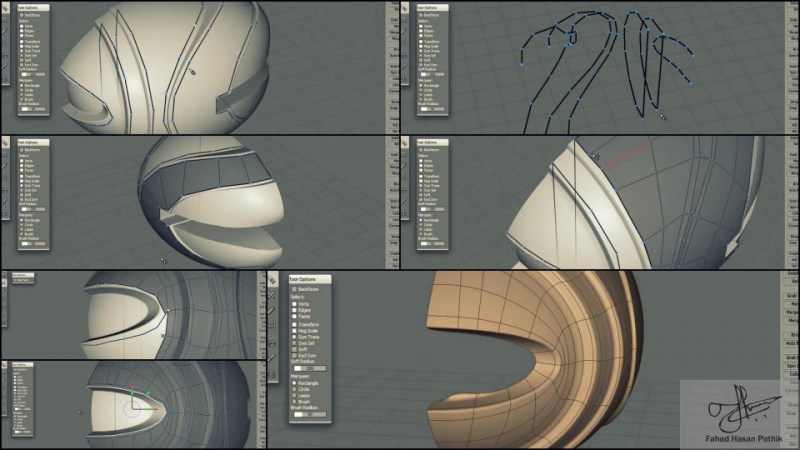
Topology: Zbrush Zremesher awesomeness and Topogun v2 draw and extrude operation flexibility:
After finishing my concept I went to Topogun first, but unfortunately it was a heck of time consuming process. Then I had started researching for a easy way, and Zbrush ZRemesher had come handy. Though it is for organic topology but I kicked my limits for hard surface in any way. Later I made bunch of tutorials on how to retopo within Zbrush with Zremesh for hard surfacing. Here’s the link:
http://www.youtube.com/watch?v=zXUlBbrecug&list=PLtGoMmi2oK5-VOj3j02gWoPcPLYbdI0CL&index=1
So I set my pipeline on this and start retopo. But for some critical objects I have also used Topogun v2.
Now Topogun v2 has their awesome extrude option I have used its possible best way and now the time consuming process has reduced not dramatically but still enough to cover.
Topogun WIP
UV warping: Again Zbrush awesomeness of UV master.
Well, the next level of UV warp revolution is UV master. I have used it totally for UVing in a fraction of a minute. 3 Hours done in 10 minutes. Hats off.
USING UV MASTER
Modifying Objects and Final mesh selection: Maya awesome Subdiv smooth preview and awesome 2014 modeling toolkit:
Always my best choice for 3d App was and is Maya. With their awesome modeling toolkit I have modified my concept to the next level and fixed some issues like physical possibility and placement accuracy of objects. I have used maya also for tiny details and eye shutter, head joint sockets etc.
Maya Still
Shader and Texture:
I have used Vray standard shader with flat colors, no need of textures. I Have used Vray for the test.
It’s Rigging time now…
Attachments