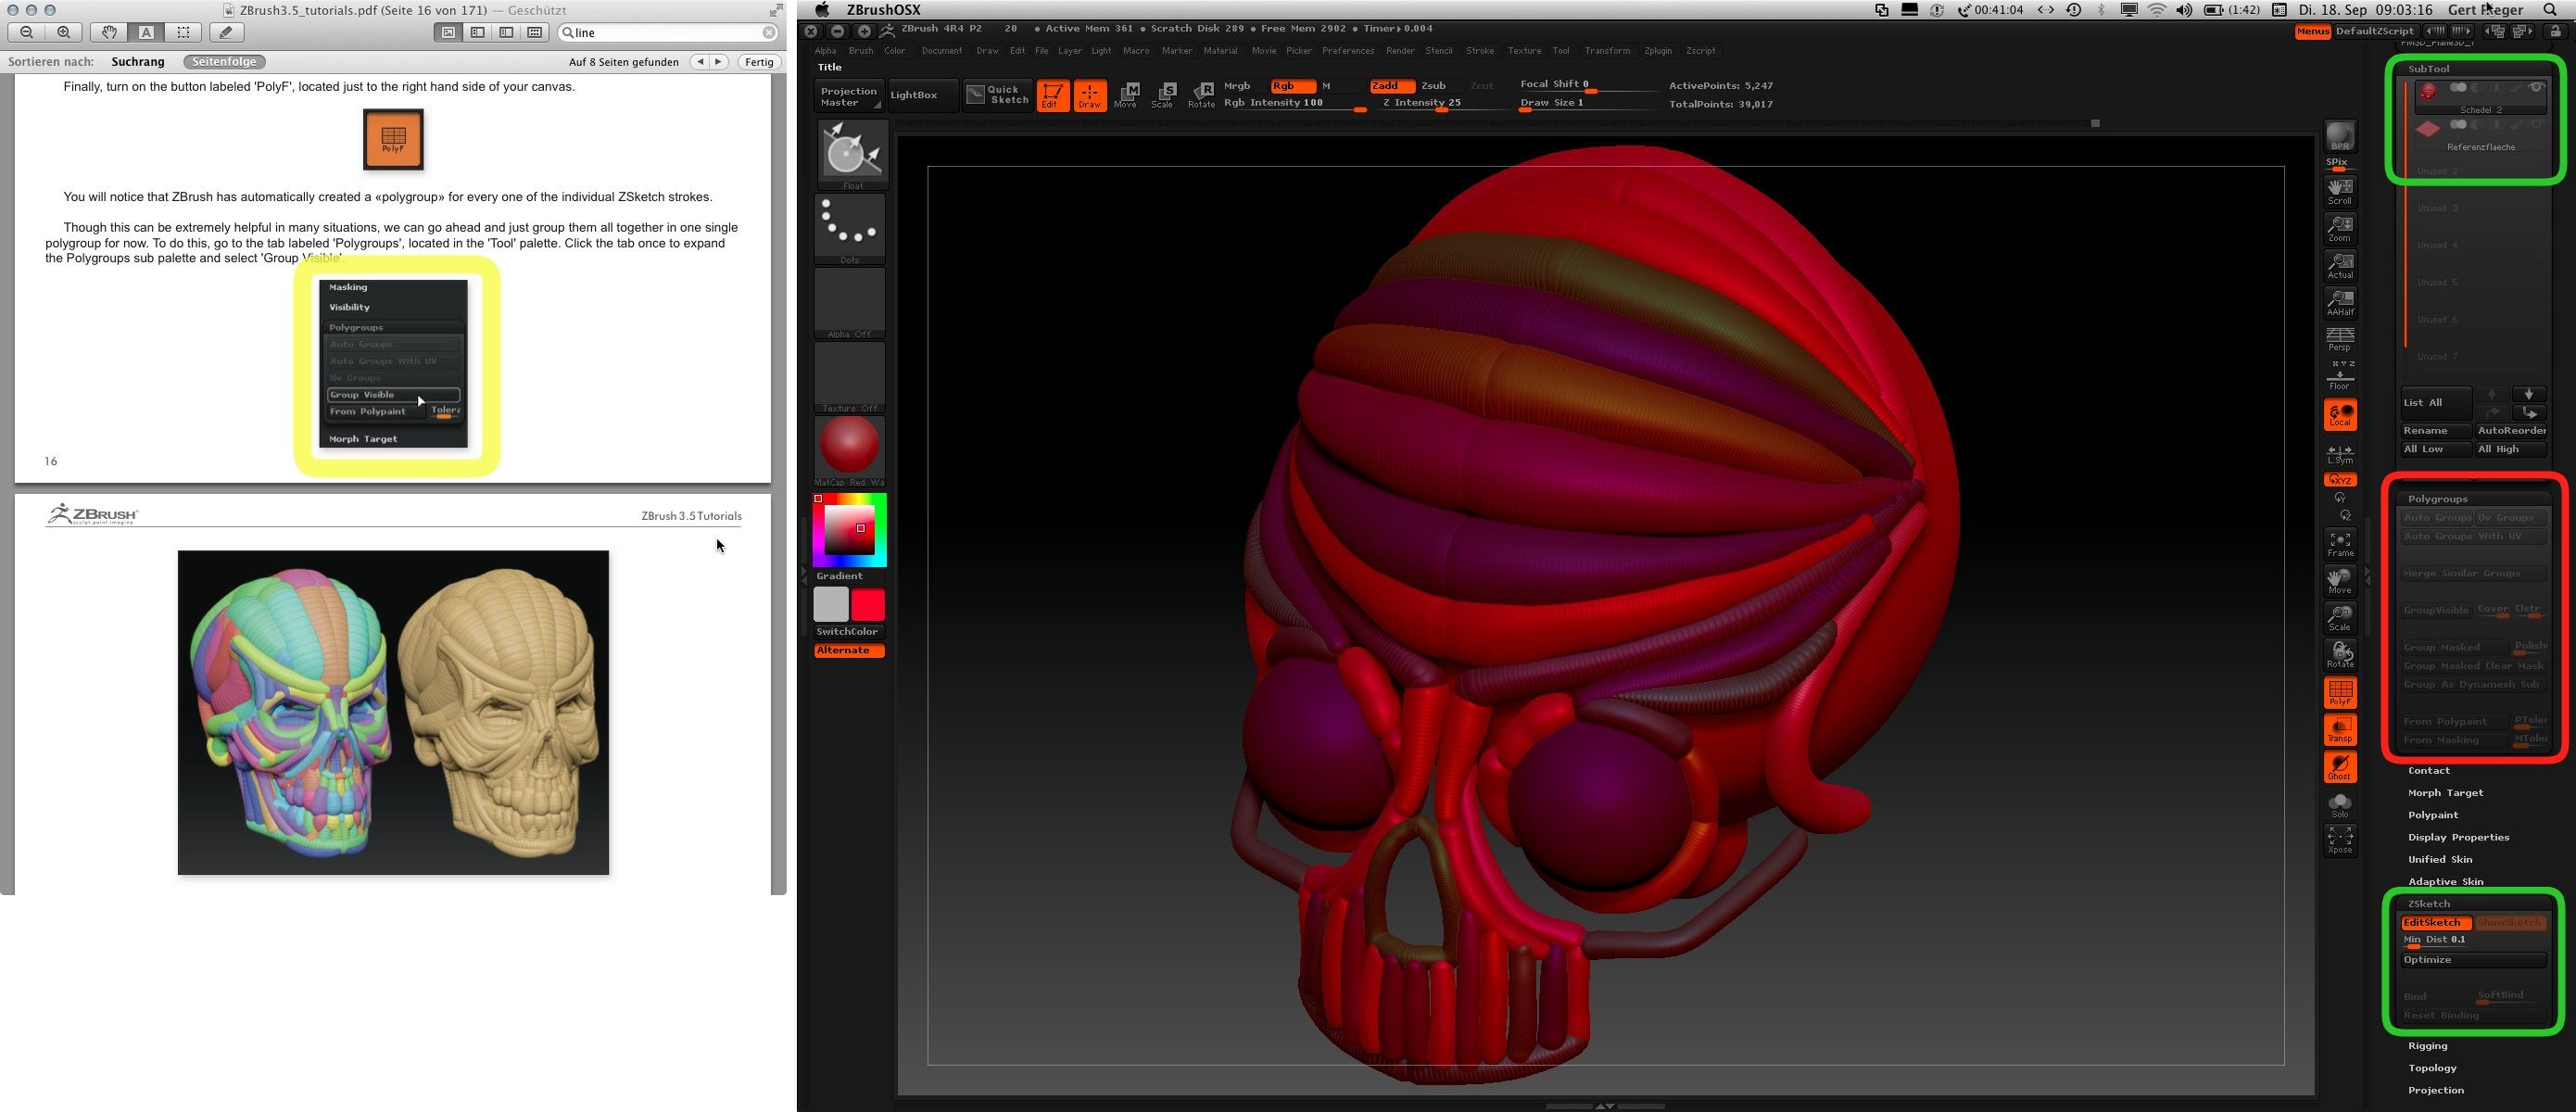
The ‘Polygroups’ palette is greyed out because you don’t have ‘Tool > Unified Skin > Preview’ turned on. Unified Skin is the skinning method used for ZSketch. Once you ‘Group Visible’, you will have to make the Unified Skin a Polymesh3D so make sure all the necessary settings changes are made in the ‘Unified Skin’ palette first (I think Ty just uses the default settings). If you don’t click ‘Make Unified Skin’ button at this time, you will get an options popup when you try to turn off the Unified Skin Preview telling you the skin has been modified and to make it a Polymesh3D or discard the changes (Group Visible). At this point, if you chose ‘Yes, make a Polymesh3D’ (same as ‘Make Unified Skin’) from the popup (which you should do), then a new Tool will be added to your Tool palette with a prefix of ‘Skin_’ added to it so you can easily identify it. You can go ahead and do that as, at this point, is what Ty is doing in the tutorial anyway. Your ZSketch is still intact and can be saved as such (as Ty mentions) once Unified Skin Preview is turned off.
Keep in mind that if you are following tutorials from older versions of ZBrush, that you are bound to run into differences in the UI or steps taken in the tutorials.