The windows look like they’re very small bits of surface detail. You have to ask yourself if they’re really going to be under the kind of scrutiny that would require you to worry about how smooth the lines are. Is any stepping going to be visible from the angle people will be viewing the model? Does every bolt head need to be perfectly round, or does it just need to catch the light at a certain distance?
That said, there are many ways to increase subdivision locally where you need it. You can partially subdivide the areas of your model where you need the most detail, by hiding or masking out all but that which you wish to divide, and subdivide at the lowest Sub D level. You’ll likely be decimating and using Zremesher after the fact to generate better topology, so it doesn’t matter how ugly you make it at this stage. Likewise you could use Zremsher now to generate a new mesh with better distributed polygons. Zremehsher has multiple options for delivering more detail where you need it. I suggest you read up on the tools Zremesher gives you to work with:
http://docs.pixologic.com/user-guide/3d-modeling/topology/zremesher/
Pay especially close attention to the ability to use it to remesh geometry locally, and the ability to paint varying degrees of polygon density. So you could Zremesh your model for better topology that delivers more polygons where you need it, subdivide, then project your detail from the original model and keep working. Note that at 5 mil polygons, it’s probably a good idea to decimate prior to running Zremesher to keep it from buckling under the burden of so many polygons.
As for what you are trying to do with the windows, I originally had a lengthier post detailing the many approaches you could take to this in Zbrush, but I decided that the easiest one (and the easiest to explain), is simply to use good old fashioned Projection Master. I wouldnt bother with mesh insertion or dynamesh subtraction for such minor surfaced details. PM excels at stamping in minor surface details, and gives you a lot of control over placement. It will take a bit of time, but not nearly as much as what you had been doing, I don’t think. They key is to have high enough subdivision level to hold the details, and to move section by section, stamping in small areas at a time. Since you already need to distribute your topology better, this doesn’t change your present situation.
See the attached image for illustrations.
-
In either ZB or a program like photoshop, make a triangular alpha the shape of the windows. See ZB documentation for more info on alphas. If you make it in photoshop, you might want to put a very slight guassian blur on it to soften the edges a fraction.
-
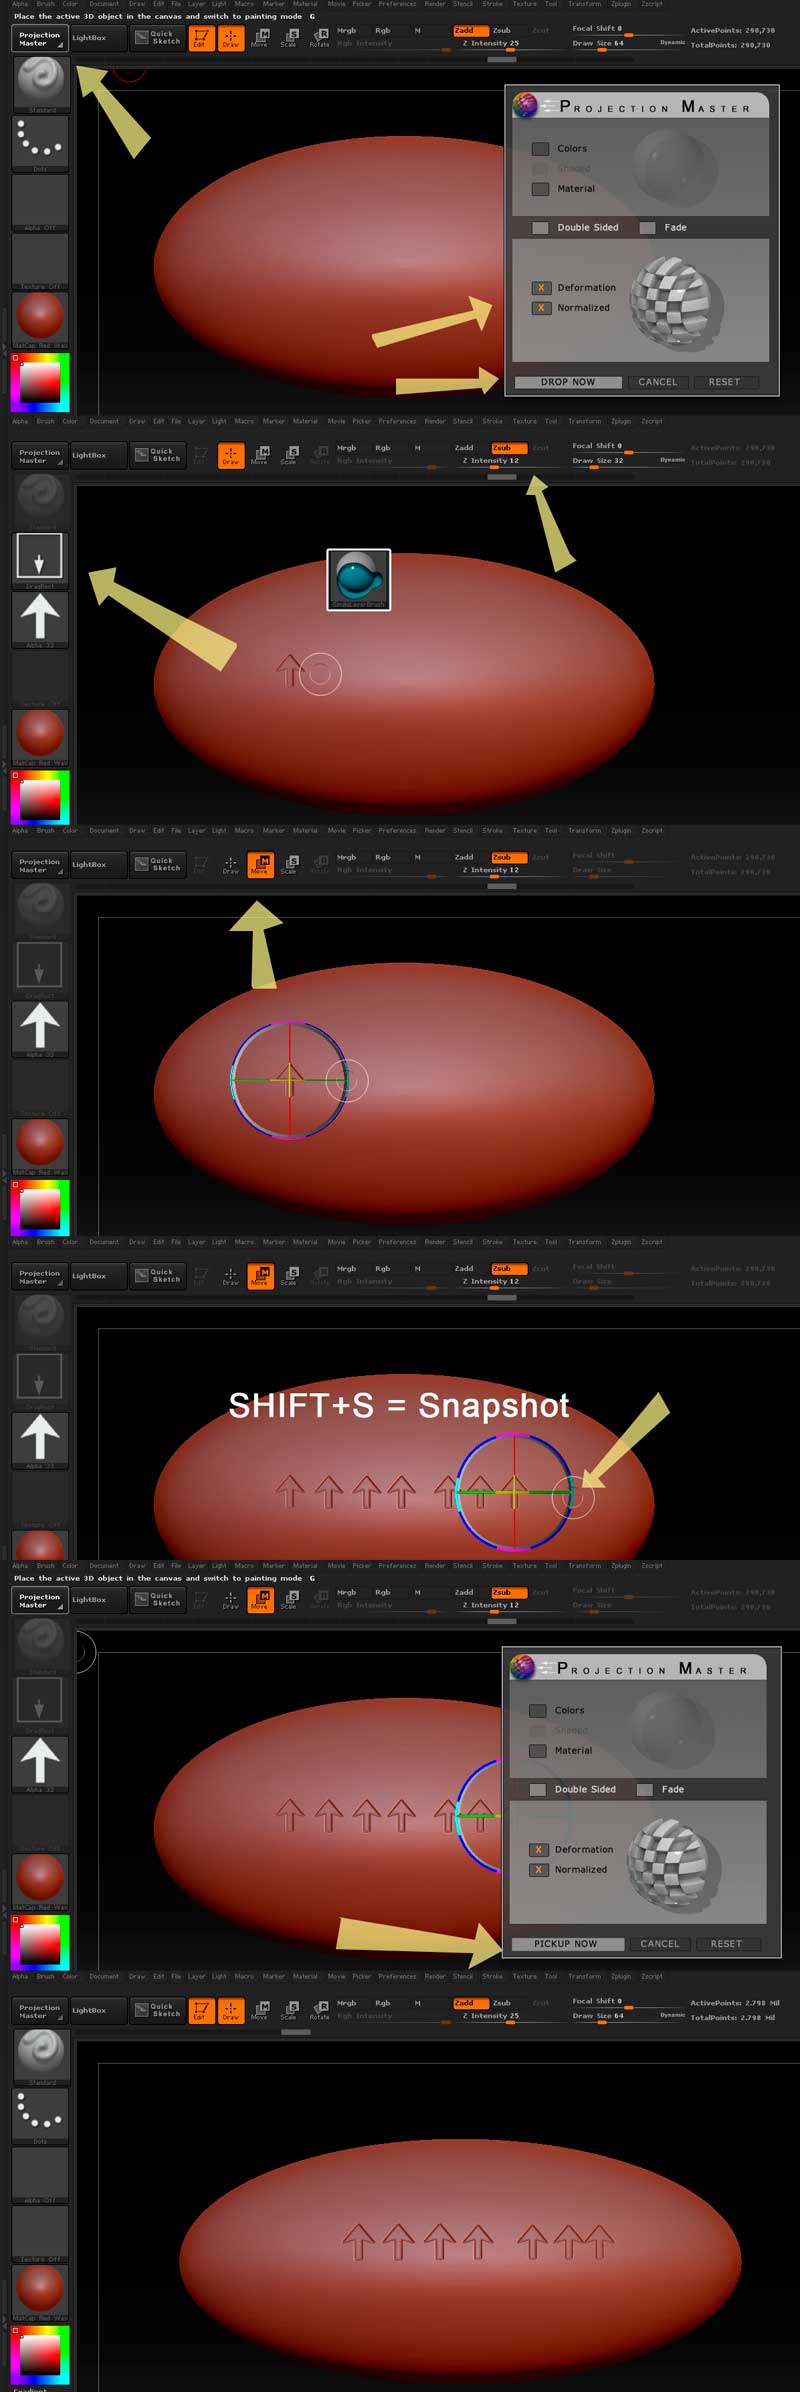
Zoom in to the desired degree, and enter Projection Master, with texture painting off, and displacement and normalization on.
-
Import your alpha, and attach it to the Single Layer 2.5d brush , with a Drag Rect stroke type.
-
With Zsub Active draw the window shape the size that you want, with the amount of depth that you want as determined by the Zintensity slider. The deeper you go, the higher mesh resolution you may need. Your windows look pretty shallow. It may require some experimentation.
5)Before making another stroke or performing another action, change the brush operation from “Draw” to “move”. This will bring up a manipulator. If you drag directly on the edge of the X axis, you will be able to move the stroke placement constrained to horizontal movement.
-
When placed as desired, press SHIFT+ S to “snapshop” the stroke, freezing an instance of the window in place, while still allowing you to reposition the active stroke. Keep dragging the window along, snapshotting as you go.
-
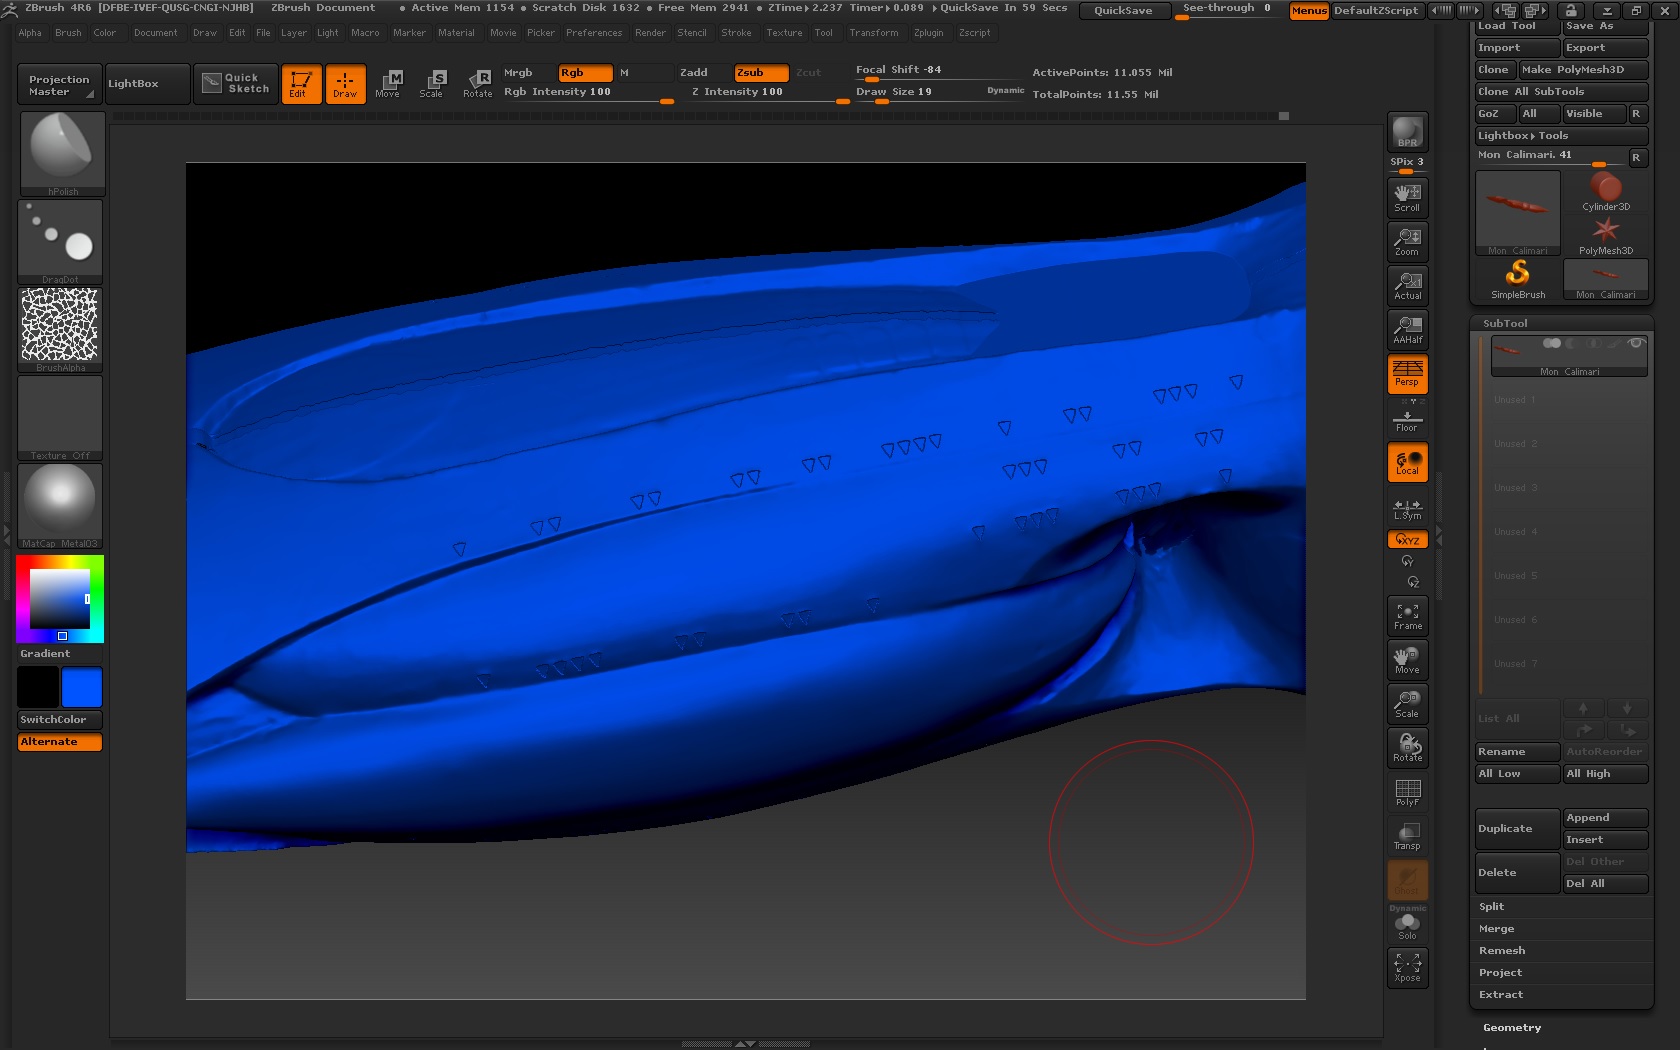
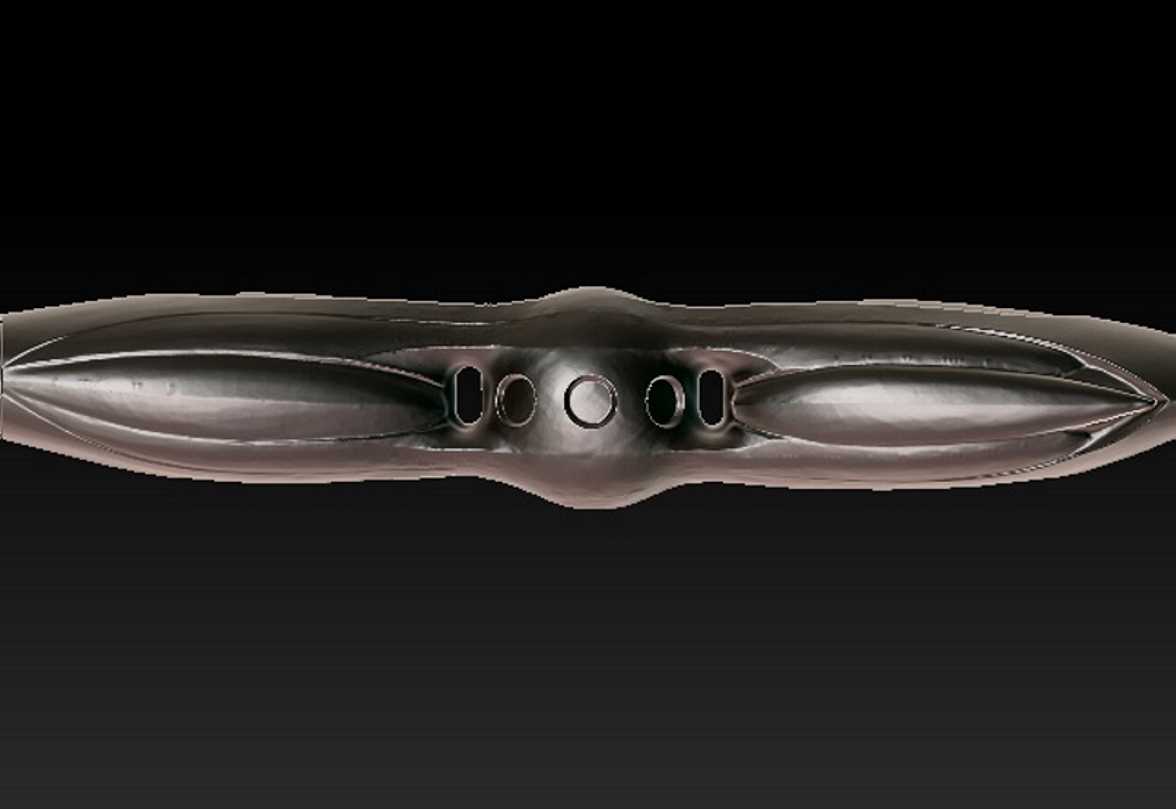
When you have a series of windows placed, switch back to “draw”, Hit PM again, and pickup the tool. The details should be stamped in. Quality will depend on mesh resolution and alpha quality.
Tips:
*Save in between every successful stamping, in alternating files. I detected some buggy behavior with PM in Zr6, and experienced a crash as well as a couple instances of odd behavior.
*Stamp in small areas at a time, and on a model with a strong curvature like yours, try to keep most of the stamping isolated towards the center of the screen, with the mesh centered on the target area. The farther out you go, the more likely the alpha is to distort from the curvature of the model.
*You could also add the alpha to Spotlight and do the same thing in real time, but I find the process much less direct and more fidgety. Spotlight’s complexity is a bit overkill for this sort of operation.
Sorry for the Wall of Text, but I saw that you’re still struggling with this after a week, and your post is about ready to fall away from people’s notice on the front page, meaning replies from here on out will be increasingly rare. Areas for study: Alphas, Projection Master, Polygroups, Subtool projection, Zremesher, Brush Palette Controls, Slice Brush, Decimation Master.
Good Luck!
Attachments