Hello all this is my 1st post and sadly its down to a texturing problem I am having. OK been reading through the whole plethora of tutorials on fixing seams and I still seem to be getting nowhere fast, As a 3ds max 9 user its hard to get the limited info that there is for a good solid max to Zbrush pipeline that works flawlessly (and yes I have read and d/loaded the official guilds also  ), but more then likely it is probably me that is hopeless at incorporating the two to work together successfully. I really have waisted so much time on this and would really appreciate if I can now finally move on. Therefore I hope you good talented people really can help point me in the right direction.
OK my work flow:
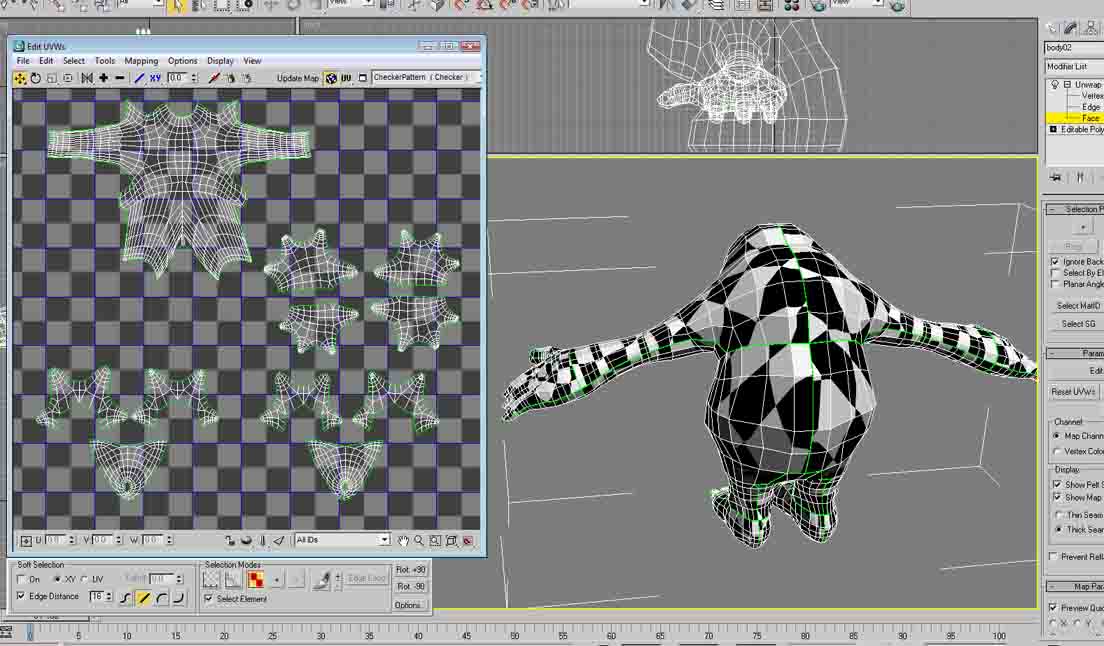
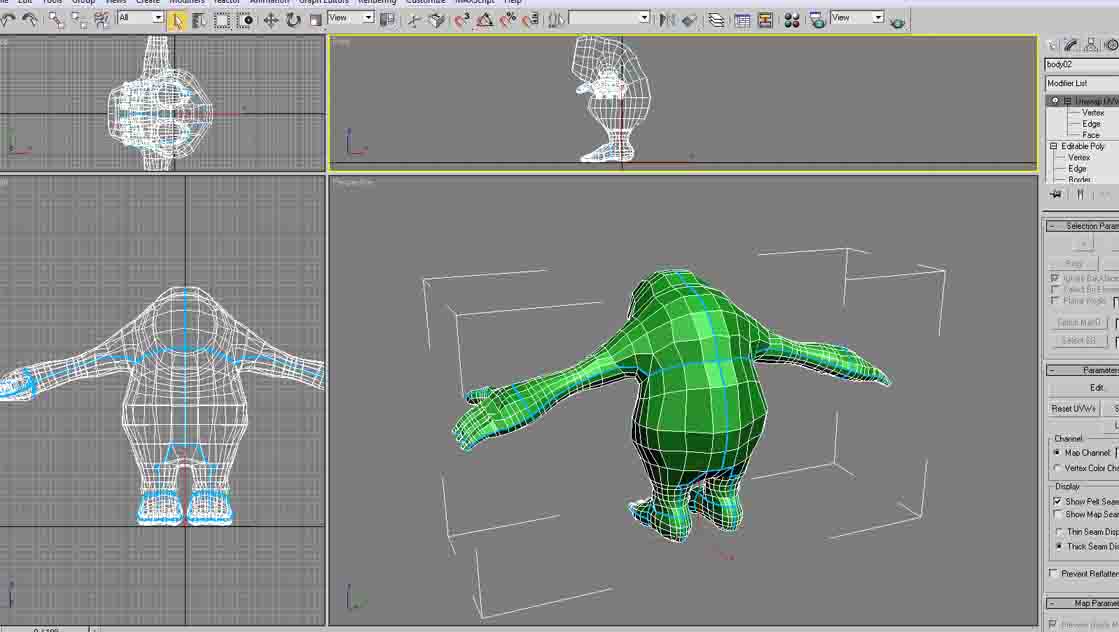
I began modelling my character in 3ds max as a low poly model, pelt mapped it checked for inverted and overlapping faces, which their was none ( well after I had finished correcting it by the 3ds max relax tools and so fourth). my UV was rendered and saved at 1024 by 1024 n order for decent detailing work.
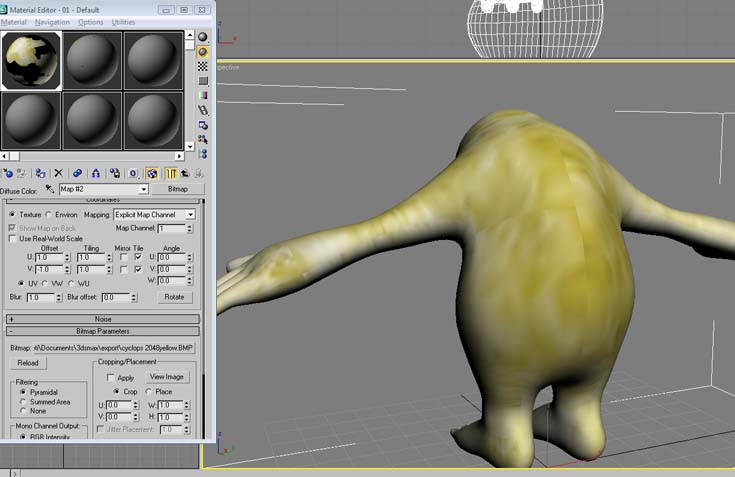
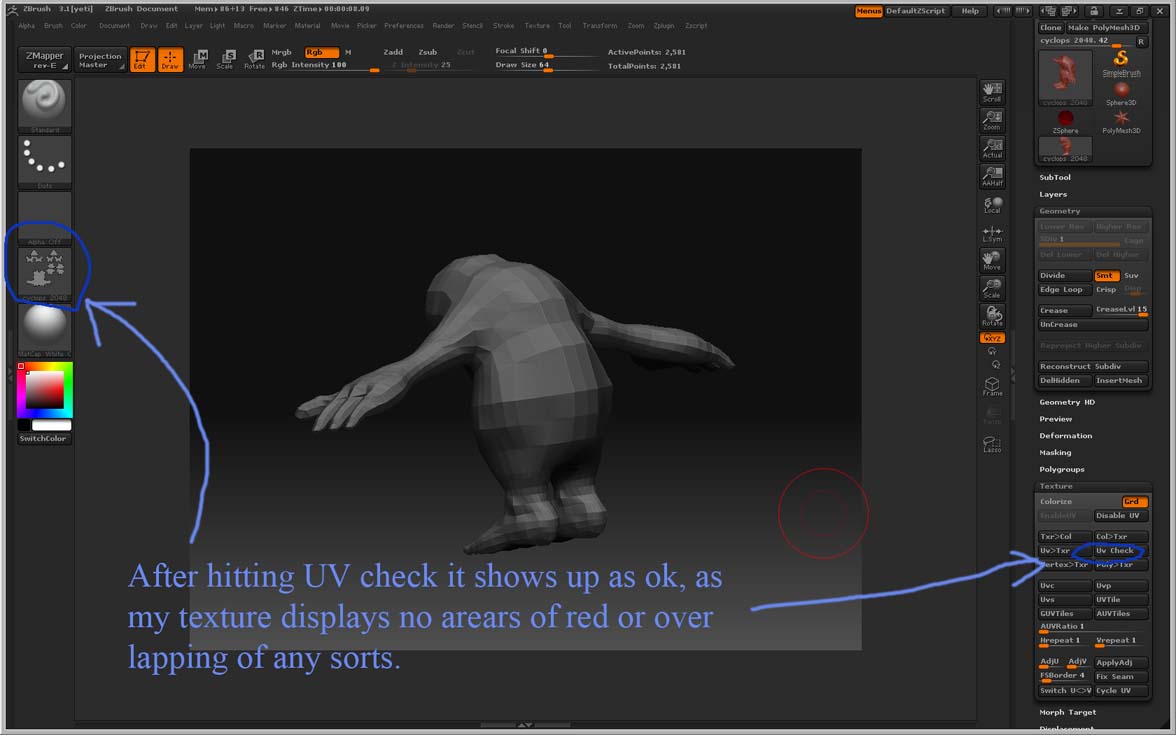
I then exported it as an obj to have my character UV textured using the poly paint tool in Zbrush 3.1. I hit the store morph target and sub dived up to 6 times giving me around 2.657 million polys to play with. Then I made sure that Zadd was turned off and only the RGB tab was on, as I only want to paint texture not add any materials at this stage. I also did the UV check and all was well and good no over lapping or inverted UV’s. Then proceeded to poly paint and when finished pressed the colour to texture tab to give me my texture map which I could then to export back to 3ds max9.
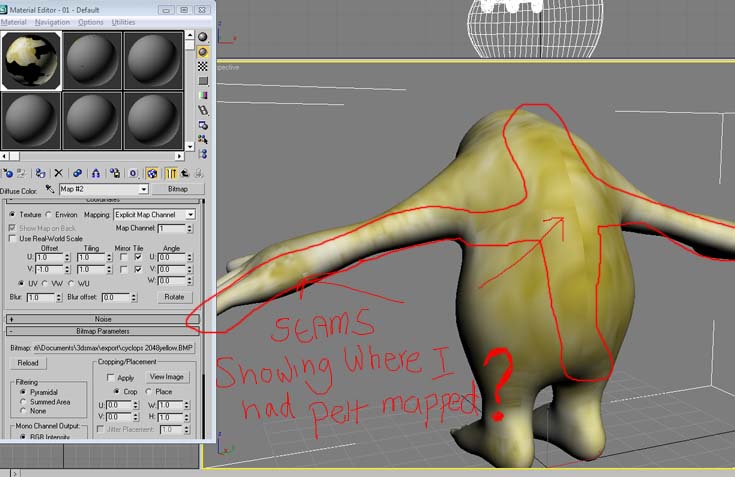
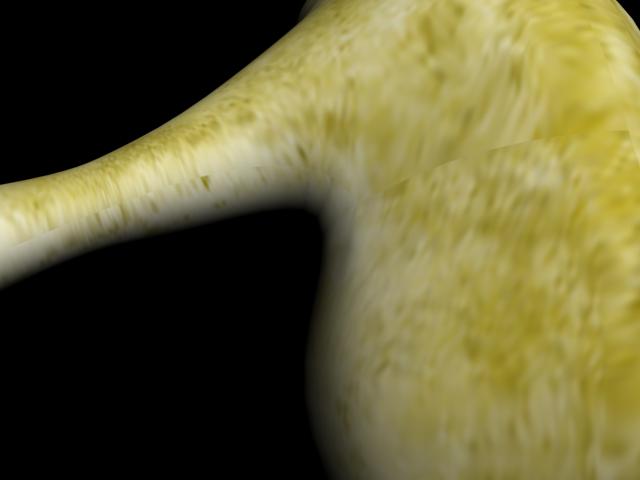
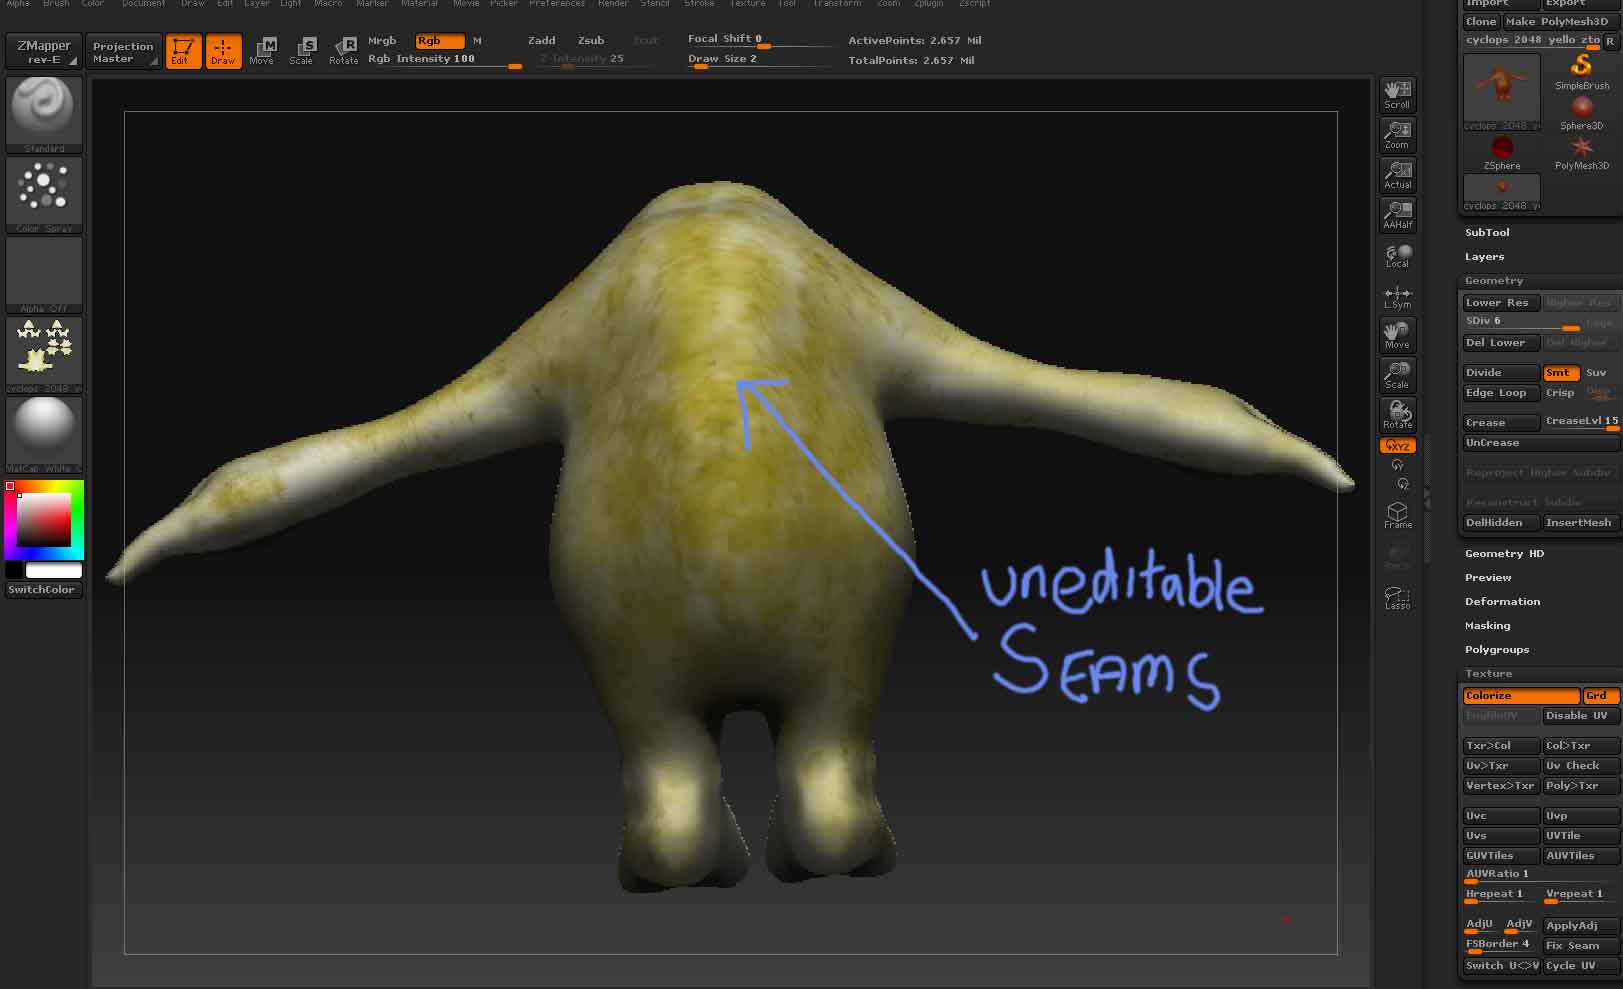
However here lies the stumbling block after I press the colour to texture tab the seams then magically appears (the same seam lines used for my pelt mapping inside of 3ds max ). when ever I switch back to poly paint mode it disappears but then when I want my texture map to be displayed (pressing col to texture tab) it reappears again…? So after this I have probably tried much of the tutorials on how to get rid of seams and none of them seem to work. I even tried the Zapplink in a vain attempt to see if that would solve the problem and again nothing. I just cant seem to get rid of the seams even if I try over painting it within Zbrush or external packages such as Photoshop. Even the fix seams tab as no effect on it along with the FSboarder tab in Zbrush which just movies the texture around the seams? I also tried to export the textured model back into 3ds max and then have it rendered out, but again the seams are more then visible there too (also tried turning of anti anti aliasing in the renderer dialog box in 3ds max)
So if anyone out there can help me I would be truly indebted to them for ever, as I just don’t seem to get past this stumbling block and has gone past the point of my frustrations. I really truly love Zbrush it really is the best thing since slice bed and really want to continue to use it as within a major part of my work flow, but if this problem continues to persist then what little else choice do I have but too end up trying/learning god forbid different new software to solve these problems which I really don’t want to ever have to do…! 
I have also taken the effort to provide you with reference images to help enable you to visualize my texturing problems…
Again please help me! 
3ds Max 9 pelt mapped model:
Attachments