ZBrushCentral

**** Pixologic Release: UV Master (WIN & MAC)

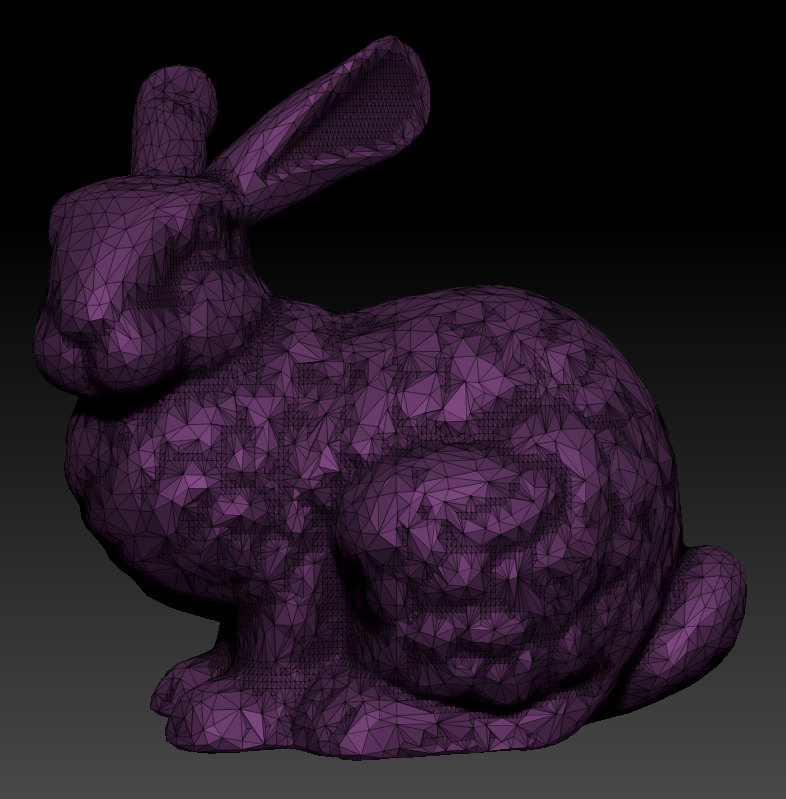
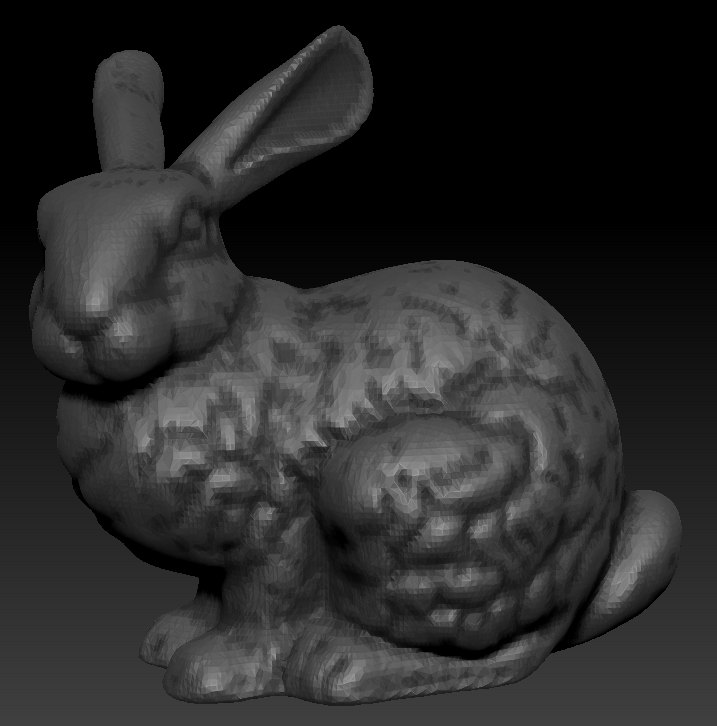
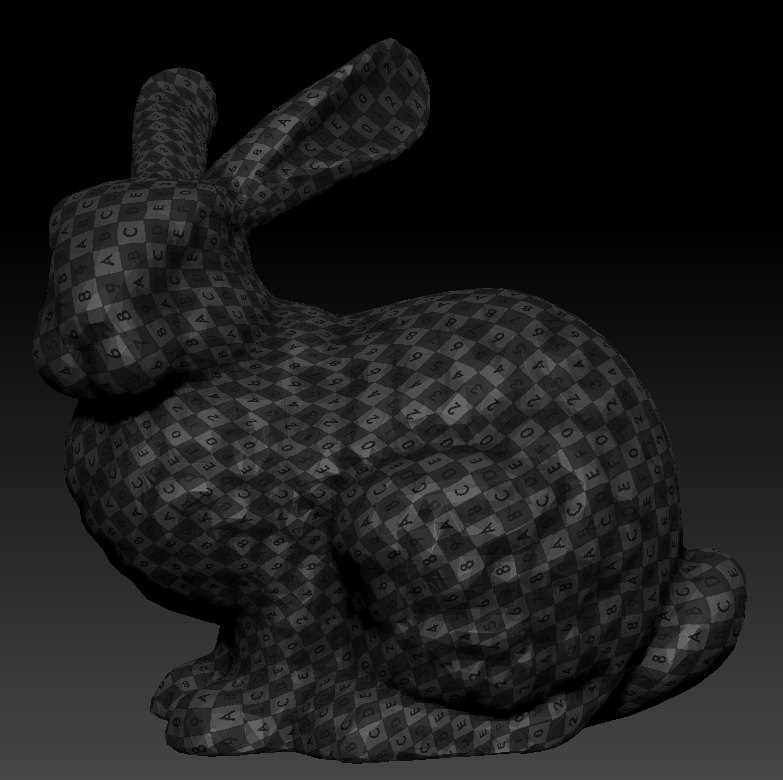
Gareee: I just did and it was even easier than i thought hehe. Have a look at the screenshots below from my little experiment using the cavitymap technique i mentioned above for polygon decimation. It works beautifully! :slight_smile:
Now you can preserve detail only where necessary, this will ofcourse also work with polypainted maps to control the decimation level in certain areas of your mesh.

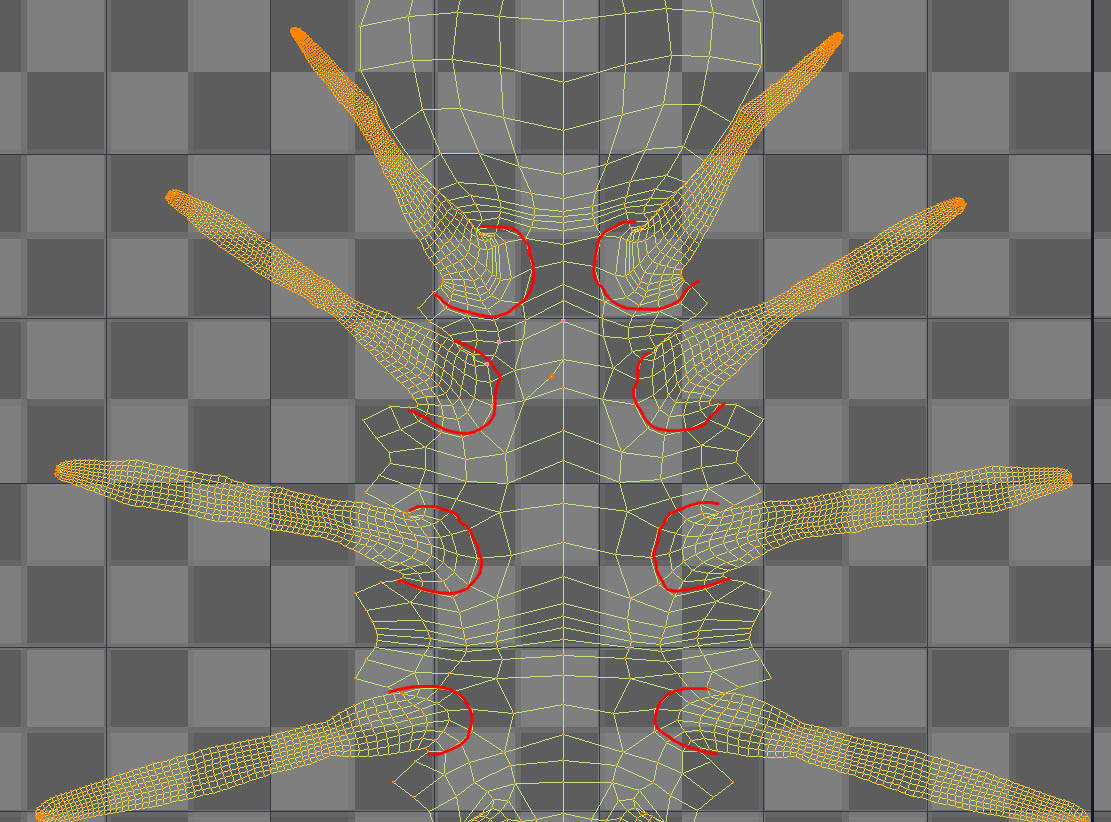
Generate a cavitymap for your model
[Bunny_cavitymapped.jpg]Bunny_intactUV.jpg

/ Magnus

Attachments

Bunny_decimated.jpg

hey there.

i just tested the uv-master in my current project. it worked perfect!
zbrush model, zbrush retopo, zbrush polypaint&texture, zbrush UV-Layout and then 3ds max rendering. it works just fine for me.

it is the fastest way to create useable uv-coordinates.
like always: AWESOME WORK PIXO! love the extension very much.

thanks! :+1:

For Decimation Master, as you may have noticed, the Mask is protecting for decimation. Then you should inverse your mask if you are creating it from the cavity. I know it’s for a sample purpose, but I prefer mention it!
And for ā€œthe funā€, you can also create your UVs with UV Master on the decimated mesh. The Decimation with the UVs preserved require a lot more memory.

Very cool! You could also reduce polys further using a de trangulate tool in lightwave, or something else as well, if you really need to reduce polys further.

I didn’t know that the decimator uses the masking to decide on how much to decimate by. That’s super clever!.

Don’t forget that reading the manual can be helpful :lol:

Sorry if this has been mentioned before, ive tried searching google etc. Im pulling my hairout, everytime i use UV master and import a model (obj) into 3dmax 2010, drop UV unwrap on, click edit, everything looks fine apart from every vert needs welding back together within 3dmax uv editor. Any ideas why this happens? i tried ticking/unticking all export obj opitions etc but same same all the time.

Also has anyone had any joy unwrapping fingers/toes? UV master works great for heads/bodies/legs etc but im having trouble with hands/feet. Im using polygroups with protect/attract options but cant get seam in the right place. any ideas?

thanks in advance. im abit of a noob in zbrush.
regards
Montana

Attachments

zbrush3dmaxerror.jpg

In the export options select Mrg and deselect Grp?

Richard

Richard that worked! Cheers mate can’t thank you enough!! I’ve been trying to work that out for hours! thanks once again.

One more question, any ideas how to get seams where you want them in UV master? on the fingers/toes im having trouble, ive tried polygroups attract, protect etc?..is it not very accurate for fingers etc? or am i a fussy git?

cheers for helping me!

best regards
Montana

Sometimes it is hard to get seams precisely where you want them. This is not the app for that. You can do just about anything with this app but try to let it work its magic for you.

I have noticed that if you do not click flatten then unflatten before painting attract protect areas, sometimes it does not register until you hit flatten unflatten then unwrap again.

Good luck!

THanks for the tips aberant, One question, when i import my Obj into 3dmax, why do i get this clipping when i zoom into the model? pic attached. The model/view port doesnt clip like this within 3dmax before exported to zbrush. strange. any ideas?

Attachments

clipping.jpg

It is a combination of scale and camera clip distance.

Your object is too small in 3DS max world. Since your camera has a clipping distance (lets say its set to 1 foot) and your model is only 1 inch high… it must zoom in closer than a foot to fill the screen and you get this clipping.

Two ways to fix it, one is to adjust the camera settings and make your minimum clipping value close to zero.

OR

Simply scale up the object and this should be solved.

Thanks mate, i will give that ago, really appreciate your help!

I don’t often post but may I just say that UV Master is TOTALLY AWESOME! I was working on something and was trying to map it in UVLayout for something like 5 hours with kinda eh results. I decided to bite the bullet and use this and had EXCELLENT useable mapping in about 8 minutes and that was with reading the tutorial and then making the maps LOL Kinda made me mad about the 5 hours I wasted not using it ROFL Anyway incredible job on this! :slight_smile:

Hey, I tryed the Plugin, but even if I protect the face of one my model and attrack the backside, it through my protexted area, the face…
I really a bit frustrated right now, is it possible that the plugin dont works with open edges?

di uvmaster is applicable to zbrush 3.5R2???:smiley:

i don’t think so, i tried on 3.1 but it didn’t show up, so i upgraded to 3.5r3.

UV Master is for ZBrush 3.5 R3 WIN and 3.2 GoZ Mac OSX. Both are free upgrades :slight_smile:

Sorry about this but im still get UVs verts not merging, i’ve enabled <img src=ā€œhttp://www.zbrushcentral.com/pixo/atn.gifā€>Mrg and untick Grp, but when ever I import into Max the UVs still arent fixed. Please help ive got deadline Friday!!! pulling my hair out ! Ive attached pic show my problem. Usually selecting Mrg fixes it but not this time, iv’e tried 20 times now still no joy. please help if u can?? many thanks!!!

Attachments

UVs.jpg

montana2008

I would separate your uv shell following the image attached.
Layout/flatten the shells in zbrush then stitch the sheel together outside zbrush.

You can re-import the final geo back into your ztl.

Tripple your mesh by running a ā€œcleanā€ operation in Max (maya has one) or use the ā€œcheck mesh integrityā€ in zbrush.

hope that helps

Attachments

UVsEdit.jpg