An other hairhead. I like those fibers more and more 

An other hairhead. I like those fibers more and more 

***54588;***48512;***51656;***44048;***44284; ***51088;***50672;***49828;***47088; ***54364;***51221; ***44536;***47532;***44256; fibermesh ***54364;***54788;***51060; ***51339;***50500;***48372;***51077;***45768;***45796;
Hey Baz
You are getting some nice results with fibermesh. Some helpful info in this thread as well. I have yet to do human hair but it seems like the longer it is the harder it is to control.You seem to be getting the hang of it.
I get the hang of it but it still takes a lot of time. After making the basic shape there is a lot of work to do. Top-hairs are diving under the underlaying hairs and in the most cases it looks like there is too much gel or glue in the hair.
I hide parts, make groups and mask the other parts to groom. Mostly I use the longhair groom brush and set all sliders to zero except the ‘preserve length’. This way it’s easy to pull the hairs. Pushing hairs back is different because they get distortion, I always work from the root to the tip and from the underlaying hairs to the hairs on the top. To push the roots more flat I use the Inverse Propagation slider with a low setting, so the tips are not moving. With the PRE Vis slider at zero it’s more easy to make the basic shape. I also push this slider up to check all hairs have the desired direction. When I’m happy with the basic shape I need more irregularity. I hide real small parts, group the visible and mask them. Then I start pulling and grooming those small groups of hairs. For the gray hairs I did the same, lot of work…
It should be great to have a slider to hide or mask a random percentage of the hairs!
Yeah, you’re getting great results!
Cheers!
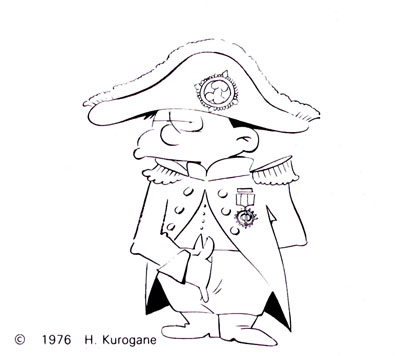
PS: I still owe you that Manga Napoleon-image scan.

Amazing, awesome work!
Thanks for you reply  Here is a small update, I changed the hairstyle and removed that stupid hat. And of course she is more attractive now…

a beautiful sensible portrait. also the hair looks great, strong and yet soft! Great result man , maybe you can tell us a little of your fiber settings:)
I definently like the warm skintone on here aswell, is there a noise filter on top of it?
Overall a great result and looking forward seeing more from you!
All the best,
Wow, Great character.
I love the attention to detail you have. The only comment would be that I think you may have used too much of the noise filter in BPR.
The image just looks a bit grainy. If that was the goal then awesome, but i think it could be toned down.
Looking forward to seeing more.
Best - Iain
Well this is just more awesomeness! However there is something I like more about the first one, unique hairstyle and the hat (even though you don’t like it much) give it this sort of other worldly feel. More so than the updated one. I mean they are both great, really great rendering, but I sort of like the surreal feel from the first one and her expression of wonderment kind of lends even more to it. Good stuff all around though.
Now she is looking hot…
hi bas, really love to see your progression with the hair, and how far you can push fibres to do a believable hair. thank you for sharing how you approach it.
A great character - portrait from Bas. As always. 
Impressive hair!
Hey , thanks for looking. Maybe the next update without noise  About the settings of the fibers, it’s nothing special, no clumps, twists or other settings. Profile 1 and about 20 segments. It was rendered with Root- & TipAniso both at zero. This will change with the next one. Here you can see the difference of those settings.
Yah she is one hot mama. I’de say 100/100 lots of good info here Baz thanks for sharing.
Haha, yeah 100/100 makes it more shining.
For the groombrushes, I only use the sliders!
I took a brush like the GroomHairLong and started with all sliders at zero exept the length.
I think it’s the best way to learn how those brushes are working. Magnetbrush can be made by using the Brush Modifier.
What a beauty, great job! 
Got the fiberfever, lot of fun! Here is the last update of this beauty. Composed BPR-renders in Photoshop and a background.
WOW! This is insanely good!
The final render turned out great, really nice work on your character! I like the composite and the colours match great - harmony:)
Definently keep up the great work and have fun sculpting!
Cheers,
