ZBrushCentral

Painting Skin Video Demo

Thanks I am glad you like it! I have Gnomononogy tutorials up on Zmapper and soe more posting soon on 16 bit displacement as well as 32bit displacement. I should also post some sculpting videos pretty soon but my time is a little tight at the moment with Gnomon ONline, My DVD, and a book I am working on : )

Love to stay busy. I need to be sponsored by Redbull!

S

lol, it is true, just a fun fact hehehe. sounds great!! so much material and expertise you’ll share. great!! We’re looking forward to it and specially the sculpting tutorials :eek: hehehe Good luck with all those endeavors!

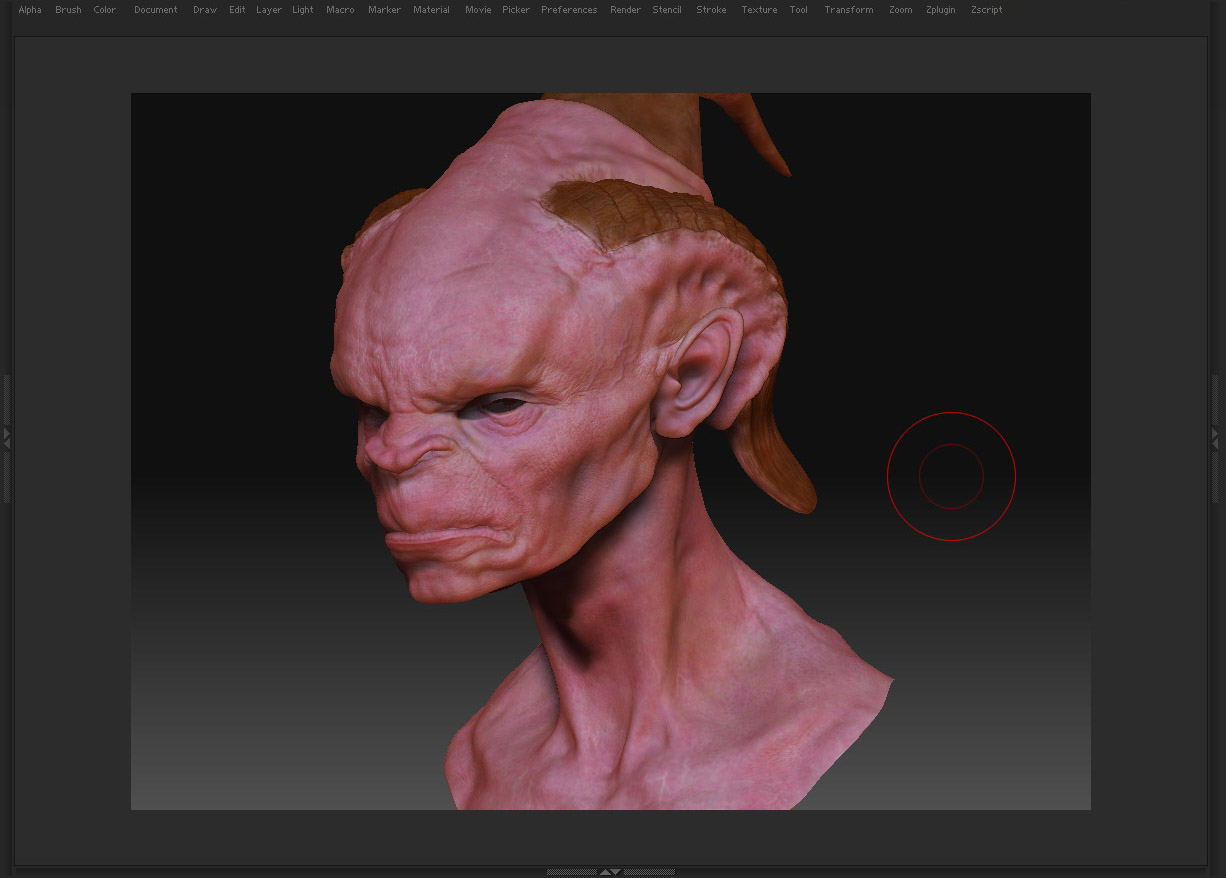
Powerful technique Scott!! awesome. Was checking it out and this is what I came up with:

[]

model from www.gnomonology.com, credits go to Scott Spencer, of course.

Attachments

stingPolyPaint.jpg

Can you still download the video? I would love to keep this for reference.

From Veoh or here:

http://highend3d.com/zbrush/tutorials/textures_painting/Painting-Skin-Video-Demo-325.html

cheers

Hey jmesias vbmenu_register(“postmenu_399412”, true); nice work!! I am glad the video was helpful.
Oh and thanks for getting the Stingerhead model from Gnomonology : )

Cheers!

S

the painting skin video is awesome, great tutorial scott :+1:

niiiiiiiiiiice

please i want download the video file please upload your tut :slight_smile:

The video is on Veoh.com. There have been several posts in the thread with the link. You may need to sign up for Veoh in order to download it but viewing the video does not require you to sign up, so go have a look. Signing up is free if you decide you want to download the video. It’s more than worth the download to be honest, as I hadn’t thought of applying airbrushing techniques in ZBrush until I saw this video. Roughly 3 months later and I still use the technique. So go for it!

(oh and thanks Scott)

thanks for the tute…very nice technique…

Thanks for this. Great tutorial. I’m about to try it out.
I had one question.
What if I was to do a Orc skin. It’s green so will I still use the same colors to point out the warm, hard, soft, areas?
Like on his forhead, should it be a more saturated green than yellow?

Also when you’re done spreading the red,blue,yellow, colors, what alpha are you using?
Was wondering if you can go into the “Misting” more. I’m a bit confused on that.

Great tutorial once again. Would love to see a voice part.
You could probably just record it just watching this film instead of record one all over again. =D

*Also, could you do a tutorial for the people who are trying to push this render out in mental ray using fast skin shader?Looks great in Zbrush but it won’t look as good in Maya.
Hey man,

Im actually writing a full description for my book right now :slight_smile: Please forgive the shameless plug : o
http://www.amazon.com/Digital-Clay-Character-Creation-ZBrush/dp/047024996X/ref=sr_1_1?ie=UTF8&s=books&qid=1195084267&sr=8-1
A maya MR render will actually work quite well with these maps or maps painted in this fashion. The cover image of the book is a MR render with nothing but a color map. It didnt require a lot of supporting maps since the translucency was painted into the color map.

As for an orc skin. I would think of the overall color you want the final to look like. If it is a cool green then start the character with a warm green or a yellow base. The idea is to just break up the color regions and put down primaries and econdaries to make your colors. All those red passes I put down will become a neutralized purple with green. I reccomend experimenting with a lot of yellows and blues and tryuing never to put down the exact color you want, try and get that color from two other colors… iof that makes sense?
Im glad you enjoyed the video!

Oh yeah and misting just means I select a version of the original base color, turn down RGB intensity WAY low and spray it on with the spatter brush (Standard brush, Spray stroke with Colro set to 0, and Alpha 07.) It has the effect of unifying the work you have done so far by covering it in a very very transparent layer of the skin color.
It kinds pushes the little speckles back into the surface and makes them look a little more natural… I hope that helpe : )

S

hi Scott, tutorial on texturing look great! but as a beginner im confuse how you did that:confused:
are you going to make a texturing tutorial at gnomonology more of a step by step?

hi, i´, quite new to zbrush, and learning the basics.
Have a question for scott or any other, as is quite simple.
all the process we see, is made with polypaint? when you mention misting a thin layer over the primary colors…are you talking about a layer similar to the ones in the tool palette?
sorry, but i am learning and that confuse me a little.
thanks in advance
t

Thanks scott this is a technique I was looking for. I always wondered how pros got the skin to look so real.

Wow, this is really a great tutorial. One of the best by far, there isn’t to many tuts out there that cover poly painting techniques. But i do have a question. What do you mean by setting the brush alpha to 0.7? Do you mean opacity? I cant seem to find Alpha anywere. Thanks for this tut!

excellent vid! lots of useful insite.
howd u rig up the slash brush used on the large back horn?
seems like theres a lot of possabilities there.
cheers!

Hey man,
I’m gonna buy your book when it’s available!!! :smiley:

great video, regards the book your working on will that ship with a companion dvd or will there be a site with models/textures to follow along with?= for people who purchased the book?

steve g

Thanks Steve,

Im glad you like the video. The book comes with a compnion DVD with videos of most fo the tutorials in progress so you can see the whole approach.

Cheers!

Scott