It’s possible I’m missing some of the specifics of your particular situation, but there are many ways to do this, as long as you view it as a multi-part process. It will be easier to do if the volume is already a solid closed mass first, so you’d want to close that portion at the bottom before cutting with your masks.
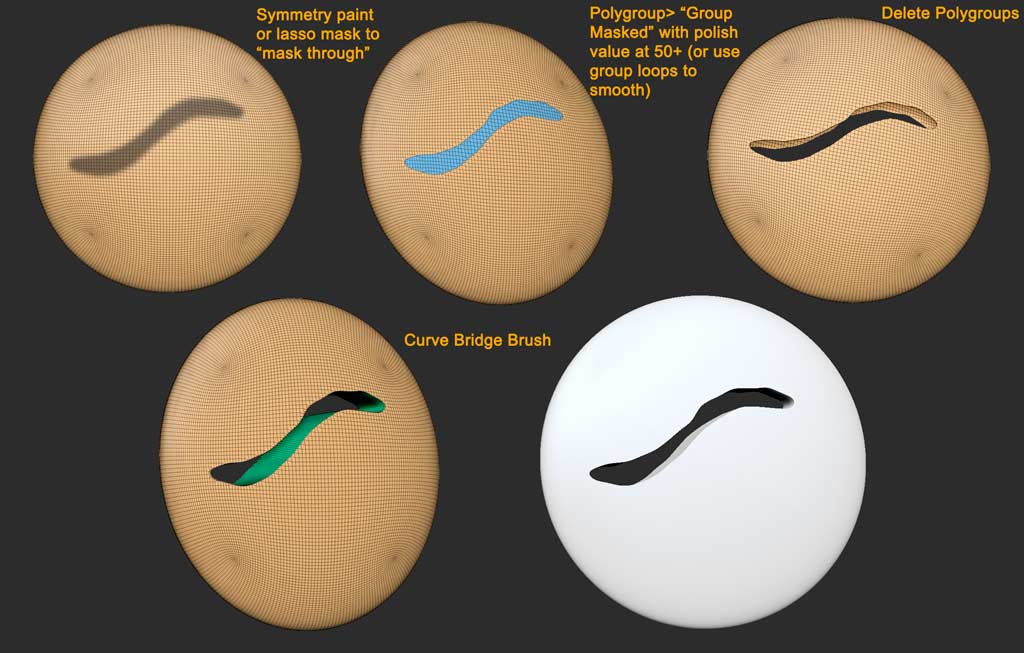
If your object is symmetrical so that you can just mirror the masking from side to side, it’s super easy. If not, consider using the mask lasso to draw your mask shapes, as that will “select through” to the other side. Then just convert the masking to polygroups, smooth as desired, delete the target polygroups on each side, and use the Curve Bridge brush to draw in new bridging geometry.
Another way to “paint through” to the other side on an asymmetrical object, is to use the “double-sided” option option in Projection Master, and polypaint the mask shapes. Convert the resulting polypaint to masking in the masking menu, and proceed as above.
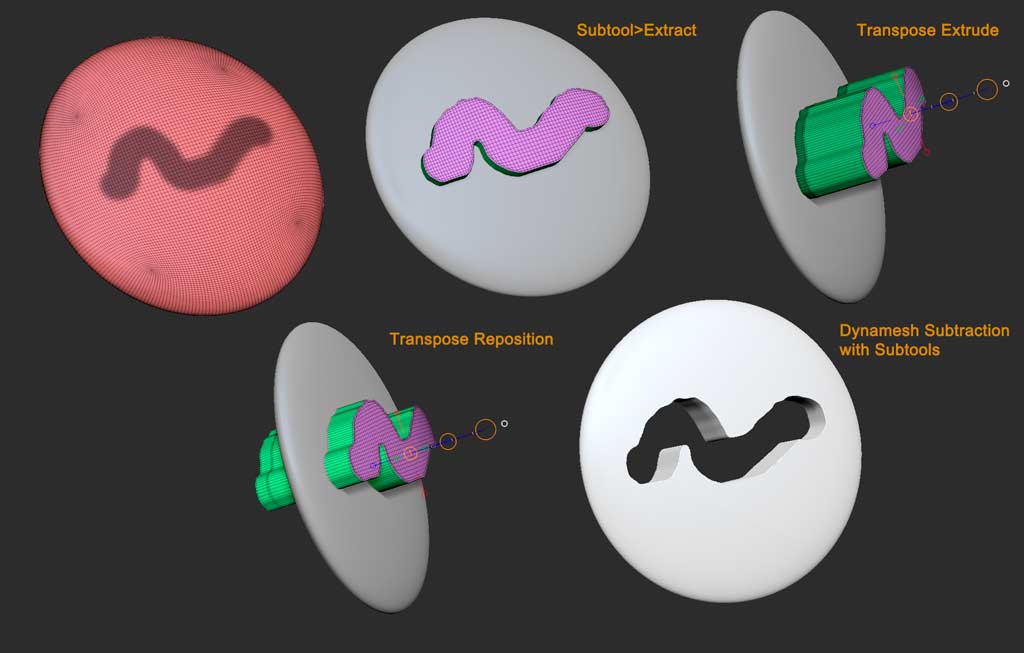
If the situation is more complicated than the above solution will allow for, you can always make a “cutting object” from your masking, and perfrom a dynamesh Sub. There are half a dozen way to do that. I’ve used mesh extraction below to start the cutting shape, and used Transpose Extrusion to extrude one side of the object out in a constant direction (a subtool extract will project out from the normals on a curved surface, so if you dont make a uniform extrusion, the resulting holes on either side will be different sizes). Then I just performed a Dynamesh Subtraction via subtools. Be sure to read the instruction on how to do that closely, as it’s a bit of a fussy procedure.
In addition to Marcus’s suggestion, that might give you a few more ideas to consider.