ZBrushCentral

Paint an Image as a Decal with Projection Master

I am a noob to ZBrush.

I am trying to place an image of a spider (the decal) on the side of a motorcycle model I created in 3ds Max and imported into ZBrush for texturing. The model has a full UV set. I think the way to do this is with Projection Master (although I could be wrong).

Here are the steps I follow to place the decal on the motorcycle:

  1. Load base mesh and divide to 1 million polygons
  2. Select a base color and fill object (Color -> FillObject)
  3. Create a texture from polypaint (Texture Map -> New From Polypaint)
  4. Clone the texture (Texture Map -> Clone Txtr)
  5. Initiate ZAppLink (Document -> ZAppLink), select Fade and Drop Now
  6. When Photoshop opens, import the image that is to be used as a decal. It will open in a new layer. Position the image as needed and merge the layer down selecting Preserve (Layer -> Merge Down -> Preserve)
  7. Save the image (File -> Save) Note: Do not use Save As.
  8. Return to ZBrush and select Re-enter ZBrush from the ZAppLink dialog box.
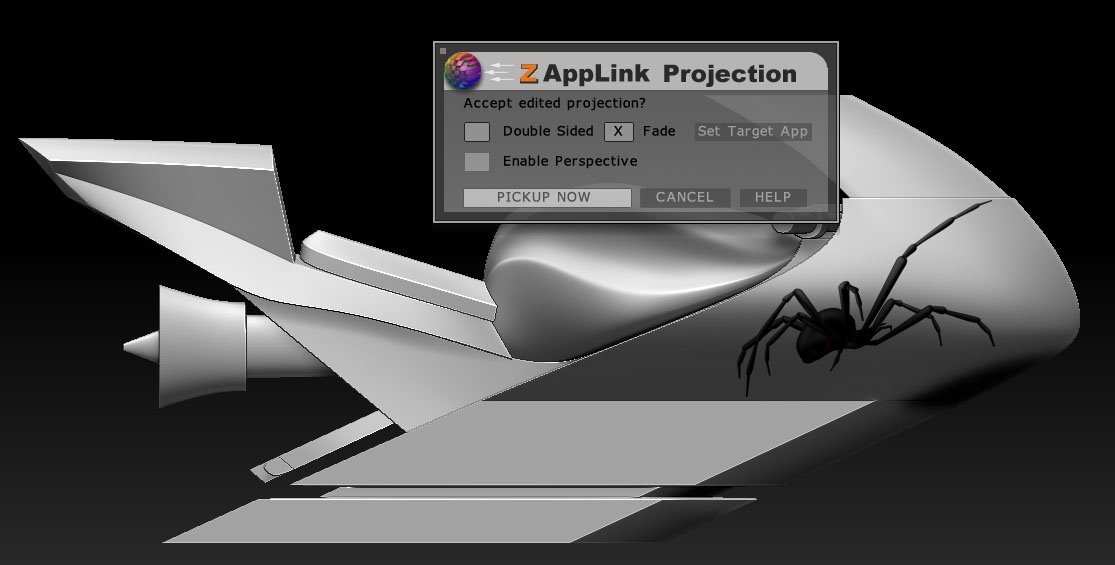
  9. Select Fade and Pick Up Now from the next ZApplink dialog. Projection Master processes the image and places it correctly (albeit poor quality) on the mesh.

My problem is two-fold:

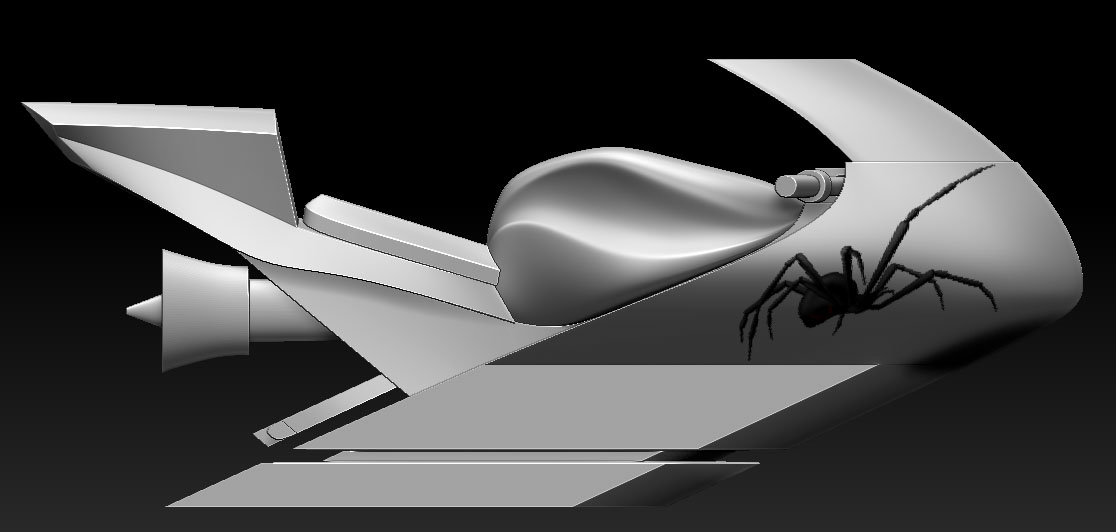
  1. Prior to processing the image (i.e., before step 9 above), the quality looks awesome. After processing, the image looks a little choppy and of low quality. Why is this? How do I correct the problem?

  2. Now that the image is on the mesh, how do I get it into my texture? I have tried exporting the texture using Texture -> Export as well as using the Multi Map Exporter. The image does not show up for either. I have also tried Texture Map -> New from Polypaint. It also fails to produce the image on the texture. What am I missing?

Any help would be appreciated.

I solved problem #2. After step 9 above, I needed to select Texture Map -> Clone Txtr.

I still have a problem with the quality of the decal after Projection Master processes it. I have attached two images that illustrate the problem. The before image shows the quality just before Projection Master picks it up for processing. The after image show the poor quality of the image after processing.

My UV and texture are 2048 x 2048 and the model is divided to 1 million polygons. How do I fix this?

Attachments

spider_before.jpg

spider_after.jpg

One more note…

When I use the texture in 3ds Max, it looks awesome. I seem to be having an issue only in ZBrush.

I have either 1) asked such a stupid question that it doesn’t warrant a response, or 2) stumped the experts.

Assuming I am guilty of number 1, I will ask this question…

What would be the recommended approach for applying a decal? Would it be Projection Master, Spotlight, Photoshop, or something else?

Anyone care to take a crack at this? With over 200 views on this thread, I would guess that others have an interest as well.

Keep in mind that ZBrush paints polygons, hence the name “Polypaint”. Zbrush sees 1 polygon as a 2D app like Photoshop would see 1 pixel. Image quality in ZBrush is dependant on mesh resolution. The more and smaller the polygons, the better the image will look. If you want the decal to look better then subdivide your mesh more and see if it improves.

Thank you for your reply.

I subdivided the model to just over 1 million polygons. I will try it with more. However, I am surprised that 1 million isn’t enough.

Which method do you employ when placing a decal on a model?

Ok, after you paint it in PS its on the UVmap and transferred to polypaint.
So, increase the UV map size and defenetrly divide one more time. 4 mil. polys is ok for this model.
ZB is a polypainting soft, so the more polys teh bether quality of painting.
I think this should solve it…

you could also try HD geometry.