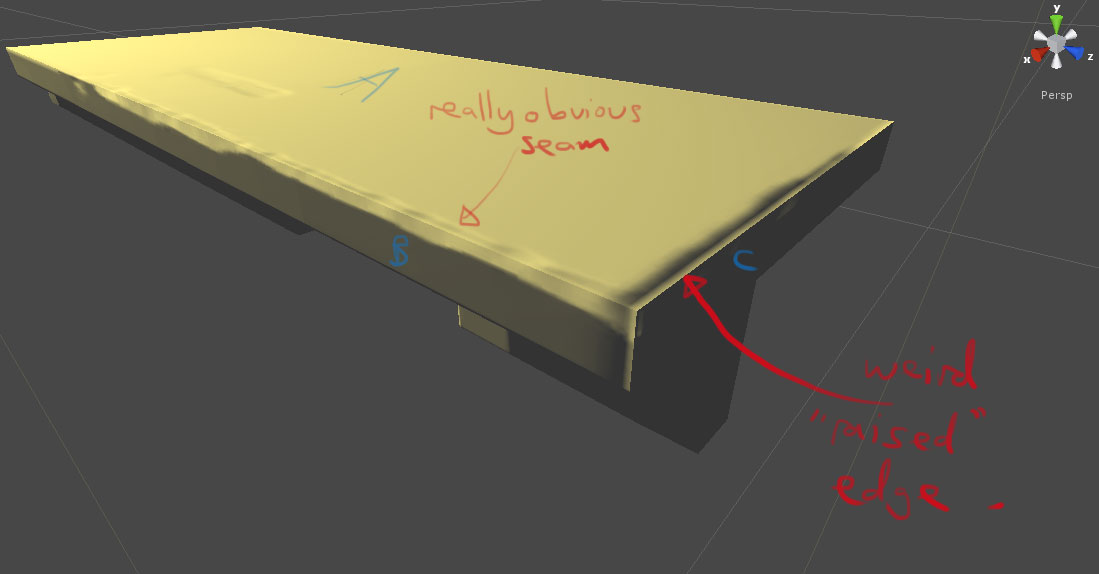
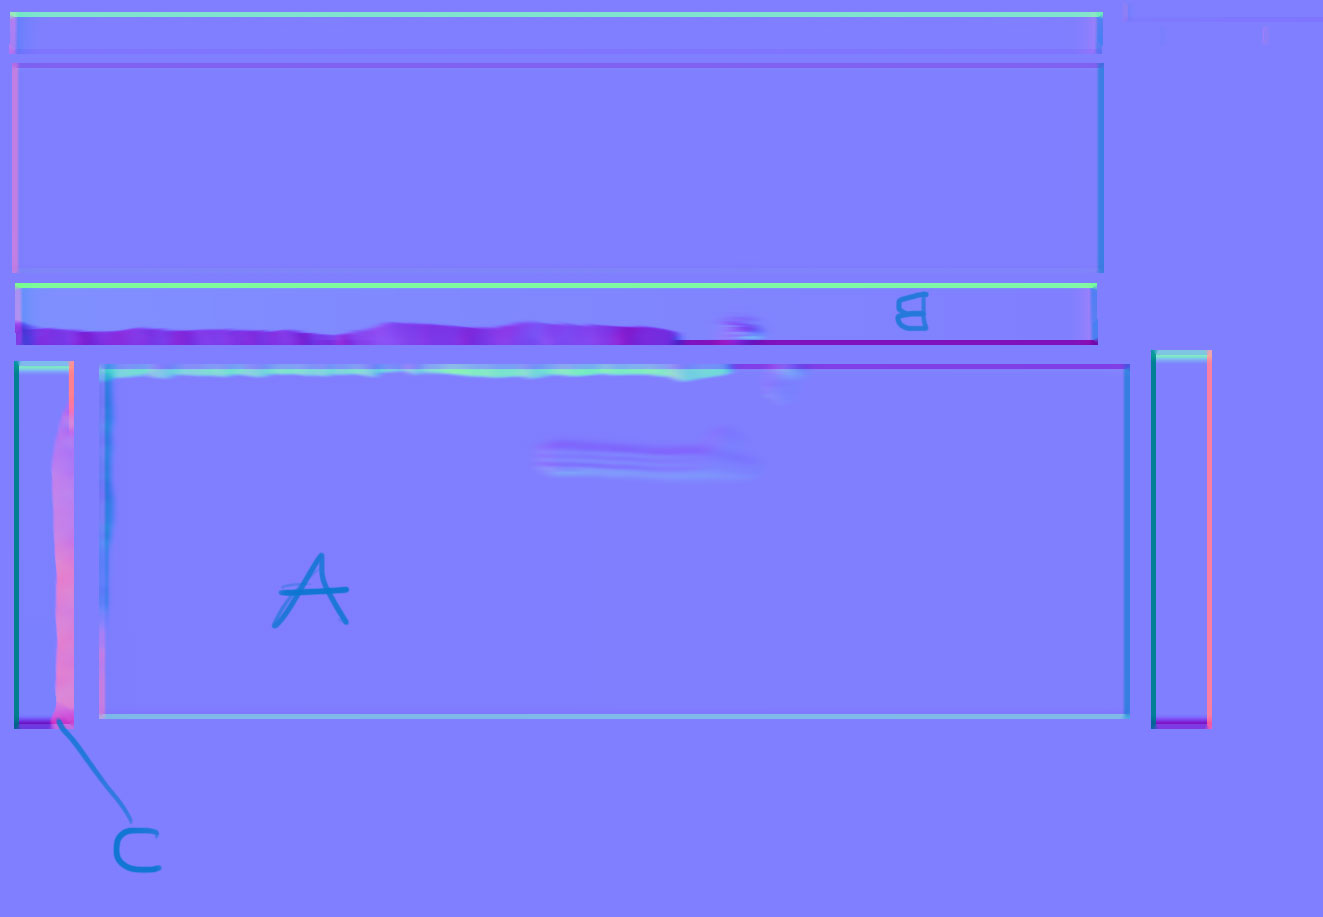
Hi, I’m having trouble baking normal maps in zbrush. The following image is taken inside Unity and shows two of the main issues I’m having.
- the really obvious seams that appear at the 90degree edges of the mesh
- this strange “raised” area of the normal map that appears at the edge of the mesh.
Hopefully you can tell what I’m trying to achieve from this image, its just a box with a roughly chamfered edge.
Here’s my workflow:
-
create a mesh in max, uv this mesh (because the edges are 90degrees I UV to separate islands so that each edge can have some padding)
-
make sure I’ve removed all smoothing groups (as these seem to adversely affect the normal mapping process, for more see: http://www.svartberg.com/tutorials/article_normalmaps/normalmaps.html)
-
GoZ to zbrush, store morph target, subdivide, sculpt, return to the lowest subdivision level, switch morph target, create normal map (only option ticked is “flip green channel”)
-
Export the low-poly mesh from max (using fbx exporter 2011), export the normal map from zbrush and import both to Unity.
While troubleshooting this issue, I was surprised to see that the “crease edges” option can really affect the normal mapping result. I was even more surprised to find that my normal map changed when I exported smoothing groups from max, as I didn’t know zbrush could read these.
I’ve also tried playing around with “smooth uv” and “s normals” options in the “normal map” rollout but without any luck.
I’ve been trying to solve this for 2 days now and could do with some assistance fairly urgently.
P.s. I’m pretty sure someone will suggest that I simply don’t use 90degree edges on my low-poly mesh. I have tried this, but still haven’t managed to get a good result. Surely it should be possible to create a chamfered effect on the low-poly mesh shown above.
Attachments