ZBrushCentral

Next Project - Dwarf Miner - Crit/Advice wanted

Hi there,

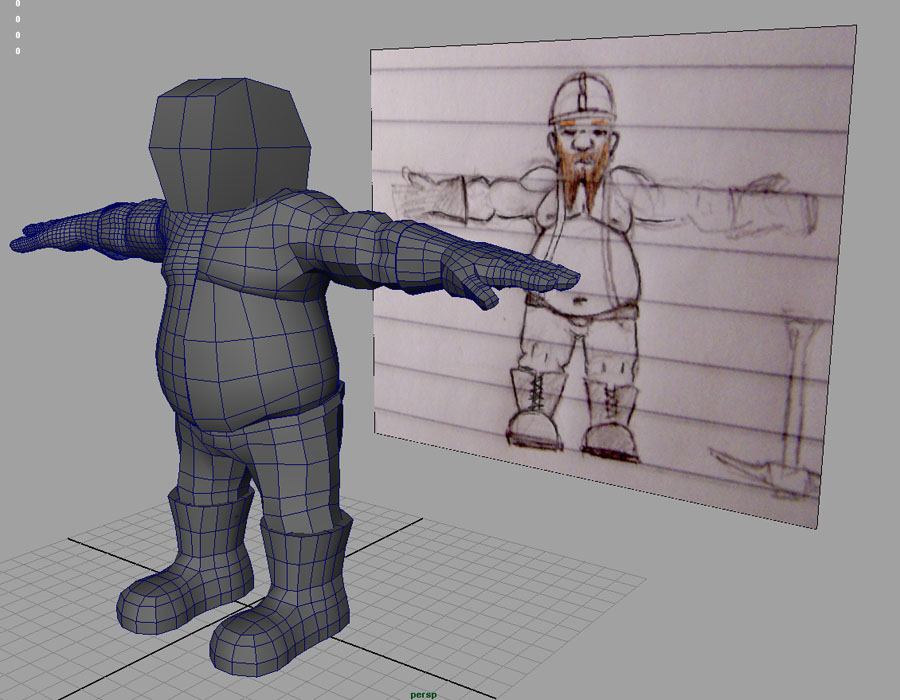
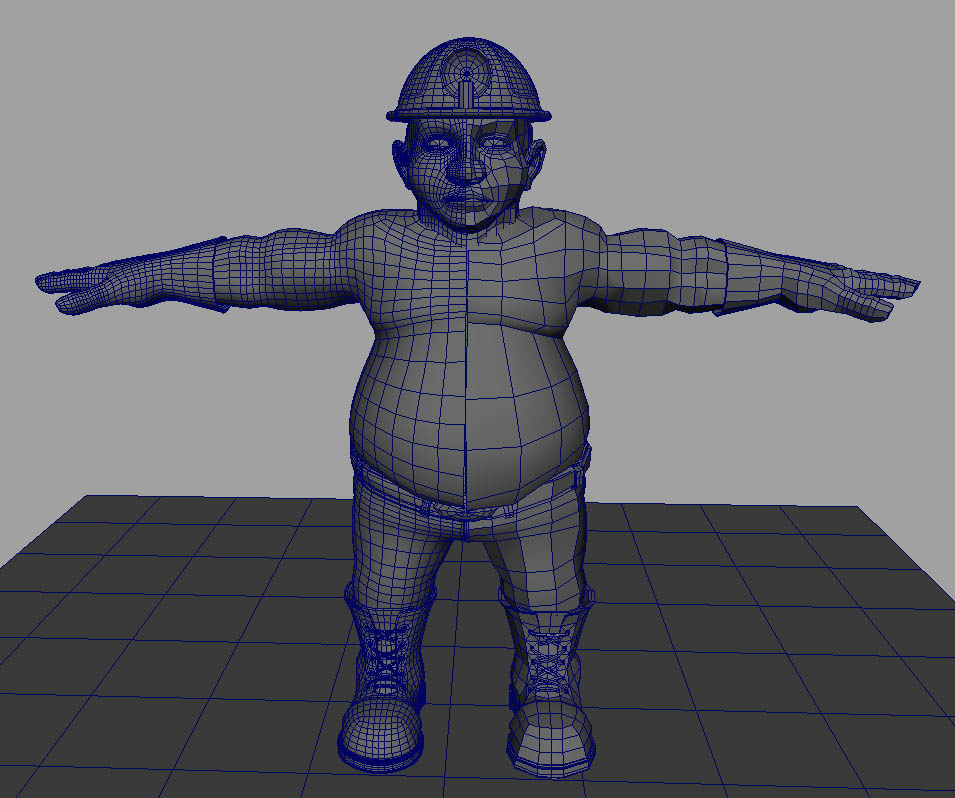
Moved onto my next project, making a dwarf miner. Was reading 5th Elephant by Terry Pratchett and dicided a dwarf would be a good first full character project using Zbrush.

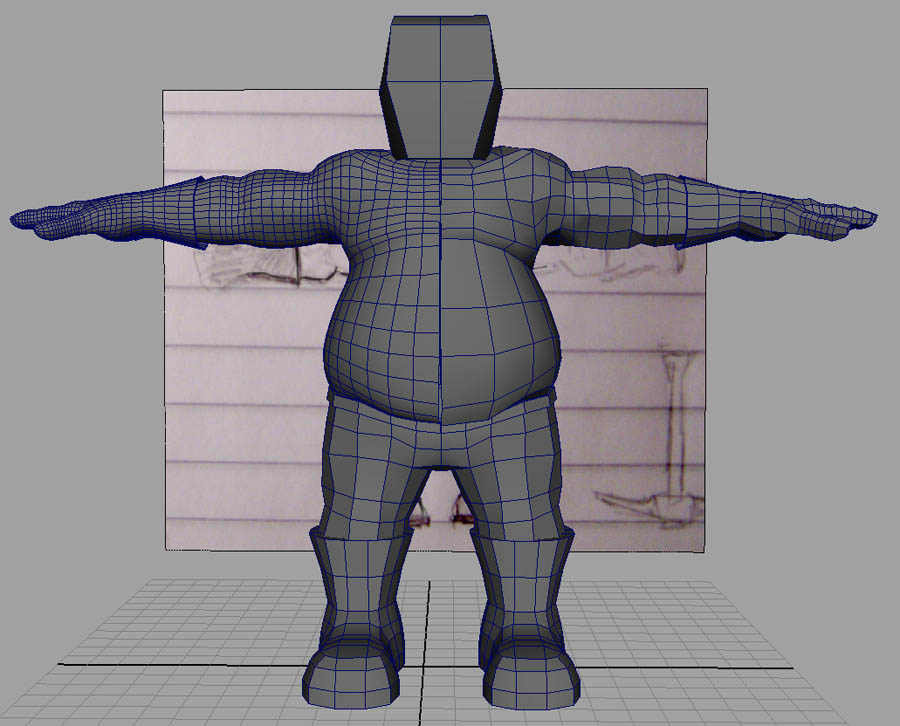
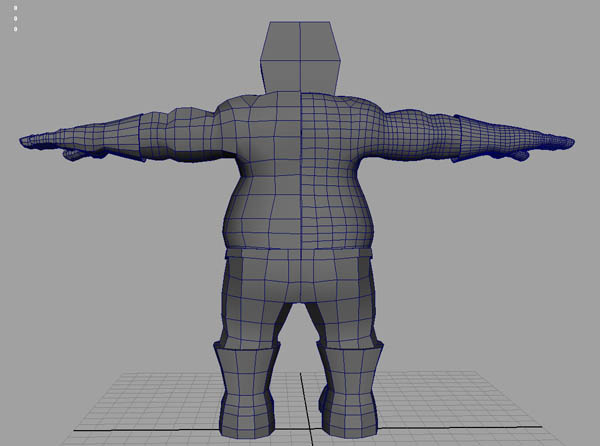
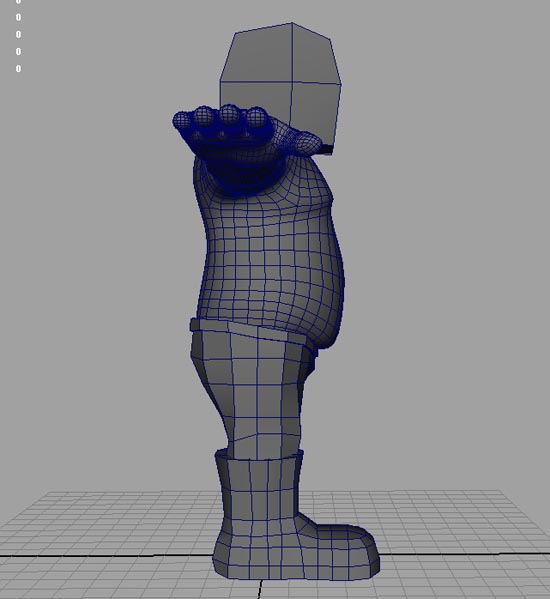
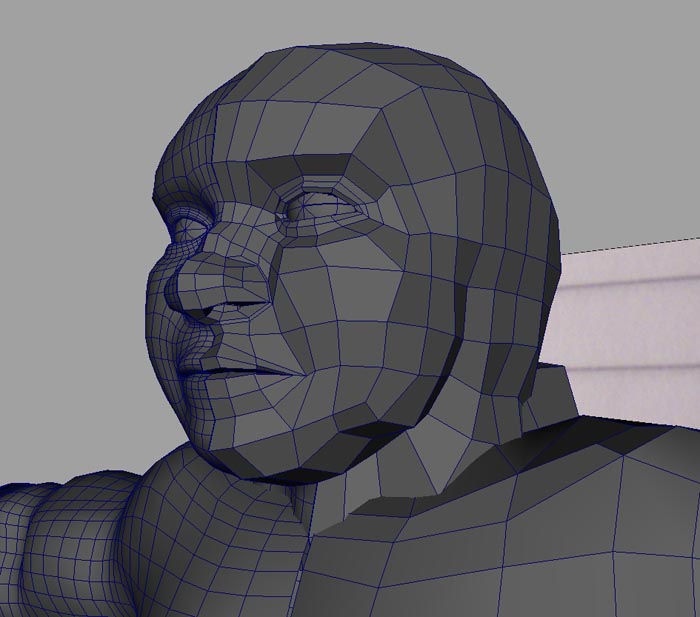
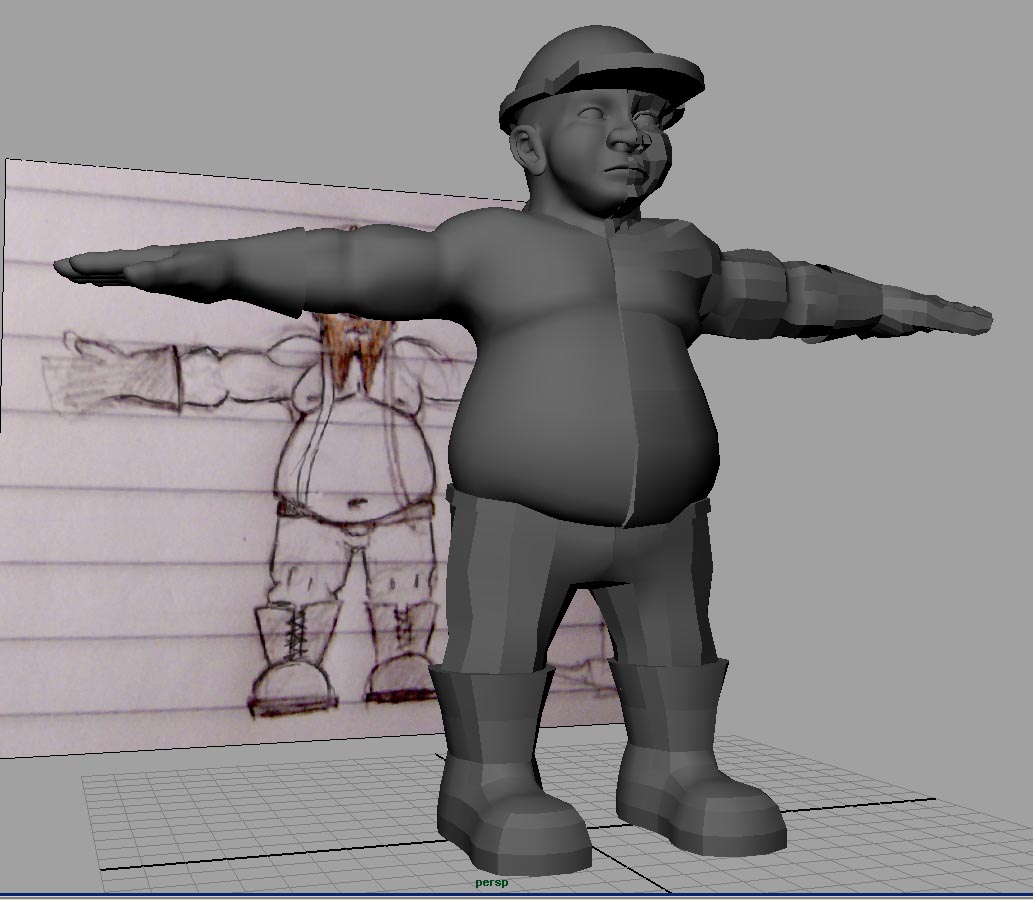
Spent today making the base mesh in Maya, still needs tidying up lots and refining but just want to check what people think of general size and proportion. etc. I plan to start on the head properly tomorrow, had one failed attempt today where nothing was ending up quads and it certainly wasn’t looking dwarfish :cry:

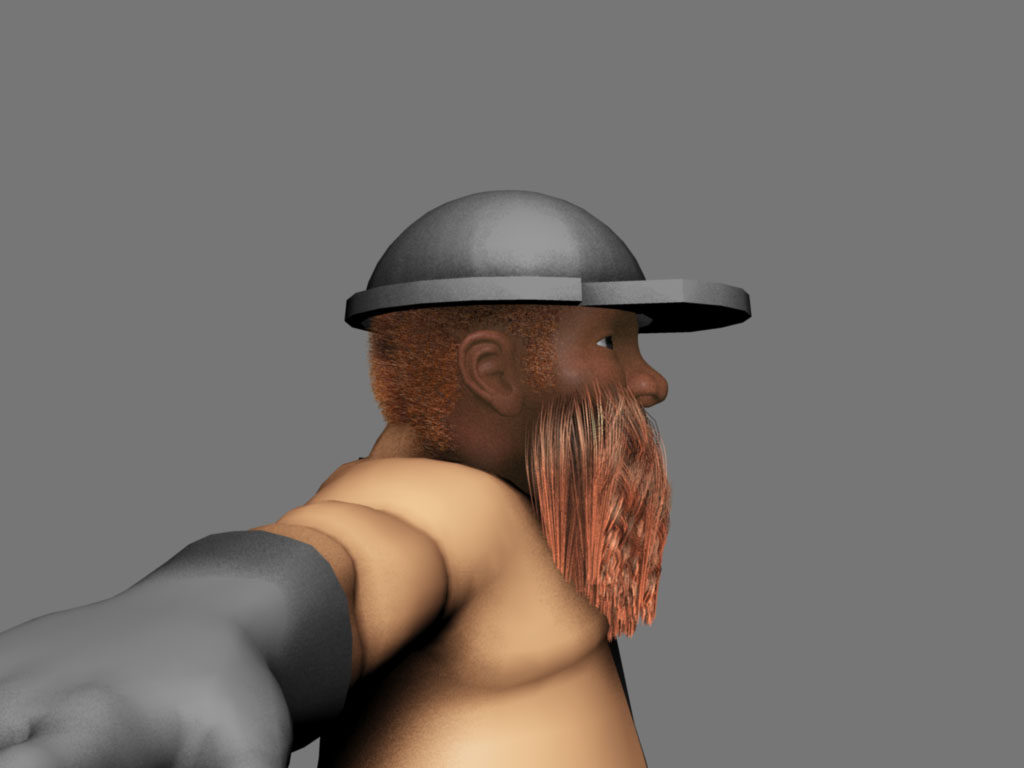
I’m going for the fat biker look, but still with alot of muscle underneath, i tried shaping the arms to follow the muscles but my anatomy isn’t great so any pointers are much appreciated. Looking now i think the hands are abit big in the top down veiw.

Thanks for any tips/critq, can’t wait to get this into zbrush and start detailing it up, but at the minute my back is stiff and my arse numb and think i’m gonna call it a day.

Cheers
Hez

DwarfWIP2.jpg

Attachments

DwarfWIP1.jpg

DwarfWIP3.jpg

DwarfWIP4.jpg

lets see a side profile when you get the time/update. :slight_smile:

Side view

His belly could stick out abit furthur i think.

[attach=21055]DwarfWIP5.jpg[/attach]

Attachments

DwarfWIP5.jpg

ya i think you’re right, give him a big fat pot belly, all dwarf miners must have fat pot bellies :)… i’m keeping an eye on this as im very curious to where you’re taking it. all looks good so far.

:b4: Logick:b4:

Well i’ve started on the head today, had a few false starts this morning where nothing was looking right. I’m only working from the fromt plane image i’ve got so the side profile was looking terrible. Think i’ve figured out most of the problems with it, trying to keep the mesh flowing with the face as much as possible but some of its still quite off.

Again, if anyone can see some glaringly obvious problems with proportions i’m missing please point them out. Just before thaking the pictures i decided to scale the head up by about 0.2 as it was looking to small. Not sure now.

Still lots of work todo, i’m not happy with the overal look yet, its not bold/striking enough. Better add some ears too.

Thanks for any help
Hez
DwarfWIP6.jpg

EDIT: He will be sporting a big beard so i’m not massively worried about the neck area to much.

Attachments

DwarfWIP7.jpg

DwarfWIP8.jpg

The modeling it’s looking good for now! Yeah adding some ears would be a good idea at this point of the model. Another thing that I might be right or wrong is his back. I think you should make his back a little bit more arched because of his heavy belly. You don’t have to doit, it’s just an idea you might have in consideration. Hezza good work, keep it up!

Javi.

one thing i do sometimes when im having trouble shaping my low poly cages in maya is: throw it into zbrush > subdivide it and sclupt it > then, un-subdivide it and export that sculpted low poly cage back into maya for refinement, it also might help to see if you have your triangle edges flowing right incase you want to animate. The idea here is your low poly cage will conform to your hi-res sculpt slightly and be a little better representation at the base level of what you want the final model to look like, also be what you want when you finally get it into zb to add detail.

:b4: Logick:b4:

Little update, added some ears (god i had modelling ears!!! got them looking ear like but there’s plently of triangles in there, tho they subdivide alright i was going for all quads) and made the face fatter and more squat. Also did a beard/hair test, happy with how it came out considering the short time to set it up.

I’m working most of this weekend so don’t think i’m gonna get much more done to it till begining of next week :cry:

I agree the back could do with more of a curve, its on the agenda :wink:

EDIT: Logick, i did actually use Zbrush to mould the low poly cage :slight_smile: i was fedup with how it was looking so just used a really high intensity brush and moved everything around, was so much more intuative than trying to move rows of verts in maya. Liking Zbrush more and more. And yes hopefully he’ll get a full rig and facial setup so good topology is of concern

Beard_Test.jpg

Thanks for advice people.
Hez

Attachments

DwarfWIP9.jpg

Looking real good so far:+1: :+1:

IMO when it comes to organic modeling, pushing and pulling verts the old fashioned way just dosent cut it anymore. Its still good for setting up your topology and so on, but for creating the form forget it ZBrush all the way!!


Tolu Abisola
Baby Dragon & Metahuman WIP
http://www.zbrushcentral.com/zbc/showthread.php?t=25203
Cardassian Woman
http://www.zbrushcentral.com/zbc/showthrea…ardassian+woman
Harpie
http://www.zbrushcentral.com/zbc/showthread.php?t=28783
Barbarian & Commando
http://www.zbrushcentral.com/zbc/showthread.php?t=30272

keep it up this is going to be great!

:large_orange_diamond: LOGICK:white_small_square:

Hi all,

Only a small update for now, had a few spare hours this afternoon so started to add some detail and tidy him up. Boots are pretty much done, i wanted to add some more seams on them but am having issues with directing the mesh so it all runs smoothly etc. Same goes for adding pockets to the trousers, had a few unsuccesful goes and given up on them for today. Also added a little candle and reflector on the top of his helment.

I’ve got tomorrow off so should be putting some hours into this, hopefully get all the maya modelling done tomorrow.

Thanks for any tips/crit/advice
Hez

Basic Render
DwarfWIP10.jpg

Attachments

DwarfWIP11.jpg

Hi all,

Well i think all the Maya modelling is done, time to unwrap him and start detailing in Zbrush. I have a couple of quick questions tho. I’ll have to take him into zbrush as lots of seperate models, which i’ve never done before. I know its something to do with using multi-markers, going to have a read through the practical manual in a minute. But i had a more general question about how many peices people split their models up into. Below the upper body and head is all one mesh, the gloves are seperate, the belt area is about 10 different meshes if you include all the loops and buckle bits. The trousers are all one mesh, the body of the boots are one mesh, but the shoelaces are about 10 seperate objects.

Is this going to be a massive headache when i start applying displacement maps? Unless i can get the displacement scale in maya to match zbrush perfectly there’s going to be lots of clipping etc.

Any pointers you guys have learned from experience.

I remodelled his shoulder area to make the mesh flow better, was a right headache but hopefully it’ll deform better now during animation.

Cheers Hez

DwarfWIP13.jpg

hi hezza,

I suggest you read the Displacement Exporter thread in troubleshooting. It’s chock full of how to do what you want to do with work arounds for some things and loads of hints and tips to make it all a little less painful for ya the first time around.

There is also a huge Maya to zbrush or vice versa thread in the tutorial forum with loads of info for ya too.

Hi all,

Well i’ve finally had some spare time and done some more work on my Dwarf Miner.

Modelling wise he’s pretty much done, got a few props to make (pick-axe, TNT, cigar, rat on a stick) and he’s gonna have a shoulder slung bag that rests on his hips (i’ve just got to figure out how i’m gonna rig it)

Used Zbrush on almost everypart of the model and most of the textures (i used the drawing lots of flat planes in projection master method as shown in one of the video’s in this forum, amazingly powerful technique), been a great learning experience overall and don’t think i could imagine not using zbrush now.

Not happy with the shading on his boots and helmet + i’m having trouble matching the colour of his hair to the beard. Also need to add some eye lashes.

Next step is to rig him, the bones are layed out and done some deformation tests, not looking to bad so far. Hopefully do a little animation if i get time.

Crits and advice welcome.

Hez

DwarfWip14.jpg

Attachments

Closeup.jpg

Don’t worry about that… in real life, i’ve seen very few times a beard that matches the hair…:smiley:

On the other hand, the beard is very well combed… too combed, IMO…

Anyway, the model looks fine.

All the best

Finally got the hair to match up better, it was the specularity setting that was screwing it up. Also ruffled the beard abit, will mess it up abit more, originally i was going to have braids in it but gave up on that idea. Thanks for the comment tho, was something i just completely overlooked, think its improved it alot.

Also turned on raytracing shadows which has fixed alot of the problems i was having with shading, need to soften the shadows abit but liking it much more now.

Comments as usual are welcome

Hez

Updated:
DwarfWip15.jpg

I like teh last one very much, WAnted to find some crits but couldnt find any :stuck_out_tongue: 
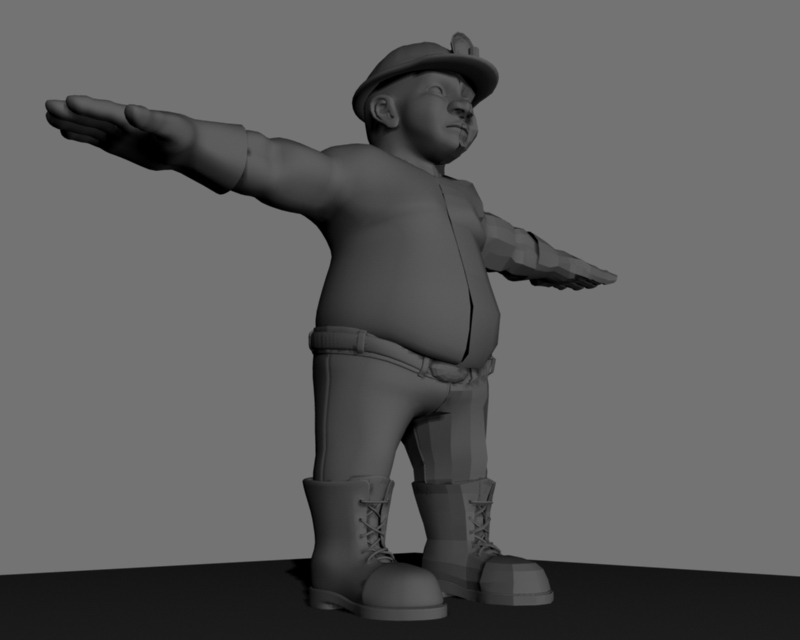
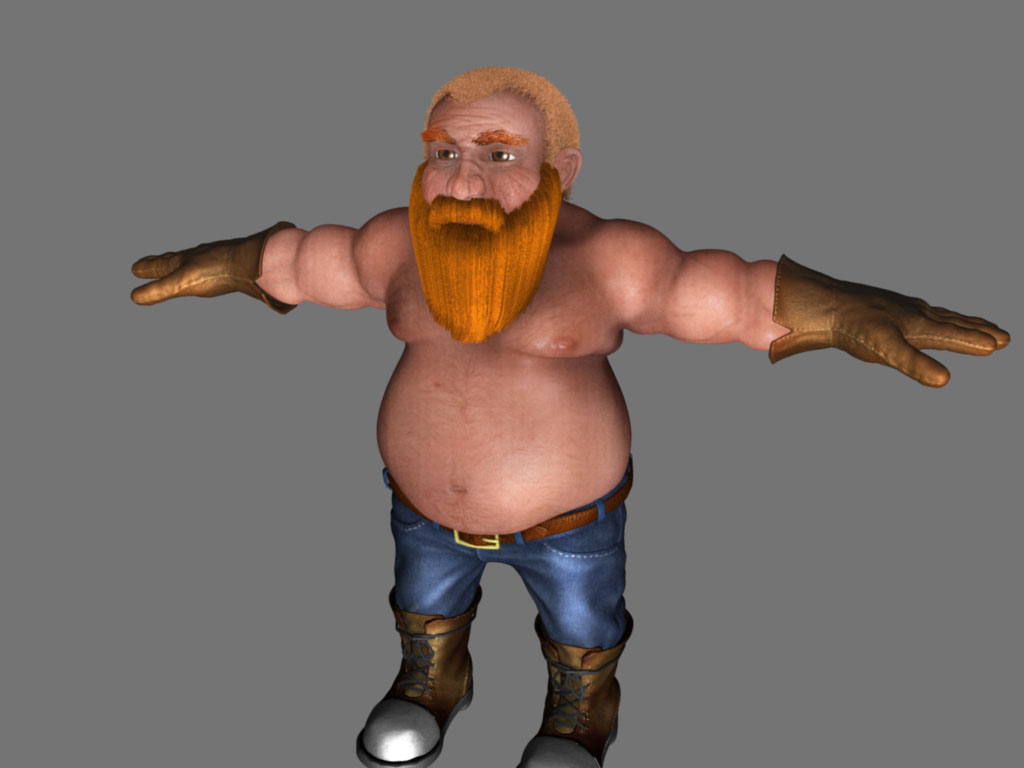
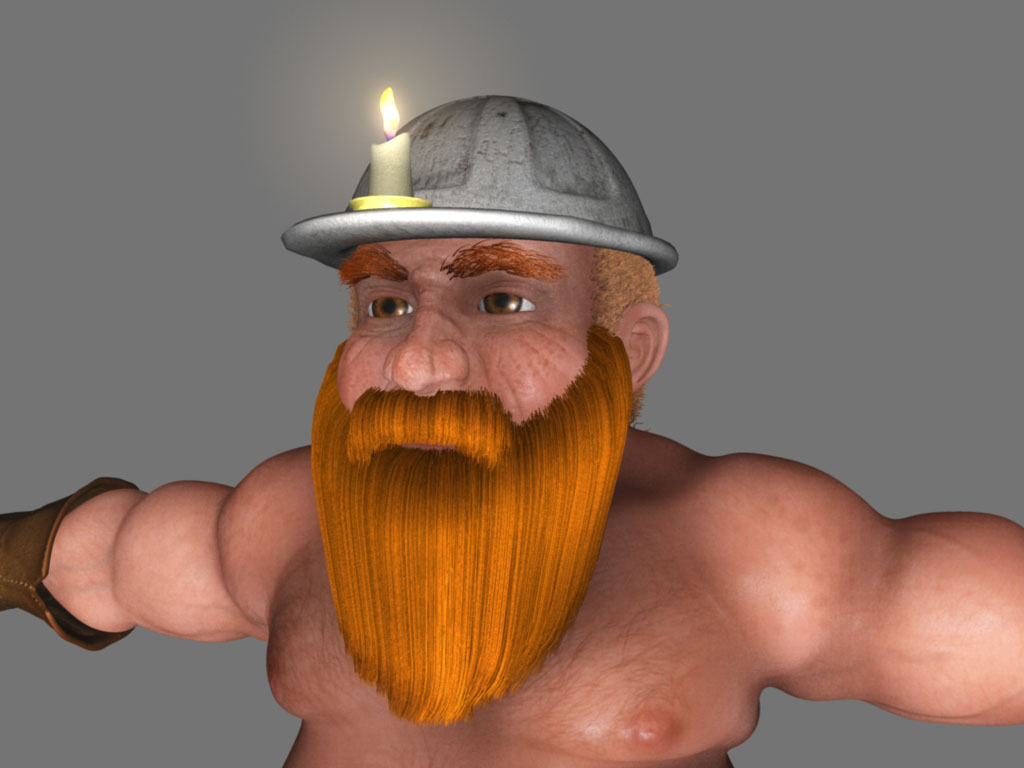
Now the only thing he need is a nice render, this looks to cartony :]

Thanks for the comments slocik, he is meant to be a slightly cartoony character but i know what you mean. Its always been an area i’ve neglected before, texturing/lighting/rendering and i’m kinda going through a trial and error process, which is taking a long time :cry: I’m happy with the skin texture which i’ve mainly concentrated on but the lower half is giving me lots of problems. Trying to get his jeans looking right and the boots to look like leather etc. I’ll rough up his steal toe caps and add some dirt maps overall which will hopefully bring him down to reality abit.

I’ll try and get some of his props modelled today, first thing is a shoulder bag and then a pick-axe. Not sure how much i’ll get done tho, lots of other stuff going on in meh life at the minute which doesn’t leave alot of time for 3D :cry:

Should have some new renders up in the next few days.

Anyother comments or suggestions are welcome

Cheers
Hez

I think you should add some dirt to his body, clothing and hair. He’s too clean at the moment. A pleasure to the eye though!

Joost

Very small update, didn’t manage to get much done today. Started on his bag, not that happy with it, looks abit small, but then if i make it much bigger its going to get in the way when he’s animated. Will rough it up and paint the textures for it tomorrow hopefully. Slightly remodelled his hard hat too.

Also gonna have a crack at some dirt maps, should be a breeze with zbrush and some good alpha maps. (Famous last words)

EDIT: Actually thinking about it now, i might just have the small bag attached to his belt one side, and a mini pick-axe on the other side in a small loop, like a utlity belt. I did some animation test with the strap over the body and i reckon its gonna give me loads of head-aches when i animate him.

Hez

bag1.jpg