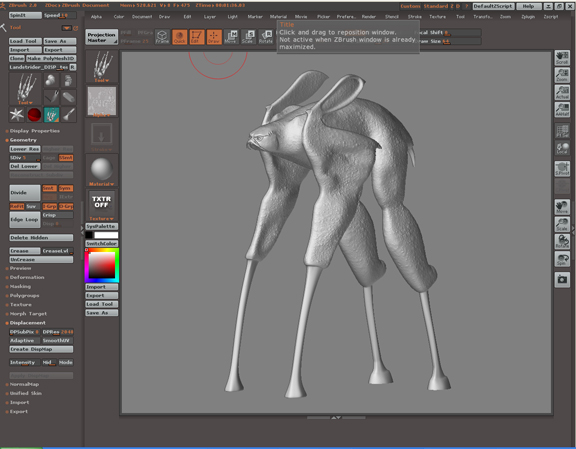
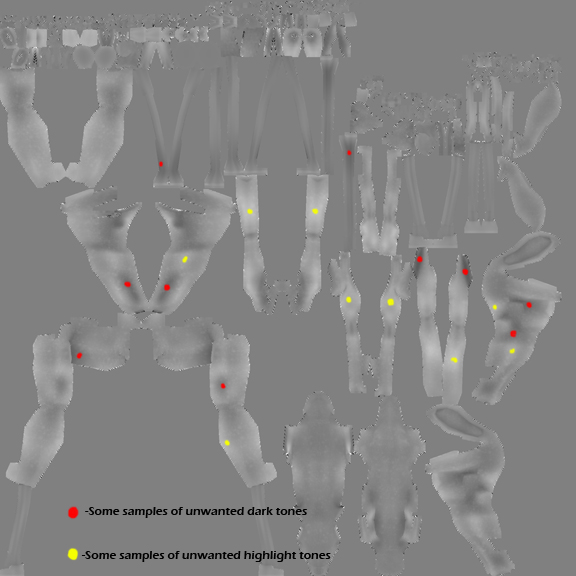
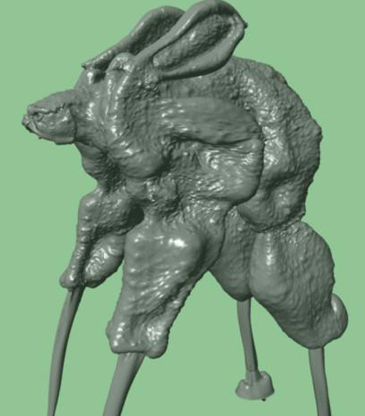
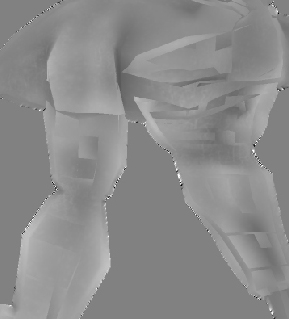
Actually I think what was causing the issue is overlapping UV’s. I mapped it originally with a planar map in Maya. But I went back and remaped using auto mapping just so there was no overlap in UV’s and that seemed to take care of the problem. However a new problem has arisen. Even with the new auto mapping it has what looks like dark splothes and highlights that I did not paint on the surface. I can see the fine details still, but its like there are larger overall tone changes in the map which ultimitely render out on my character making it look bloated or sunken in. I have uploaded some different images of what it should look like in ZB and how it is coming out in Maya. IF yo look at the Disp map exported from ZB, you can see some of the ares I indicated in red that denote a splotch of dark tone, and other areas I marked in yellow that indicate a splotch of highlight. Do these overall, non-detail, tone changes always happen when you render out a disp map from ZB? I just painted small bumps and wrinkles with projection master. I did no ZB modeling with brushes. I would expect the Disp map to look as one overall tone of grey with just flecks of highlights that indicate the details of the bumps and wrinkles I painted on. Is that right? Why do I get these overall tone chages? Could this be resulting from overlaping strokes while using the rectangle stroke option even though I have the edges of the alphas disolve to pure black?
Here is my workflow:
-Model low poly version and lay out UV’s (auto mapping for now) in Maya and export out as .obj file.
-Import as tool in ZB.
-enter edit mode
-Divide to division level 5.
- Paint disp map on surface using Projection Master. I use the simple brush, with different “bumps” and wrinkles" alphas, with my stroke set to “Drag Rectangle”. I paint from various angles using “Drop Now” and “Pick Up Now”.
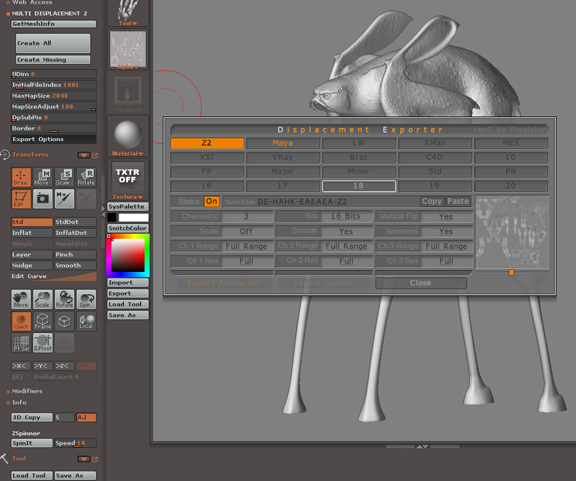
- Once finished I export the alpha out of ZB. I have used both the Native Disp Map exporter and the “Displacement Exporter Plug In”. Both have yielded the same results, that is the splotchy tone changes.
-Import Disp Map into Maya and apply as disp map on a shader. Adjust for alpha difference by setting my alpha offfset to “-.5”, make sure the “Feature Displacement” box is unchecked under Displacement Map in attribut editor so that Mental Ray has full control over the disp map. Apply shader to geometry of character.
-Open Mental Ray approximation editor and creat approx’s for both Disp Map Approx and SubDiv Approx. Adjust both to be set to “spatial”/Min Values 3/Max Values 5/Length .25" Now I have heard that you can use one or the other or both. I have tried to play around with them as a team and both individually, but I still get the same results.
-Render out with MR set to production quality.
I can get the whole process to work, just can't get it to look like what i have in ZB. Any and all suggestions would be greatly appreciated.
Thanks! :D
-Dave
Attachments