ZBrushCentral

New model. Looking for advice.

Hello,

I started this model some time ago after watching NickZ’s timelapse of his Spidey model here: http://nickzucc.blogspot.com/search/label/spidey%203d%20sketch

Anyway the model below is very much in WIP, I haven’t spent much time on the legs/torso. I have posed it and started to define some of the muscle groups in the back/arms/chest. My question though is this:

Should I have built the model in a standard pose until I was happy with the anatomy before I posed it? I suspect YES, but I have come this far!!! Should I pose it back to a normal standing pose, and continue from there?

The model was developed from a ZSphere model (see NickZ thread above). I have lost the original somewhere but here are some of the lower SubD’s.
arher.jpg

Attachments

arher2.jpg

Archer.jpg

I say youve come this far, its good practice. Now finish it off. However! If you are finishing this you have to have to give him those pants like the reference! lol

I wouldnt go past sub div level 3 if you plan on posing it. I finished a model with complete anatomy, then brought it down to the first subd level and posed it. Im sure im not that good at it, but it messed up a lot of detail and i had to rework it. When in T pose, click unify in the Deformation palette and then go to Transform at the top and click poseable symmetry.

That way after you pose it, it will still mirror your cursor based on the vertex and not the placement of your cursor. Although that doesnt really help except for the trunk area where things usually flex the same way. Otherwise you will be giving seperate and focused attention to each body part as each one is flexing in a different and specific manner.

For me and my style, i go to sub d level two then pose the figure. I spend about 3-4 hours on the first sub d levels cause it makes it so much easier for the rest of the detail work.

Make sure the first 2 levels are perfect and you will see how much easier it is to sculpt after your pose.

Hello again. I decided that the best way to go was to build a muscle-bound guy first and then pose him. So here is the first attempt. The head/hands/feet have not been worked at all, so please don’t feel like you have to comment on them :slight_smile: .

What I am looking for is some comments on overall proportions. The guy is supposed to be “Fantasy” so may look overdone to some extent, but refer to the image posted earlier for what I am going for.

Thanks for looking and PLEASE comment. :slight_smile:

arher3.jpg

Hey Elixir - I just finished a fantasy/heroic anatomy sculpt/study a little while ago like this so I thought I’d share what I learned, for what it’s worth…

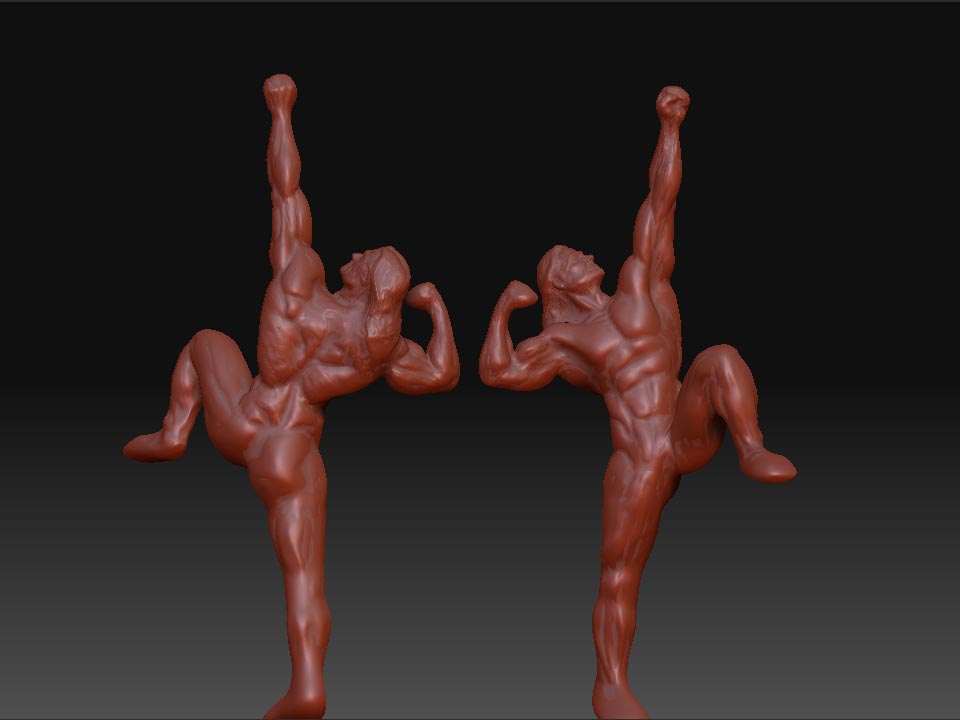
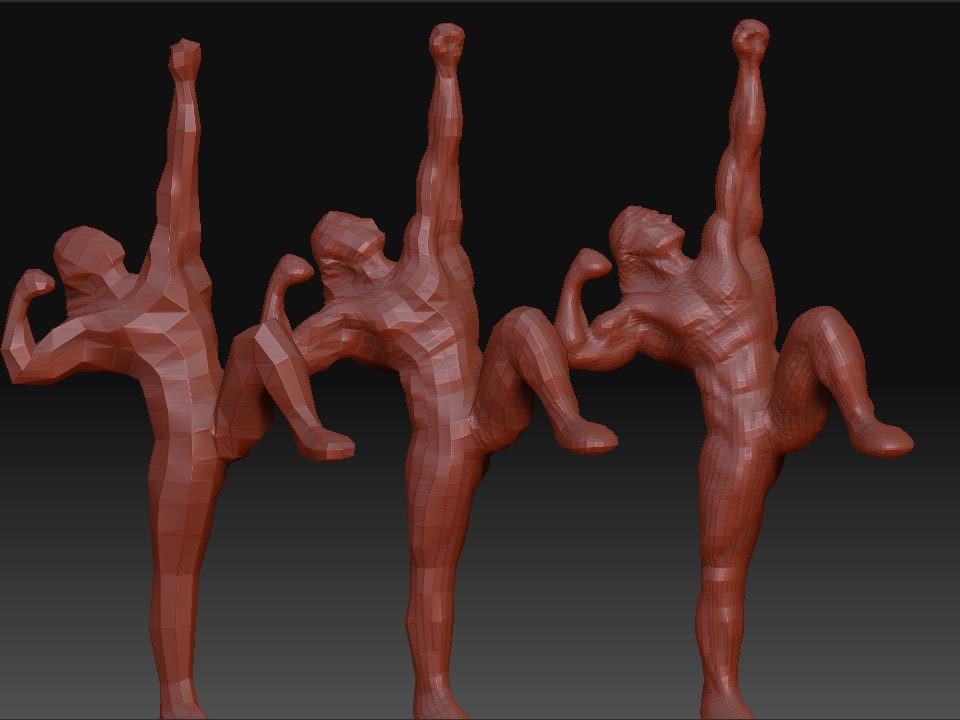
Looks like your overall proportions and general anatomical accuracy are pretty good. The only thing that looks a little off is the length of the thighs - maybe a tad too long? Making the lower legs look a little short?

So for me, the next step after getting everything in place was to really try to establish the foundation and structure of the model. This is done on the lower subdivision levels. That was basically really working on defining the overall shapes and primary planes of the anatomy. Sort off creating a bit of a “chiseled” look, that will ultimately be smoothed out later. (See link below) This is where lots of reference helps. Seeing all the diferent ways say, a deltoid can be shaped and connected, and then designing your character accordingly. Seems to me this is the stage most people appear to overlook or rush through, when in fact this is the stage that is going to make or break your model, so really spend some quality time here. (Maybe search online for some traditional clay sculpting tutorials as well to see how they build up forms).Also keep in mind the overall proportional flow of the different areas and how they relate to each other, as well as trying to establish a sense of rythm and gesture in there as well. As the forms and planes begin to take shape, maybe start adjusting the proportions/design/anatomy to start define the “character” of your character. I.E. - is he brave, strong, fast, slow, powerful, agile, weak etc… ( For example, I gave my character slightly larger traps and a thick, but not too wide back, and legs that were muscular, but not too large, to try to convey the feel of a powerful but agile character, like a linebacker or sprinter or something) I found the Flatten brush pretty helpful at this stage to help define the primary shapes/planes/forms, as well as to keep things from getting too 'bubbley".

Once the primary forms/planes/structure/look/feel were established, I began to refine/unify the model, shaping and sculpting the model, with my brush strokes following the natural directions of the muscle fibers/striations. I found the clay tubes brush worked well here, helping define or hinting at the directions of the muscle fibers, as well as adding surface irregularity.

Here’s a link to some great resources, this page in particular showing the primary forms/structures/planes I was talking about…
http://www.freedomofteach.com/products/artist_busts/bust_flesh_torso#

Like I said, these are just my conclusions thus far, I have a ways to go myself… Looking forward to seeing your progress.

So I have decided to pose the guy and then clean-up the mesh. This is just tonights efforts. Transpose tool looked so easy on the QT demo :lol:

Anyway here it is

arher5.jpg

hands any arm seem to be little off , try to fix the size.

good shaping though.

Here is where I’m at.

Lip: Thanks for the suggestion, let me know how this looks.

I am fairly happy with the positioning of the arms compared to the reference. I have some clean-up work to do as a result of the transpose tool. At this point I am just trying to get the pose somewhat accurate, I will go back and check where the muscles need correcting when I am happy with the pose. ANyway here it is, and thanks for looking, As always, feedback is welcomed. :slight_smile:

arher6.jpg

Its looking pretty good :slight_smile: … I like the 1st one u did also, not as crisp but definitely has nice gesture and artistic character.

Here is an update. Repositioning the bent leg was harder than I thought. I spent a lot of time resculpting the back of the knee and calves. The arms have had some work on them. I have made them more acurate in terms of muscle placement. I don’t think I will try to replicate the pose exactly; I always thought the bent leg looked a little awkward to me! (sorry Boris!). ANyway, here is where I am. Please feel free to C&C.

arher7.jpg

Looks good! :+1:
When’re you adding the pants?

Hi ppl.

Just got back to rebuilding the topo on this guy and something stragne is going on. Perhaps you have seen it in the past and can offer advice…I hope. Check out the crazy mesh at the eyes.

badRetopology.jpg

It´s a way zbrush behaves when you´re retopologizing with open edges. Around open holes corners it sometimes gets messed up. what you can do is either smooth the area (from lowest subdivision to highest, step by step) or you can also (before you project the details) subdivide the new topology and store morph target (tool -> morph targer -> Store MT) on the highest subdiv level. then go down to lowest and start projecting step by step. never mind anything that messes up on the way. as you move to the highest subdiv. level, you´ll be able to revert the messy areas to the targeted morph shape using morph brush (the same way you would sculpt on the model, you´ll be able to revert to the original mesh shape wherever it is needed with just a single stroke).
I hope it makes sense, I´ve seen many tutorials about this, unfortunately I don´t have any by the hand. Just try googling “morph brush” and you should find something.

good luck.