[hair.jpg[/ATT]%3C/font%3E"] ](http://%3Cfont%20color=%22#9a9a9a%22%3E[ATT=267296)
not sure about the XYZ but you can try useing alt to move objects not sure if that helps but down to the matter at hand
to add hair. well this is the way i do it i mask out the areas i want the hair to be then invert the seletion then use mesh-extrat to make a base for sculpting then use the wave brush to make the hair not the best of brushs but it works. as for the other thing you where talking about
to make a box normal polys you have use unifeid skin to do this you have to go in the tool pallet and look for [unifeid skin] open it and set the res to 128 if its not allredy set and you have to set the smouth to 10 then click [make unifeid skin] then at the top of the tool pallet you will see the box all fix
i think that covers all of that if you have any more things to ask send me a privet message
hope this helps
I think most people would start with a sphere for a hair subtool, but you don’t want one with the poles in it. There is one without poles in the Lightbox > Project folder called DefaultSphere.ZPR. You can also make your own by following the steps below:
- Draw a Cube on the canvas, enable Edit mode and make it a PM3D.
- Go to ‘Unified Skin’ submenu and turn Resolution down to 8 and Smooth down to 0 and click ‘Make Unified Skin’.
- Click on the Skin tool (Skin_PM3D_Cube3D_1) that was just put into your Tool palette to put it on the canvas.
- Turn on Polyframe (Shift+F) so you can see the wire.
- In ‘Geometry’ submenu, click ‘Reconstruct Subdiv’ three times so there is only 1 poly per face on the cube then click Delete Higher so there is only 1 Subdivision level.
- Make sure ‘Smt’ is on then subdivide the cube into a poleless sphere.
Regarding the Tip in the image below for centering the subtool, use Shift+rotate to snap to the X orthographic view first.

[hair.jpg[/ATT]%3C/font%3E"] ](http://%3Cfont%20color=%22#9a9a9a%22%3E[ATT=267379)
Also, what would be the best way to reduce the height of the forehead or bring the top of the head down?
pg
not sure about useing layers to model but i can tell you about makeing the head smaller heres how
you have to set you polys to as low and you can go then mask out the top of the head and invert the mask then use deformations in the tool pallet theres a bar called size set your [xyz] to [Y] then use the bar
im not to sure if thats the best way if not im sure some will correct me
one last thing if you want more detal on the head and not so much on the head do retopo on the top head and keep the lower head low topo
Thanks 3D-user, If you were sculpting this mesh would you have used “layers” to sculpt the head so you could go back and shrink it down?
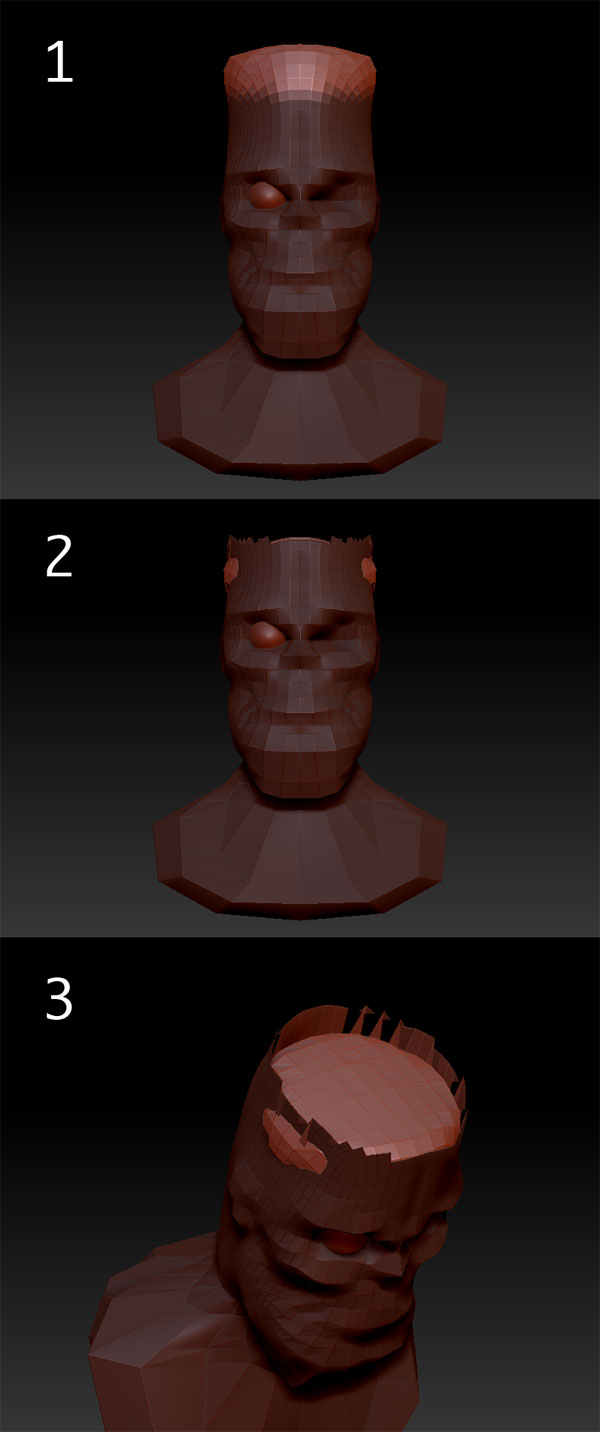
Well I gave it a try but how do you prevent the mesh from compressing in on itself.
Image 1. - I masked the head and inverted the mask.
Image 2 & 3. - I used Deformation > offset but the head folds in on itself. How do I prevent this from happening or is there a better way to do this?
[ ]
]
im sorry i did not explane how to do it so well
you have to mask more of the head then invert the mask then blur the mask by clicking on your model while holding ctrl that will blur the mask then use transpose make a line in the center of the mask then scale it with transpose
and if stil compress keep it masked then use move with transpose and bring it up it take me almost 3 months to get use to transpose
and no i would not use layers to model
this is hair i made in two minets lol
