Hi Piggyson,
I solved it 
It was an older plugin version of “InsertMeshMaster”, that makes the problem.
Now, anything is fine.
Thanks for your cool plugin
Best regards,
Thomas
Hi Piggyson,
I solved it
It was an older plugin version of “InsertMeshMaster”, that makes the problem.
Now, anything is fine.
Thanks for your cool plugin
Best regards,
Thomas
me too
Piggyson@Campi: Interesting! I don’t think I have ever used a single NanoMesh that is larger then 50k. The NanoMeshes are still looking at the max poly per mesh. So if you have 10x 500k NanoMeshes it will still be registering 5 million. It appears that the effect you are witnessing is the NanoMeshes reaching that cap. I’ll give it a go on my end.
Agreed 100k+ on a single Nanomesh is definitely a fringe case. I only subdivided it to show that the placement issues get progressively worse the higher the nanomesh resolution.
I had a case though where I placed a lot of rivets, so I created one poly per metal plate and created one nanomesh consisting of multiple rivets (all placed correctly in a square first then saved as n-mesh). The final resolution per nanomesh was roughly 11k and it was impossible for me to get the naomesh fit perfectly to each source-polygon.
It was only a small offset (again it gets worse the higher res mesh you are using as nanomesh) but it looked like the welder showed up drunk for work that day
I ended up using insertMesh instead manually dragging them into place but seemed like a perfect case for nanomesh if it would be working correctly 
Regrding NanoTile 1.4:
Thanks for the 8k Update Joseph, I can live even with 7824x7824 !
I am not sure if anyone else has reported this yet but I cannot seem to get rid of the placement plane anymore.
I am trying to export ‘scatter maps’ with a transparent background so I can just place them via masks wherever I want but ‘ShowPlacement’ off doesn’t seem to work when ArrayMeshes are involved.
I can make it work fine using my technique from the youtube video but with your plugin I need to create a manual mask out of the ID Map and then delete the background planes pixels via photoshop. Is there a better way to approach this ?
@Campi: For the placement plane showing up on the map generation what passes is it appearing on? For any of the rendered ones it should not be processing if the Show Placement is turned off?
@xedef: Here is a video Tutorial for ya
Here is a quick Tutorial on usage of the NanoTile Texture plugin to create a quick Nylon tiling detail map. Hope this helps!
-Joseph
Awesome Tutorial THANKS JOSEPH!
That was exquisite of you Joseph, thank you very very much!
xedef
Great video!!! many thanks for showing this.
Is it also possible to have plane (groundplane) in there if you wanted to create some ground details using alpha’s instead
of using the nanomesh for ground details. I guess you would need to have a plane (using wrap mode) so its tilable. How would you frame it correctly (plane)? and
would this work using NanoTiles textures plugin? Thanks
Great tool Joseph, thanks!! I did have some questions though. I am having trouble getting things to line up correctly when trying to do offset tiling (i.e. a hex pattern). Again, it works great with square meshes but anything that requires that offset is a little difficult for me to wrap my head around. Any chance you could shed some light on this?
Hi!
Very cool plug! You are a genius Piggyson!
Now I search for the thread, where you had explained the technique, how to do this tileable lizard tool. Can’t find it any more 
Thx for your reply SPRINGFIELD-JACK!
But I think you misunderstood me, because I explained it bad!
Long Time ago there was in this forum a thread where he explained how he develop this lizard itself. Watch it in detail. The legs from the lizard grab 100% perfect in the other lizards head.
You can place full screen with lizards without overlaping any lizard. He uses a nice technique to do this tool, that he use as nanotile.
That was it what I searching for.
I understand this NanoTile Texture tool and used it, very nice and easy to use.
I just did a quick search for “Escher” and “tessellations” and found this http://www.zbrushcentral.com/showthread.php?24902-2-5D-fun&highlight=escher along with many others.
A lot of the earlier posts have missing images and dead links so it is hard to know what is being discussed.
If you remember any other details add them to the search (it is sometimes worth doing a “Site” search in Google)
If you find what you are looking for post the link -I’d like to know too!
@decorix: You can just divide the plane up with SMT off and then sculpt like normal. Wrap Mode ‘1’ will work correctly for the size of the plane [Brush:Curve:WrapMode 1]
@willlord: For creating Hex patterns you just need to apply NanoMeshes in rows then use the ‘Offset’ settings under NanoMesh. Below is an example of a quick Hex pattern using 2x NanoMesh indexes (notice the Polygrouping rows on the plane.)

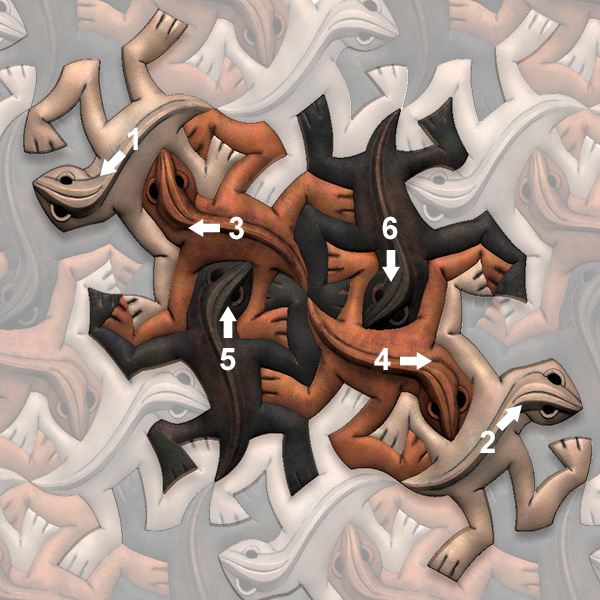
@McFly1437: This link may help as well: http://euler.slu.edu/escher/index.php/Tessellations_by_Recognizable_Figures. I originally did the recreation of the Lizards (Escher 56) using 6 nano indexes (there are 3 sets of lizards) with varying offsets (this took a while )
I then broke the design down even further to just use 2 indexes. Below is a quick image of the break down; the original 6 indexes, then the final chunk used with 2 indexes.
(Escher was the true genius; I just dissected what he already figured out )
@SPRINGFIELD-JACK: That book is really nice; thanks for linking the ZBC thread too!
-Joseph
NanoTile Textures
(Ver 1.5 Updated 5/15/2015)
Installation
**** Make sure you have updated to ‘ZBrush 4R7 P2’ or later! *****
ZBrush 4R7 32bit:
UnZip the attached NanoTileTextures_v1.5_x32.ZIP file to your \Pixologic\ZBrush 4R7\ZStartup\ZPlugs\ folder.
Restart ZBrush.
NanoTile Textures will be located under the Zplugin tab.
ZBrush 4R7 64bit:
UnZip the attached NanoTileTextures_v1.5_x64.ZIP file to your \Pixologic\ZBrush 4R7\ZStartup\ZPlugs64\ folder.
Restart ZBrush.
NanoTile Textures will be located under the Zplugin tab.
**** Make sure you have updated to ‘ZBrush 4R7 P2’ or later! *****
Change Log
v1.2: Initial Public Release
v1.3: Hopefully fixed the issue where Auto Exported maps were being generated incorrectly. (Thanks to ][-][4Z4R][)) for helping test this!)
v1.4: Fixed a ‘Y’ frame plane alignment issue (was slightly offset.) Added 8192 map resolution with some caveats. When selecting 8192 you will get a popup that asks you if you want to use ‘Full 8192x8192 that will have small seams on some passes’ or ‘Seamless 7824x7824.’ (Normal Map, AO, and Height Maps passes should generate seamless at both resolutions.) If you are okay with the maps being generated at 7824x7824 all passes will be seamless. If 8192 is selected on x32 bit; you will get a dialog that pops up suggesting you generate the 8192 resolution maps in the x64 bit of ZBrush.
v1.5: fixed an issue where the default ZModeler brush would be selected after creating seamless maps (You would have to switch back to the NanoMesh brush you were last using each time.)
Notes
-JosephNanoTileTextures_v1.5_x64.zip (78.5 KB)NanoTileTextures_v1.5_x32.zip (78.5 KB)
Thank you so much for this tool!
Everything works great thus far.
I did do a test render and the normal map is rendering color from one of my indexes in the actual normal map.
Any ideas? 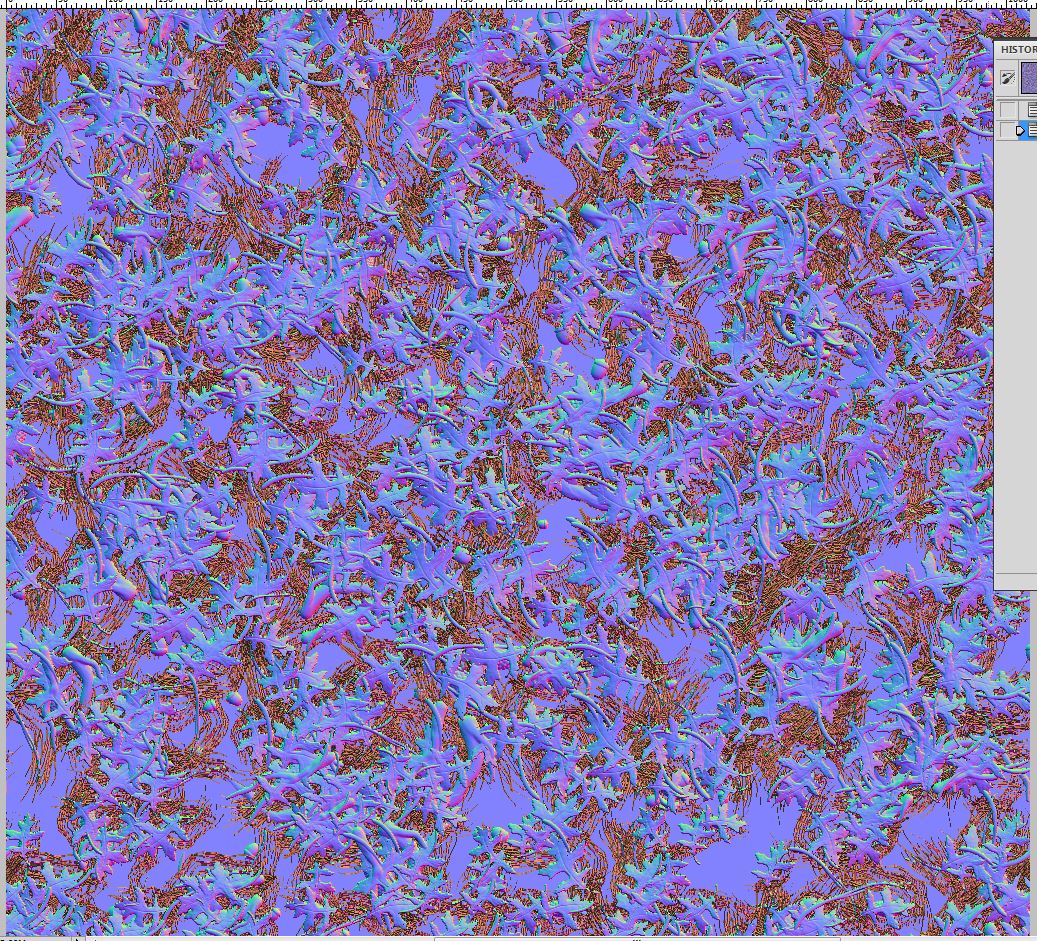
@Chris.3d: Nice catch on this one The NanoMesh index creating the issue had Matcap Material information stored. On rendering this was trumping the Normal Material. Below is an update to the plugin that should prevent this from happening. (The issue may still arise if a Texture Map is applied to the NanoMesh that has MatCap Material information stored thou.)
NanoTile Textures
(Ver 1.6 Updated 5/21/2015)
Installation
**** Make sure you have updated to ‘ZBrush 4R7 P2’ or later! *****
ZBrush 4R7 32bit:
UnZip the attached NanoTileTextures_v1.6_x32.ZIP file to your \Pixologic\ZBrush 4R7\ZStartup\ZPlugs\ folder.
Restart ZBrush.
NanoTile Textures will be located under the Zplugin tab.
ZBrush 4R7 64bit:
UnZip the attached NanoTileTextures_v1.6_x64.ZIP file to your \Pixologic\ZBrush 4R7\ZStartup\ZPlugs64\ folder.
Restart ZBrush.
NanoTile Textures will be located under the Zplugin tab.
**** Make sure you have updated to ‘ZBrush 4R7 P2’ or later! *****
Change Log
v1.2: Initial Public Release
v1.3: Hopefully fixed the issue where Auto Exported maps were being generated incorrectly. (Thanks to ][-][4Z4R][)) for helping test this!)
v1.4: Fixed a ‘Y’ frame plane alignment issue (was slightly offset.) Added 8192 map resolution with some caveats. When selecting 8192 you will get a popup that asks you if you want to use ‘Full 8192x8192 that will have small seams on some passes’ or ‘Seamless 7824x7824.’ (Normal Map, AO, and Height Maps passes should generate seamless at both resolutions.) If you are okay with the maps being generated at 7824x7824 all passes will be seamless. If 8192 is selected on x32 bit; you will get a dialog that pops up suggesting you generate the 8192 resolution maps in the x64 bit of ZBrush.
v1.5: Fixed an issue where the default ZModeler brush would be selected after creating seamless maps (You would have to switch back to the NanoMesh brush you were last using each time.)
v1.6: Fixed an issue where NanoMesh indexes with stored Matcap Material information would not generate Normal, Albedo, or Bump Maps correctly.
Notes

-JosephNanoTileTextures_v1.6_x32.zip (78.8 KB)NanoTileTextures_v1.6_x64.zip (78.8 KB)
Good evening
I extracted and installed the new Plug in.
I also went back to my original IMM brush and filled all the tools with a Basic Material instead of a matcap and grabbed a new texture from the polypaint. I then created a new Nanobrush to teset.
However the color information is still rendering in the normal map.
Is there any other information I can provide in order to help with this issue?
Should I be turning off all my textures on each nano before I run the normal map Create Texture function?
Thanks again for all the support!
UPDATE EDIT:
I found a workaround. When I enable Use BaseMesh UVs and Use BaseMesh texture under UV in the NanoMesh palette this appears to render the normal map correctly.
It strange how I don’t have to do this with the other objects in the nanomesh brush.
@Chris.3d: This version should solve the texture issue. Let me know if it does not
NanoTile Textures
(Ver 1.7 Updated 5/22/2015)
Installation
**** Make sure you have updated to ‘ZBrush 4R7 P2’ or later! *****
ZBrush 4R7 32bit:
UnZip the attached NanoTileTextures_v1.7_x32.ZIP file to your \Pixologic\ZBrush 4R7\ZStartup\ZPlugs\ folder.
Restart ZBrush.
NanoTile Textures will be located under the Zplugin tab.
ZBrush 4R7 64bit:
UnZip the attached NanoTileTextures_v1.7_x64.ZIP file to your \Pixologic\ZBrush 4R7\ZStartup\ZPlugs64\ folder.
Restart ZBrush.
NanoTile Textures will be located under the Zplugin tab.
**** Make sure you have updated to ‘ZBrush 4R7 P2’ or later! *****
Change Log
v1.2: Initial Public Release
v1.3: Hopefully fixed the issue where Auto Exported maps were being generated incorrectly. (Thanks to ][-][4Z4R][)) for helping test this!)
v1.4: Fixed a ‘Y’ frame plane alignment issue (was slightly offset.) Added 8192 map resolution with some caveats. When selecting 8192 you will get a popup that asks you if you want to use ‘Full 8192x8192 that will have small seams on some passes’ or ‘Seamless 7824x7824.’ (Normal Map, AO, and Height Maps passes should generate seamless at both resolutions.) If you are okay with the maps being generated at 7824x7824 all passes will be seamless. If 8192 is selected on x32 bit; you will get a dialog that pops up suggesting you generate the 8192 resolution maps in the x64 bit of ZBrush.
v1.5: Fixed an issue where the default ZModeler brush would be selected after creating seamless maps (You would have to switch back to the NanoMesh brush you were last using each time.)
v1.6: Fixed an issue where NanoMesh indexes with stored Matcap Material information would not generate Normal, Albedo, or Bump Maps correctly.
v1.7: Added code to remove MatCap data from any linked textures (textures that have the ‘M’ channel baked in) before generating the Normal, Albedo, or Bump Maps.
Notes
Hopefully this version will fully prevent MatCap contamination on Normal Map generation.
-JosephNanoTileTextures_v1.7_x32.zip (78.8 KB)NanoTileTextures_v1.7_x64.zip (78.8 KB)
@decorix: You can just divide the plane up with SMT off and then sculpt like normal. Wrap Mode ‘1’ will work correctly for the size of the plane [Brush:Curve:WrapMode 1]
Hello Joseph,
I have appended my TexturePlane which uses unified space setup. With lets me
sculpt on the edges of my borders using brush/curve wrap mode. To frame my unified space correctly I’m using
a FRAMER subtool.
The problem I’m having is that when I turn on YtileExample and start playing adjusting nano-mesh.
and want to renders out my maps its not tilling correctly. Is this because of running the nano-tile
plugin it frames it on different size. Or are there other things I should consider/check? How
would I set this up correctly?
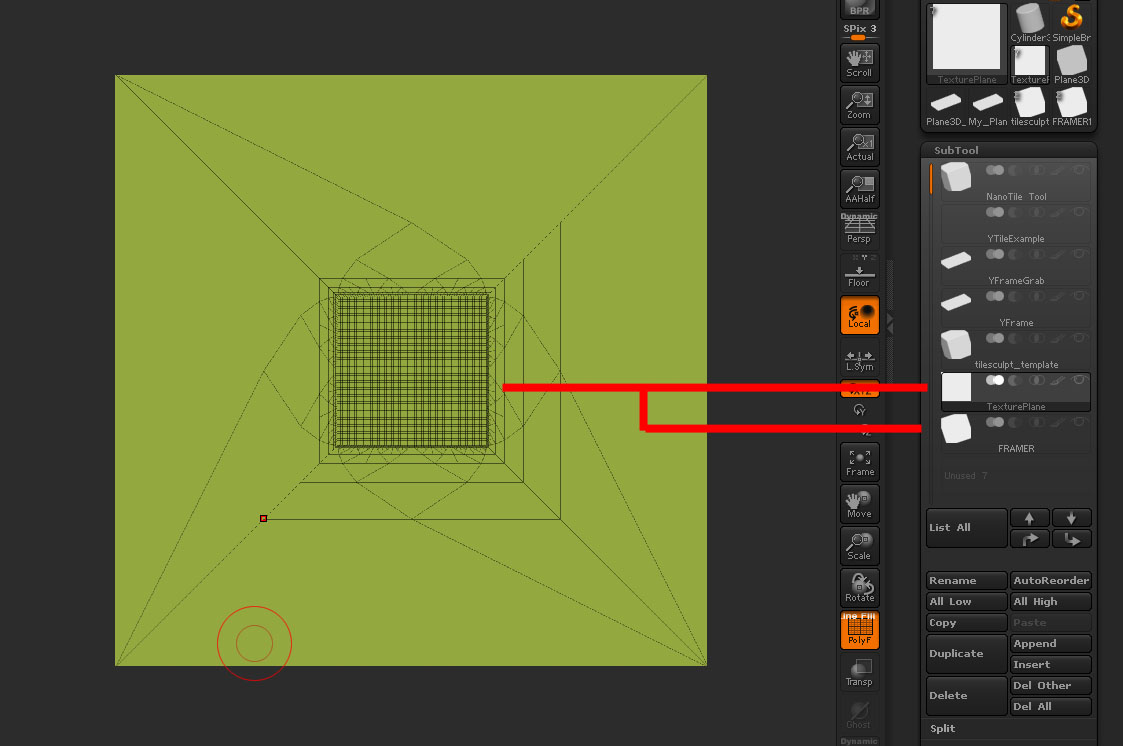
@decorix: If you can you PM me your TexturePlane I’d be happy to take a look at it. It should work fine as long as the ‘middle geometry section’ is the same size as a Plane3D Object (if ‘Wrap Mode 1’ is working this should be fine.) The order in which you have it setup should be fine too. Just make sure that the top 4 Subtools stay the same (the script is using the order to process the framing.)
Clicking the “Frame” button (on the right side of the canvas UI) can also break the framing of the “Reframe the TileTool” and “Create Seamless Maps” process. Try clicking the “Frame” button again and see if it will Re-Frame correctly.
(Clicking the ‘Frame’ button actually toggles between two frame modes: all Subtools, or selected Subtool. There is no way to check which mode is active in scripting. So make sure you have it framing to “selected Subtool” before running the “Reframe the TileTool” or “Create Seamless Maps.”)