ZBrushCentral

My first ZBrush Model...

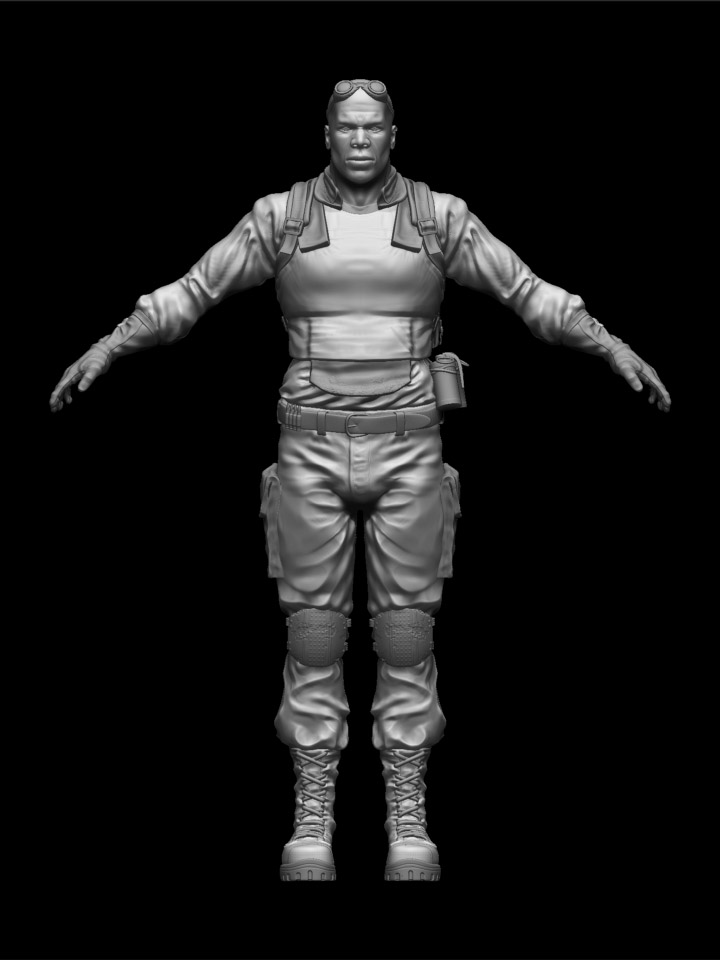
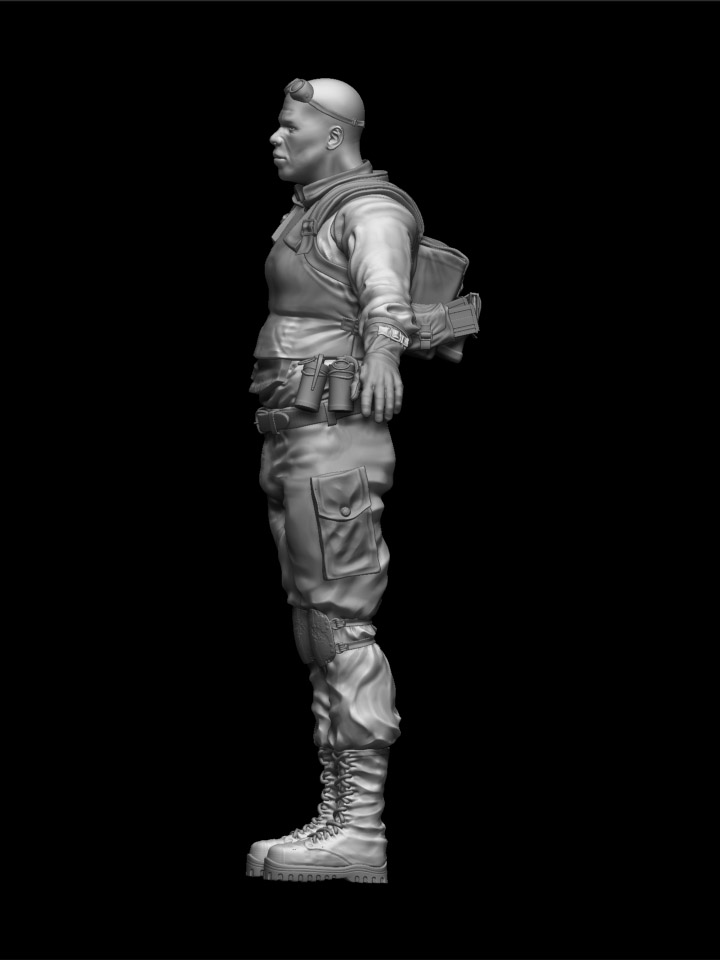
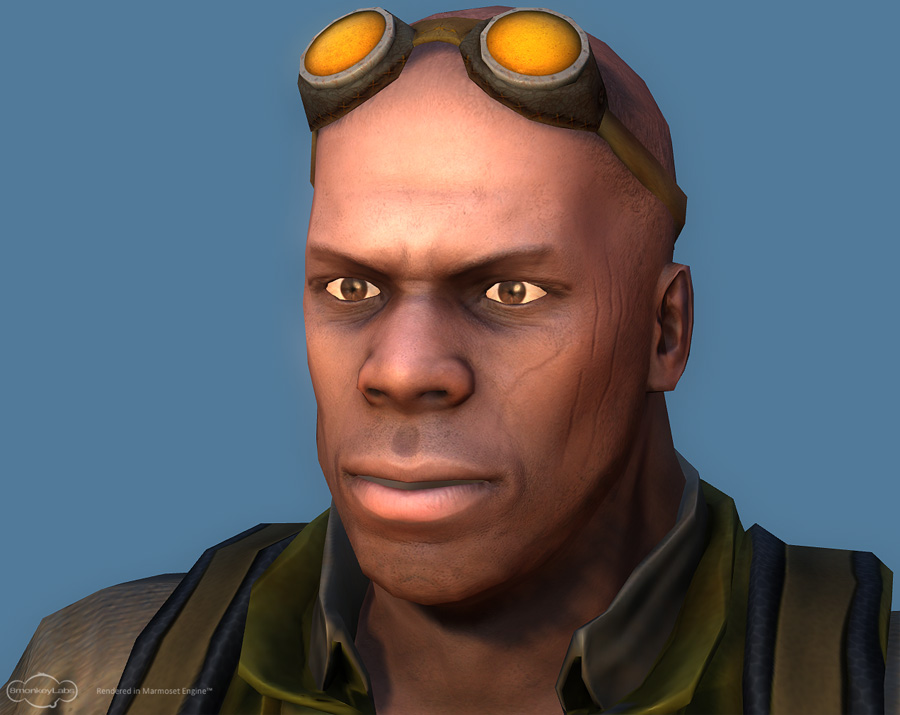
Hi all- allow me to introduce myself; I’m Russ, I’ve decided to learn 3D modelling (I am currently a primary school teacher)and I recently bought ZBrush along with some training vids from Escape Studios. After playing with the various tools I also got the Gnomon tutorial on hi res game modelling and this model is the result of two days’ hard sculpt.

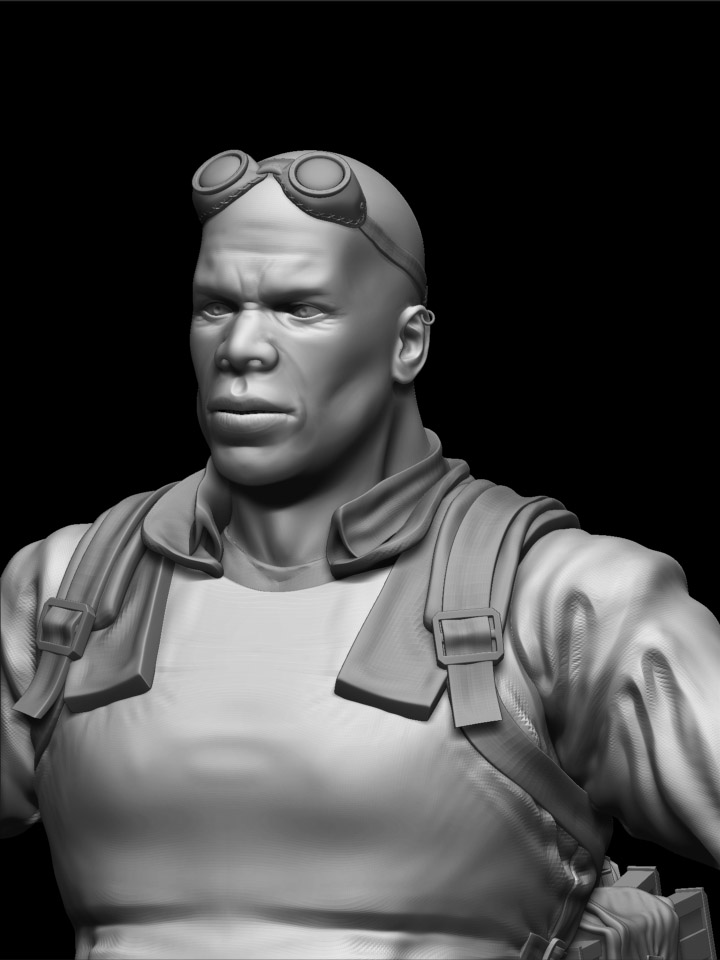
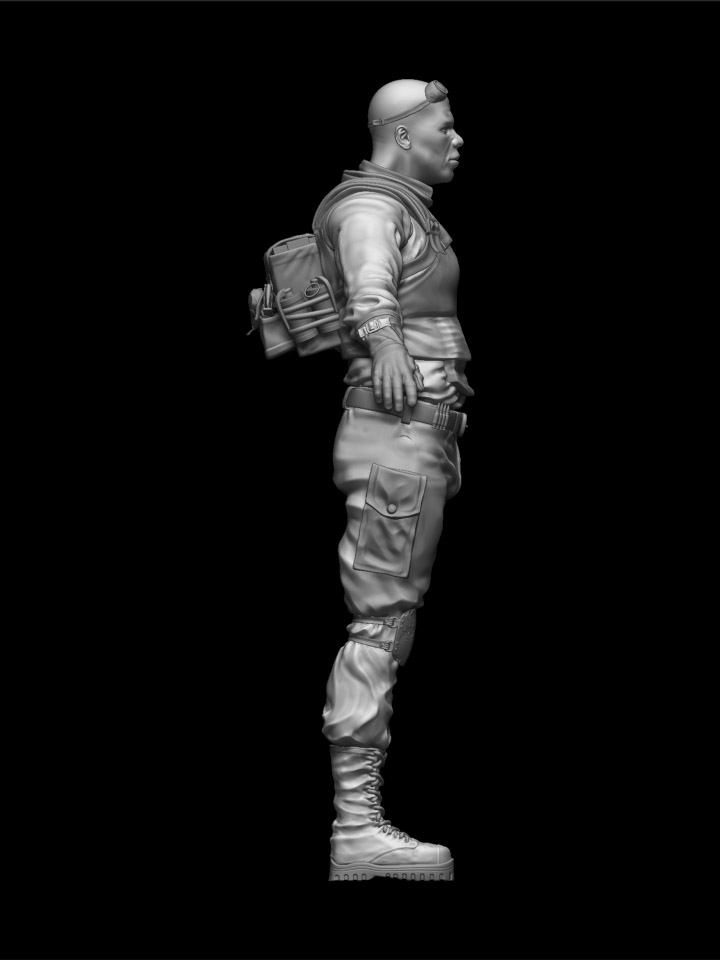
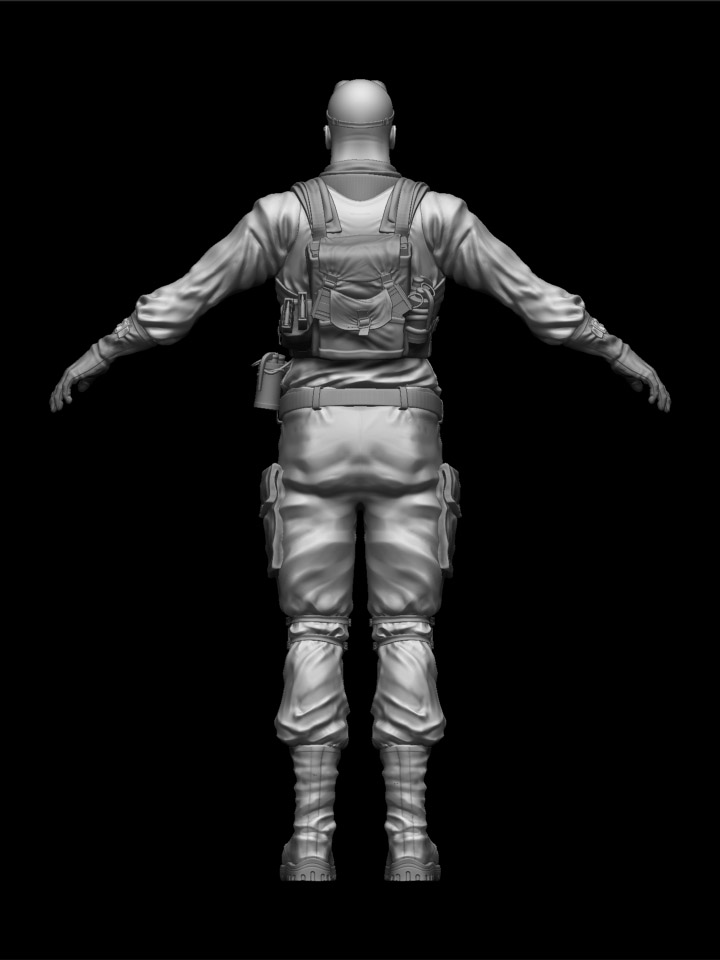
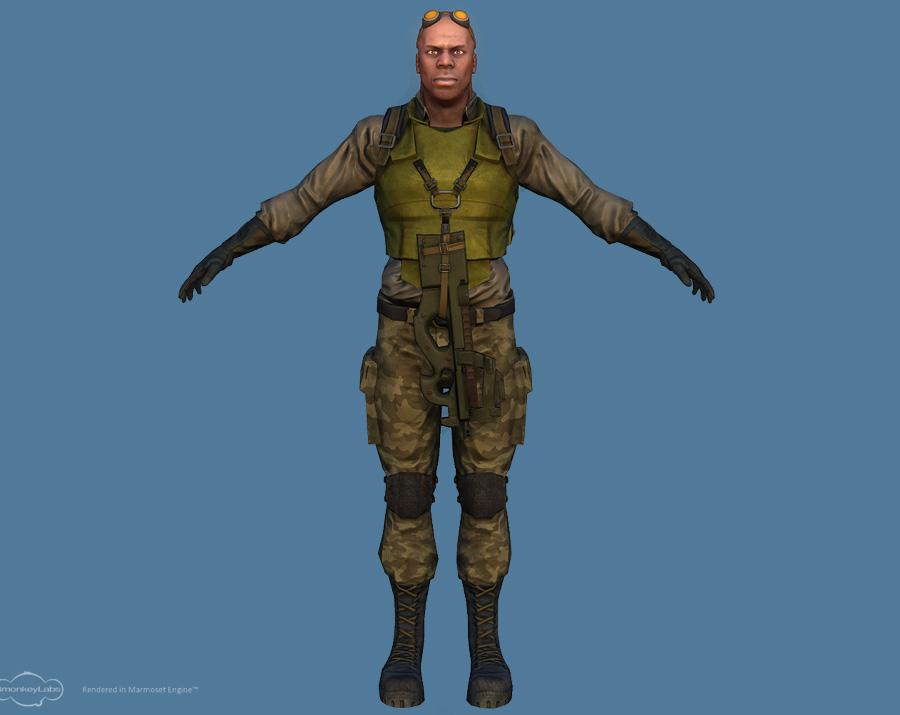
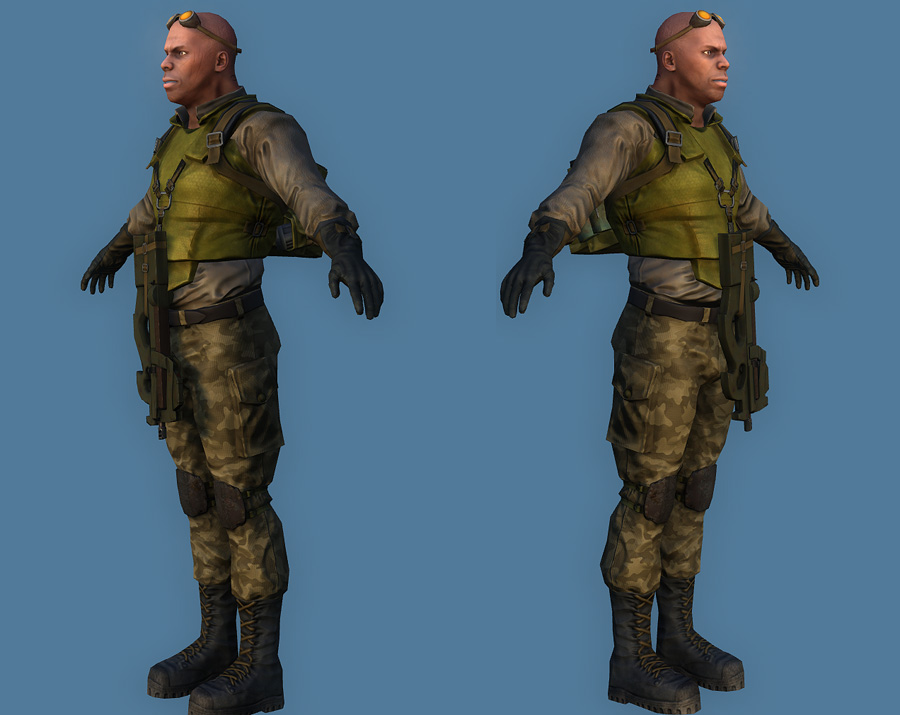
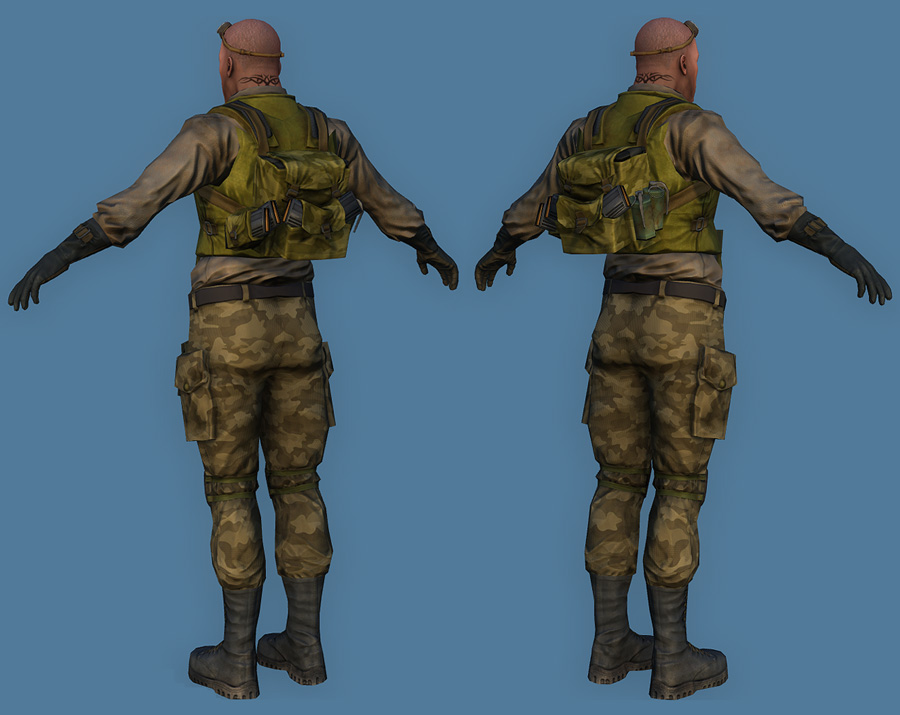
I was going for a “merc” looking guy who I can texutr up in a formal military style or equally go with a tattered, apocalyptic texture. I decided to have a go at doing a more african face than a generic “white guy”, which was a first as I’ve not modelled heads beofre. This will be generating normal maps for realtime render, so there’s no skin pores or similar level of detail as I will be putting that directly onto the maps by hand. I’ll be adding a P90 style weapon which clips to the body armour front (like in SG atlantis) so there’s not much detail in that area.

So, this is my first attempt at a sculpt, hope you appreciate it…feedback welcomed!

[attach=142089]front01.jpg[/attach]

[attach=142090]front06.jpg[/attach]

[attach=142091]front02.jpg[/attach]

[attach=142092]front03.jpg[/attach]

[attach=142093]front04.jpg[/attach]

Attachments

front01.jpg

front06.jpg

front02.jpg

front03.jpg

front04.jpg

very very good for first work)
but I dont believe this is first ))))

I’m new to Zbrush and 3d sculpting as well so I really enjoy looking at beginner work. I really like the way the wrinkles in the clothes breath life into this character and look forward to seeing him textured. Did you start out with the standard mercenary package they had and change it from there? If so I like the details you’ve added. It shows that you have a knack for realistic looking accessories, keep up the good work and I hope to see more of your posts.

I’m going to stop explaining that this is my firsat model and take it as compliment that people don’t beleive me :smiley:

I didn’t use the Merc base you mention. I recommend the Gnomon tutorial I used as it makes the process of creating a sculpt like this simple to pick up with a little effort.

A textured version now exists but it’s a low res realtime game model with normal maps and occlusion maps from this one, all per the tutorial. If you want to see it, it’s on the Game Artisans forums in 3D WIP as “Gnomon Merc” - I won’t post the images here as they are not ZBrush sculpts, but low res built in Maya. I’m very pleased with the infal results though (even if the render is a bit wonky!).

Cheers

Prax

you can post your final image even if it’s a maya render in low rez

for us it’s interesting to see what append to your zbrush sculpt even if you render only normal maps…

lots of images in this forum are not only zbrush, for exemple, you can post some reference images to show what you are trying to do or you can post photoshoped images of your works, or the low res version of your zbrush sculpt.

For me either it’s difficult to understand how you do this sculpt in only two days and as a first sculpt… but we are not here to know if you lies or not, that’s just append because for most of us, the first sculpt is horrible. I believe you, and I recommand you to continue your works and to lear from tutorials. You have already some very good skills for modelling, and I think I will see your name again…

you can be proud of your first sculpt

Thanks for the comments. Like I say, 2 days’ sculpt but for me that’s probably close to 30+ hours work! Because of my full time job I often get up at 5:30am and do 2 hours before work, and at the weekend *(when this was done) I get up around 5:30 and can still be going at 9:30 at night if my wife lets me!

Anyway, here are some renders of the final, which includes the P90 I mentioned originally. I worked for about 5 days on getting the low poly built, mapped and making the mapping work the way I wanted. Painting textures was about another three days’ work, but the gun kept going wrong despite looking really simple! If the proportions seem a little different, it’s just the difference between ortho and the persepctive render. Rendered in Marmoset, which I recommend to anyone doing low poly!

[attach=146046]beauty1.jpg[/attach]

[attach=146047]beauty2.jpg[/attach]

[attach=146048]beauty3.jpg[/attach]

[attach=146049]beauty4.jpg[/attach]

Attachments

beauty1.jpg

beauty2.jpg

beauty3.jpg

beauty4.jpg

Did you start totally from scratch with your model? I was thinking of getting that tutorial. Are some of the models he uses included in the package? I don’t think I’ll buy it unless that’s the case.

You do start from scratch, but the tut also comes with the ztl of his model and all the maya files and obj files for the final. You could also probably use one of the male torso base meshes from the downloads area of pixologic to get going. When you see the workflow, there’s alot of generating REALLY basic objects in maya for creating zbrush topology, but they are often just cubes or similar, and you can use any 3D package, it’s not maya specific. Ther’s aslo a couple of places whee he uses nurbs in maya but I used zspheres, but only because I’d just read up on them- that’s how I did the laces of the boots.

It’s a really good tut, and highly recommended. Just one thing- it doesn’t teach texturing beyond generating a normal and occlusion tex- you have to ifgure the rest out yourself :slight_smile:

hey thanks for the reply and the update. Its some really amazing stuff, I’d say use the tutorials you have and see how far they take you, so far so good. I’m having to teach myself so it will be a longer process.