If I were you madmax, I wouldn’t hestitate to buy Zbrush, especially before the cost goes up to 600+.
You definetly have the artistic and creative talent for this, no doubt. 
If I were you madmax, I wouldn’t hestitate to buy Zbrush, especially before the cost goes up to 600+.
You definetly have the artistic and creative talent for this, no doubt.
Thanks AngelHoof:)
i’m really thinking at it:) but i don’t have so much money (i’m a student), so i need to get the money working first, and then i’ll buy it!
for now i’m really enjoy the demo!!
Some one know how to unwrap uv’s from a model in zbrush without uv master?
Thanks to everyone for the tips:)
Simplest thing is to go to the UVmap meny and choose AUV tiles. Adaptive UV basically places each polygon in the model as a square piece on the texture map. Make sure that you’re in the lowest subdiv level.
Good thing about AUV: It uses between 90-100 percent of your texture map (unlike unwrapping that depending on model shape and amount of UV islands might leave a lot of the texturemap unused)
Bad thing: The texture map looks like a quilt and you can forget about doing any serious texture work in photoshop.
There are some other options in UVmap menu but I never used them. Should be explained in the help, or possibly if you press CTRL (or shift, don’t remember) and hover the mousepointer over the buttons. Then you get more detailed info about button.
And lastly. A lot of people use external software to create UV mapping.How it’s done depends on software.
Doesn’t Polypaint exist in 3.1 ? That’s pretty nice since no UV mapping is needed.
madmaxxx to get the uv’s you could try getting another trial of a 3d program. If you get a program like 3ds max or maya, they have the option of unwrapping the uv’s.
I use 3ds max and zbrush. what I do is make a base mesh in 3ds max, unwrap the uvs, then bring it into zbrush and sculpt. It might be just my method, but its worked really good so far.
Thanks Verde
and with 3ds max the steps are diffucult?? there is a simple tutorial?
LMMagnusson
“Doesn’t Polypaint exist in 3.1 ? That’s pretty nice since no UV mapping is needed.”
I can’t find polypaint so i think that in the 3.1 it dosen’t exist:)
And where is “UVmap meny and choose AUV tiles”?
Thanks so much for the help!
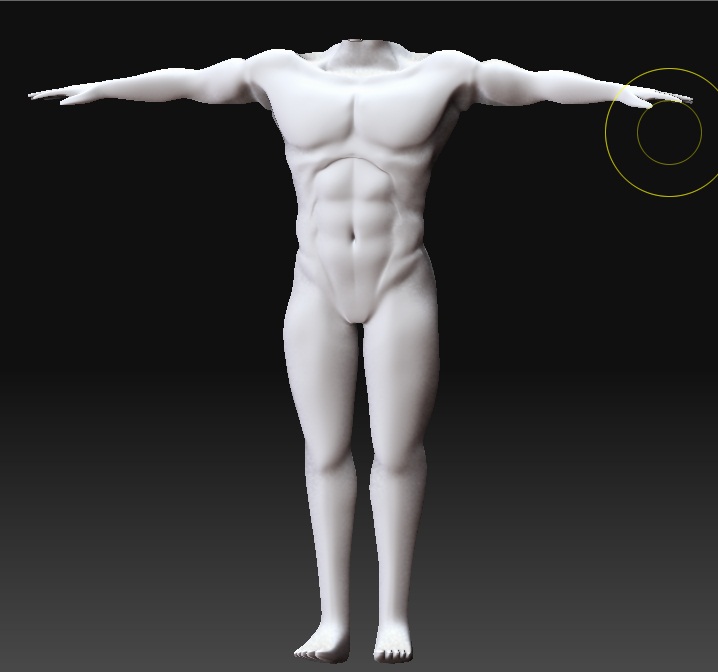
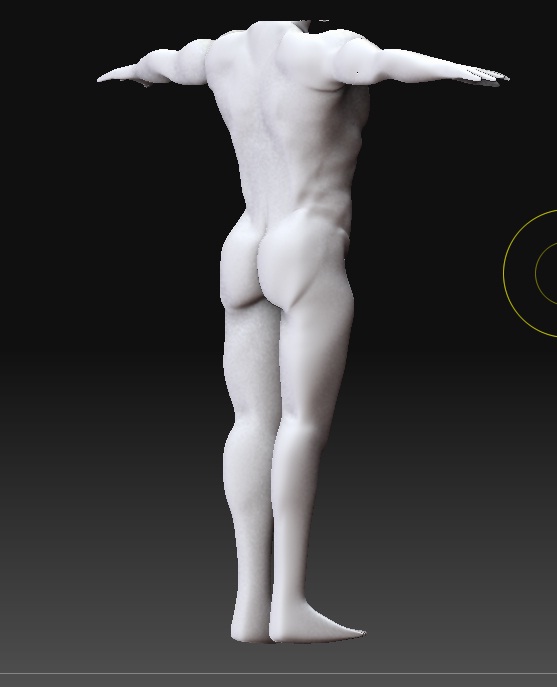
A little update of what i’m trying to do now:)
it’s a sort of study of human anatomy…i did the torso, for the legs i want to create some jeans, how can i do this in zbrush??:)there are tutorials about dress, t-shirt ecc??
thanks very much
Here are the test:
[ ](javascript:zb_insimg(‘210655’,‘male_body1.jpg’,1,0))
Should be found here:
Tool - Polypaint
Tool - UV Map
For clothes:
Paint a mask by holding CTRL (yellow cursor)
Tool - Subtool: Extract
Tool - Masking: Clear , to get rid of mask when it’s not needed.
Basically 90% of everything that is really usefult can be found in Tool meny
I was watching the videos of Uvmaster, but one question came to me…When you have unwrapped the uv, how you save it?? you take it in photoshop?and if it’s in photoshop how can you paint it??and after that how can you (in a external program like 3dsmax)apply this uv to the object???
Sorry for the neewbie’s question, but i don’t know how it works and i’m really interested in this process!
PS:tomorrow i’ll try to model jeans:) thanks LMMagnusson:)
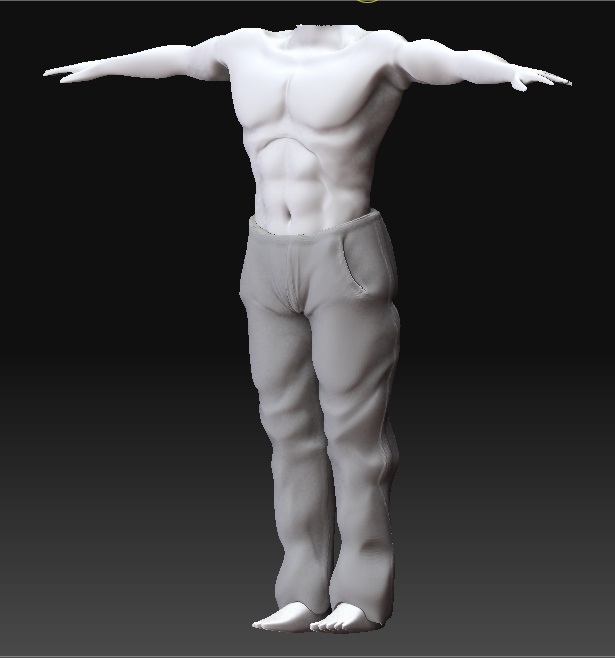
A lillte update of the model…
[ ]
]
Nice jeans!
Don’t have Zbrush on my work computer so I hope I remember correctly:
UV mesh:
First:An icon in right toolbar that looks like a grid to turn on meshgrid on model. Use lowest Subdiv.
Tool - Texture : From UVCheck, (if you polypainted, then you can also use From Polypaint) then Clone texture which makes it appear in the top texture menu. There you can export as PSD, TIF and BMP for editing in Photoshop or similar.
The exported UVCheck image looks like what you saw in the uvmaster video when they pressed flatten.
Most render softwares like MaxwellRender, 3DSmax, Maya etc then lets you create a material for your imported object.
And in that materials color-channel you can import the texture image.
It’s slightly different in all systems so you’ll have to go through manuals/tutorials for that as well.
The “UV information” is stored in your tool. If you do the UV unwrap (or AUV) in ZBrush, you have to export your tool as an OBJ file and then import that into the external rendersoftware.
It’s the same if you do as Verde suggested. Creating a base shape and UVmapping in for example 3dsmax, then exporting it as OBJ (UV info is inside that file) and import into ZBrush. Work with it in ZB, Export as OBJ, import into 3DS again, render.
I understood:)…But… when you get the file unwrapped, and you take it to photoshop, how can you bring to the right positon eyebrows, mouth ecc?? how do you paint that?
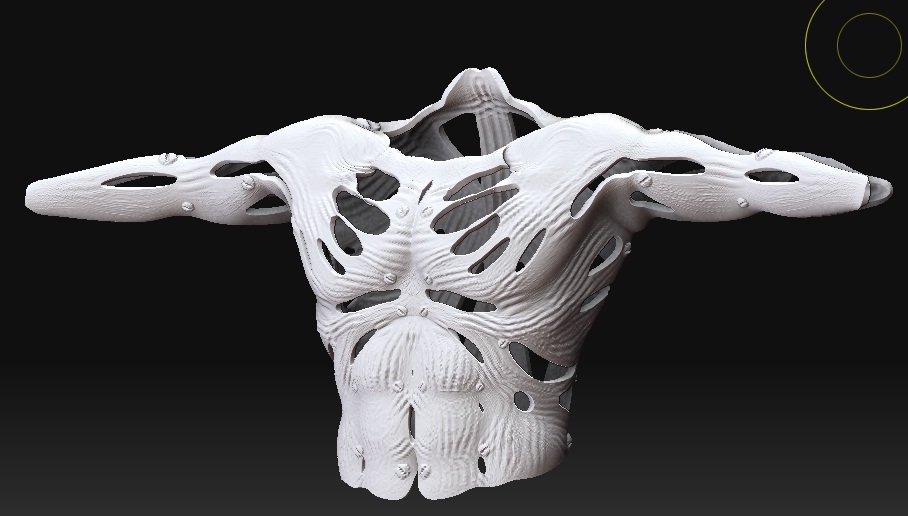
Those are experiments for the clothes:
[ ]
]
Ok, granted that for some models, only the flat mesh really isn’t helpful when it comes to detail stuff like eyebrows.
I export the uv map and has that as a shape referense in the bottom layer of photoshop.
Then polypaint as much as possible, export that, and add that as a second layer in photoshop.
Then I can paint finer detail in photoshop, because the limit with polypaint is that you paint the polygons. You might need many millions of polygons to be able to paint a hair in an eyebrow. (HD geometry is a way to get that, tutorials on the same page as the rest)
However, if your hardware can’t handle enough polygons you could polypaint where the eyebrows should be, then in photoshop paint the individual strands of hair.
See this thread for polypainting example (a lot of practise needed to get this skilled ):
http://www.zbrushcentral.com/showthread.php?t=90781&
There is some news in ZB4 that might make photoshop unnecessary…but I havn’t tested those things yet…think it’s called Spotlight?
In my latest ZBrush sculpt (ZB 3.5R3):
http://www.zbrushcentral.com/showthread.php?p=713947#post713947
I made the coloring with polypainting, and in photoshop I added the “skin”-detail, took a photo of skin on a hand, and basically filled a photoshop layer with that and then blended it with the photoshop layer that had the polypainted detail. Gave some nice fine detail to the model that I couldn’t polypaint (because I used a, for ZBrush, rather low-polygon mesh)
Thanks very much LMMagnusson:) in those days i’m trying the polypainting:) but i have another question… someone can expain to me the process to get a realistic portrait? how do you get the right shape of the face ecc??there is a simplest way than the one with photoreference and model the head starting from a sphere??_:)
Thanks:)
no one can help??
You can try the search button and check some of the threads in the forum, sometimes they show the step by step.
And since this forum is open for everyone to see, you can even search with www.google.com
Enter this in the google search field:
head sculpting site:www.zbrushcentral.com
Got 2450 hits on that search.
(the site: part is important, otherwise you will end up getting a lot of useless links)
And don’t worry about lack of response, this forum is slightly oddly organized with ONE “Main Forum” that everyone posts in, both final galleries, work in progress, questions…I mean, an hour after posting, your thread can be pushed to second page if a lot of others post in other threads.
I didn’t respond when the email notification came since I don’t have any good answers on this. I don’t do portraits that look like someone (if I try, it usually ends up as a monster of some kind since I think that is more fun :D)
I have however seen recommendations to switch to perspective view on a regular basis (or possibly constant perspective on?)
Since if you ha a photo referense, that photo will have some perspective distortions in it (depending on camera lens, bigger zoom lenses, and larger distance to face = less distortion), so for example, it’s not good to use a photoref that is taken with wideangle lense close up (like a cellphone camera close to face)