my galery: http://cghub.com/images/view/99968/
thank you for watching
Attachments
I love them all! Such cool character designs! Great sculpts!
wow thats awesome. well done!!
just a question how to do low poly fur?
Great cloth sculpting 
nice character, i’ll use them always for reference
very nice characters …
thank you very much everyone !!
for the fur render in low ploy check this PDF from shadow of the colossus, it’s a very good way to have good render with just a small texture.
http://www.bruno-urbain.com/resources/making_of_sotc.pdf
the trick is to have one texture with very small alpha dots on it, then you multiply the layers of polygons to have deepness into your mesh.
once you have it you must now build a shader who consider the fresnel of your mesh as an alpha (to hase smooth profile) and to finish you color the layers of polygons with some vertex paint (from the base layer wich will be very dark, to the outside layer wich will be the brighter one)
…i’m not sure i’m very understadable but if you read the pdf from the link i give to you i’m sure tou will understand.
now it’s a very common way to do fur in video games (look the screenshots from the first lost planet for example) but the first who started to do this was those genius of Team ICO…
great work, as always in the AC line.
congratulations 
cool stuff, bro
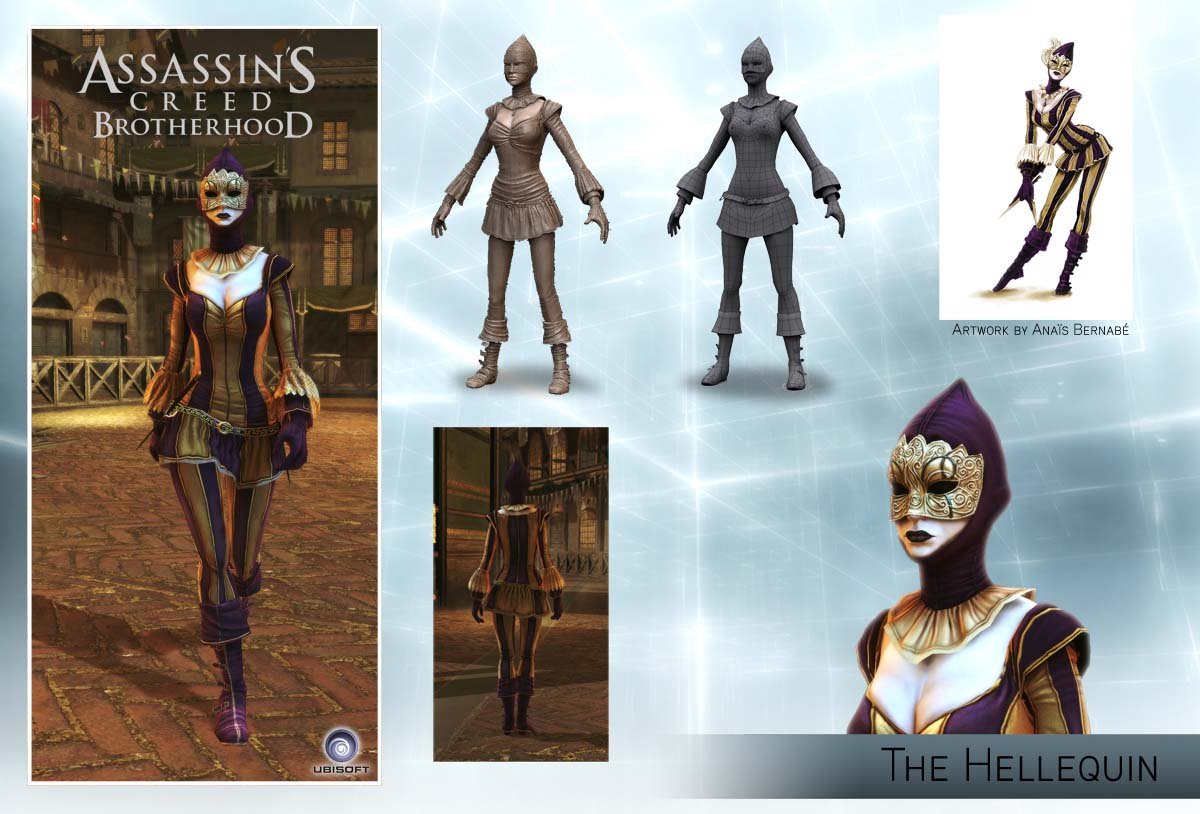
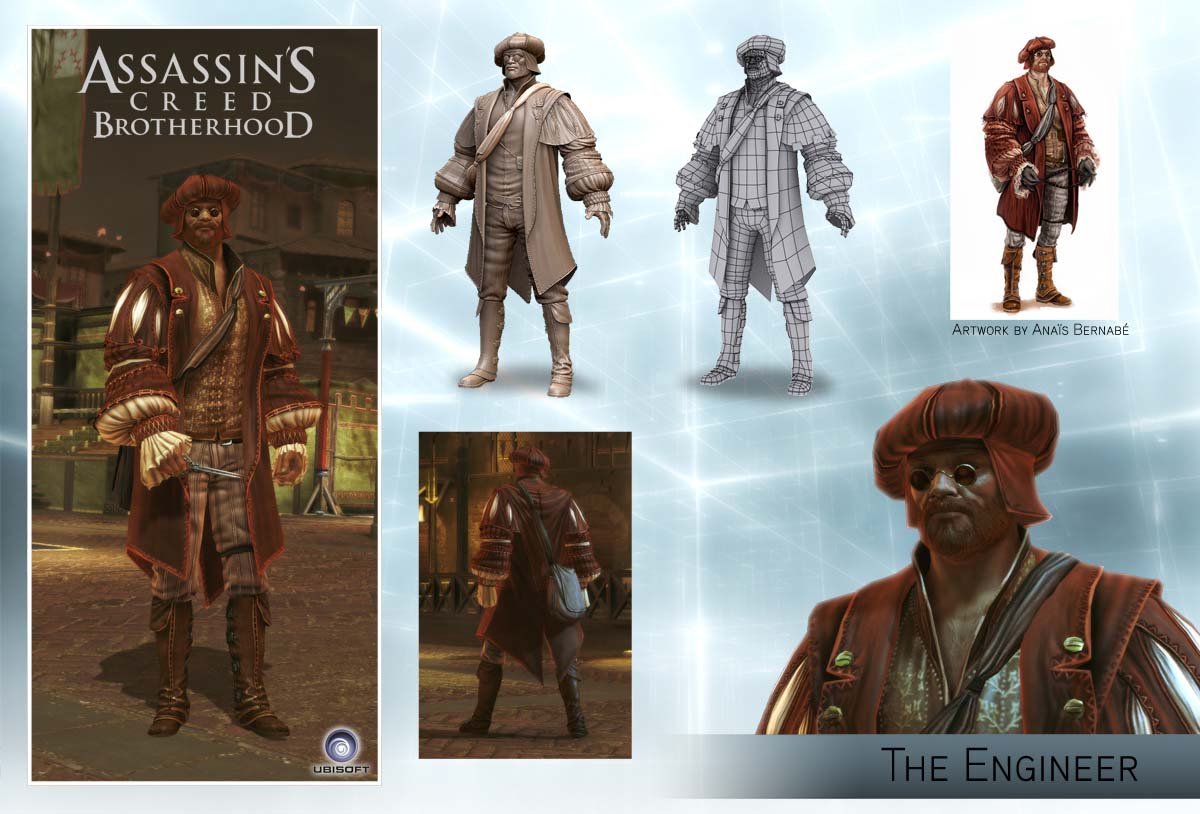
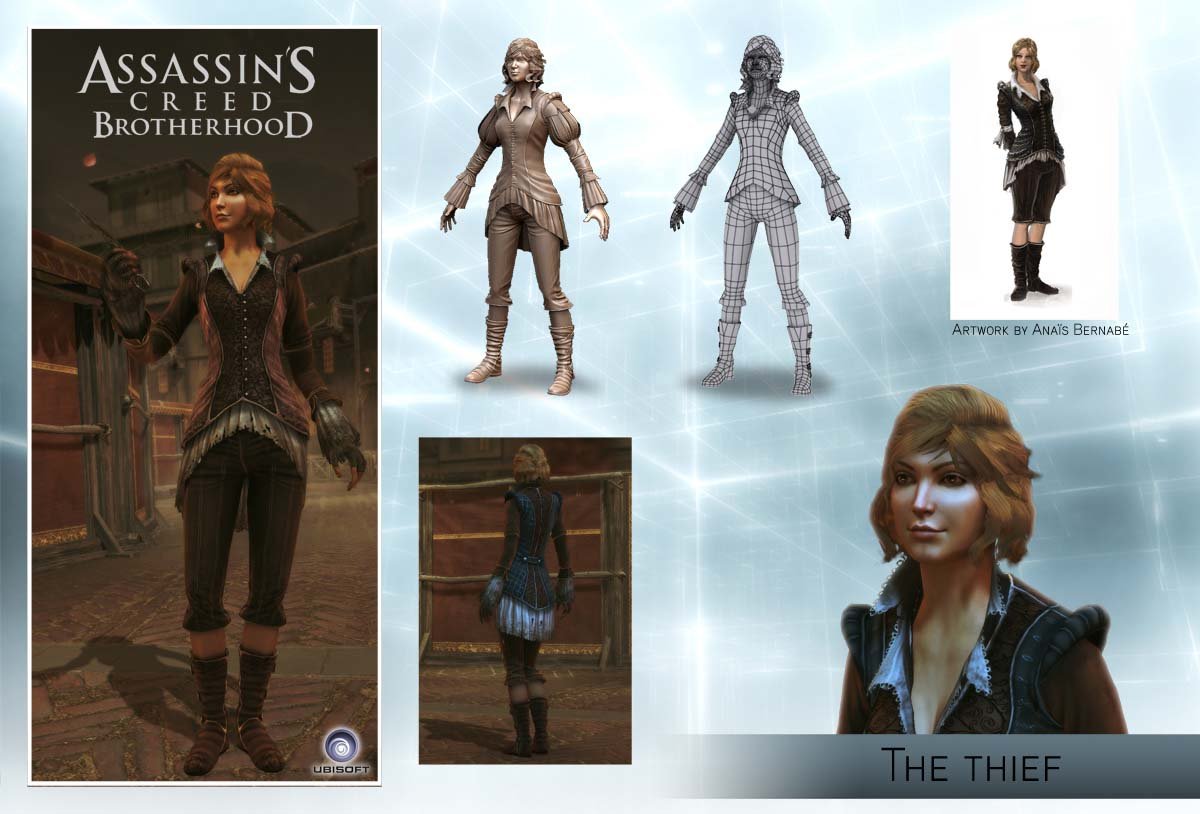
Nice work! I really like that engineer costume.
Amazing work. Any chance of seeing some more work flow images. i.e How you generate the normal maps on such low poly mesh and keep the detail. When I generate mine in Zbrush they seem to not want to work if the mesh is too low poly(no fine detail). Thanks for sharing.
thank you again for the compliments !!!
@soulty666:
to generate a very clean normal map on these characters i use topogun and xnormal:
once iv’e finished my hires character i use the decimation master plugin to export the object from Zbrush with not too much polygons but a very good fidelity.
then i started to retopologozed my meshes in topogun from zero.
I unwrap my Uv and export the very high poly mesh from zbrush and the low poly with unwrapped uv into xnormal.
once i’ve finished this i just have to generate my normal maps and then i start to texture the character.
our workflow is very close to the Mashru Mishu’s tutorial :
http://www.tutorialized.com/view/tutorial/Street-Cop-Workflow-3D-Character-Modeling/36296
you should look at this, it’s very usefull to understand how to process when you have to bluid a very detailled character with very hard constraints.
i hope it will be usefull.
thank’s to everyone for the comments
great work!
Thanks, much appreciated. I need to have a look at xnormal.
Such a cool thing to work on AC!, great characters!
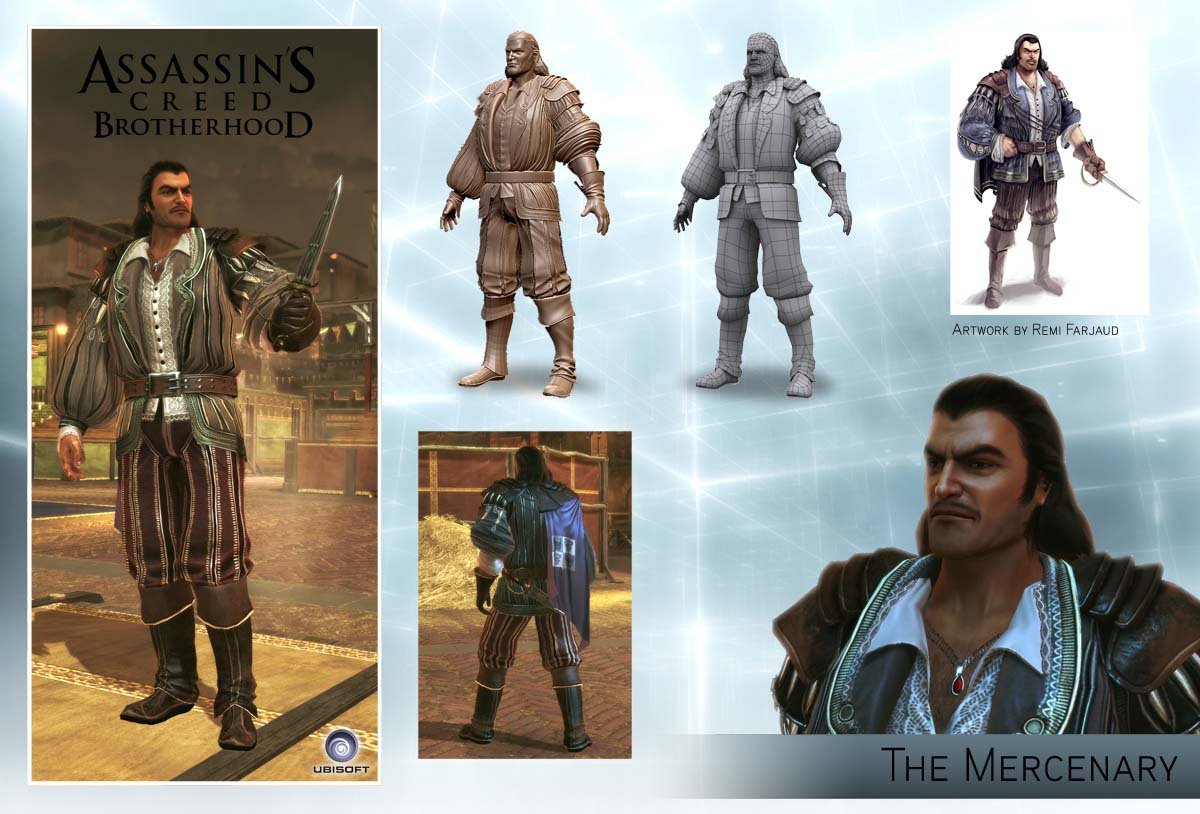
hi man, congrats for your work on the the multiplayer version.
You guys did a cool work on the character designs for those characters and the models/textures are nicely done as well 
once again thank you everybody for the congrats, it’s very rewarding !
thank you very much for the compliments as i say earlier it’s a privilege to work with the assassin’s creed team.
i’ve seen your work and this is really a good work that all the team have accomplish on the solo experience.
I hope we could talk more and exchange our tricks  .
.
Whats the polycount on those chars ? Really good job you did!
this characters have between 7000 and 8000 triangles depending on the characters and on the levels of customs you selected.
thank you for the compliment