ZBrushCentral

Music video animation: First zbrushing attempt

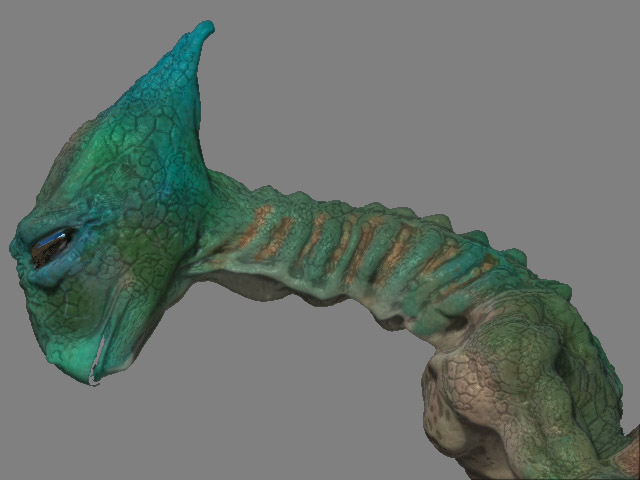
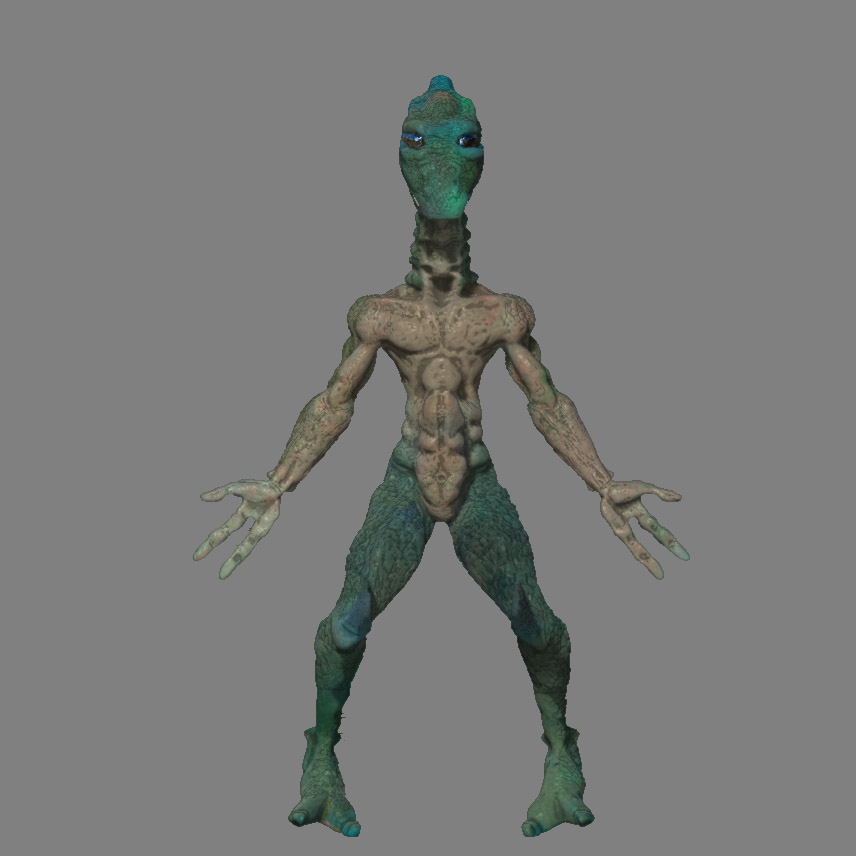
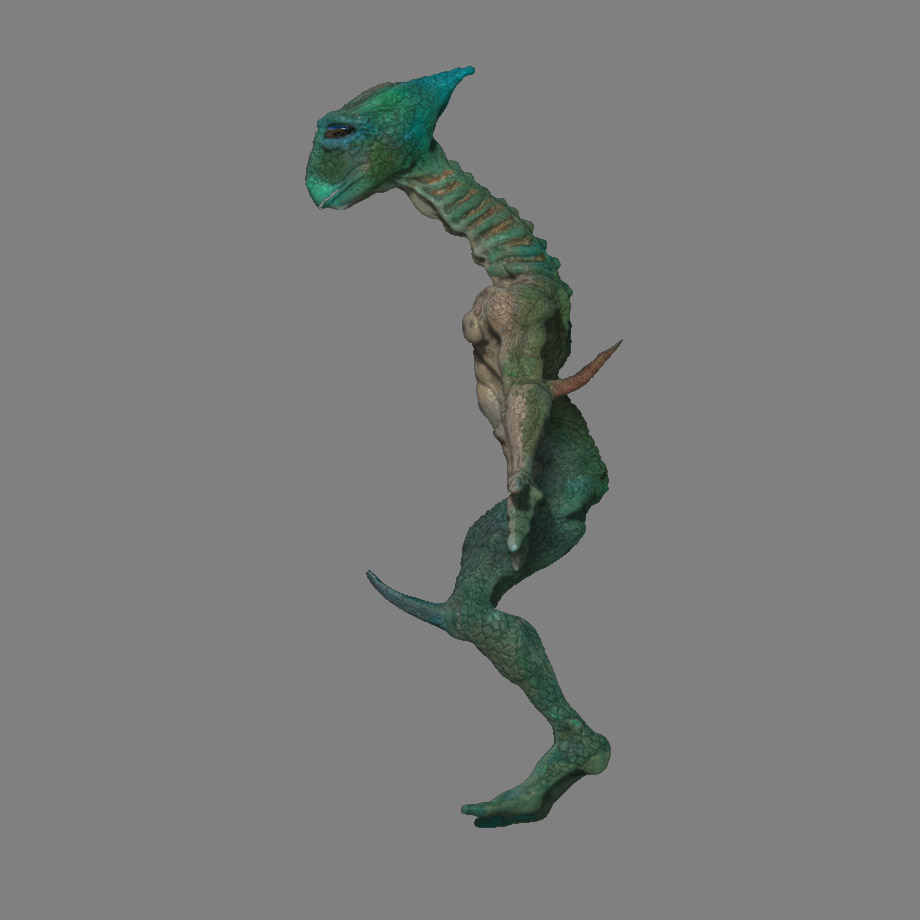
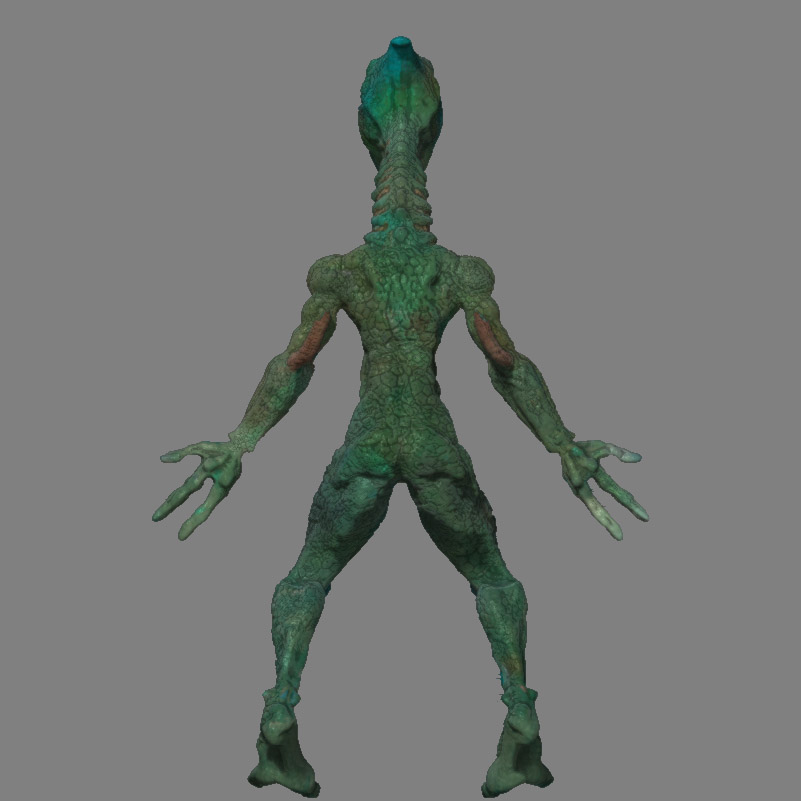
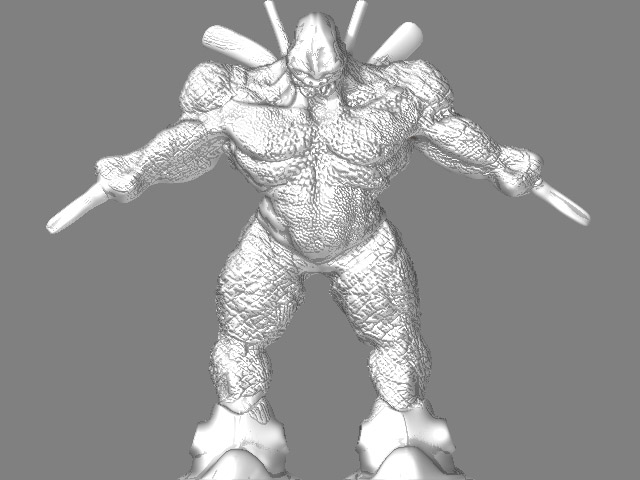
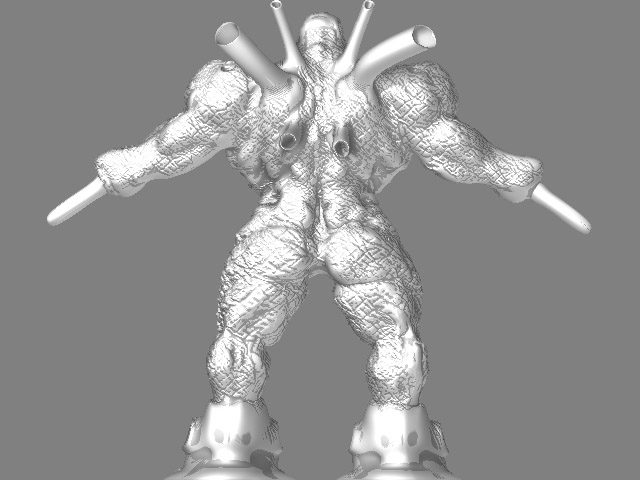
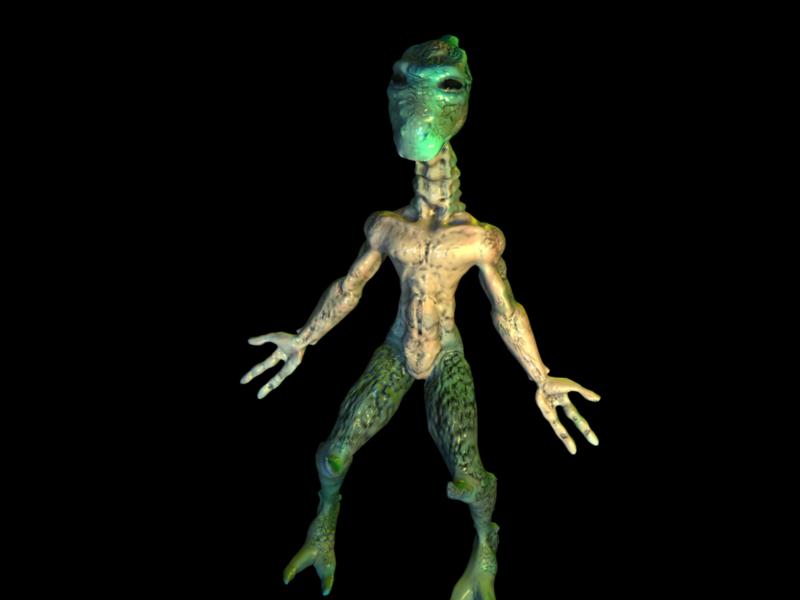
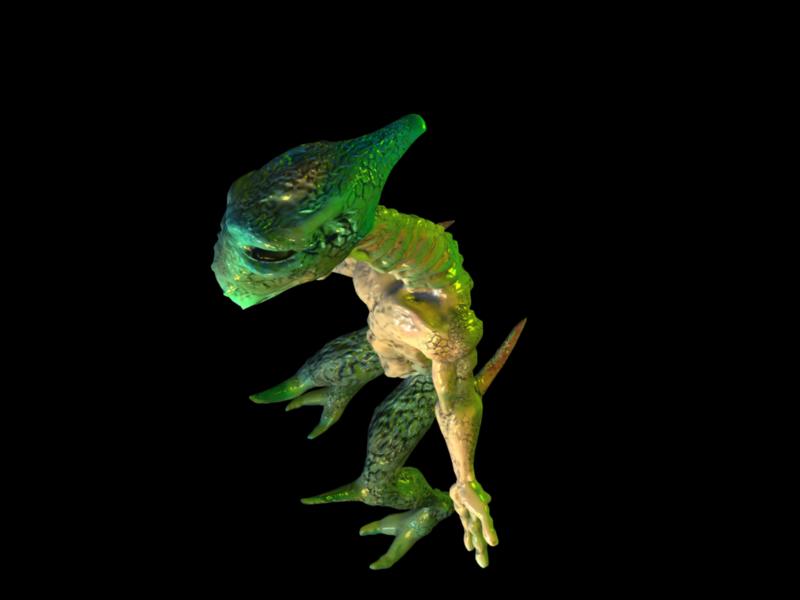
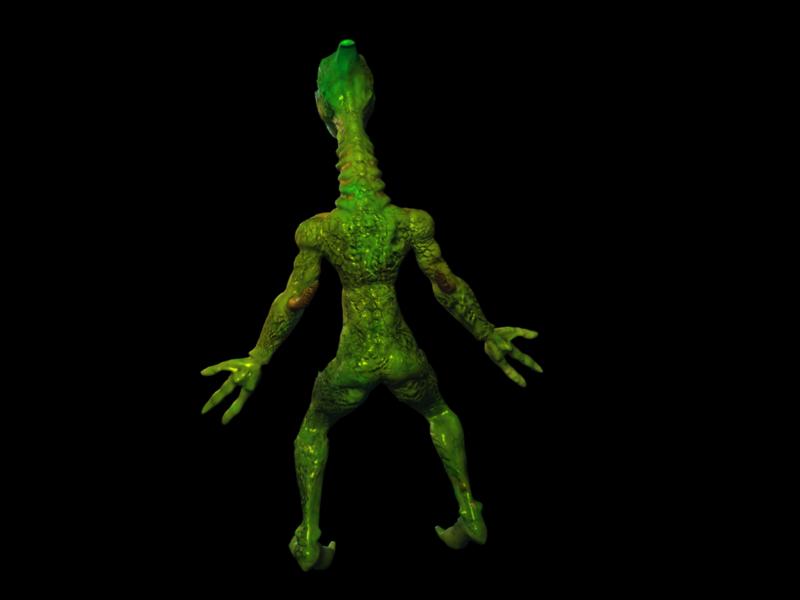
Here are my first almost complete zbrush (detailed and textured) model. The other model will be uploaded when I redo his textures and some of his musculature. They will be the main characters of a music video animation I am doing for my advanced computer animation. I’m not sure if these files uploaded so if they are there multiple times or not at all I appologize. Sketchy connection. :cry:
skinnyguybeauty.jpg

We may only have 3 days to render the animation, so do Normals maps render fast in Maya?

i can’t wait to see the movie … . .as for the maya question. … i can’t answer that. . .sorry

Yes, they do, womball

Try out Pixero’s normalMapper shader:

http://forums.cgsociety.org/showthread.php?p=3513386#post3513386

Chris

Thanks atwooki! If worse comes to worse we may have to use the hardware renderer. It seems like there is a script for that, so not sure how well that will work. I would ideally like to experiment with the fast sss skin shader of mental ray. It had 3 layers and combined with procedural textures on the different layers created some cool effects. http://forums.cgsociety.org/showthread.php?t=343686

Some more info about the character, he’s a reptilean character well versed with swords. I did not create the concept design, the head of my group did. I did tweak it a lot. :smiley: THe cage meshes were modeled in Blender and are both under 4000 polys. I wanted a lot of detail in them so that they would be able to stand on their own if they displacements or normals didn’t work. The reptile was mapped with GUVtiles. The upcoming mancbus like character was unwrapped with blender CVS build’s ABF live unwrapping. There wasn’t much stretching and I did it under 2 hours. :slight_smile:

Good luck with your project.

Ofcoarse we naturally expect to see a link later to the finished result.

I take it the lizard will not be singing a Frank Sinatra song?

Will do! Hahahahahah I like that. If I was director it would be rediculous. :slight_smile: I don’t like fight scenes, unless they are funny. But considering its the end of semester I’m not going to protest much. Kind of stressed out overall.

I’m using Mahlikus The Black shader for this guy. Its awesome! I need to study the settings of it a little later. HOwever I have been working on this guys face and face an face paint. He’s going to be generally in the dark, but his eyes will glow like the robot characters in AppleSeed. I also want to give him metalic parts like colosus of X-men. I’m having issues with his horns on his back (not visible yet, I want to finish getting the basic texturing done). I would like to create a heatsink like texture to the horns using masking in rows. However this technique for some reason doesn’t seem to be available for my model. Its available for primitive objects in zbrush not for imported geometry it seems.

muscleguyface.JPG

I also want to texture him overall with elephant and rhino hides. So where do I upload the alpha files I will create and what format are zbrush alpha files?

skinnyguyneck.jpg

I figured out how to make alpha maps! BMPs seem to work. Also The skinny guy is now finished! I generated a normal map, however I have no idead how to get Maya 7.0 to recognize the UV’s orientation or the normal map. Are they supposed to be flipped too before they are created, I didn’t flip them…

Attachments

skinnyguyfrontcavity.jpg

skinnyguysideviewcavity.jpg

skinnyguybackcavity.jpg

Do you flip UV’s before you export them? Also how do you load the js shaders. I downloaded the normal maps shaders yet I don’t know how to get them into hypershade. I also tried displacement maps as well, and it said that both .psd and .tif were unacceptable file formats. because it didn’t render in mental ray.

I got the displacement to work somewhat. It looks like I’m loosing detail. However I need to know where to find the alpha information on the zbrush model is so I can set my Alpha Gain And Alpha Offset. This is for the displacment node Color Balance setting. I still do not know how do to normal maps in Maya though.

Here’s some more views of the muscleguy, without color map. I’m working on finishing up the bumps. I created the alphas from elephant and rhino skin pictures. His hands have chainguns that are modeled in maya. Personally I think it would be funnier if he could just poke people.

muscleguyfrontbumps.jpg

Attachments

muscleguybumpsback.jpg

15,658 faces maya, with 3 lights, 2 area, 1 directional. Maya Software render at production settings, and ray traced shadows. Working at division level 2 in zbrush I created the normal map. The first level didn’t have enough geometry to look like 1mil poly zbrush character. However the second level did have enough geometry. The extra polys were for details. Their is a tangent normal map on a phong shader since blinn made it look like a toy. Ansiosctrophic is really nice color wise, yet its two shiny. All rendered in 20-27secs! At 800x600 resolution too.

normalfront.jpg

Attachments

normaltop.jpg

normalback.jpg

On a dual core xeon workstation, these render out at 8-10 seconds! I don’t think my characters are going to slow the render time down!

ive seen this on a few models on the forum, yours included, but what is the dark grainy color in between the cracks of the skin? its a cool effect.

Its a cavity shader. You can recreate for use in other programs using zmapper, and exporting out a cavity map (I use them for diffuse maps). It basically darkens the indentations and cavities of the character. There is a setting for cavity intensity in zbrush materials to achieve it in the program, but I don’t know how to export zbrush materials.

awesome thanks a lot, actually you cannot export zbrush materials. materials are software native and cannot go from program to program, it sucks i know:rolleyes: