ZBrushCentral

more maya displacement nightmares

hey…it’s my first time posting on here…not one to usually post much…I’ve just been struggling with the maya mental ray displacement mapping for days now. I’ve read the the practical manual…followed the scott spencer video…gone through the forums…and no matter what I do I end up with a useless image…
I’ve played with the alpha gain and offset level quite a bit…but there just seems to be no detail in it at all…
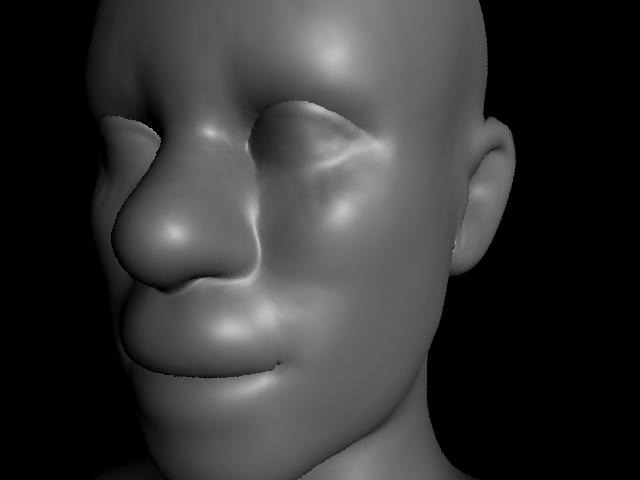
I even tried producing seperate negative and positive maps for the gain and offset…the results were better…but with a total lack of detail.
I’ve begun to think it must be something I’m doing in zbrush?
my DPsubpx and my DPres are at the highest level…
is there something I’m missing?

thanks for the help…
-tiktok

Attachments

mishap.jpg

What are the exact steps that you follow from the moment that you finish your high res sculpting to the moment that you export your displacement map? We can’t find where you might be doing something wrong without knowing what you’re doing. :wink:

I usually block it out in maya…export a super low res cage into zbrush…sculpt up the iteration to the highest level…then…when that’s all done…I click GUV to have it set up the uvs…Then I go to the tool menu…and geometry…set the subdivision level to 1. Then, I go down to displacement…I crank up DPSubpix and DPres all the way up…and I hit make displacement.

And like 10-20 minutes later it spits out a grayish map.
I go to the alpha menu click on the alpha…(write down the depth number at the bottom…export as a .TIF.

bring into photoshop, flip horizontal…change to RGB…save as TIF.

Export the sudivision level 1 model as OBJ…
bring into MAYA.
apply a BLINN…open the hypershade…drag the displacement thing over the blinn thing…Specify the displacement file as the right file…
go to the alpha offset…apply that equation…
turn off feature displacement…
and render.

I have also tried inputing the depth value from zbrush itno the alpha gain an dnegative half that into the offset…that always makes it appear SUPER bloated…
I have also tried generating a map for the gain…and a map for the offset…

this didn’t work either…

I must be missing something??
-tiktok

It looks like you’re forgetting to restore the unsmoothed base mesh before calculating the displacement map.

When you return to level 1, you should click Tool>Import and load your original mesh. The unsmoothed mesh will then replace the smoothed version of level 1. Now do the UV mapping, calculate the displacement map, and then export both the map and the UV’d mesh

I had no idea that you should do that?..I’m slightly confused. I go to level 1–I don’t understand what you mean by original mesh? The whole thing is sculpted…I load the same tool again?..back at the stage before it was sculpted?..

I’m slightly confused…

do I go to level 1 and hit the cage button?

I tried that before and it didn’t seem to change much…
-tiktok

I understand your confusion Tiktok.
I have read a lot of different tutorials and seen some videos about creating displacement maps in Zbrush for use in Maya, and I don’t remember any of them saying anything about importing the original base mesh again. However I do remember having read a few words about this somewhere.

I also have some problems creating good looking maps in Zbrush but I think I better start a new thread about that, since my problems seem to be slightly different.

However could anybody please explain in detail how to restore the unsmoothed base mesh before calculating the displacement map? I really don’t get that part!

And what is it with this “cage” button? - why use it? Why not just create the displacement map from whatever level of detail and then just apply this to the original mesh in Maya?

Thank you :)

strangely enough…maybe you’ve experienced this too…

Are you missing a ‘best’ button?
kind of strange…though the menus in zbrush tend to warp around quite a bit…

it’s like that hogwarts castle where the stairways change every couple of minutes…you go back…and everything’s notquite theway you remember it…
-tiktok

Would anybody have a scene from maya where everthing’s setup…so that I might examine exatly how the displacement’s working?

I’m having the worst troubles with this stuff still…I think if I could physically see something…then I could see where the problem really lies…

-tiktok