…rent money to him? 

Absolutely sweet stuff, very cool and even more cool to see it in live action. keep up the good work.
Coool. nicely done man. Renders look fantastic. Good job!
AWESOME. make sure you keep us up to date
Thanks for the comments! When I get some of the animation fully rendered out, I’ll post a movie.
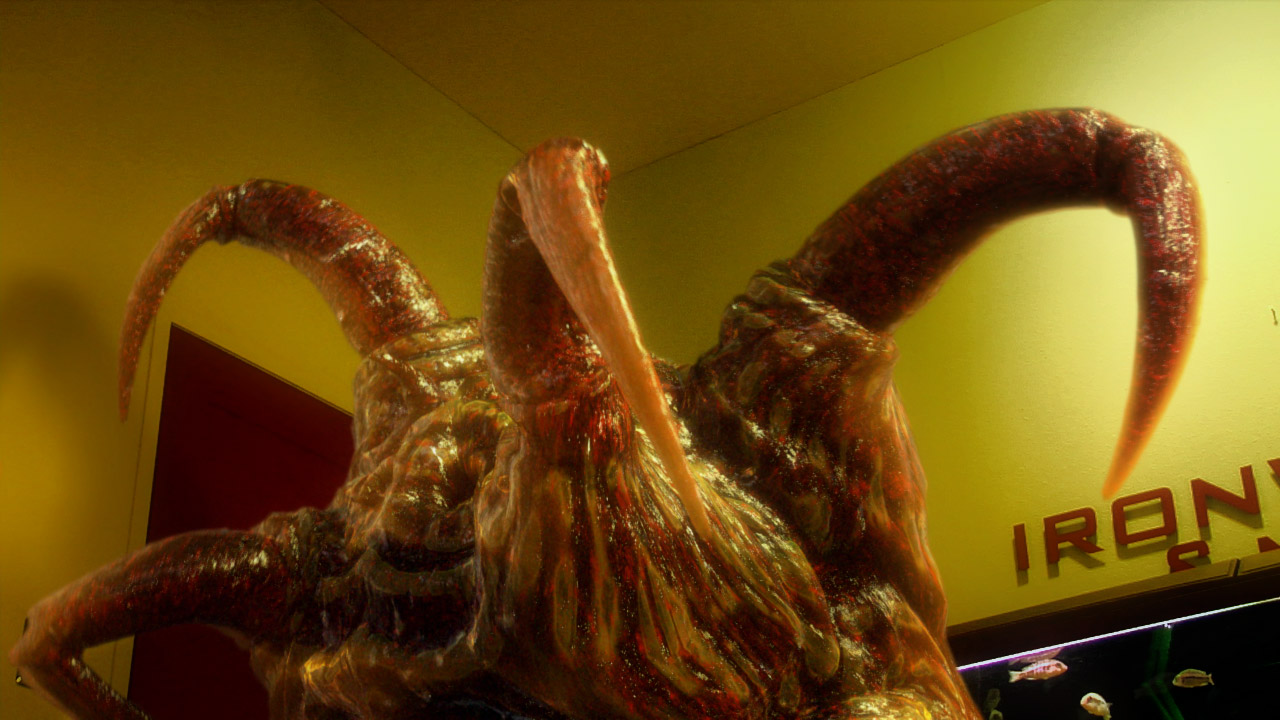
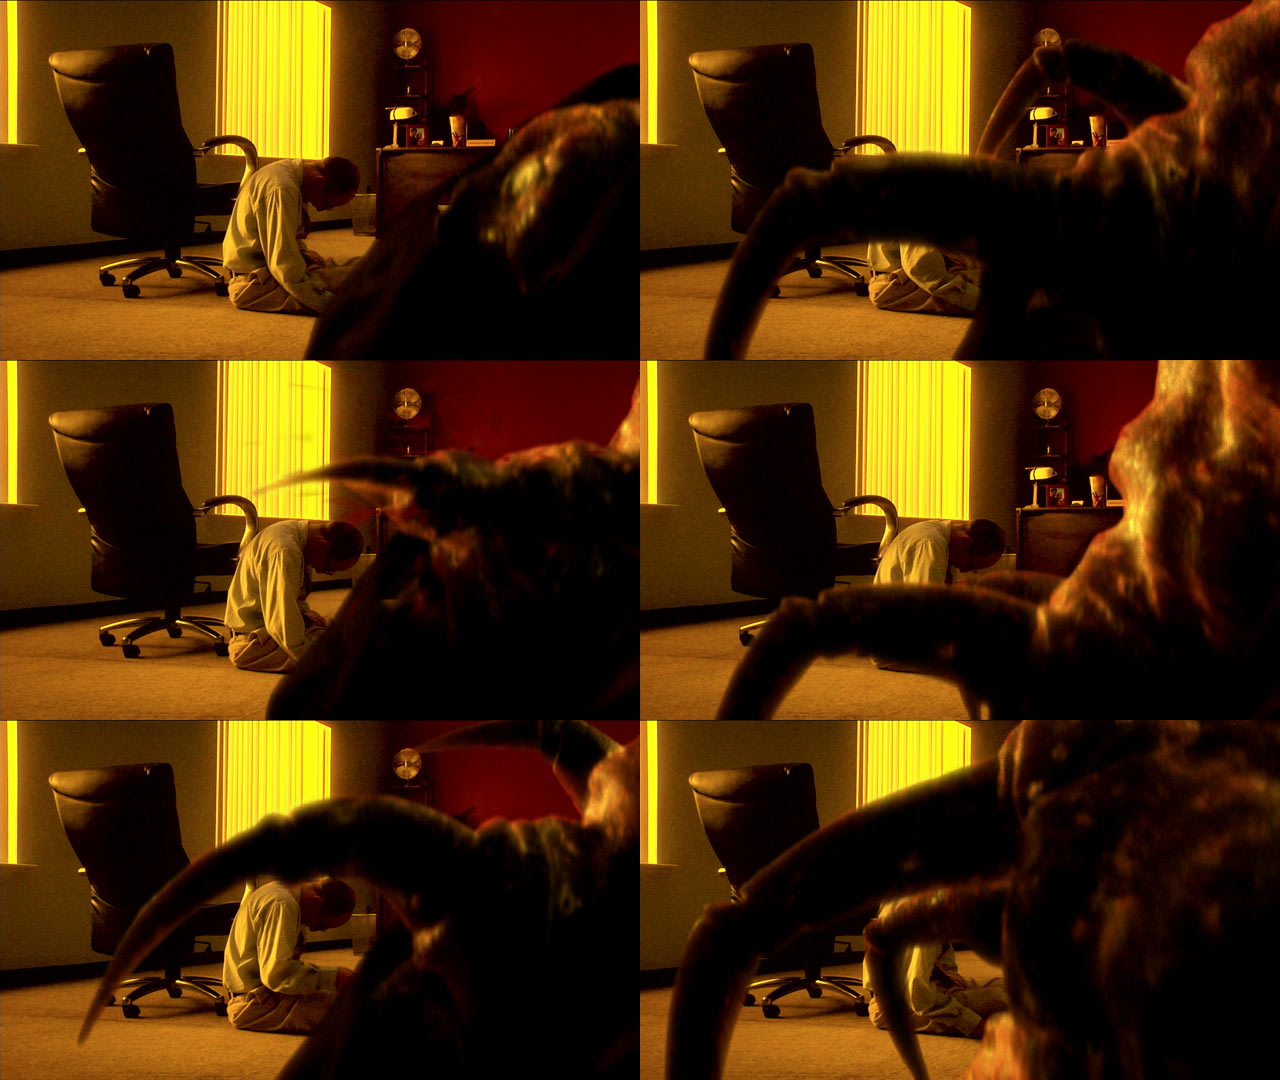
Based on some good feedback I had about my previous test images, I did some re-work on the monster before finishing up 3 shots to be included in a 5 minute version of the short submitted to the TV short contest ‘On the Lot’.
Here’s a short list of things I tried to address:
- Texture too busy
- Light from behind not affecting monster
- Darkened area around eyes to make them ‘pop’ more
- overall scene too flat looking
- monster doesn’t look wet
I still have some animated blood particles that run down his body to put in as a seperate pass, but I’m unsure whether those will look good. Might also try a animated bump moving vertically to give the look that liquid is moving down his skin.
Anyway, here’s three frames from the composited sequence to compare with the previous test renders I posted.
Attachments

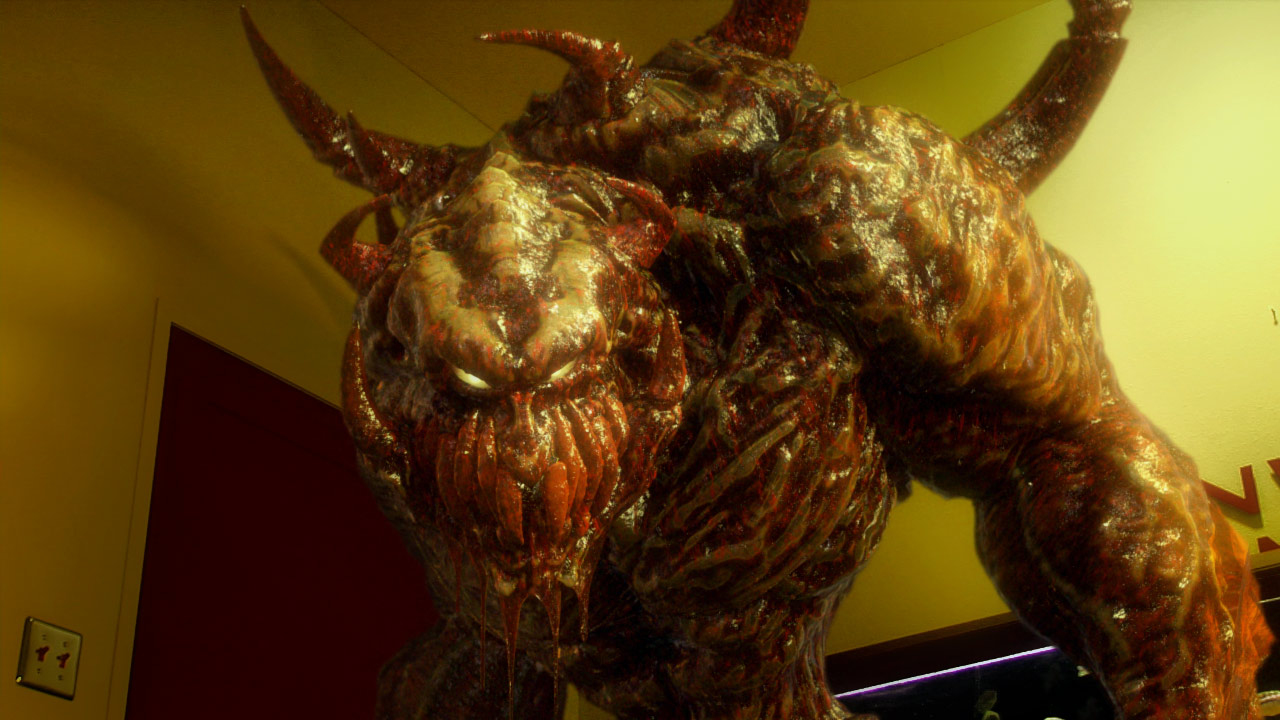
And, here’s a couple of images from the other two completed shots:
Attachments
wow, looks a lot better ;] i like the new texture
This looks really cool! For some unknown reason, I’m reminded of Dungeon Keeper! Maybe it’s the style…
Thanks again for the comments!
KrakenCMT - I had to do a google search on Dungeon Keeper. Yeah, he does kinda look like that guy on the box art.
I have to make this guy swell up and explode for the finale of the short. Something like what happens to Stephen Dorf at the end of Blade. I’m thinking of using Sculpt deformers in Maya on the mesh combined with a Zbrush painted bubbly displacement map for the more detailed stuff. Maybe some morph targets thrown in there as well. Back in Lightwave (where I render), I would animate the displacement value as the sculpt deformers expanded. But, I’m up for any suggestions as well.
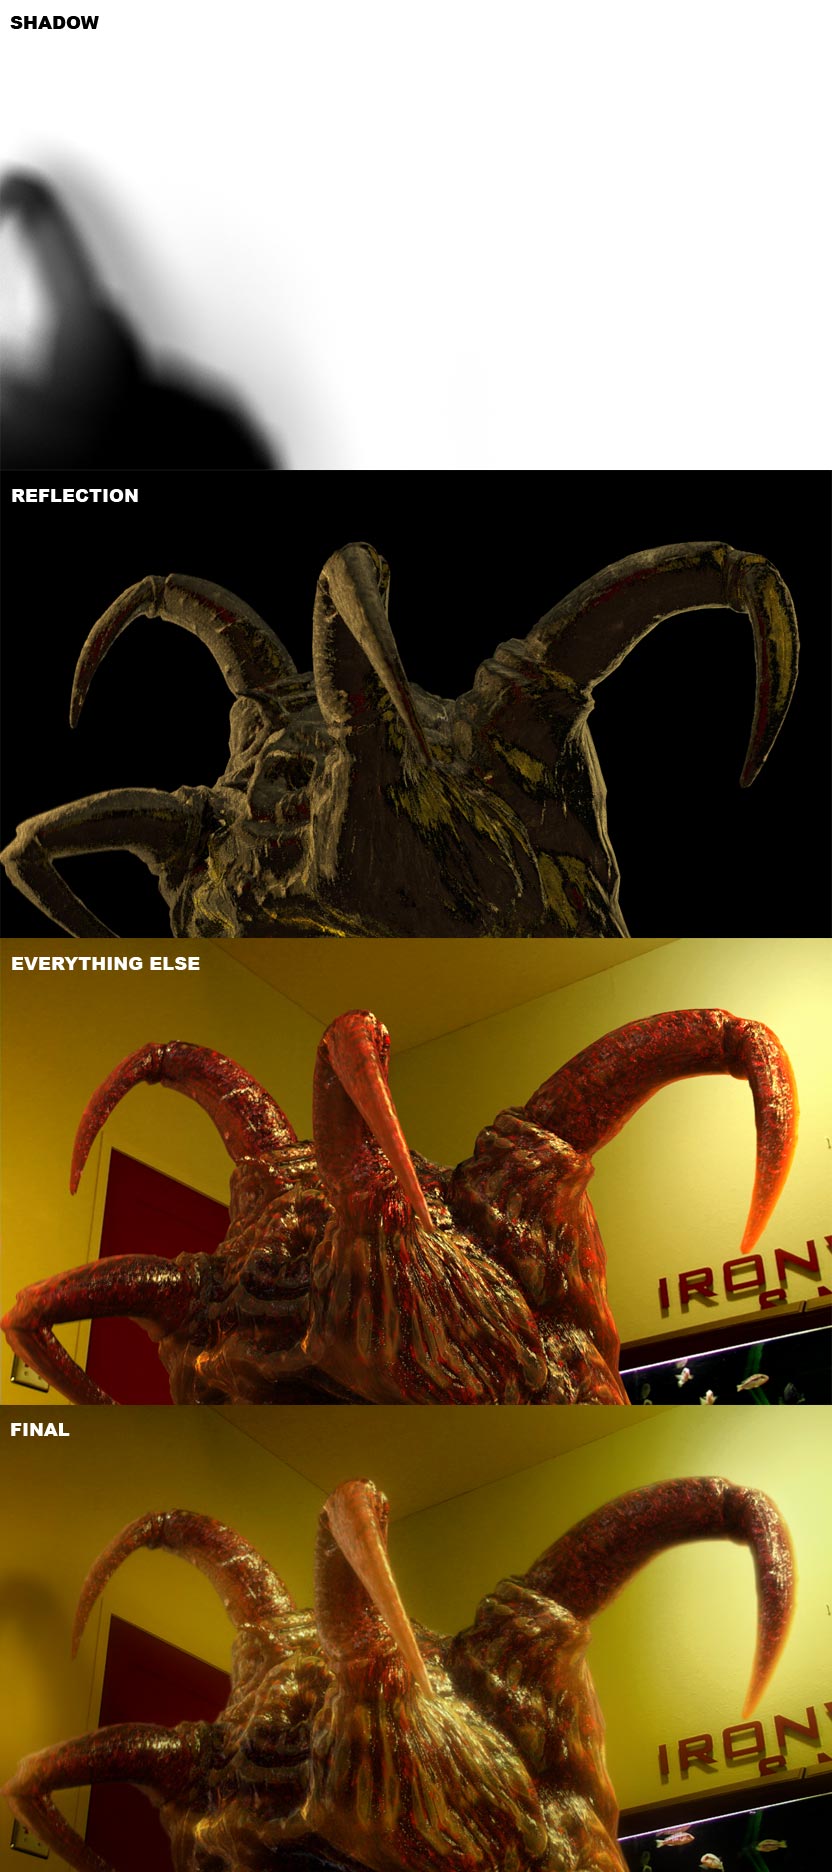
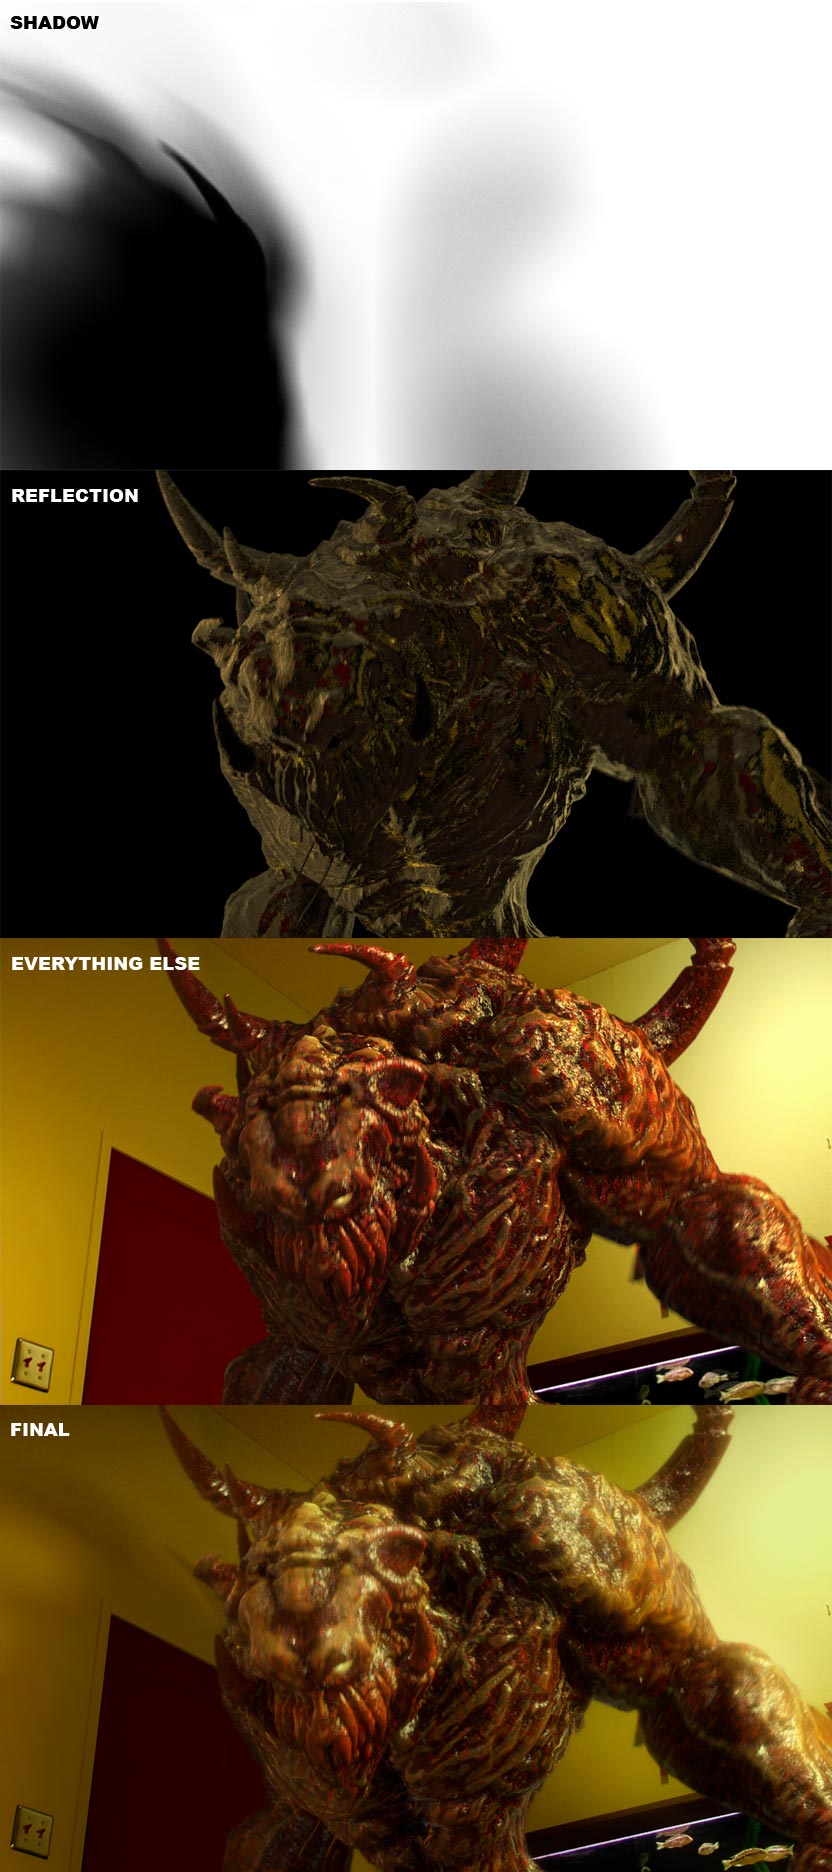
Here’s a couple of images showing what layers I used to composite the final images. I used Fprime for rendering, and since it doesn’t support passes, I tried to render as much as possible together. I’m surprised at how much I was able to change the original image in After Effects without having all the seperate passes. Compared to the original color render, I think the Subsurface scattering effect works a lot better after all the comp work is done.
Attachments
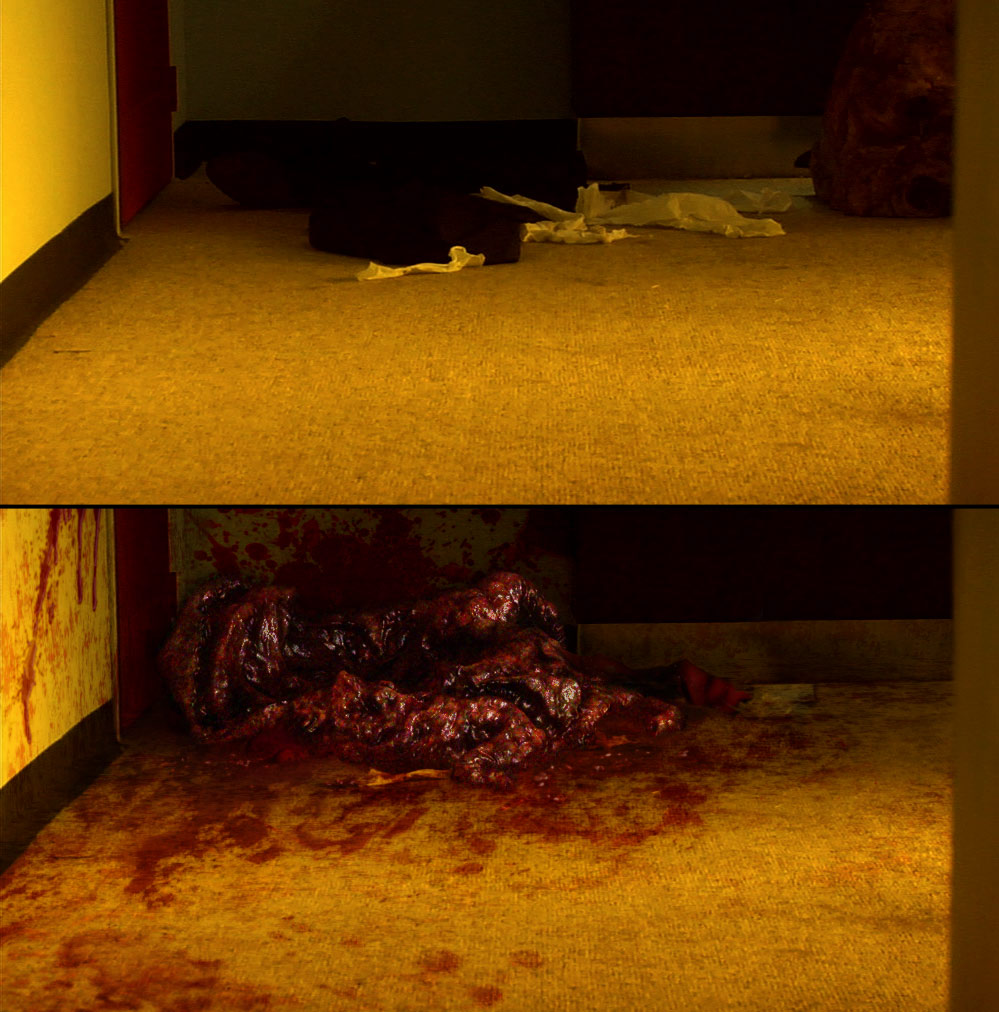
Here’s a little update on the short. Had to make a pile of guts to place in the corner of a shot (left over body from monster hatching). Nothing too exciting, just made a quick gut pile in Zbrush along with a texure and then rendered a couple of different material versions from Zbrush. Finished it off in Photoshop.
The five minute version of the short is now up at: http://films.thelot.com/films/24440
I you have the time, take a look, and if you like it, give us a good rating on the site.
Thanks!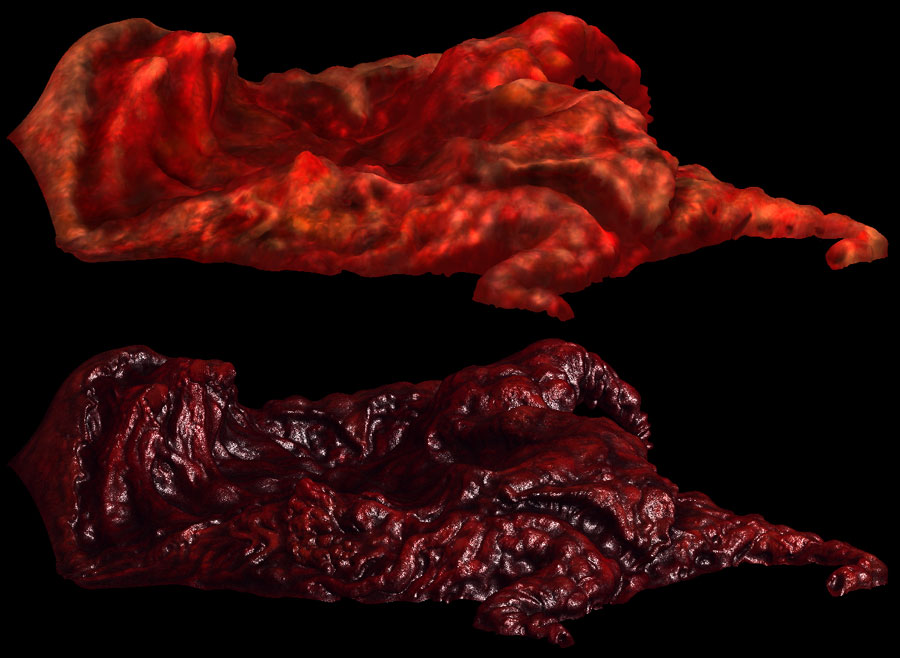
Attachments
does this mean i have the job? lol
WOW!! Extremely realistic stuff here. 
And why isn’t this stuff on the top row yet?
Great work man.
Really cool. You guys put a lot of work into this. Well done. Cant wait to see the monster tear into the the dude. haha!
AWESOME.
The film is nice, and the cg part really is great. The rendering is beautiful and so is the animation.
Do you have a higher res version of the cg part? Is there more animation than just what displayed in the short? I’d like to see everything 
I’m just going to repost the link for you, I think people are missing it.
---------------------------ANIMATION:----------------------------
Thanks again for the positive comments!
KarimZ - Thanks for posting a more noticeable link to the short. Here’s an alternate version (quicktime) posted that is probably better quality
http://www.monsterjobhunter.com/5mincut/
But, feel free to still give it a good vote at the other site 
The On the Lot show states that the short can be no longer than 5 minutes, hence the shortened version. I’m glad about that though, that submission was not originally in the plans and there’s no way I could have finished everything by the deadline. The final short will be around 8 minutes when complete and I’m currently working on animating/rendering the rest of the shots. I also have done some re-work on the roar anim to give it better build up along with improved compositing for all the shots (not that you can tell much from the compressed ones) Work should be done by end of March.
When everything is complete, I’ll try to get some high rez movies of the fx stuff posted.
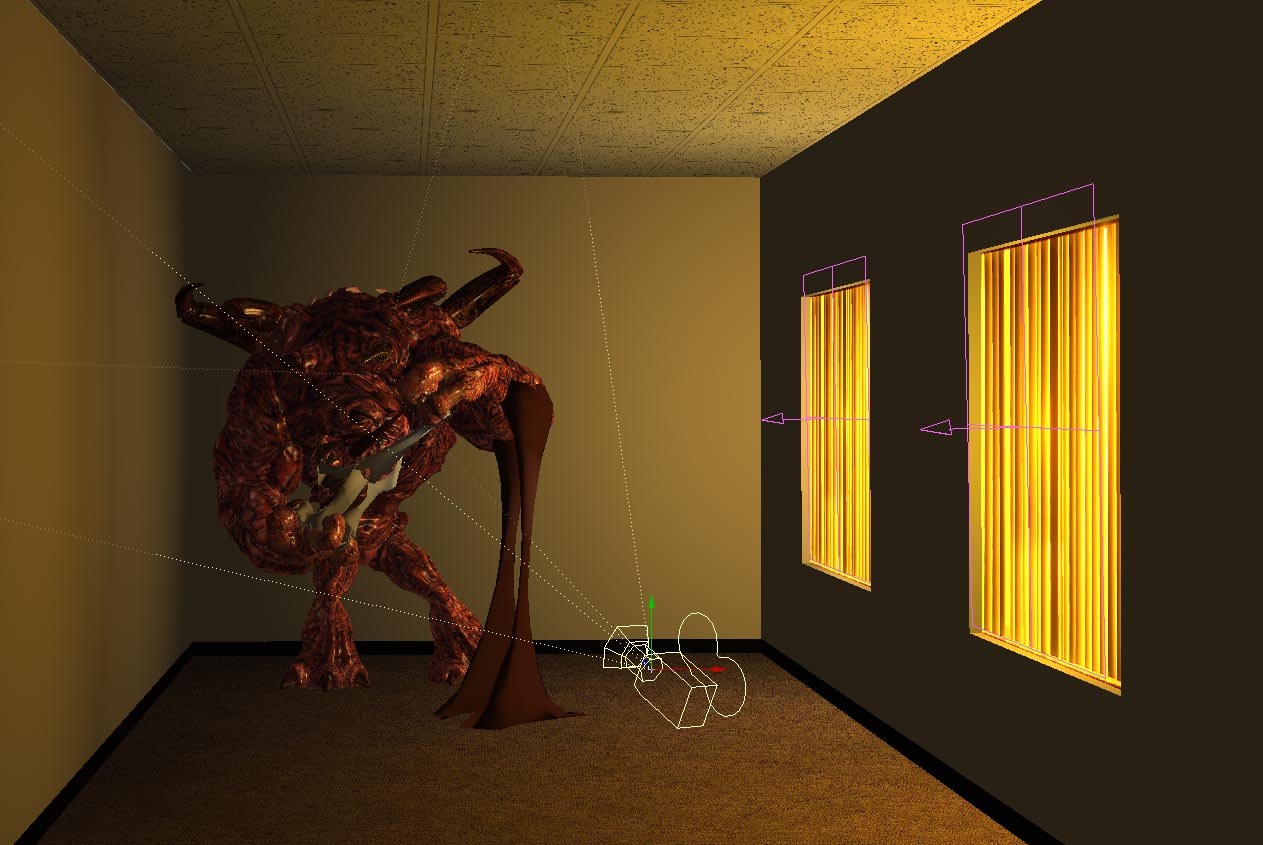
I posted a thread on the Newtek Gallery about this project and someone asked about the lighting setup. Might as well post that here as well.
Images of the set
First attempt at lighting using shots from my point and shoot camera as reference. The auto color setting was on, so my reference shots were cool compared to how it actually looked on set. Unfortunately, the original monster textures worked better with this light color. I built a simple version of the room to catch shadows, as a reflection source, and to occlude the outside lights. Nothing fancy since it will never actually be seen.
Lighting tweak after I received some images of the set with the proper color. See, that monster doesn’t look as good now.
Image showing 3D versus on set image (lighting/shadows).
Just another test image with the 3D room turned on.
And, here’s some shots showing the lighting setup in Lightwave for the membrane tearing shot. Color coded lights according to diffuse, specular, or subsurface scattering (no diffuse or specular turned on for those).
Attachments

cough top row cough
I wonder what’s taking so long…