ZBrushCentral

Modelling an internal bevel in ZModeller - an arch

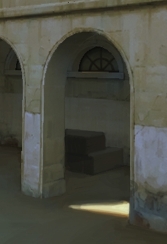
Perhaps someone might be able to help me with a clean workflow for modelling an archway in a wall using ZModeller?

In another 3D package one might apply a bevel, which I can then export - but the imported .obj has terrible topology (very long stretched tris…)

Just trying to solve how one might do it with ZModeller; 100% subDiv?; Mask + ClipCircle?

Like this,

Attachments

419 _ 2015-06-25.jpg

Use Zmodeller by insert edges on a flat plane to create arch central point, then split the point to the desired arch size, then add edges to arch outer points from base of plane, finally delete or qmesh the arch opening polygons. You can then edit to suit in Zmodeller. As for subdivision, use dynamic subdivision with one level of qgrid and bevel to suit or add control loops to hard surface the model

Could you just explain “then add edges to arch outer points from base of plane”.
The rest of it brilliant - thank you.

Hi
I do it a different way now.

  1. Draw out circle3d, polymesh it
  2. Use Zmodeler to uncrease outer edges and scale complete outer edge to desired distance.
  3. Delete bottom half of polygons with delete hidden.
  4. Use X sym, move outer points between pole points to make square top corner.
  5. Delete inner polygons of half circle.
  6. Qmesh with front face island to desired thickness.
  7. Qmesh bottom and side faces to desired size.

Using circle3d gives you control of total points on outer edge for better resolution. I also use GOZ to align faces, add edges, as a 3d app has better edge slicing tools and alignment tools then back to Zbrush to add features etc.
I also use GOZ to add hard edge control loops if needed and finally to size mesh.

That solves it. Much appreciated.

You could also use the initialize feature before you polymesh it, using internal radius control and segment division. here is example of polymeshed circle and points moved.
Arch_002.jpg

I can see how you might ‘Initialise’ the disk with more radial segments (removing most of the radial edge-loops afterwards to leave a reinforcing edge to the arch, as this is difficult to recreate afterwards).

I then used used clipping curves (with the arch faces masked) to create the orthogonal edges of the arch - as you image.

You can the use slice-curve to add further supporting edge-loops.

Finally I stitched the corner verts to the corner to complete the model.

Nice