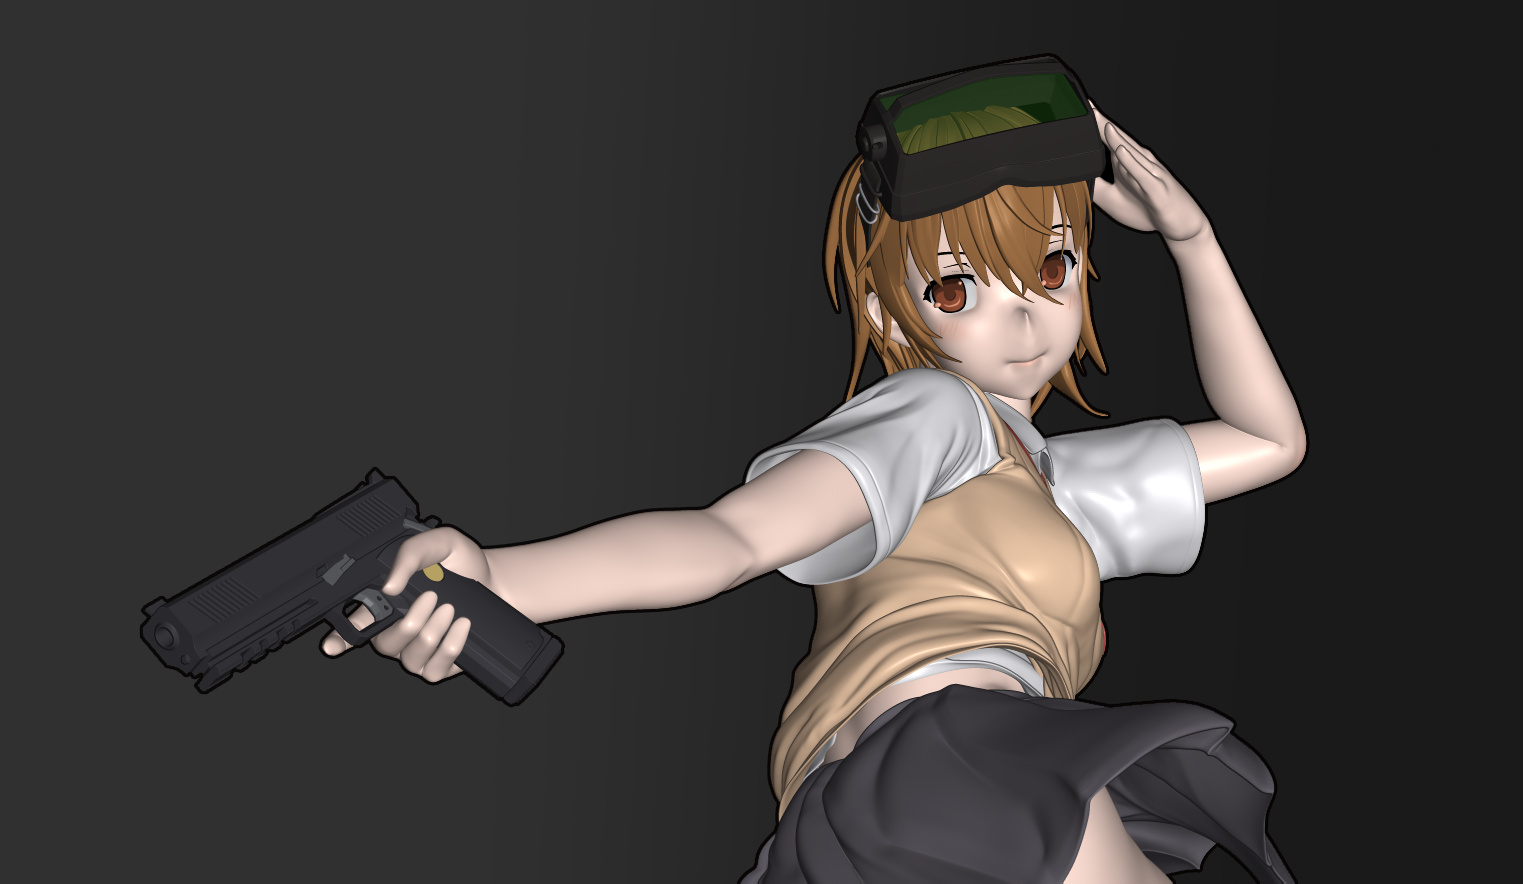
Hi everyone, I’ve just made a FanArt sculpt from the series “A Certain Scientific Railgun”.
and wanted to share you guys with some tips and tricks around how I made this model.
Since I’m pretty familiar with making figurine models for my hobby, this serves as a practice model for that purpose. It was a sculpt done in 26hours total.
So, First of all, you’d need to make the base mesh for the body.
I usually start off from a sphere, and then stare at the anatomy book and the reference image for a long time. It’s the most fun part, since it will test your knowledge about the anatomy.
When making the Anime model, you’ll want to stick to anatomy for the body. but not for the head. Since that has a lot of other Ratios to keep in mind .
Generally, nose is positioned around the middle of the head, and then under the nose to chin, you’ll need to split it to thirds, and then place your mouth there… It’s better to follow some manga tutorials for these.
After making the basemesh, you would want to apply “ZRemesher” to have a lower & clean topology, and then project back the details with “Project All”, then you can go up & down the subdivision to have a better control over the sculpt. This will make the Transpose Master’s posing process much easier too.
For the Stylized Hairs, I tend to use my own STN_HairSet2. which is just a elongated cube, but which has a decent amount of edges, so you can have a better control when smoothing.
Some artist in Japan will use a more simple mesh, and then use Zmodeler and Dynamic Subdivision to have a better control on each strands, but I tend to go for a “casual” approach.
I guess many artist are aware of the “Move Topological” brush, but that brush is using the AutoMasking’s “Topological” option. So, if you like SnakeHook brush, and then wanting to use it on each Geometrical Islands, you can do so!
Before Posing with Transpose Master, you’d want to save your project file separately, so you can import that model and use it to bring back the mesh to a TPose state if you need to.
It’s better in my opinion to have a good topology before you pose, so you can control the vertex order. You can check out Joseph’s #AskZBrush video to get what I’m talking about, This is very handy when you want to go back and forth to a pose / Tposed state.
Additionally, you can assign a temporary polygroup while using Transpose Master.
So don’t hesitate to put a polygroup on the entire head or the torso, when needed.
After you got the initial pose, it’s time to put the small accessory to your model.
In this case, the character is carrying a hand gun. during the posing process, I’ve placed a dummy model so I can get the feel of how it looks like to have an item with the right hand.
I’d usually prefer to make a Simple shape using primitives, and ZModeler to get the silhouette of the model. and After I got the overall shape, I would proceed with using the primitives and ZModeler to get a more complex shape with LiveBoolean in Mind.
and of course, you can use MeshFusion with IMMs too.

So, This was how My model was made in 26 hours.
downloadable Custom Toon Materials / Custom IMM brushes / Custom Basic Material.
https://www.dropbox.com/sh/ef0qwh0z5a5qzi1/AAC-ndpxcMHKL3jQYfcQfcYBa?dl=1
thanks!
Let me know if you have any questions! 


 Keep’em coming
