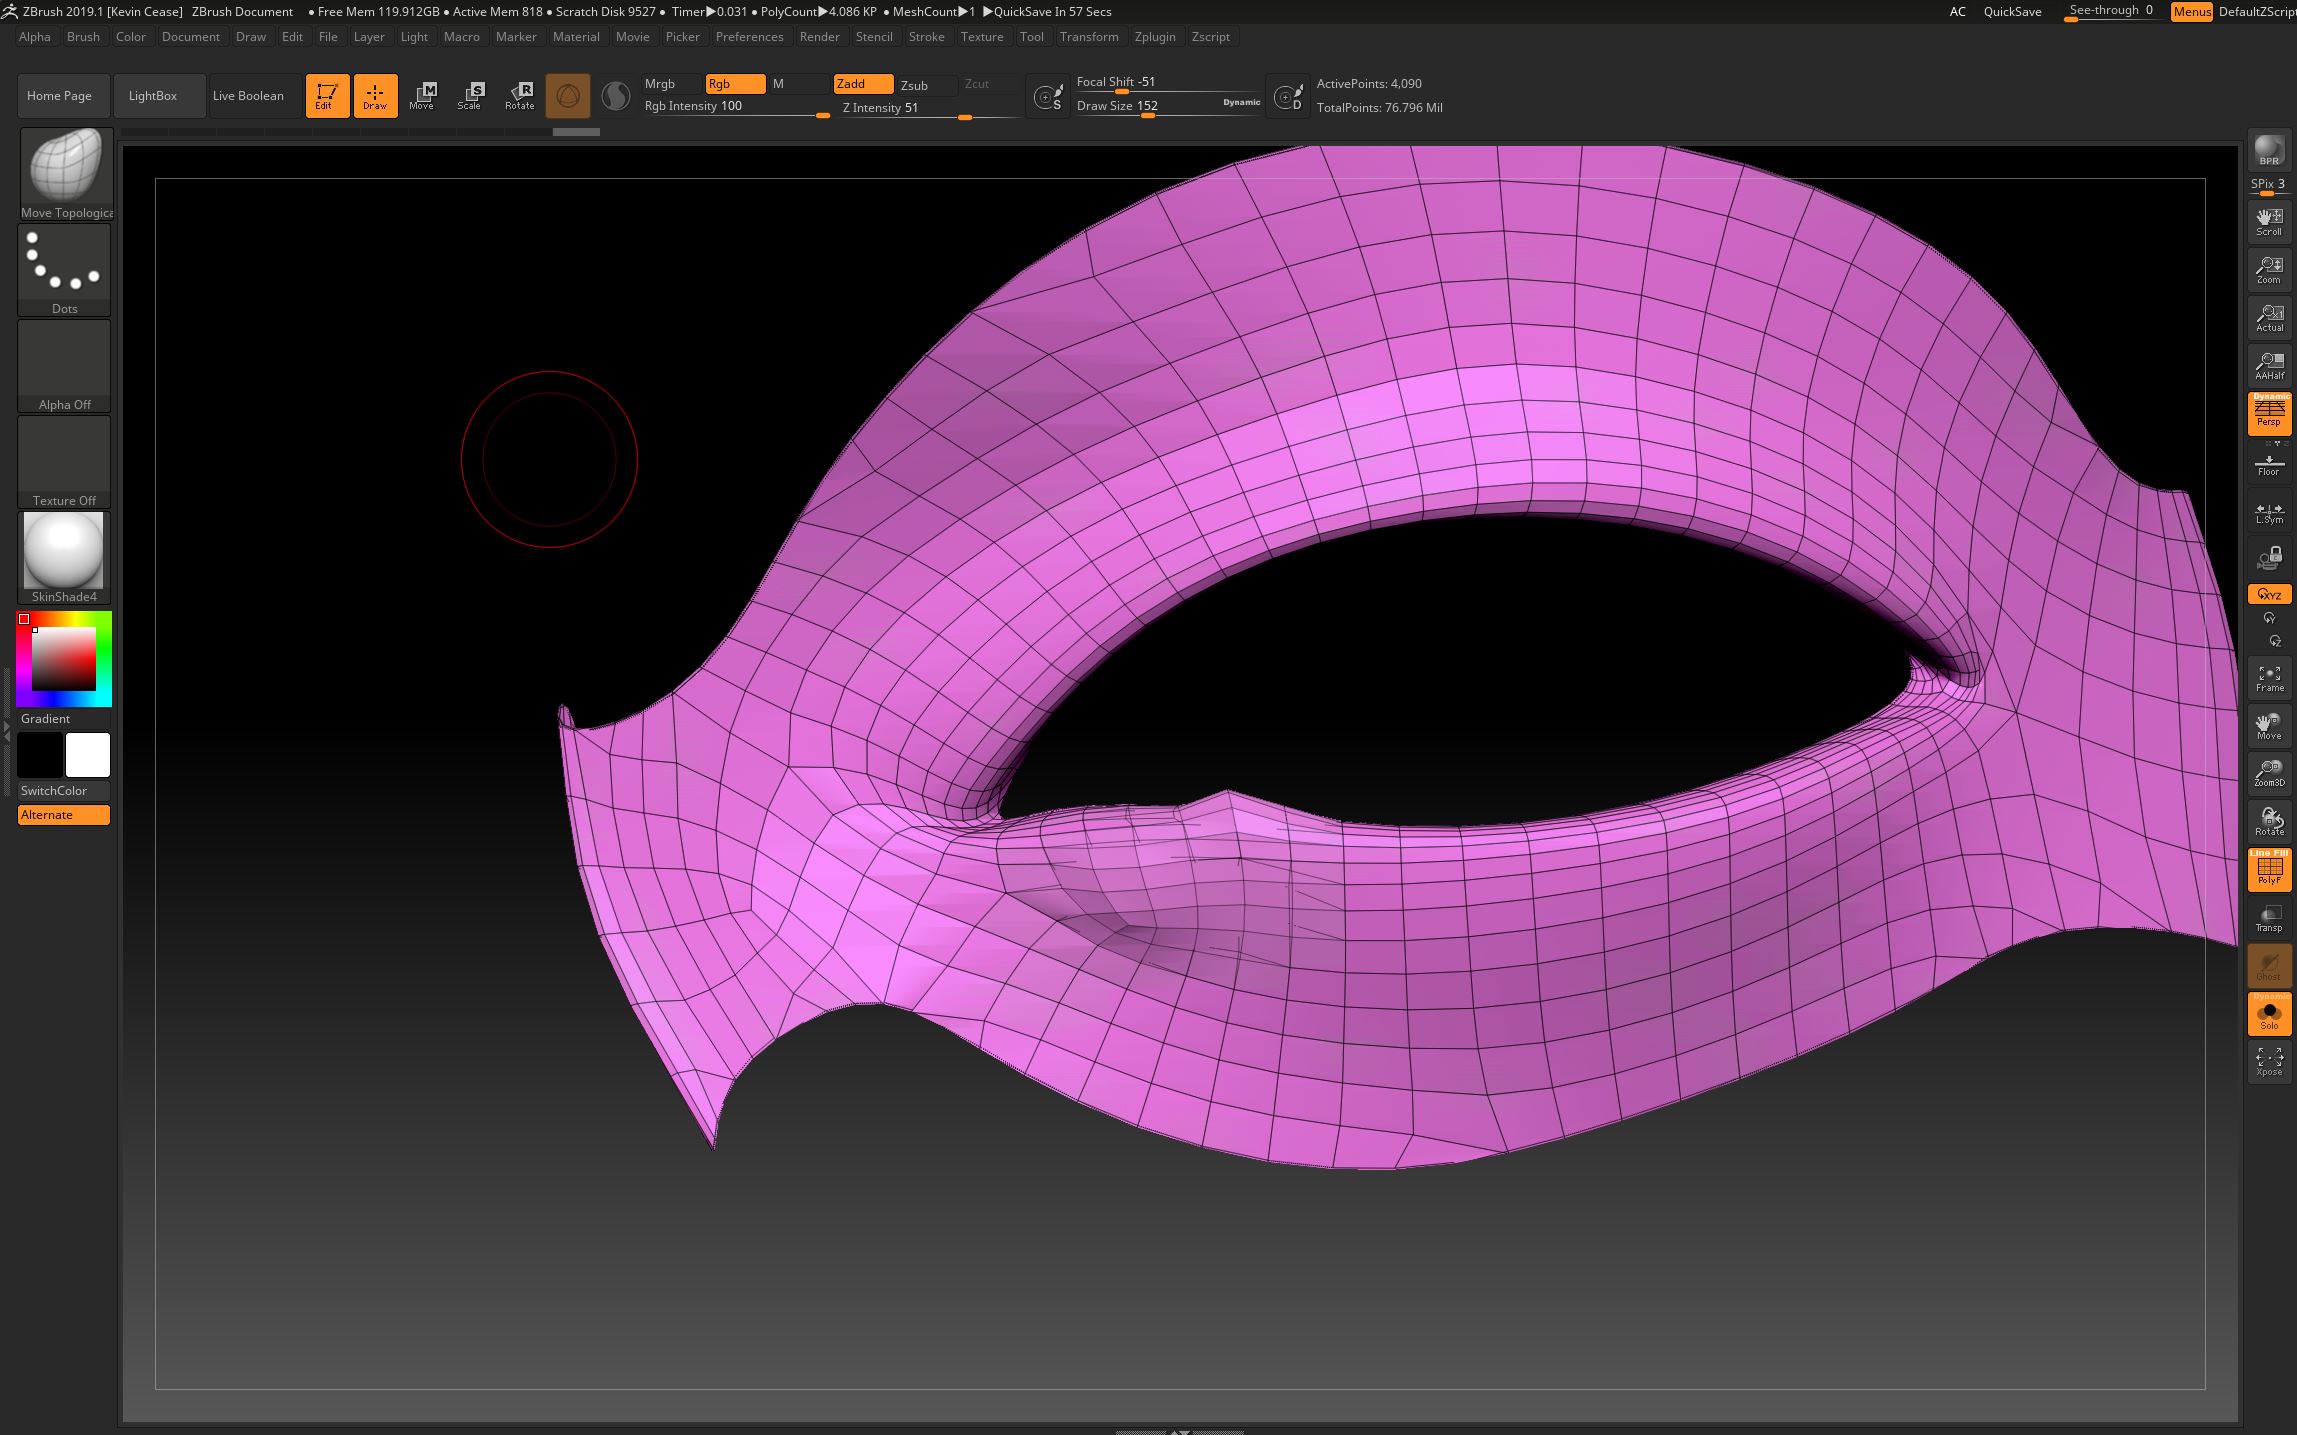
Hello, this is causing me lots of problems. When I extract a mesh, it creates two of the meshed I’m trying to extract in the same space. Please let me know if you have any ideas how this could be happening. I am currently using zbrush 2019.1. You can see in the image I used the move tool to pull apart the mesh.
Hey Kevin. There are a few possibilities for confusion here (also note that Zbrush 2019.1.2 is the most up to date version–be sure to grab that).
- Make sure you view the extract subtool with Solo mode (Transform > Solo) enabled. This will verify that what you’re seeing appears in the active subtool, and is not a similar or duplicate subtool. Also, in the subtool in question, Hit Tool > Polygroups > Autogroups which would separate two overlapping meshes into separate polygroups if they arent connected. Can you see overlapping polygroups after doing this with polyframe mode switched on?
- Tought to say without a better look, but is it possible you’re pulling at an interior surface? Remember Mesh Extract creates a mesh with thickness, so it will have two opposing sides. If you didn’t extract with very much thickness, these two surfaces may be very close to each other.
- Is it possible your original tool has overlapping surfaces? Sometimes duplicates can be inadvertently created in a subtool. If you were creating your Extract subtool by just masking everything in your source subtool, this would also produce overlapping extracts.
If none of that is helpful, it would be very useful to see the original mesh, and how you’re creating the extract.
You don’t explain at all which one of the numerous ZBrush’s tools you’ve been using to generate thickness to your flat wireframe. So it’s hard to tell what happened or how you could avoid that. One good way, when you work on a flat surface to generate a thickness is to use the Zmodeler brush :
- Choose ZModeler brush (BZM)
- Hover over a face or a polygroup
- press space and choose QMesh / A Single Poly ( or Island, Polygroup Island, etc.)
- Click a quad and move towards the normal direction (or opposite direction but then you’ll have to flip the faces. Something you can also do in the ZModeler menu).
It seems you’re thinking topology the way you might be used to think it in Max, Maya, Modo, C4D or some software of this kind : poly modeling.
You need to approach ZBRush differently : there, you can sculpt or do any of the lowpoly modeling you’d do in another software with the a-m-a-z-ing ZModeler brush (shortcut : B-Z-M). Don’t work your object one face thin but instead treat them as thick objects, like if you were working with clay. Along the sculpting process, use ZRemesher to create better topologies.
And only at the very end, if your object is meant for real time 3D engines or even for movies : do a clean retopology (by hand is often the better option) where you’ll think your wireframe wisely.
